Here are 10 easy activities for that extra ten minutes at the end of the Valentine’s Day class party. Get the kids up and moving or focused on gameplay. Keep these ten treasures in your back pocket and bringing the party in for a landing will be a breeze!
Who even KNEW how hard running class parties could be?
I wish that there was a guide somewhere–some easy-to-follow guide that gave you every kid-approved craft, game, activity, or snack that room parents and teachers needed to get through the chaos of class parties. Look no further!
What do you do when you have exchanged Valentines, eaten all the goodies and played all the games? What if you have 10 minutes of idle time at the end of the party? Then what?
What do you do when you’re stuck with thirty 4th-graders. Sitting… Staring… At you?
Honestly, if you rock it out with any of our Valentine’s Day Class party plans, you won’t end up with an extra 10 minutes. But if you do. . .
Valentine Day Class Party Activities – Quickie Ideas for That Extra Ten Minutes
These activities are inn no particular order and for a general elementary school aged classroom. Definitely adjust as necessary depending on the needs of the student body.
1. What is It?
Place an object inside a box or a bag and allow each student to place his or her hand in to feel the item but not actually see the item. Encourage students to use all senses to make a guess about what object is hidden in the box.
This is an activity best done with a smaller group, but it can be played with a larger group, too. Have 2-4 parent volunteers walk around the class allowing students to feel objects.
Here are a few ideas for What Is It items.
- a piece of fruit—banana, apple, orange, lemon
- a sock or glove
- a utensil—fork or spoon
- craft items—feather, pipe cleaner, craft stick, cotton ball, etc
- writing utensil—crayon, chalk, pencil, pen
- a small toy—slinky, jacks, dice, domino, wii remote
In order to make this run smoothly, have kids write down numbers 1-5 on their paper and number each bag or box 1-5. That way, as they feel or touch each item, they write down what they think on their paper.
2. Memory Tray
Place 5-10 items on a tray in the front of the room. Make sure all students can see the items. Give them 30-60 seconds to study the items, and then cover the items with a sheet. Have the students write down all the items they remember. The goal is to remember all of the items!
3. Telephone
Also known as “Whisper Down the Alley” this game involves passing a message between an entire group of people. The first person whispers a phrase to the person next to him or her, then that message is passed from person to person until the last one to hear the message shares it out loud.
The goal is to have the message pass through the entire group without error, but very seldom does that happen!
Here are some messages to get you started:
- Today I ate spaghetti for dinner.
- Her grandma does the fox trot.
- Three strikes and you’re out.
- His seashells cracked in the storefront.
- The delivery person just brought me six big boxes.
4. Crossword or Word Search
You can’t go wrong with some crosswords or word searches so I always love to have a few of these printed out and ready to go for class parties.
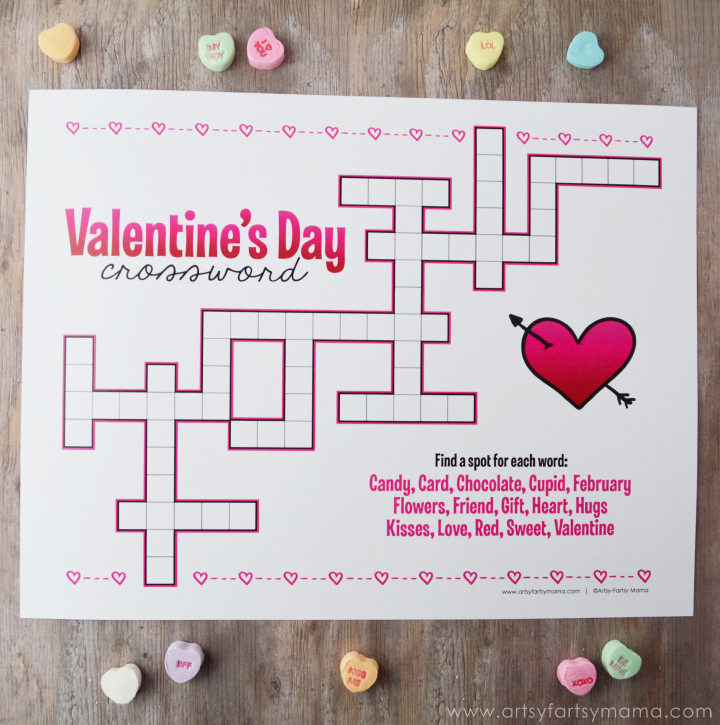
Download the Valentine Crossword Puzzle Here.
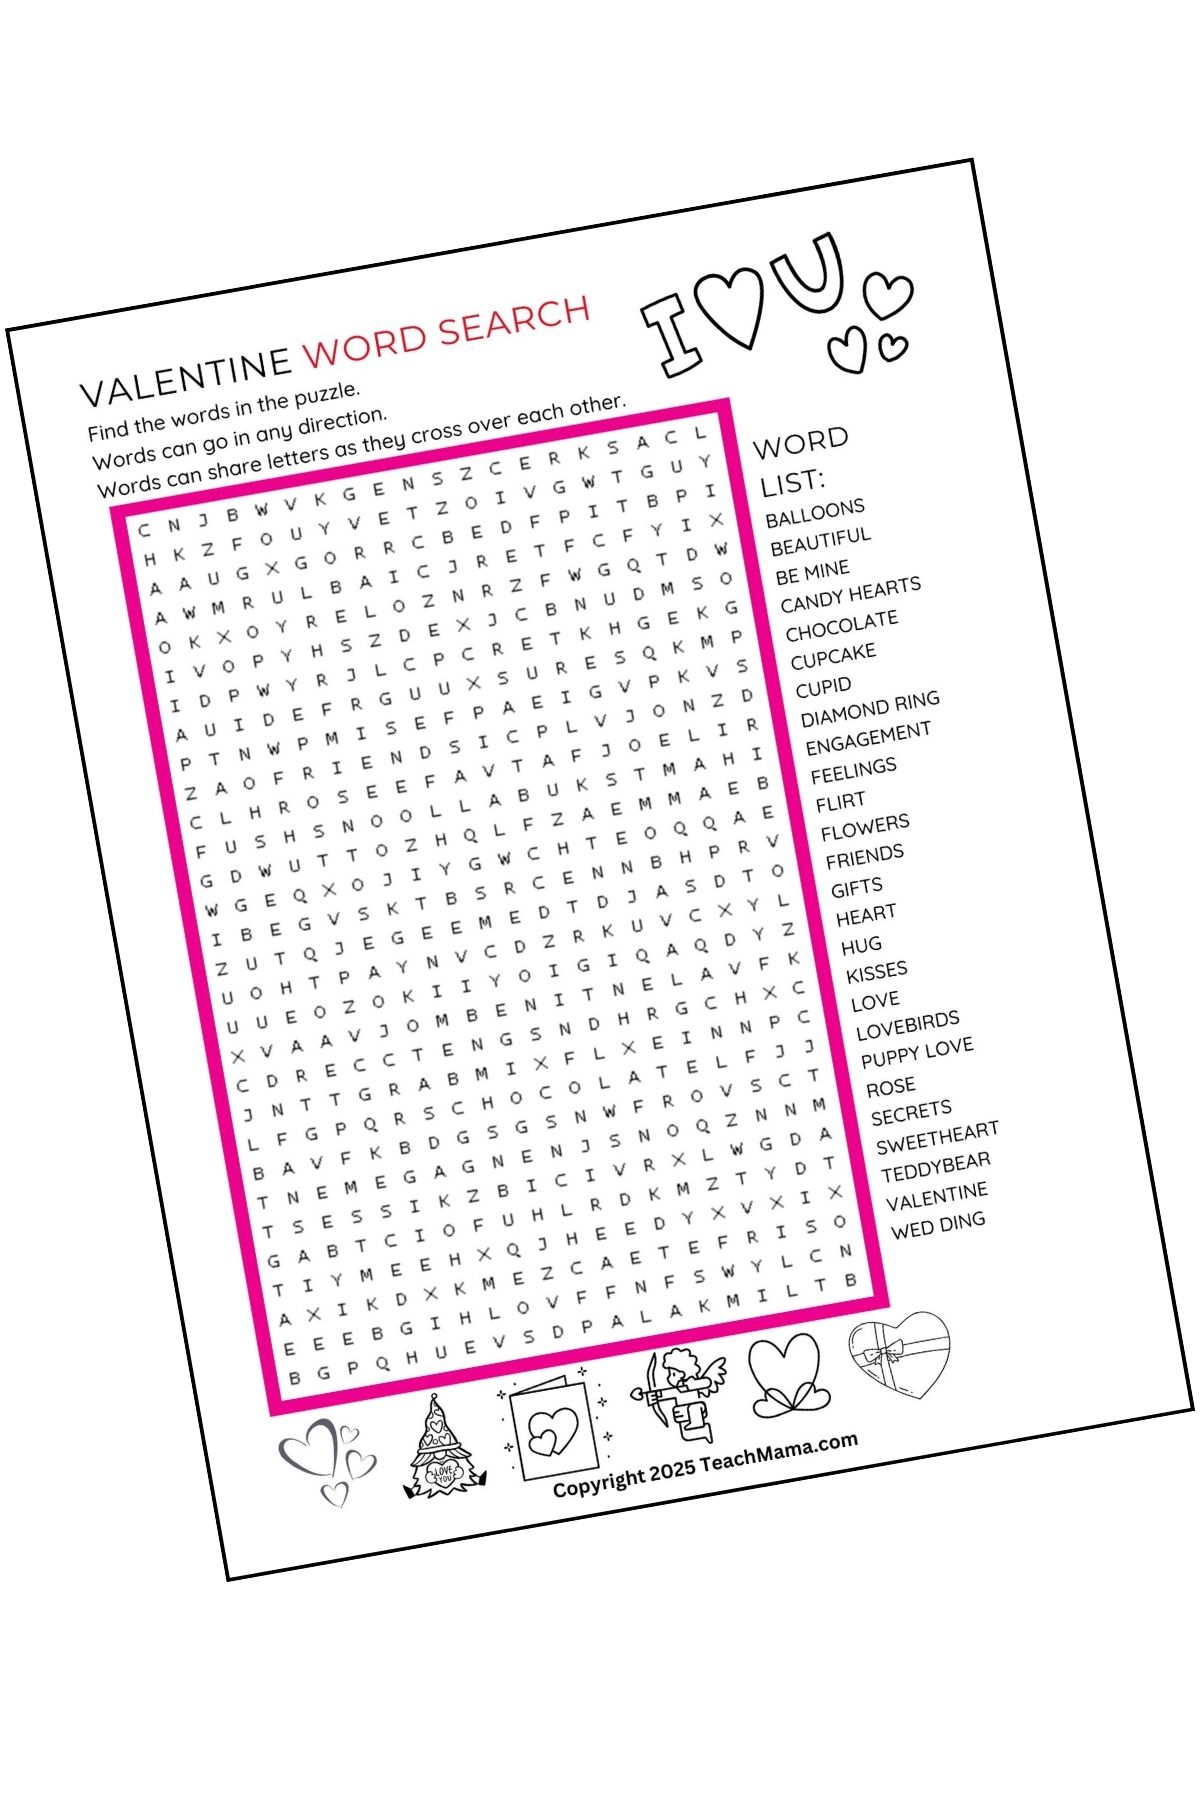
Download the Valentine Word Search Here.
Or just Google and you’ll find dozens…
5. Hangman…or…Heart Man
Man, I wish this game went by another name, but really, most kids know it as ‘Hangman’.
For Valentine’s Day, play it as HeartMan and see what the kids think.

Put spaces for each letter of the ‘mystery’ word on the board and give each child a chance to guess the letters. If they choose a letter that’s actually in the word, place it on the line.
If they guess a letter that’s not in the word, then one by one, draw in a part of HeartMan’s body: heart head, eyes, nose, mouth, stem, body, arms, hands, legs, and feet.
Here are some words to use for the Valentine game:
- candy
- sweetheart
- lovebirds
- heart
- secret admirer
- boyfriend/ girlfriend
- chocolates
6. Two Truths and a Fib
You can play this a number of ways, but a quick way is this: three children sit in front of the class. Before they sit down, a parent volunteer decides that two children will say something true about themselves and the third will say something false about himself or herself.
The class then must guess which children are telling the truth and which child is telling a fib.
7. Hot Potato or Hot Heart
All you need for this one is music and a small squishy heart. Or if you don’t have a squishy heart, a small stuffed animal with a big, pink bow will work!
Children sit in a circle on the floor. The music starts, and when it stops, the person holding the object is out! Because some children feel awful when called out like this, it can also be played with 2-3 objects being passed around while the music plays.
This way, the game moves more quickly and 2-3 children are out at a time. No hard feelings!
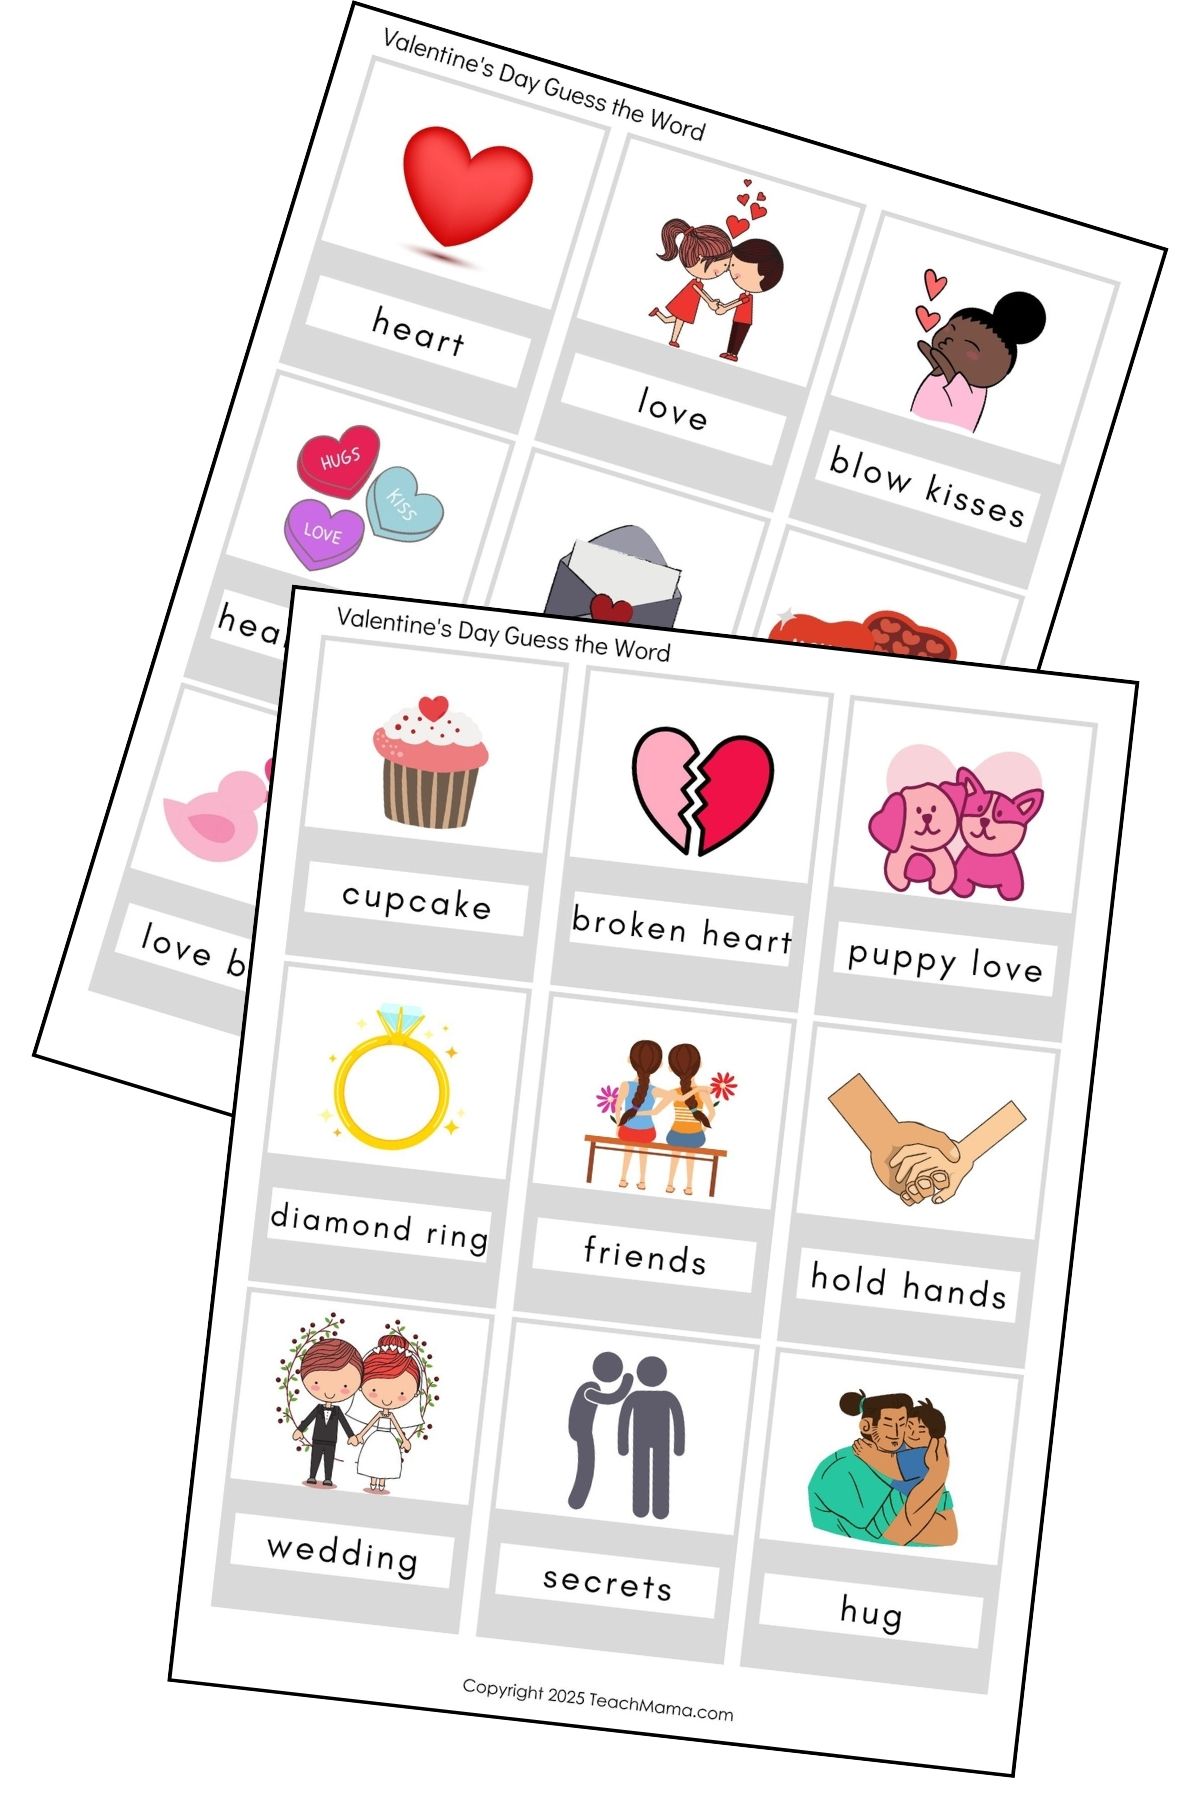
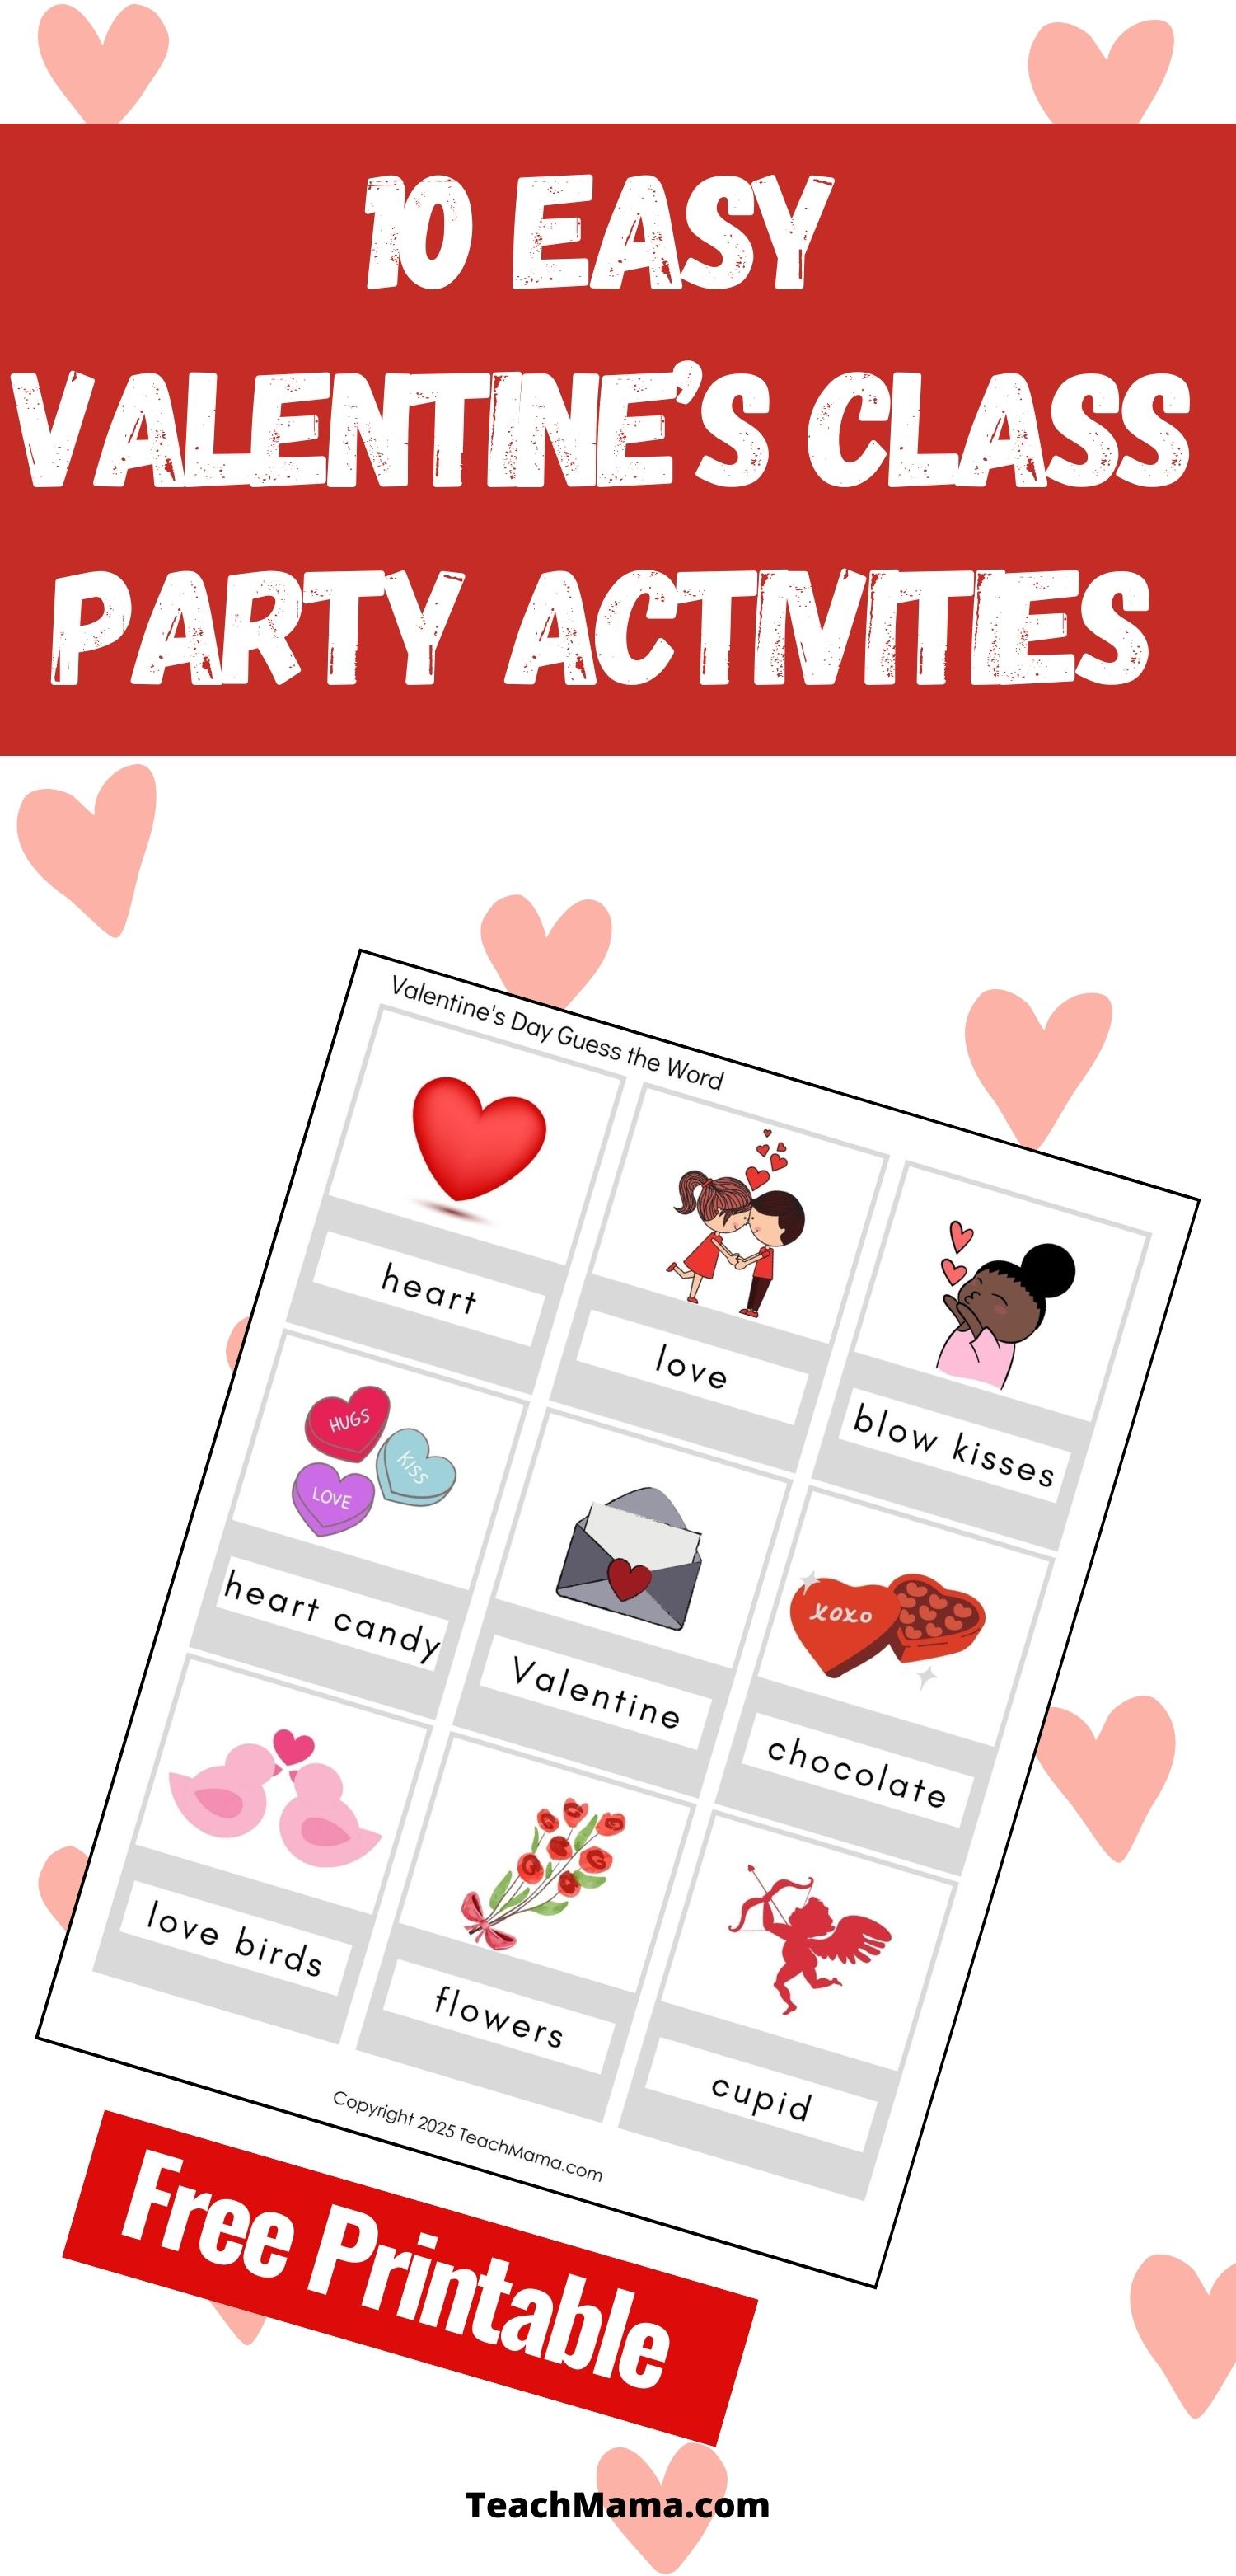
8. Guess the Word
It’s always fun when the teachers plays this game. Essentially, the teacher holds one card above his or her head, and on the card one word is written.
Children take turns giving the teacher a one-word clue to help him or her guess the word on the card.
This is a super game to play while students eat snacks because it gets their brains moving and keeps them engaged while they down some sweet treats!
Grab our Free Printable Valentine Guess the Word Cards by Dropping Your Email in the Box Below:
9. Guess Who?
Each child writes down five facts about himself or herself. While the kids are eating or finishing snacks, the parent volunteer reads the five facts to the class.
The students do their best to guess who is being described, and the person who guesses correctly wins!
10. Freeze Dance
Kids. Love. Freeze dance. They really, really do.
For the last 10 minutes of the party, let the kids burn that last bit of steam, costumes and all!
Turn on some silly love songs (believe me, all kids love these sappy, love songs!).
Looking for More Great Valentine’s Day Class Party Fun?
- Sweet Kid’s Valentine’s Stained Glass Hearts
- How to Throw a Rockstar Valentine’s Day Class Party
- Valentine Word Search
- Valentine’s Day Heart Bingo
- Musical Hearts: Reading, Moving and Crazy-Fun Kid’s Game
PIN THIS FOR LATER