Create a festive DIY Santa cookie tray that’s perfect for Christmas Eve! Transform a plain wooden tray with a little paint, Mod Podge, and a holiday napkin for a homemade touch that’ll delight the whole family and impress Santa. This sweet craft is easy, fun, and brings holiday cheer to your table!
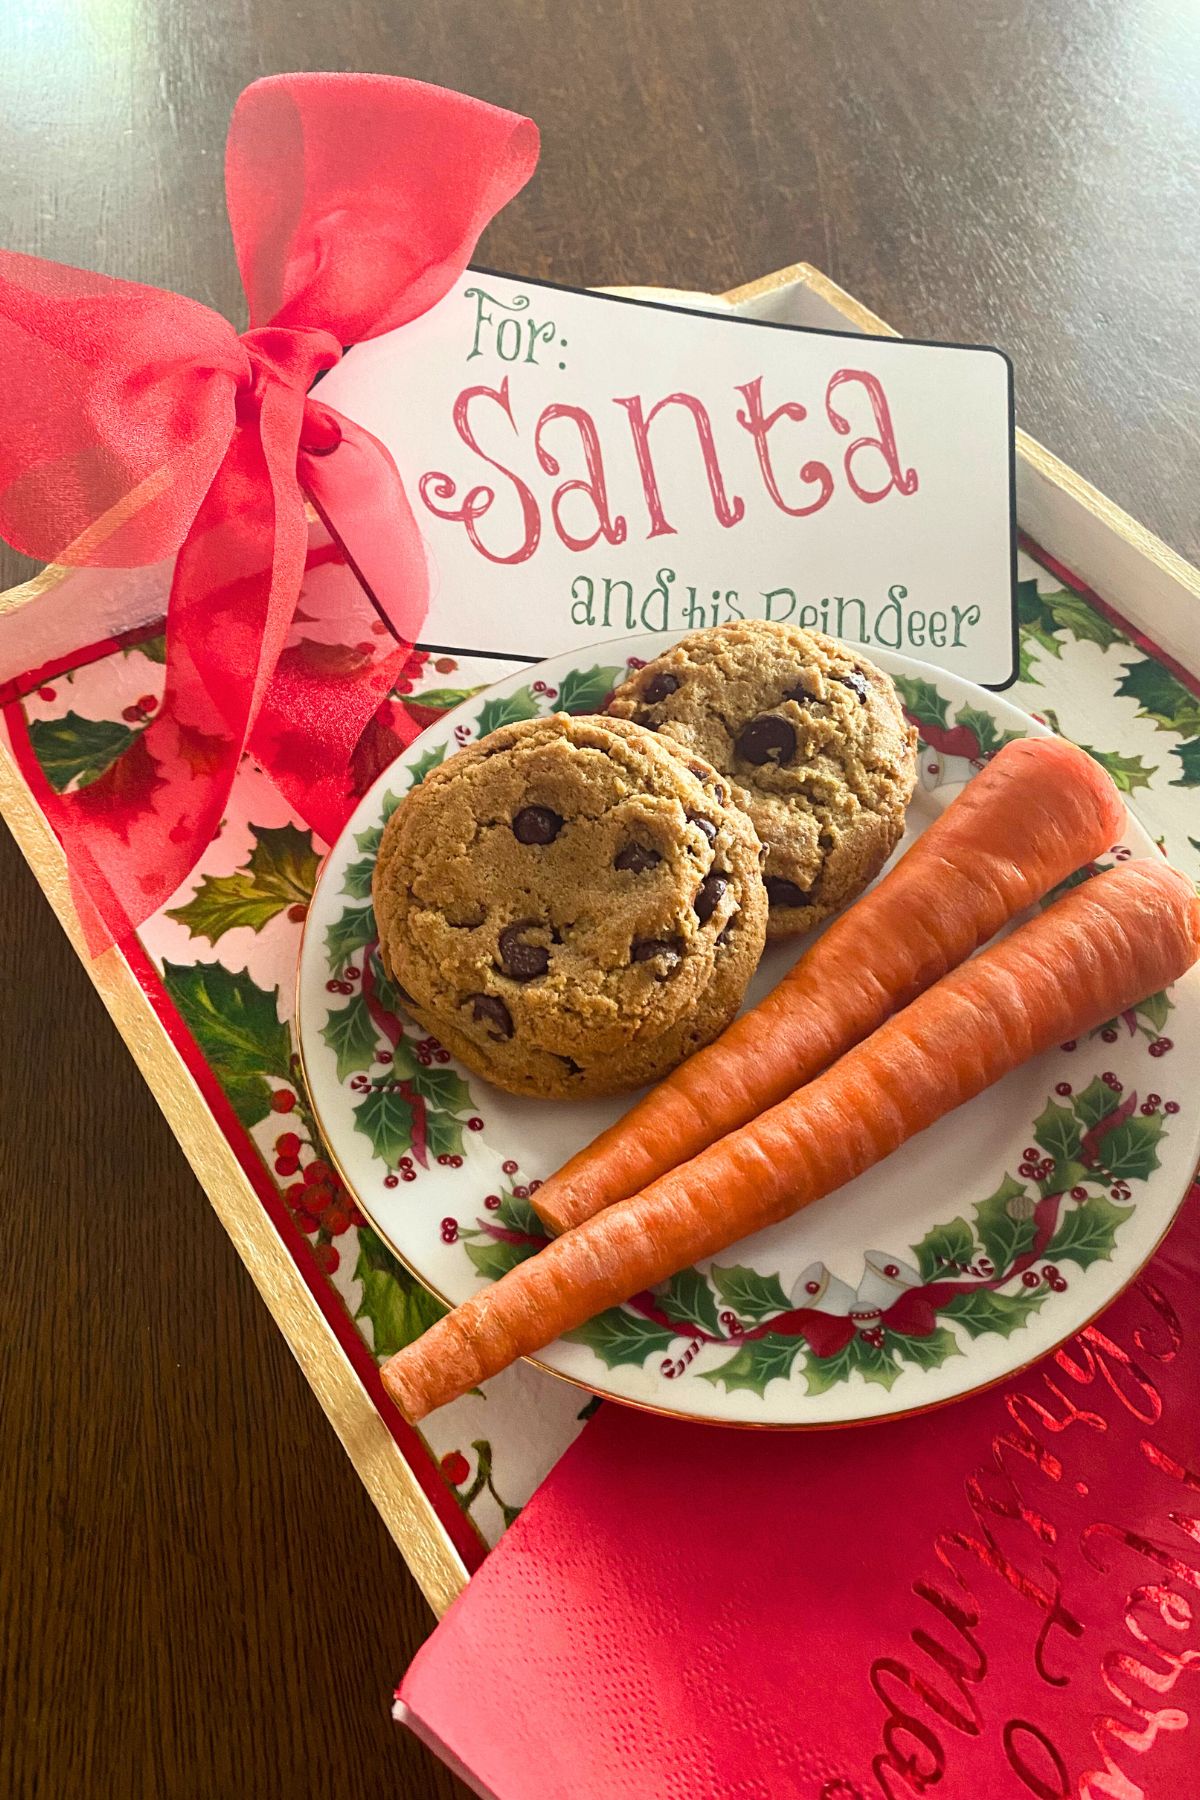
We’ve left so many treats for Santa over the years. It’s no wonder he’s so fat and jolly! We started leaving a little something for the reindeer also when kiddo #3 was little. (He really enjoyed the chewed carrot nubs they left behind.) Years later Scott Calvin in The Santa Clause movie assured us the reindeer really appreciated the extra thoughtfulness. I felt so validated!
Sweet Homemade Santa Cookie Tray
I love pretty holiday napkins! Some women buy shoes…I buy festive napkins. The problem is the napkin to guest ratio never matches exactly! As a result there are always orphaned napkins in the napkin drawer. So I’m always looking for ways to use those one or two left over napkins. I was really excited to do this project with one of our grandkiddos. He did an amazing job and I think it turned out great!
Materials Needed:
- Plain wooden tray (available at JoAnn’s or Hobby Lobby)
- White (or cream) acrylic paint plus any extra colors you might want for contrasting trim
- Christmas-themed paper napkin
- Mod Podge (matte or gloss finish)
- Paintbrush
- Scissors
- Sandpaper (optional for a rustic finish)
- Clear acrylic sealer spray (optional for extra durability)
Instructions:
- Prepare the Tray
Lightly sand the wooden tray to smooth out any rough areas. Wipe away any dust before beginning. - Paint the Base
Apply an even coat of white acrylic paint to the entire tray, inside and out. Let it dry completely, then apply a second coat for a smooth, opaque finish. - Prepare the Napkin
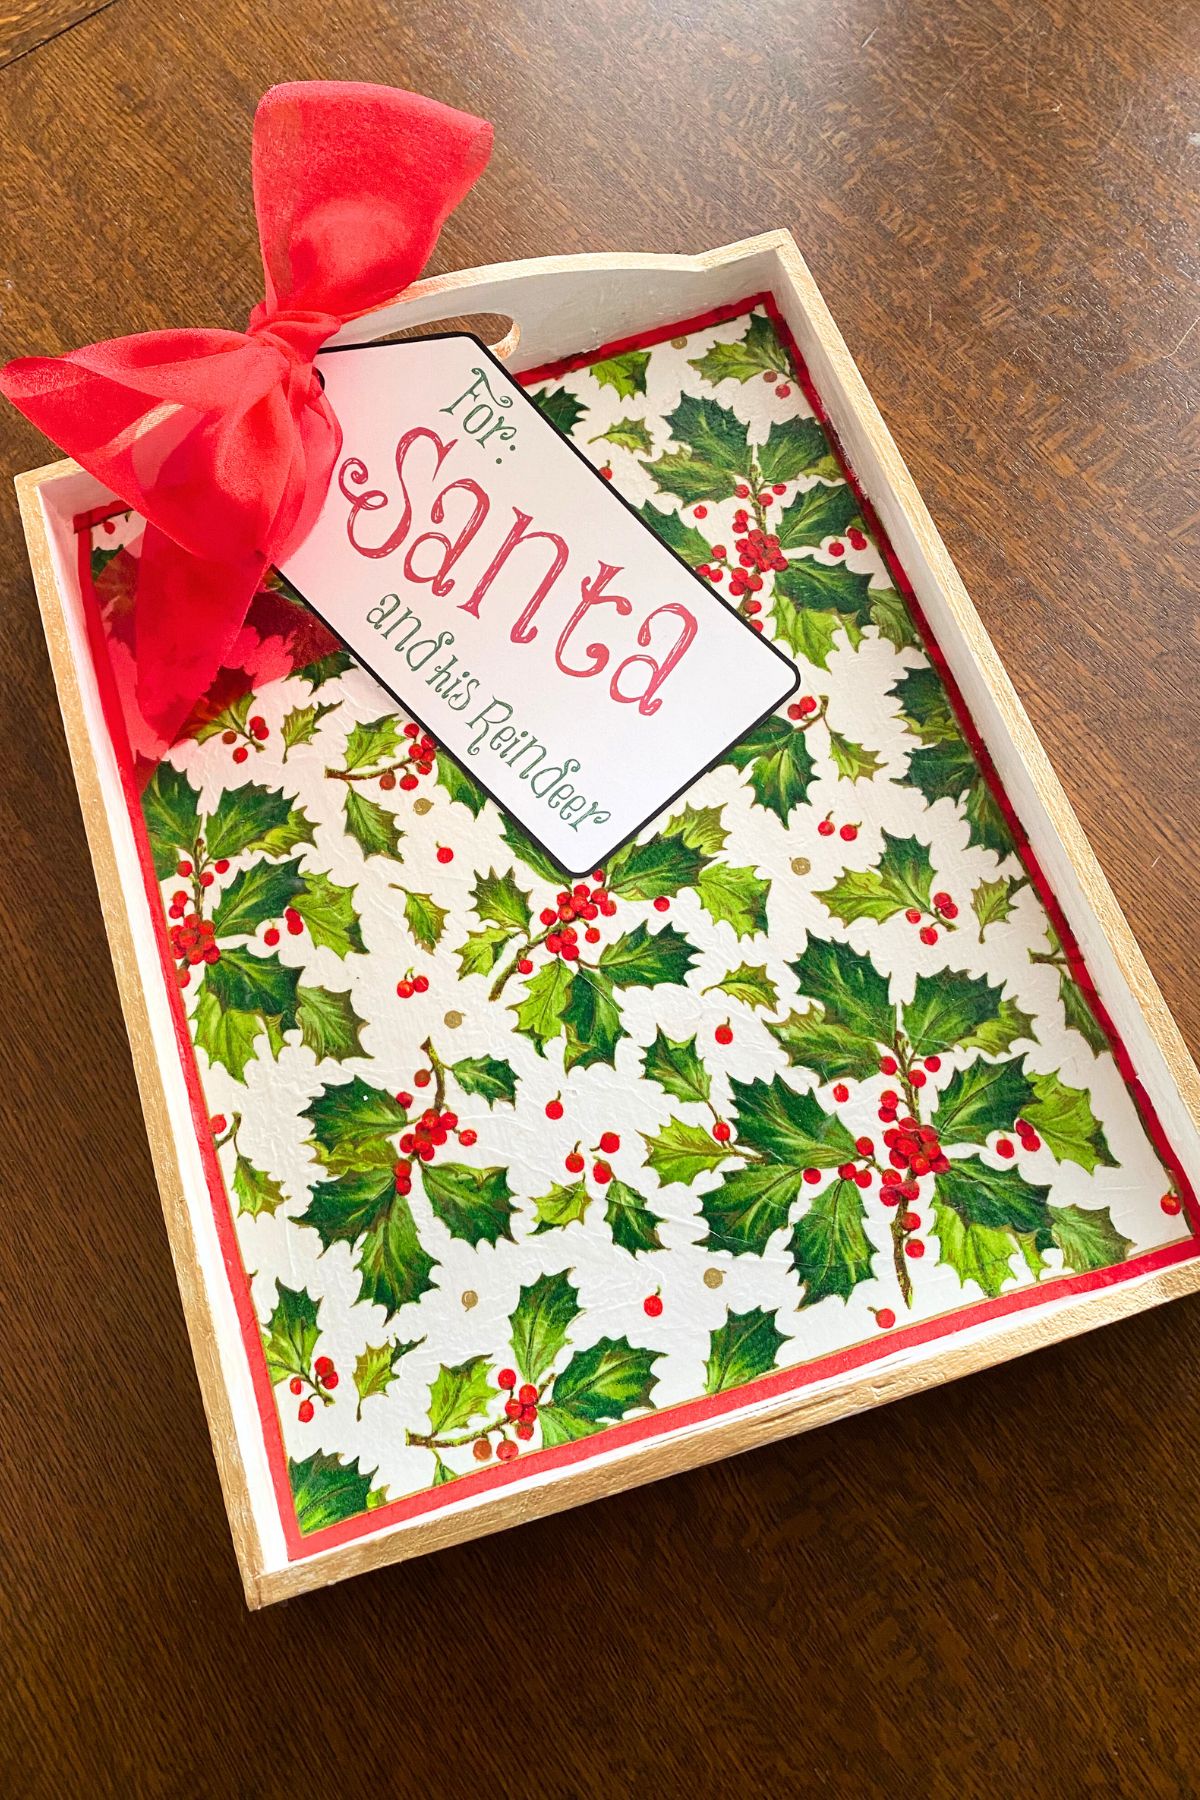
Take a Christmas-themed paper napkin and separate the top printed layer (most napkins are two-three ply, so gently peel off the unprinted backing). Cut the napkin to fit the bottom of the tray. - Apply Mod Podge
Brush a thin layer of Mod Podge onto the bottom of the tray where you’ll place the napkin. Carefully lay the napkin down, smoothing out any wrinkles with your fingers. Work very gently to avoid tearing. - Seal the Napkin
Once the napkin is set in place, let it dry then brush another thin layer of Mod Podge over the top to seal it. Allow it to dry completely. Repeat with one or two more coats, letting each layer dry fully in between, for durability. - Optional: Sand for a Distressed Look
If you’d like a rustic feel, lightly sand the edges and corners of the tray once everything is dry. This gives it a charming, worn look. - Optional: Painted Trim
You may decide to add some pinstriping or other trim details (like the gold edge in the pictured tray). Add and let it dry completely before continuing to the next step. - Protect Your Design
For added protection, finish with a coat of clear acrylic sealer spray, especially if you plan to use the tray frequently. Remember this tray will not be washable. - Add a Tag
Print the Santa Tags on bright white cardstock and cut them out. Select the one you like, punch a hole in the small end and tie to a handle. Easy peasy! - Add Cookies and Enjoy!
Place your beautiful DIY tray by the fireplace or under the tree with Santa’s favorite cookies. This homemade tray will be a cherished piece for Christmas Eve for years to come!
Happy crafting and Merry Christmas!
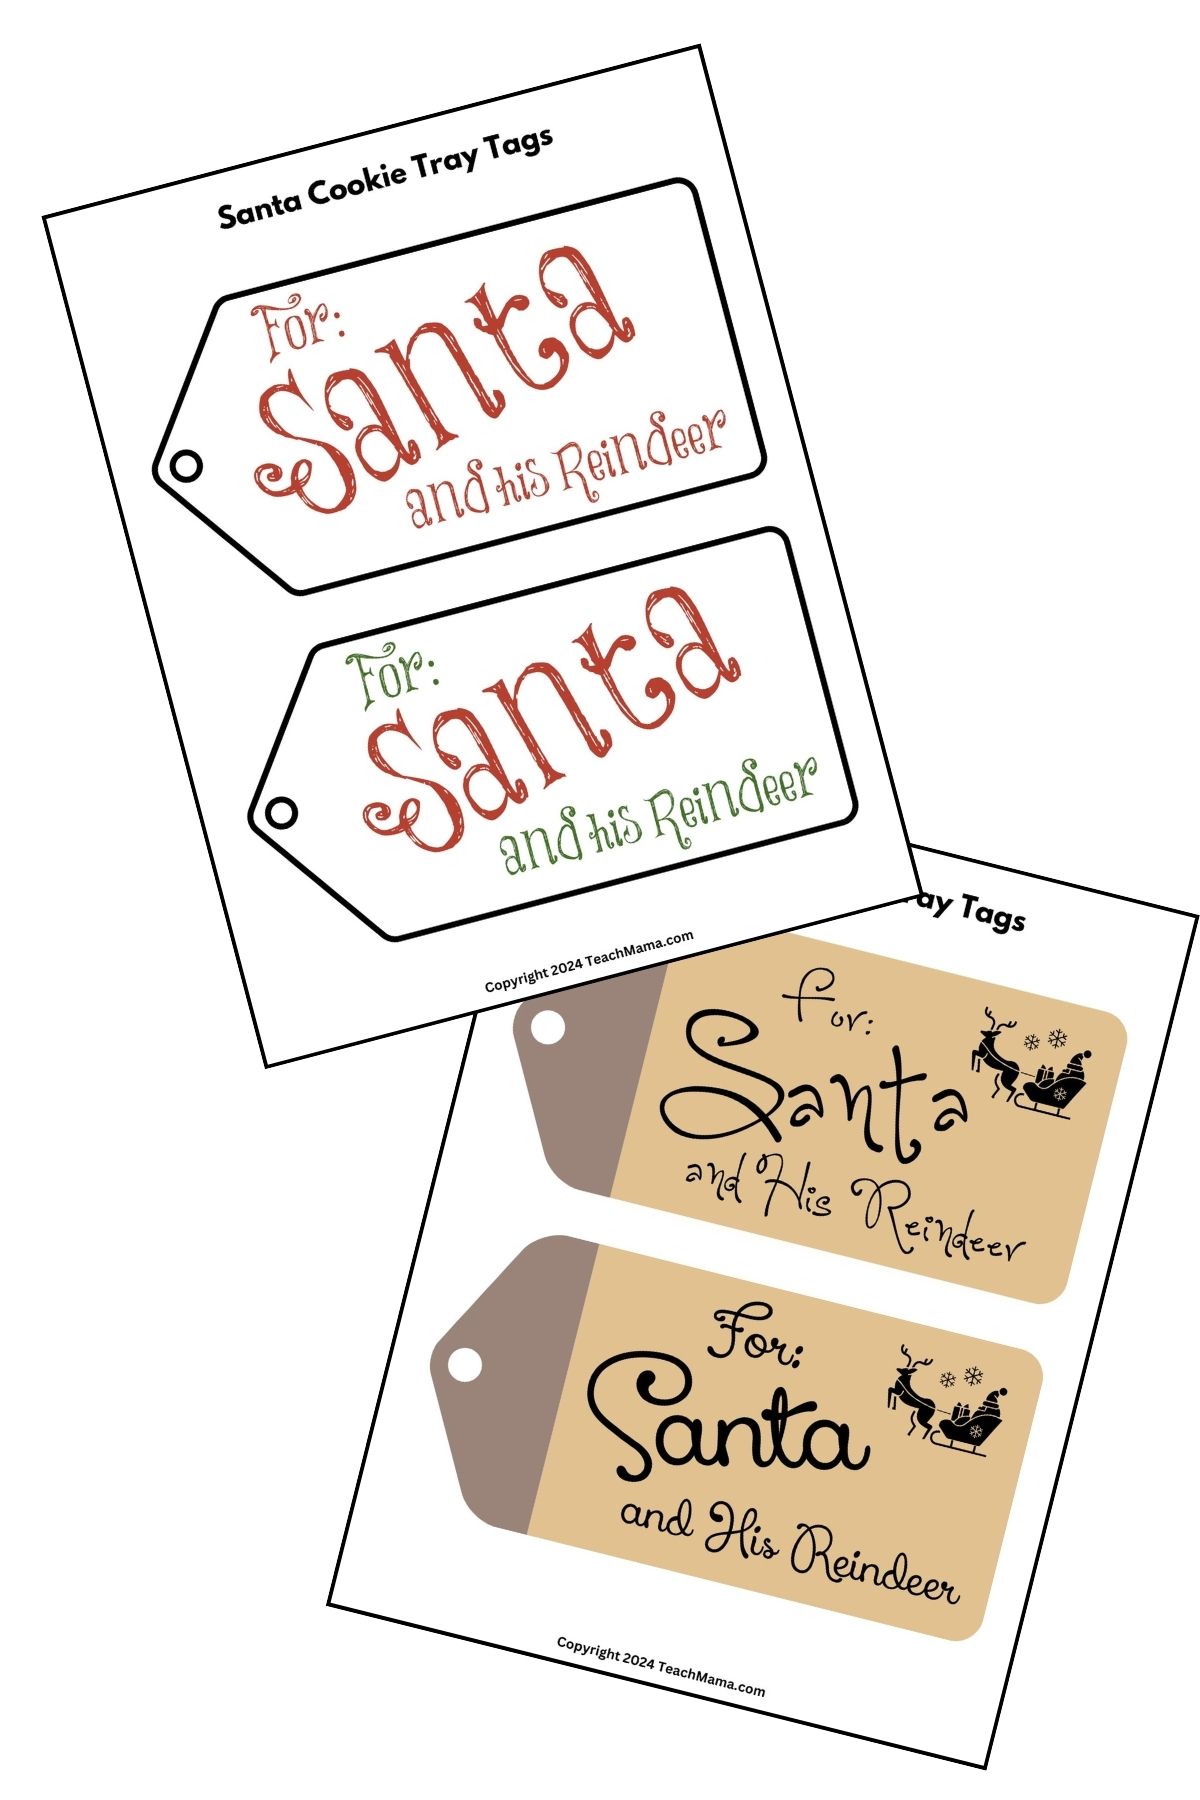
Want Your Own Santa Tags for Your Sweet Homemade Santa Cookie Tray?
Just throw your email in the box below and the link for the download will appear in your inbox as if by holiday magic!
Looking for More Holiday Fun?
- New Year’s Family Interview
- Holiday Fun Fact Lunchbox Notes
- More Holiday Fun Fact and Joke Lunchbox Notes (includes Hanukkah!)
- Printable Christmas Games for Kids
- Bake a Scripture Cake this Christmas
- Christmas Eve Scavenger Hunt
- Christmas Eve Traditions to Start this Year
PIN THIS FOR LATER


Wonderful idea! I am totally preparing sth like that with my little ones this year! Btw – will a “santa” eat the cookies and drink the milk so the kids think he actually visited your house ;)?
Ha! Thanks so much, Alexandra! Of COURSE he will!! He always does!!
haha good to know – I will read it to my better half (as he is always complaining why he has to dress up every single year – he hates the beard…) 🙂
I love how your project turned out. Sparkle Mod Podge is my favorite.
thank you thank you thank you Trisha!! I, too, will be a longtime lover of Sparkle Mod Podge!!
It’s hard to tell how awesome the Sparkle is until you see it in person – I love it too! Cute project!
hey Amy! I agree–love the sparkle Mod Podge–it’s beautiful here but 100 million times more beautiful in real life! Thanks for taking the time to write, my friend!
I love that you made a tray… I’m sure it will be used for years and years, and become a cherished holiday memory for your family.
thanks so much, Carolina–really appreciate your kind words and feedback!
How cute! I love the tissue paper edges.
thanks, Heather! Means a boatload coming from the queen of all things crafty! Appreciate you taking the time to come on over, my friend!