 We’ve had two dancers in our family this year–Cora, who has been rockin her Hip, Tap, Toe class each week, and Maddy, who started out as a ballerina but who moved on to classes with a little more beat and movement by mid-year.
Now she’s a tap-dancin’, jazzy-jazz dancer, and we’re really excited that both girls are enjoying their classes.
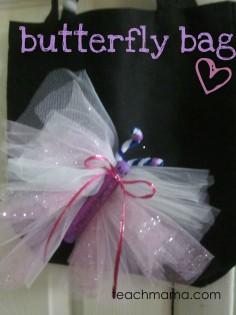
But like Cora, Maddy needed a sweet bag to tote her dancin’ shoes to and from class each week, so this mama got searching around our house for some ways to spruce up an old bag for our Maddy. Luckily, we had a little black canvas bag here from something–I honestly have no idea why–and with some collaboration, Maddy and I came up with a sweet little Butterfly Bag for her dance shoes.
Here’s the skinny. . .
- Beautiful Butterfly Tote Bag: Like I’ve said before, I’m no seamstress. I don’t have a sewing machine, and I have never hemmed a pair of pants.
But I can sew a mean button (on a sock puppet), and I have been known to whip out a pretty hot embellishment or two on an old pair of shorts. And I can do ribbons on a blinged out ballet bag like nobody’s business.
So without that sewing background–or sewing machine–we had to use what we had. I asked Maddy what she wanted on her bag, and the only thing she gave me was ‘a butterfly’. So we ran with the butterfly idea.
our blank bag–ready for some butterflies and bling. . .
I grabbed the tiny black canvas bag we had in our house, and we pulled out our fancy ribbon box. Maddy was playing with the rolls of tulle in the box, and I thought that the tulle might make pretty butterfly wings–with a bit of a ballet frill.
And what better butterfly body than a wooden clothespin? Maddy wanted the body purple, so we decided she could paint the head and that we could cover the body in a shiny, sparkly ribbon.

Maddy paints her butterfly head. . .

. . . and she glues her pretty ribbon on its body.
While the butterfly body was drying, we created the wings.
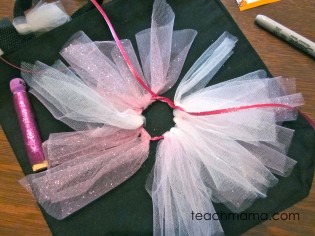
We simply cut some pieces of tulle, maybe eight inches long. We used pink sparkly, light pink, and white–and we tied them on a ribbon. And then we tied that ribbon in a loose circle. That way our wings would look like wings once they were secured to the bag.

Our wings–ready to fly!

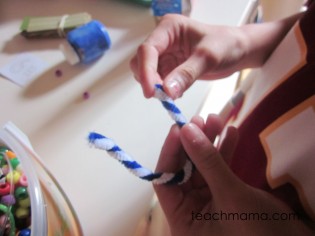
Maddy twists the antennae.
We made sure that the wings were even, and we pinned the ribbon to the bag.
With a few very easy stitches, the wings were secured to the bag!
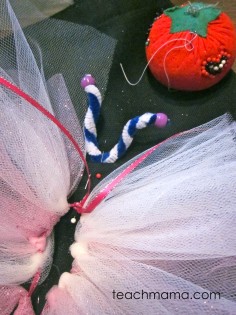
While I was sewing the wings onto the bag, Maddy was busy twisting two pipe cleaners together to make antennae. She put a purple bead at the top of each antenna, and with a tiny dot of glue to hold them, she was finished.
We pinned the antennae to the bag, and I sewed them with a few quick loops. After that, we waited until the butterfly body was completely dry, and we sewed it in between the wings. We simply sewed a few loops around the neck of the body, and we hid them with a pretty pink ribbon.
Maddy wanted to add a few more embellishments to the bag, like some ribbons on the straps.
So she cut and tied, and she cut and tied some more.
And that was it! Her bag was finished. . .
She was a dancer with a crazy-cool butterfly dance bag!

Maddy is ready to rock out her butterfly tote bag!
And that’s it! Just one weekend morning with my sweet Maddycat, when we really put our heads together to figure out the best way to create a beautiful bag that she could use each week–with materials we had here at home.
I love the way that together, we problem-solved and made this bag.
It wasn’t easy at first–and we tried a few things that didn’t work–like covering the butterfly body in pipe cleaners and tying wings onto the clothespin. But it was fun–and as Maddy’s getting older, I know that it’s super important to involve her in the process. And it’s even more important to walk with her as we figure things out, try new ideas, and . . . even fail a bit.
Happy bag-making!!


Super cute! Love this easy no sew project!
What a great bag! Tulle is so girly and makes a perfect butterfly.
thanks, Brandy!! I am a huge tulle fan, too!
Very cute! My girls are taking musical theatre and jazz dancing. They love it. I bought them each a canvas bag that they decked out with glitter glue.
JEN! SO fun!! Musical theater sounds totally cool–and I love that we both let our girls bling out their dance bags!!