Many parents rank egg dyeing up there with pumpkin carving: a highly-anticipated activity that often results in a huge mess, complete with crying kids and frustrated parents.
But it doesn’t have to be that way. At all.
In fact, I have a few tricks for you that will make egg dyeing as mess-free, easy, and fun as possible for families.
Here’s the skinny. . .
Egg-Dyeing 101–Making Egg-Dyeing as Mess-Free, Easy, and FUN as Possible for Families:
It’s not rocket science, friends. In fact, these few steps will make
1. Have your tools and workspace ready.
You’ll need the following:
- eggs! (We usually shoot for 6-10 eggs per child.)
- egg dye tablets
- plastic tablecloth
- water
- color cups
- vinegar
- whisk
- PAAS egg dipper
- paper towels
- wire drying rack and/or egg dying box (did you know it doubles as a drying rack?)
Set up your work space.

2. Then place the proper tablet in its matching egg cup: blue tablet in blue cup, yellow in yellow cup, etc.
3. Dissolve the dye tablets by adding 1 Tablespoon of vinegar to each egg cup–EXCEPT THE PINK CUP! The pink dye is more vibrant without vinegar–who knew? And? Your welcome for that second really cool tip.
4. Once the dye tablet is dissolved, fill each color cup with water up to the line midway (about 1/2 cup). Now the egg dyes are ready to go!
5. Dye eggs by dipping them one at a time into the egg dye and moving the egg around a bit with the egg dipper. The longer the egg sits in the dye, the more vibrant the color.
6. When eggs are the desired color, remove the egg from the dye and blot the excess with a paper towel.
7. Place on the drying rack and allow egg to dry completely!
2. Make it easy for kids.
A few tips for making egg-dyeing easy for kids:
Model for kids how to properly dye eggs so that we’re setting them up for egg-dyeing success!
Show kids how to use the egg dipper–the smaller, skinnier end of the egg goes into the hole! It does require balance, but it’s a great way to work on this skill!
Let kids use a whisk to dip eggs into the dye if the egg dipper is too challenging.
Surprisingly enough, the egg can go in and out of the whisk very easily!
Make sure kids have a sturdy spot to hold the eggs while decorating.
Whether it’s the egg stands that come in the decorating kit or whether you make your own–see below–the idea is that the eggs are still while kids are creating. This removes a ton of stress for our little ones!
Remember, too, that if the whole-egg dyeing is too much, that parents can dye eggs first and allow children to decorate them–kind of like letting kids put the icing a cake!
Try using PAAS Monogram stickers to personalize eggs and to celebrate kids’ initials. Consider even giving each person in the family another person for whom they should decorate an egg.
For example, I might decorate an egg for Owen; Owen would do one for Maddy; Maddy would do one for Cora; Cora would do one for her dad, and her dad would do one for me. Or something like that.
The only rule is that the person’s egg must be clearly theirs. So you could put the person’s name on it, initials on it, in some way personalizing the egg for the other person.
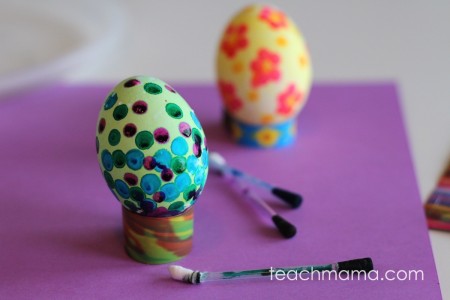
Or use the PAAS Color Sticks for super-easy and vibrant decorating with the snap of a stick!
Seriously, you just snap these little sticks up where you see the line, and then you let the dye run to the opposite end.
And then? The decorating fun begins–vibrant, rich colors via a tool that makes writing, drawing, doodling, and creating– easy!
3. Make it fun.
Above all, egg-dyeing should be fun!
So remember:
Use the often-forgotten ‘magic’ crayon!
That little wax crayon is used to draw on eggs before they get dunked in the dye. When they come out of the dye, the wax has created a resist, so whatever was drawn will not be dyed.
The ‘magic crayon’ is a great tool to use to practice writing letters, shapes, numbers, and names!
Play with color blending! Encourage kids to mix colors, experiment with color shading, and try new things!
Use stickers! Most egg dyeing sets come with stickers. Use them to decorate already painted eggs, or use them to block off color before you dye the eggs for a different type of color resist.
Remember that your eggs will not be–and do not have to be–perfect!
Especially when you add a few kids to the mix, egg dyeing is perfectly imperfect, friends. The good news is that with the help of some great quality egg dyeing products, your eggs will look great no matter what!
Other fun PAAS egg-dyeing facts:
- PAAS turns 135 in 2015!
- PAAS was established in 1880 by William Townley in his New Jersey drug store. He sold packets of egg dye to neighbors and the company grew from
there. - Townley named the company PAAS after the Dutch word for Easter, Pasan. So PAAS literally means Easter!
Check out a quick PAAS video on egg dyeing:
Hope this helps, friends, and hope it makes egg dyeing as mess-free, easy, and fun as possible!
What are your tips for egg dyeing? I’d love to hear them!
Do you have questions about egg dyeing or the PAAS products? They’ve been around for 135 years. They know egg dyeing!
Connect with them and learn more: PAAS website | PAAS YouTube channel | PAAS Facebook page
fyi: I was asked by the good people at PAAS to share a bit about egg decorating with my readers, and I was happy to do so. I cannot remember an Easter that I didn’t use PAAS egg dyes on my Easter eggs, so of course it was a natural fit. PAAS egg dyeing kits are as much a part of Easter for my family as are daffodils and jellybeans. Though I was given PAAS products to try, as always, my opinions are all my own, influenced only by my experience as a parent and educator and lifetime user of PAAS products!


 april fools’ tricks for last-minute prankster parents