Teach Mama
  • Reading
  • Early Literacy
  • Writing
  • STEM
  • Activities
  • Digital Literacy
Top Posts
Best Slime Bundles for Creative Play: 5 Must-Have...
Learning Through Everyday Routines and Special Adventures
How to Talk to Kids About Goals and...
Making Everyday Learning Count: Turning Small Moments Into...
Raising Kids Who Understand the Balance Between Needs...
Family Learning Projects That Spark Conversations About Money
How Long Do Typical Summer Camps Last?
Bright Smiles for Life: How to Teach Kids...
Which Standing Balance Activities Work Best in Occupational...
How to Recognize the Early Signs of Dyslexia...
Teach Mama
  • Reading
  • Early Literacy
  • Writing
  • STEM
  • Activities
  • Digital Literacy
Teach Mama
Teach Mama
  • About
  • Contact
  • Contact
  • disclaimer
  • terms of use
  • privacy policy
  • Site-Map
Copyright 2021 - All Right Reserved
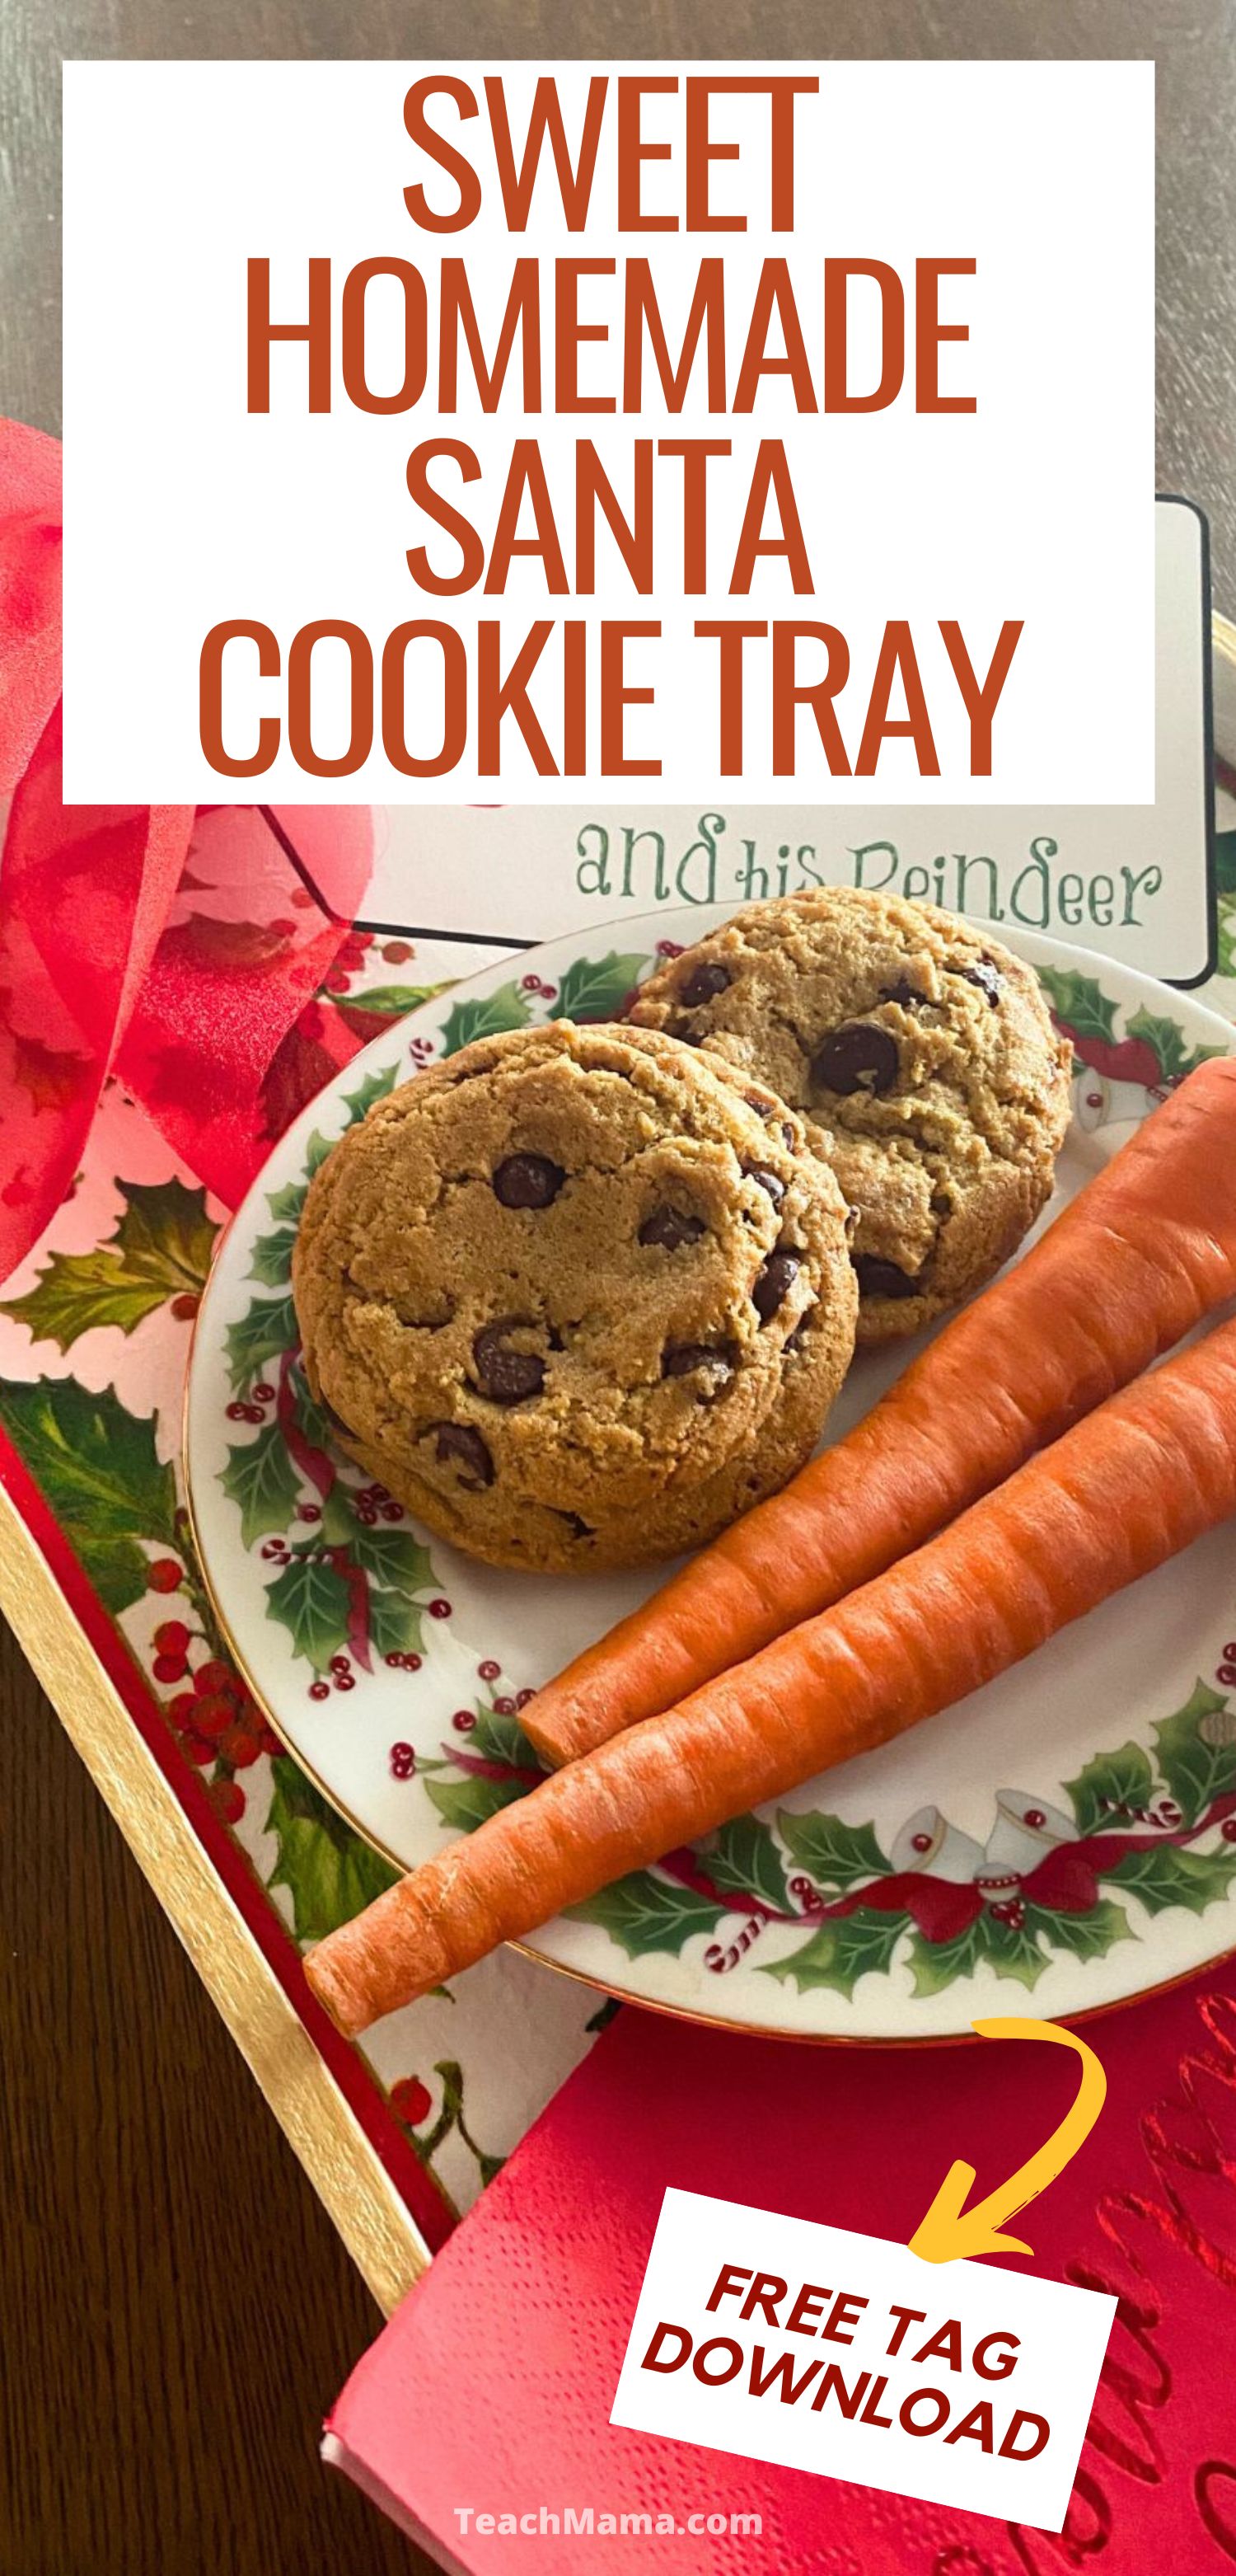
Cookies and carrots on a Christmas plate all on a wooden tray with a holly and berry theme
christmascraftsholidays

Sweet Homemade Santa Cookie Tray

by Teach Mama November 5, 2024
written by Teach Mama

Create a festive DIY Santa cookie tray that’s perfect for Christmas Eve! Transform a plain wooden tray with a little paint, Mod Podge, and a holiday napkin for a homemade touch that’ll delight the whole family and impress Santa. This sweet craft is easy, fun, and brings holiday cheer to your table!

We’ve left so many treats for Santa over the years. It’s no wonder he’s so fat and jolly! We started leaving a little something for the reindeer also when kiddo #3 was little. (He really enjoyed the chewed carrot nubs they left behind.) Years later Scott Calvin in The Santa Clause movie assured us the reindeer really appreciated the extra thoughtfulness. I felt so validated!

Sweet Homemade Santa Cookie Tray

I love pretty holiday napkins! Some women buy shoes…I buy festive napkins. The problem is the napkin to guest ratio never matches exactly! As a result there are always orphaned napkins in the napkin drawer. So I’m always looking for ways to use those one or two left over napkins. I was really excited to do this project with one of our grandkiddos. He did an amazing job and I think it turned out great!

Materials Needed:

  • Plain wooden tray (available at JoAnn’s or Hobby Lobby)
  • White (or cream) acrylic paint plus any extra colors you might want for contrasting trim
  • Christmas-themed paper napkin
  • Mod Podge (matte or gloss finish)
  • Paintbrush
  • Scissors
  • Sandpaper (optional for a rustic finish)
  • Clear acrylic sealer spray (optional for extra durability)

Instructions:

  1. Prepare the Tray
    Lightly sand the wooden tray to smooth out any rough areas. Wipe away any dust before beginning.
  2. Paint the Base
    Apply an even coat of white acrylic paint to the entire tray, inside and out. Let it dry completely, then apply a second coat for a smooth, opaque finish.
  3. Prepare the Napkin
    Take a Christmas-themed paper napkin and separate the top printed layer (most napkins are two-three ply, so gently peel off the unprinted backing). Cut the napkin to fit the bottom of the tray.
  4. Apply Mod Podge
    Brush a thin layer of Mod Podge onto the bottom of the tray where you’ll place the napkin. Carefully lay the napkin down, smoothing out any wrinkles with your fingers. Work very gently to avoid tearing.
  5. Seal the Napkin
    Once the napkin is set in place, let it dry then brush another thin layer of Mod Podge over the top to seal it. Allow it to dry completely. Repeat with one or two more coats, letting each layer dry fully in between, for durability.
  6. Optional: Sand for a Distressed Look
    If you’d like a rustic feel, lightly sand the edges and corners of the tray once everything is dry. This gives it a charming, worn look.
  7. Optional: Painted Trim
    You may decide to add some pinstriping or other trim details (like the gold edge in the pictured tray). Add and let it dry completely before continuing to the next step.
  8. Protect Your Design
    For added protection, finish with a coat of clear acrylic sealer spray, especially if you plan to use the tray frequently. Remember this tray will not be washable.
  9. Add a Tag
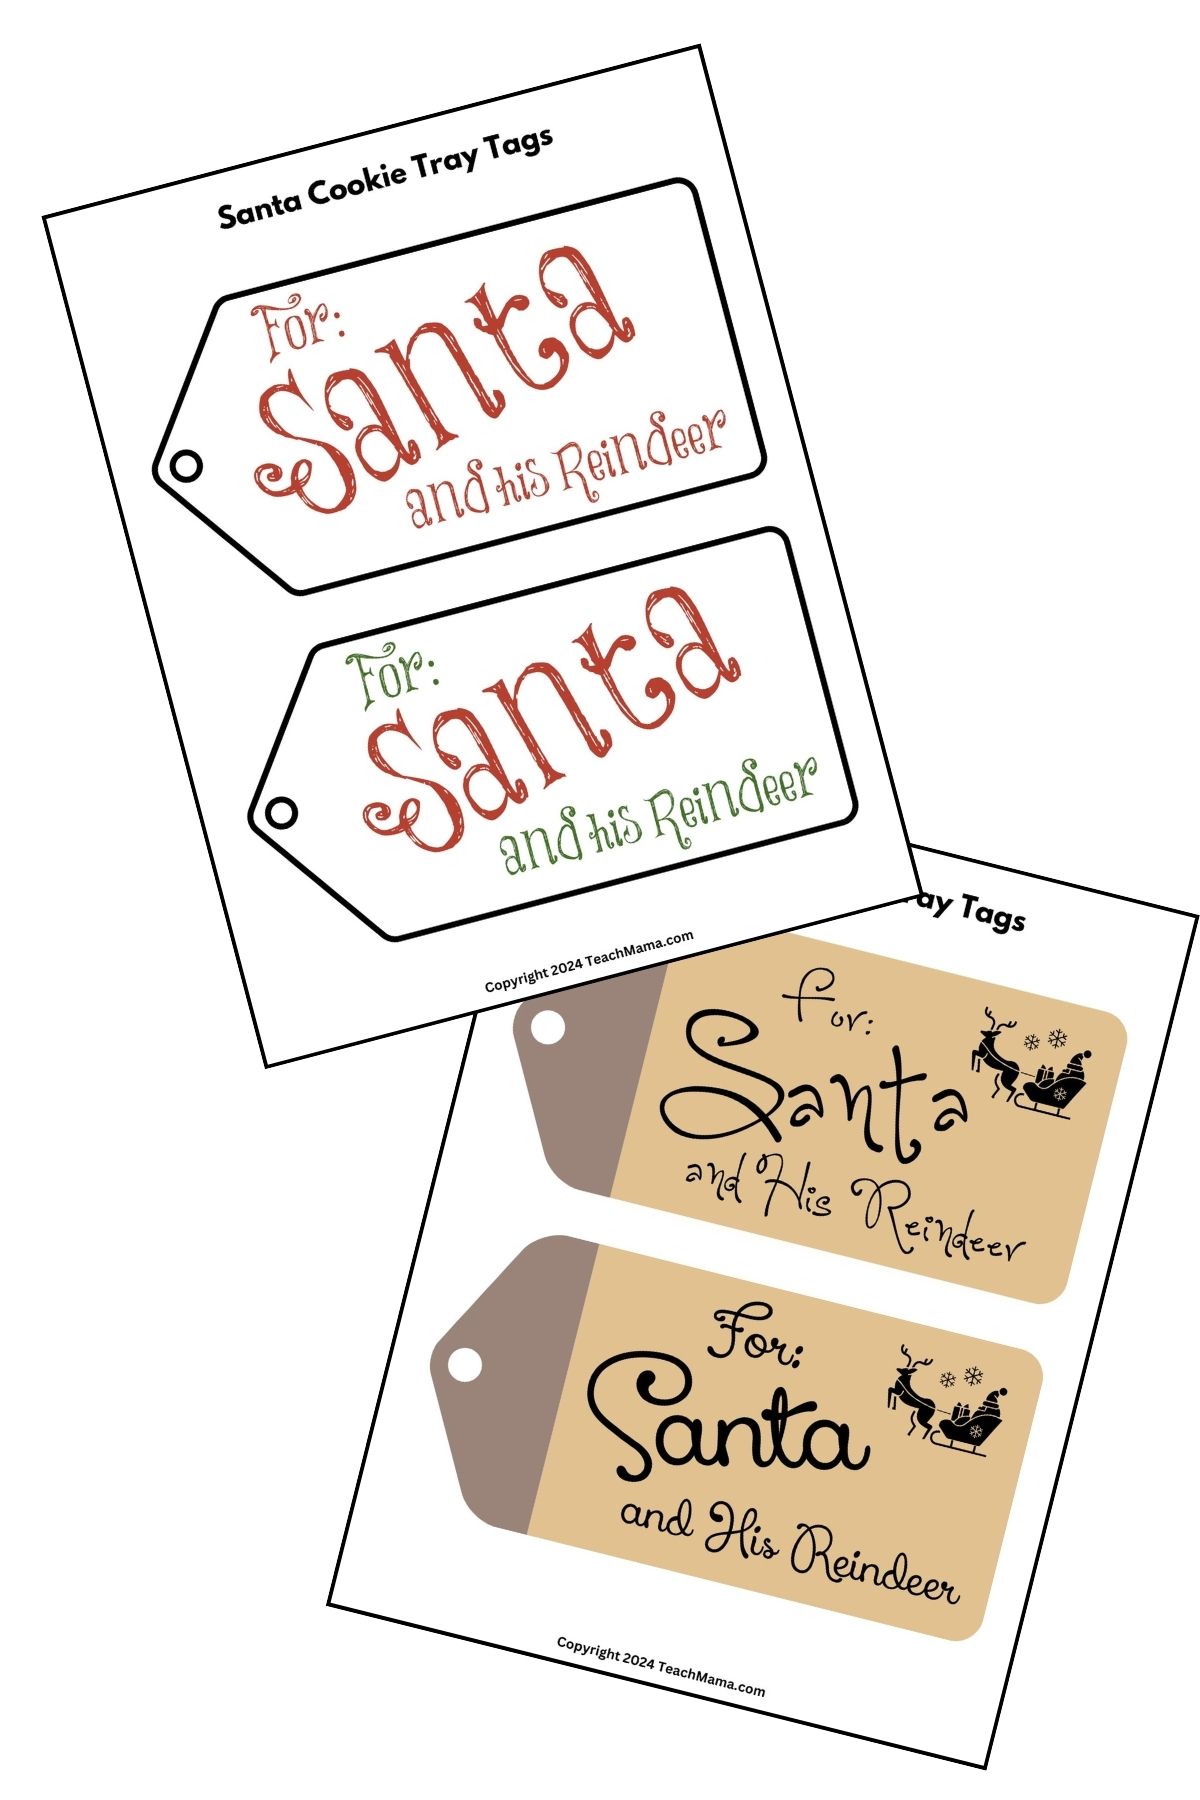
    Print the Santa Tags on bright white cardstock and cut them out. Select the one you like, punch a hole in the small end and tie to a handle. Easy peasy!
  10. Add Cookies and Enjoy!
    Place your beautiful DIY tray by the fireplace or under the tree with Santa’s favorite cookies. This homemade tray will be a cherished piece for Christmas Eve for years to come!
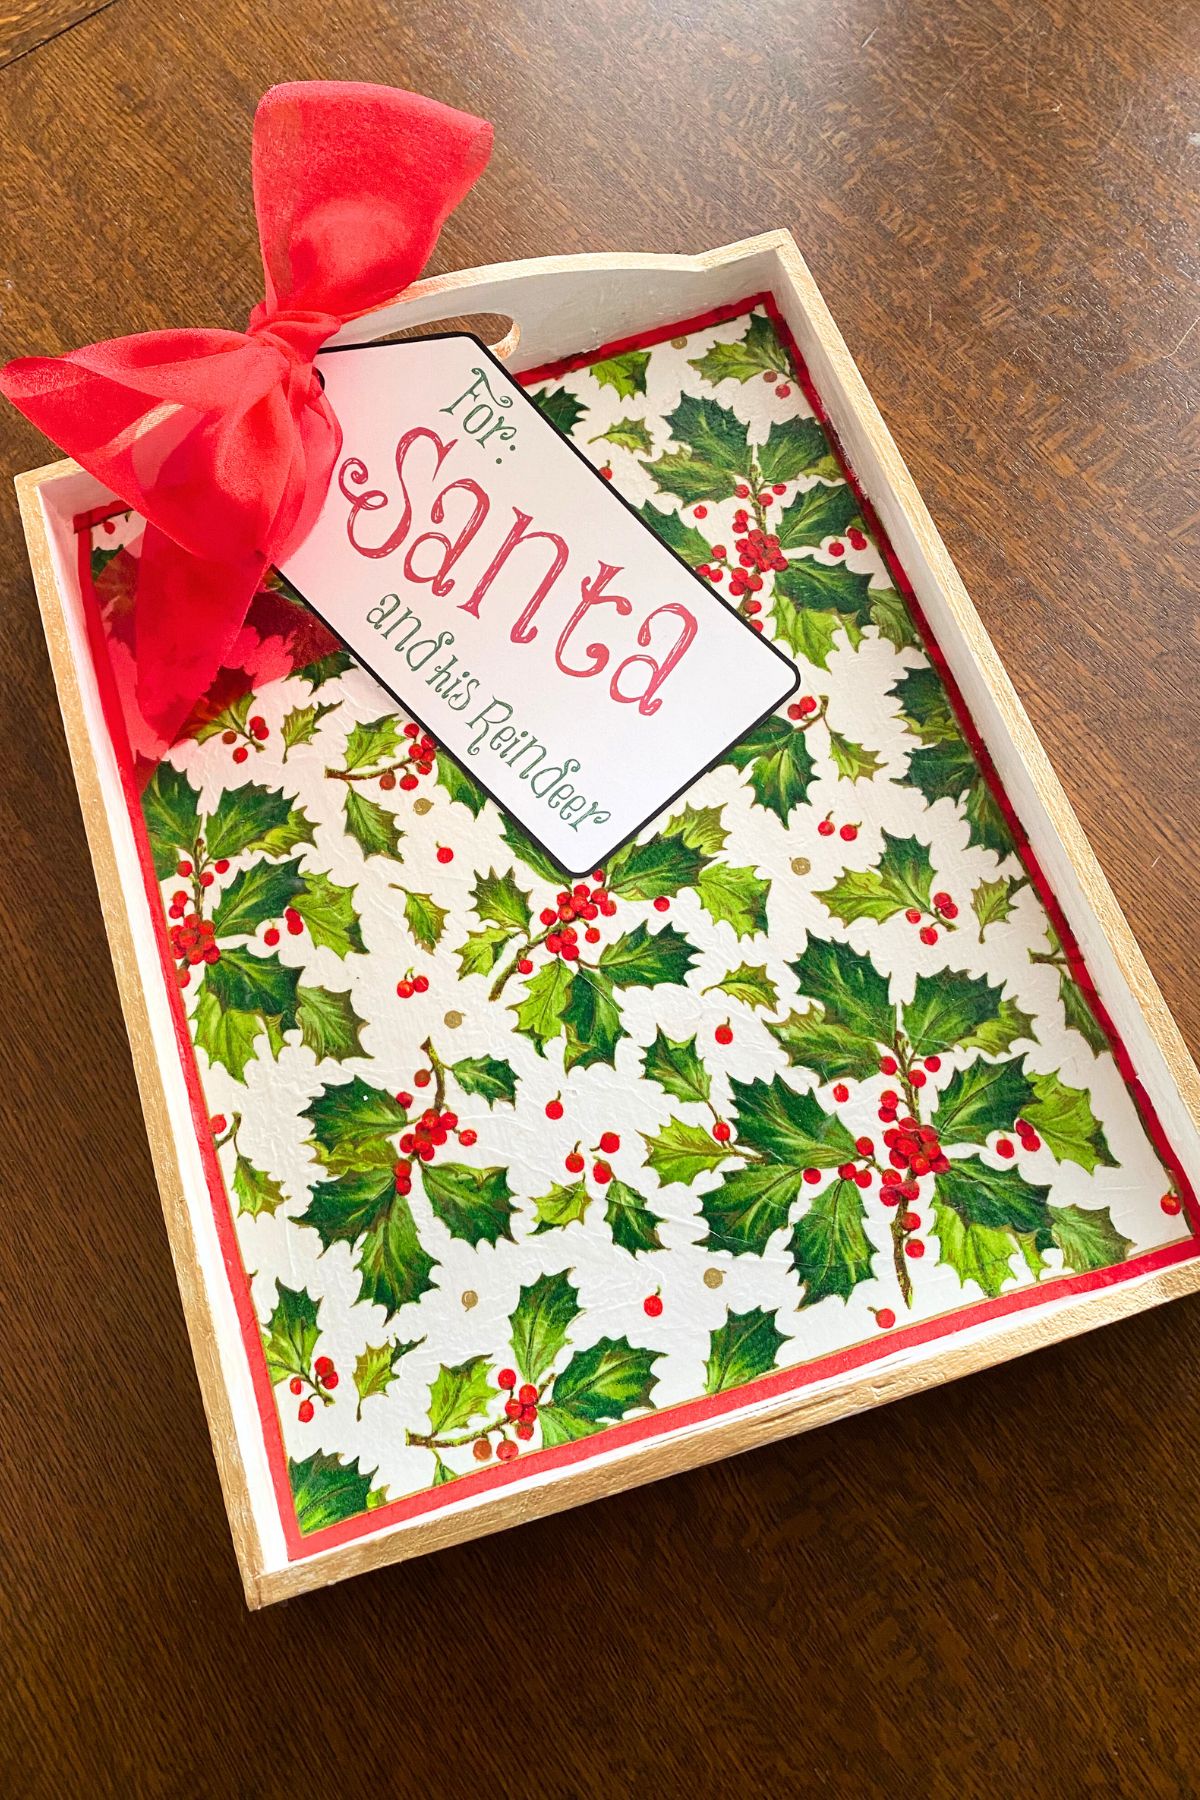
Wooden tray with holly leaf and berry lining

Happy crafting and Merry Christmas!

Printable Santa Cookie Tray Tag Collage

Want Your Own Santa Tags for Your Sweet Homemade Santa Cookie Tray?

Just throw your email in the box below and the link for the download will appear in your inbox as if by holiday magic!

Looking for More Holiday Fun?

  • New Year’s Family Interview
  • Holiday Fun Fact Lunchbox Notes
  • More Holiday Fun Fact and Joke Lunchbox Notes (includes Hanukkah!)
  • Printable Christmas Games for Kids
  • Bake a Scripture Cake this Christmas
  • Christmas Eve Scavenger Hunt
  • Christmas Eve Traditions to Start this Year

PIN THIS FOR LATER
November 5, 2024 14 comments
0 FacebookTwitterPinterestPocketThreadsBlueskyEmail
Fun Christmas Games Printables for Kids
reading

Fun Christmas Games Printables for Kids

by Teach Mama November 5, 2024
written by Teach Mama

Get ready for some festive family fun with Christmas Printable Games for Kids. Play our Christmas-themed memory card game or rush to complete the Christmas A-Z Nativity Race or the Santa A-Z race fill-in-the-blank game printables! These activities are perfect for holiday gatherings! Enjoy quality time together while challenging memory skills and creativity. Perfect for kids and adults alike they’ll make your Christmas celebration extra merry!

We like puzzles and games and during the days leading up to Christmas it is common to see the family working on a puzzle of a snowy woodland scene or cozy Christmas cottage. We starting leaving these games out as well and found that two players would join-up for a quick game quite often.

Printable Christmas Games for Kids

Christmas Memory Master

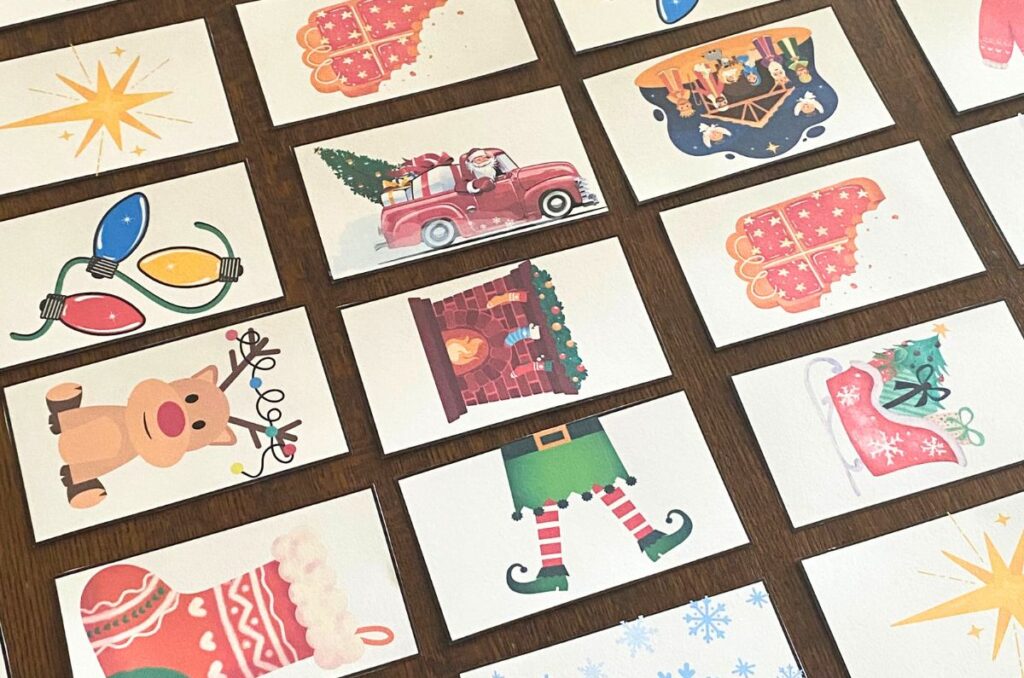
This is similar to the old Concentration game, but with fun Christmas images. Once you’ve printed two sets of cards I recommend backing them with a second piece of cardstock or scrapbook paper before cutting them out so the image can’t be seen during the game. Print out two sets for a simple game. Print four sets for even more chances to get a match!

How to Play Christmas Memory Master

Lay the cards out face down in a grid fashion. Each player turns over two cards. If they match the player takes them out of play. If the cards don’t match they are turned back over and it’s the next player’s turn. When all the cards are claimed the player with the most card pairs wins!

We leave this game out for several days leading up to Christmas to give the kids something to do!

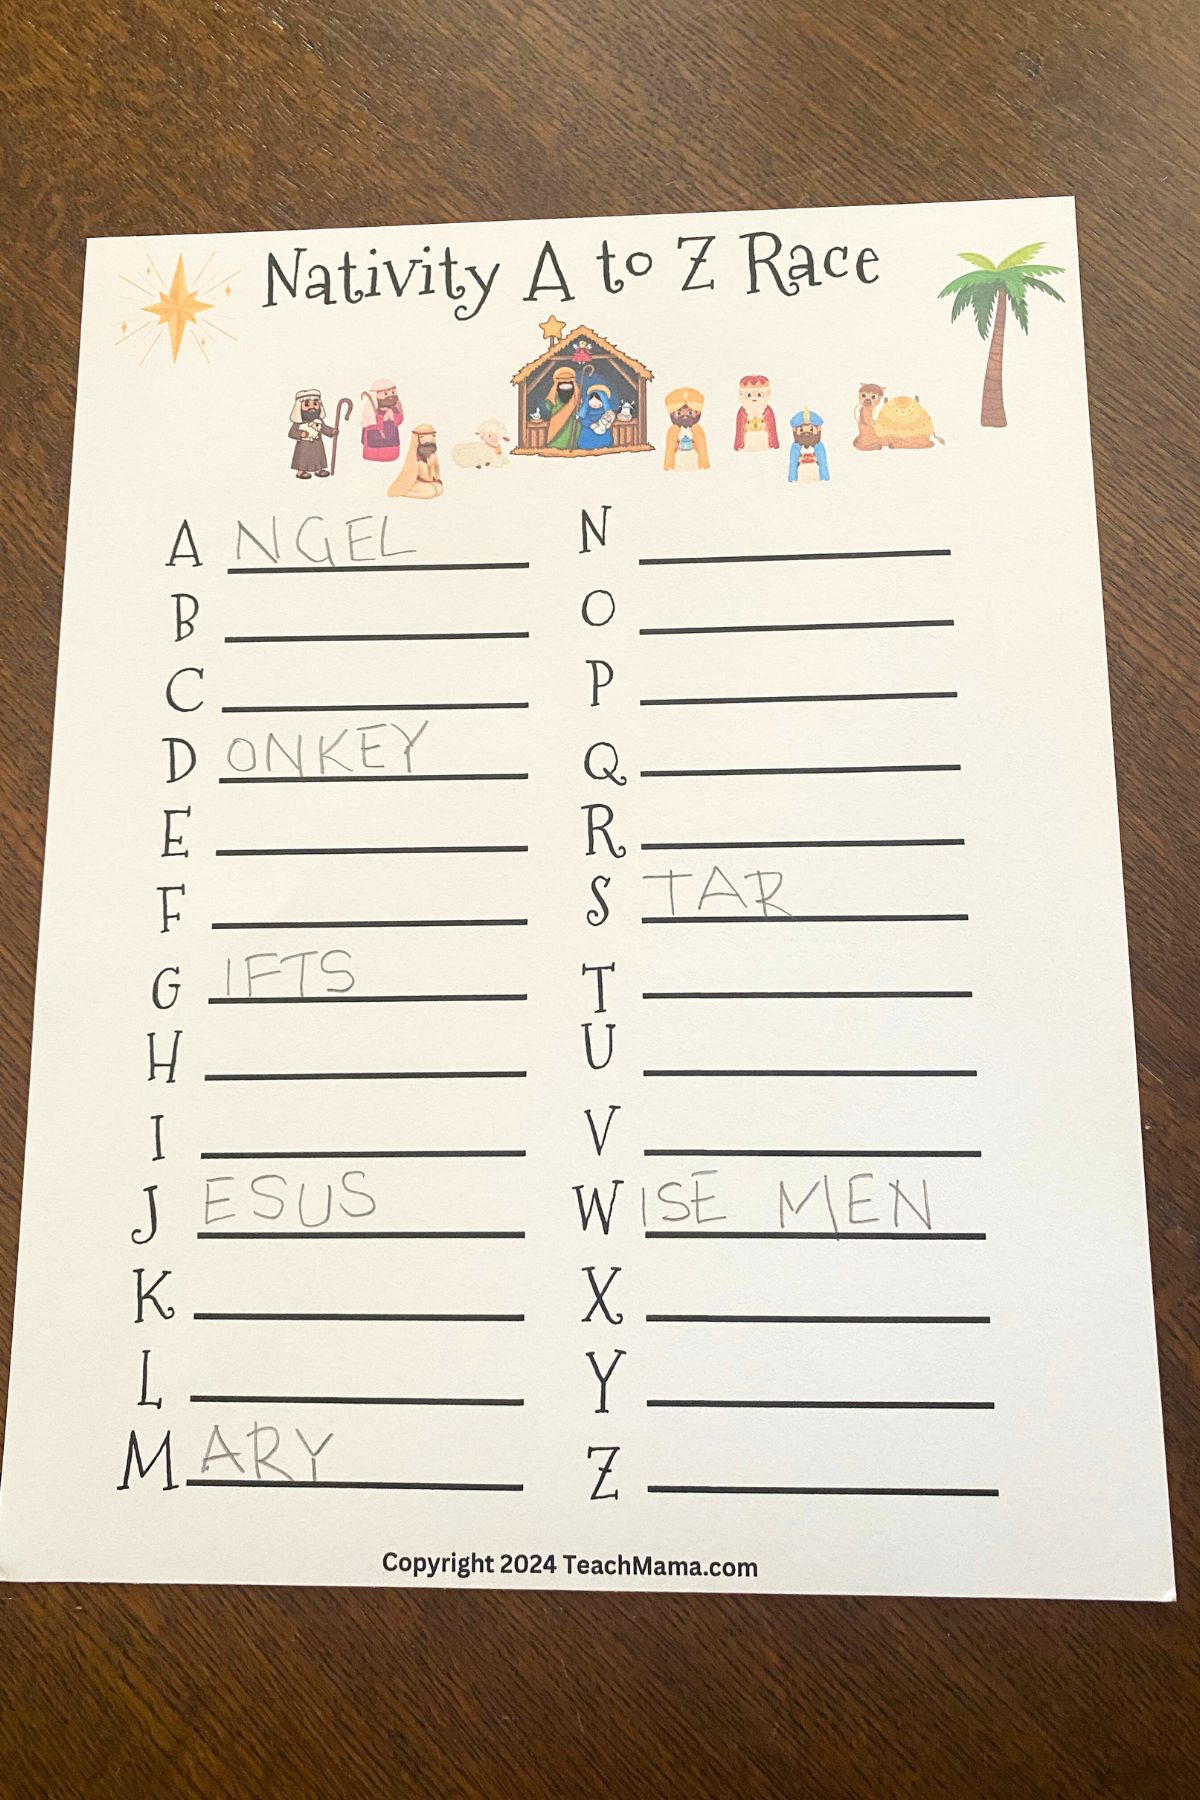
Printed Nativity A to Z Race with the alphabet and lines to write in in two columns on the page

Christmas A – Z Nativity Race

Print out one copy of the race for each person, set a timer and see how many blanks you can fill in before the buzzer goes off! (If you manage to think of Christmas words starting with Q, X, Y, and Z, you are a bonafide genius!) The amount of time you set will depend on the ages of the people playing.

You’ll want to allow more time for younger kiddos so they have the time they need to write their answers. Also if you are playing this with a mixed ages group, you should consider having both a youth and an adult winner. Whoever, in both categories, has filled in the most blanks when time is up wins!

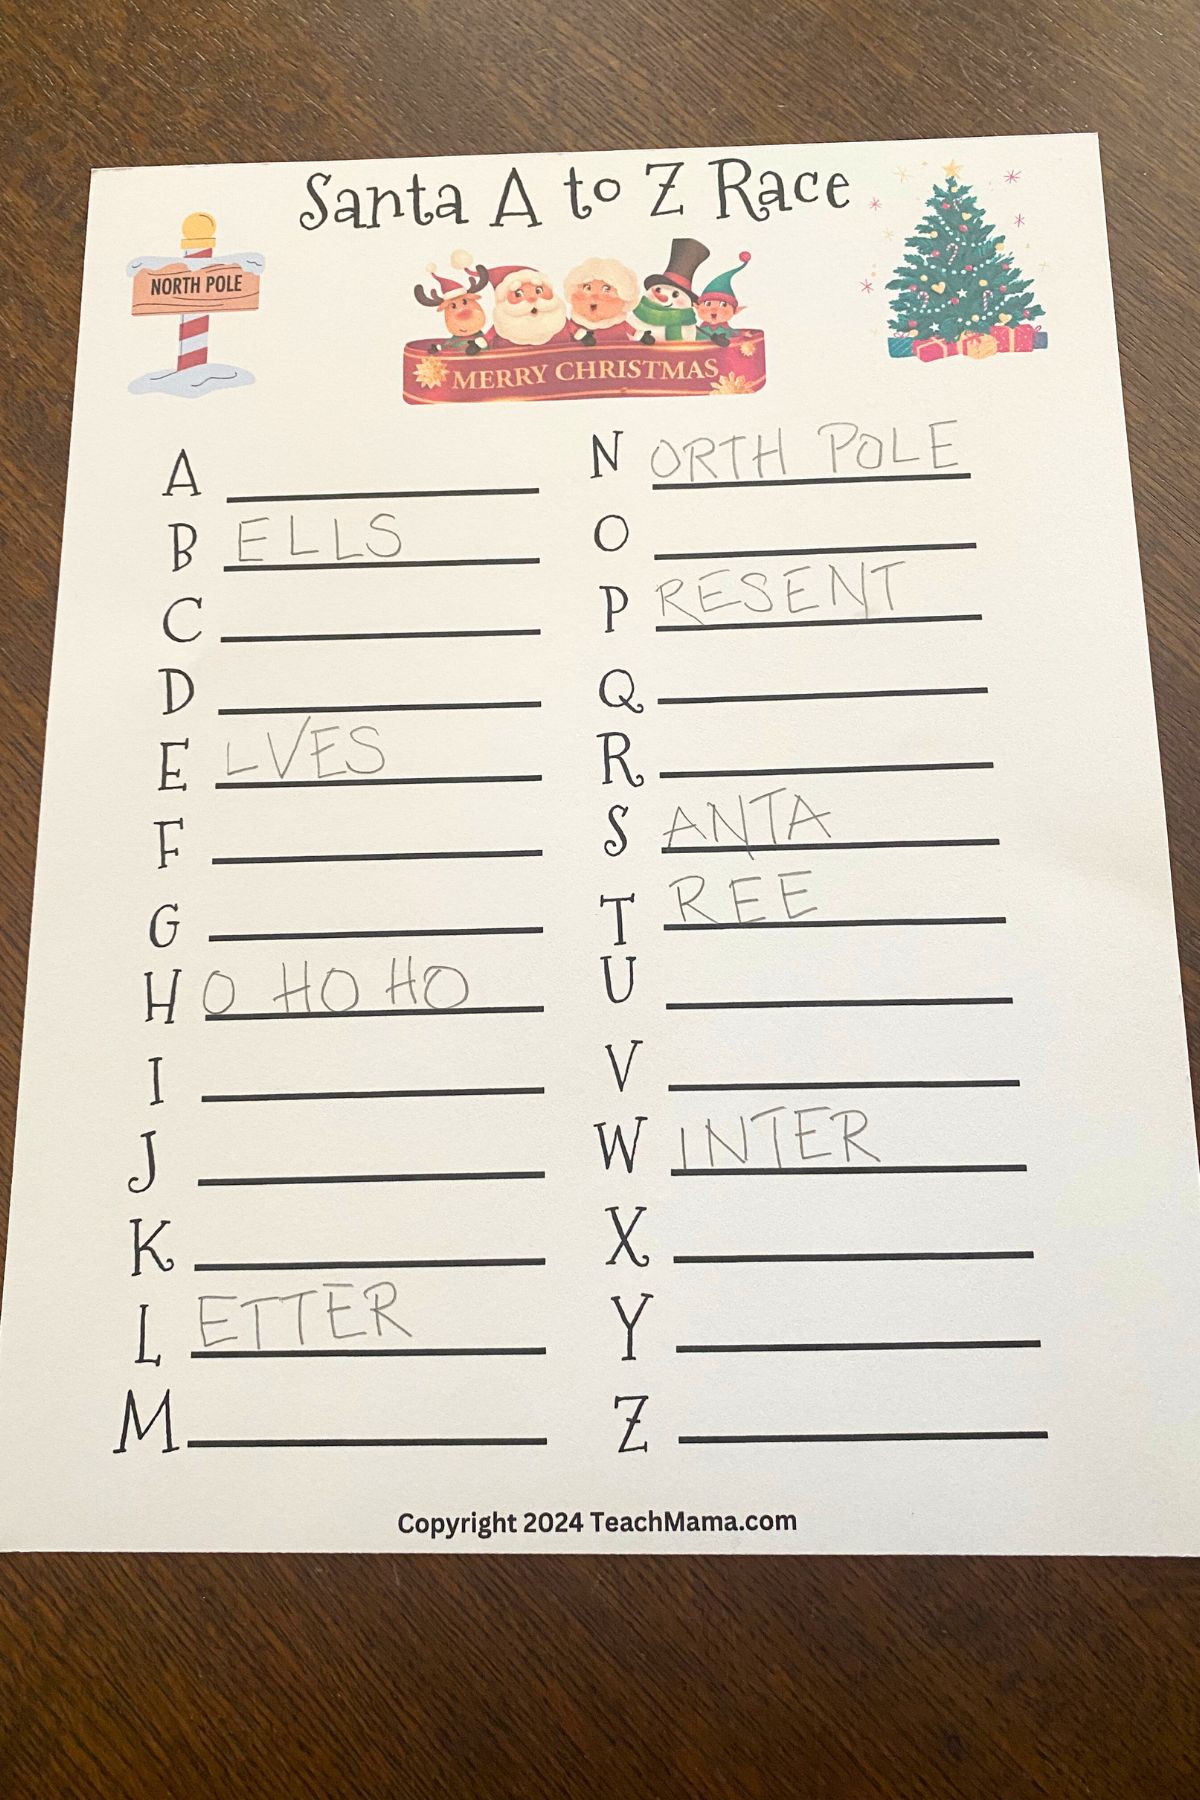
Printed Satna A to Z Race with the alphabet and lines to write in in two columns on the page

Santa’s Christmas A – Z Race

But perhaps you are looking for a secular version of this fun game? This is the exact same game, but from a traditional playful Christmas point of view. Either one is sure to be a winner with your friends, co-workers or family!

Want Your Own Christmas Printable Games for Kids?

Just throw your email in the box below and a link to the download will appear in your inbox as if by holiday magic!

Looking for Even More Holiday Fun?

  • New Year’s Family Interview
  • Holiday Fun Fact Lunchbox Notes
  • More Holiday Fun Fact and Joke Lunchbox Notes (includes Hanukkah!)
  • North Pole Postal Printables
  • Bake a Scripture Cake this Christmas
  • Sweet Homemade Santa Cookie Tray
  • Christmas Eve Scavenger Hunt
  • Christmas Eve Traditions to Start this Year

PIN THIS FOR LATER


November 5, 2024 0 comments
0 FacebookTwitterPinterestPocketThreadsBlueskyEmail
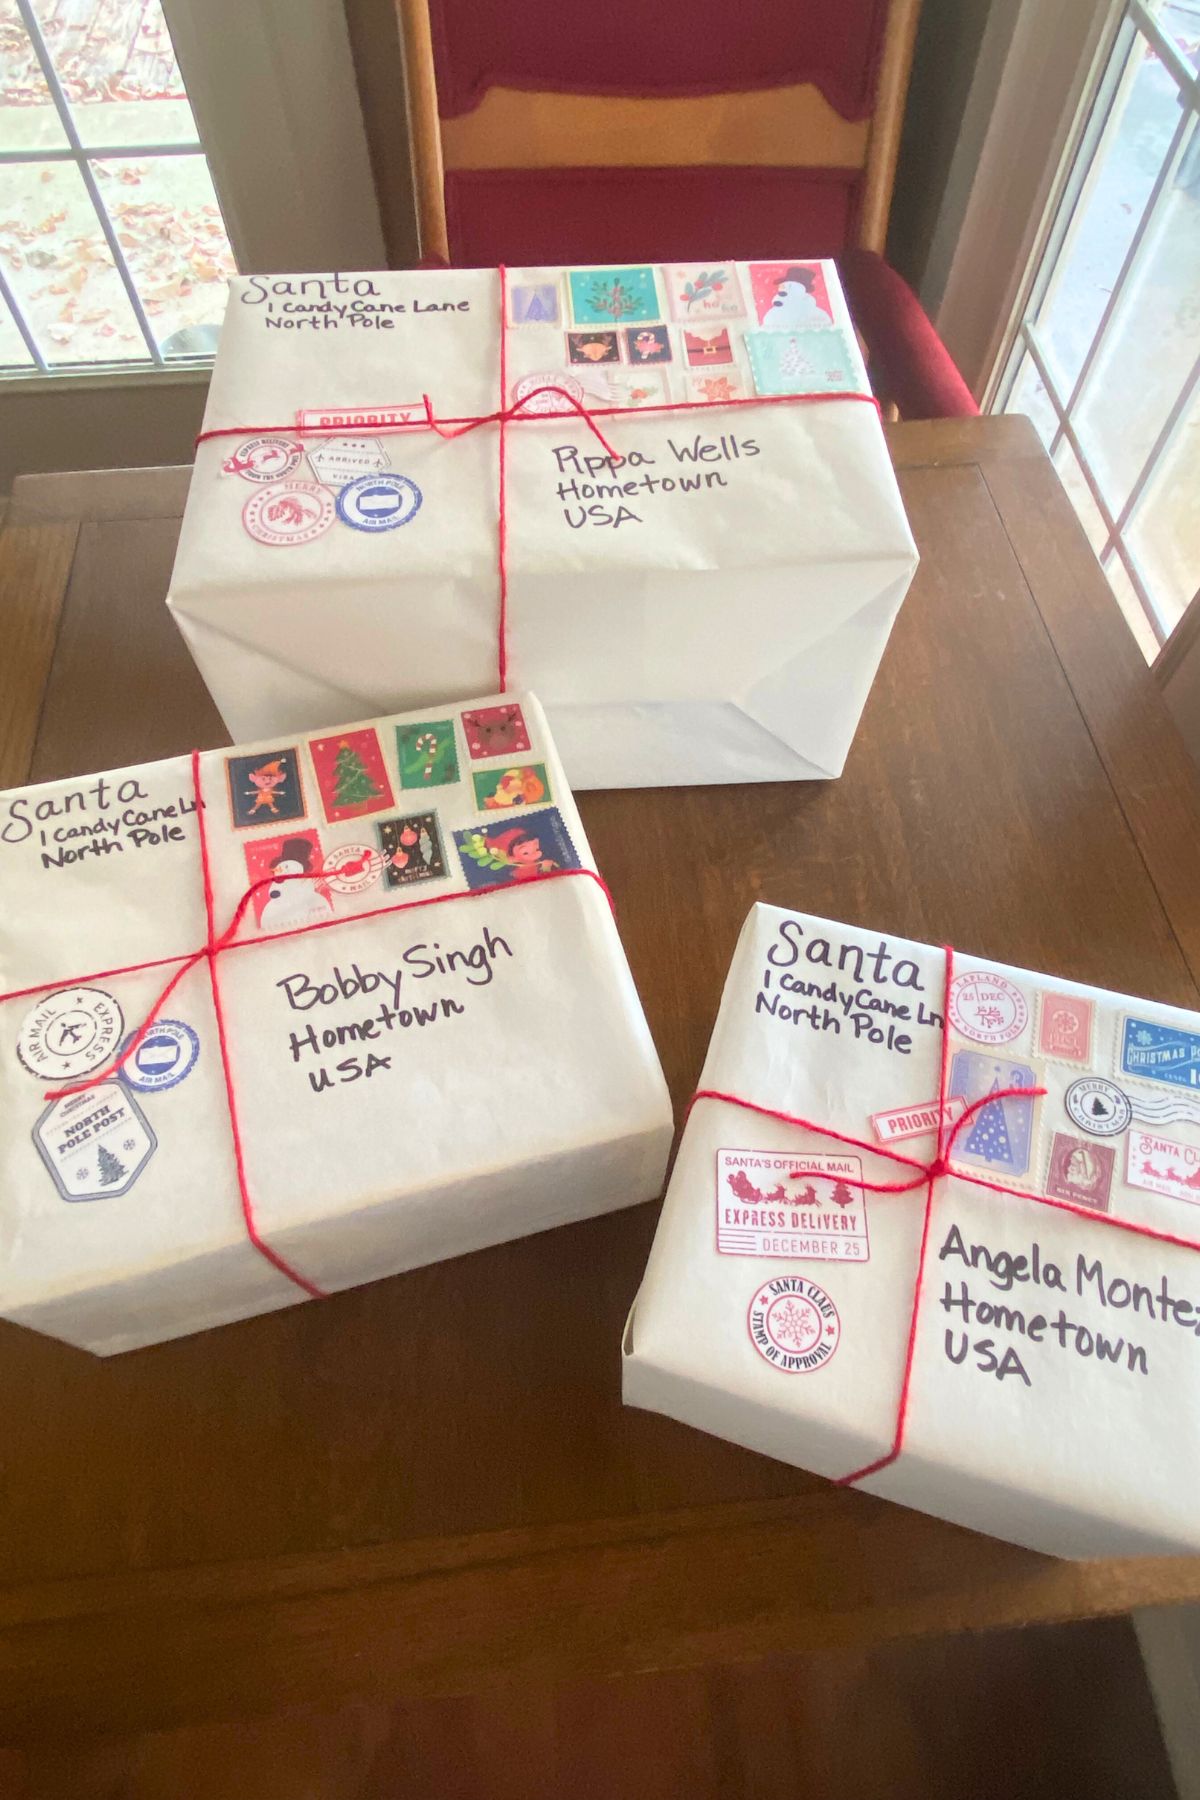
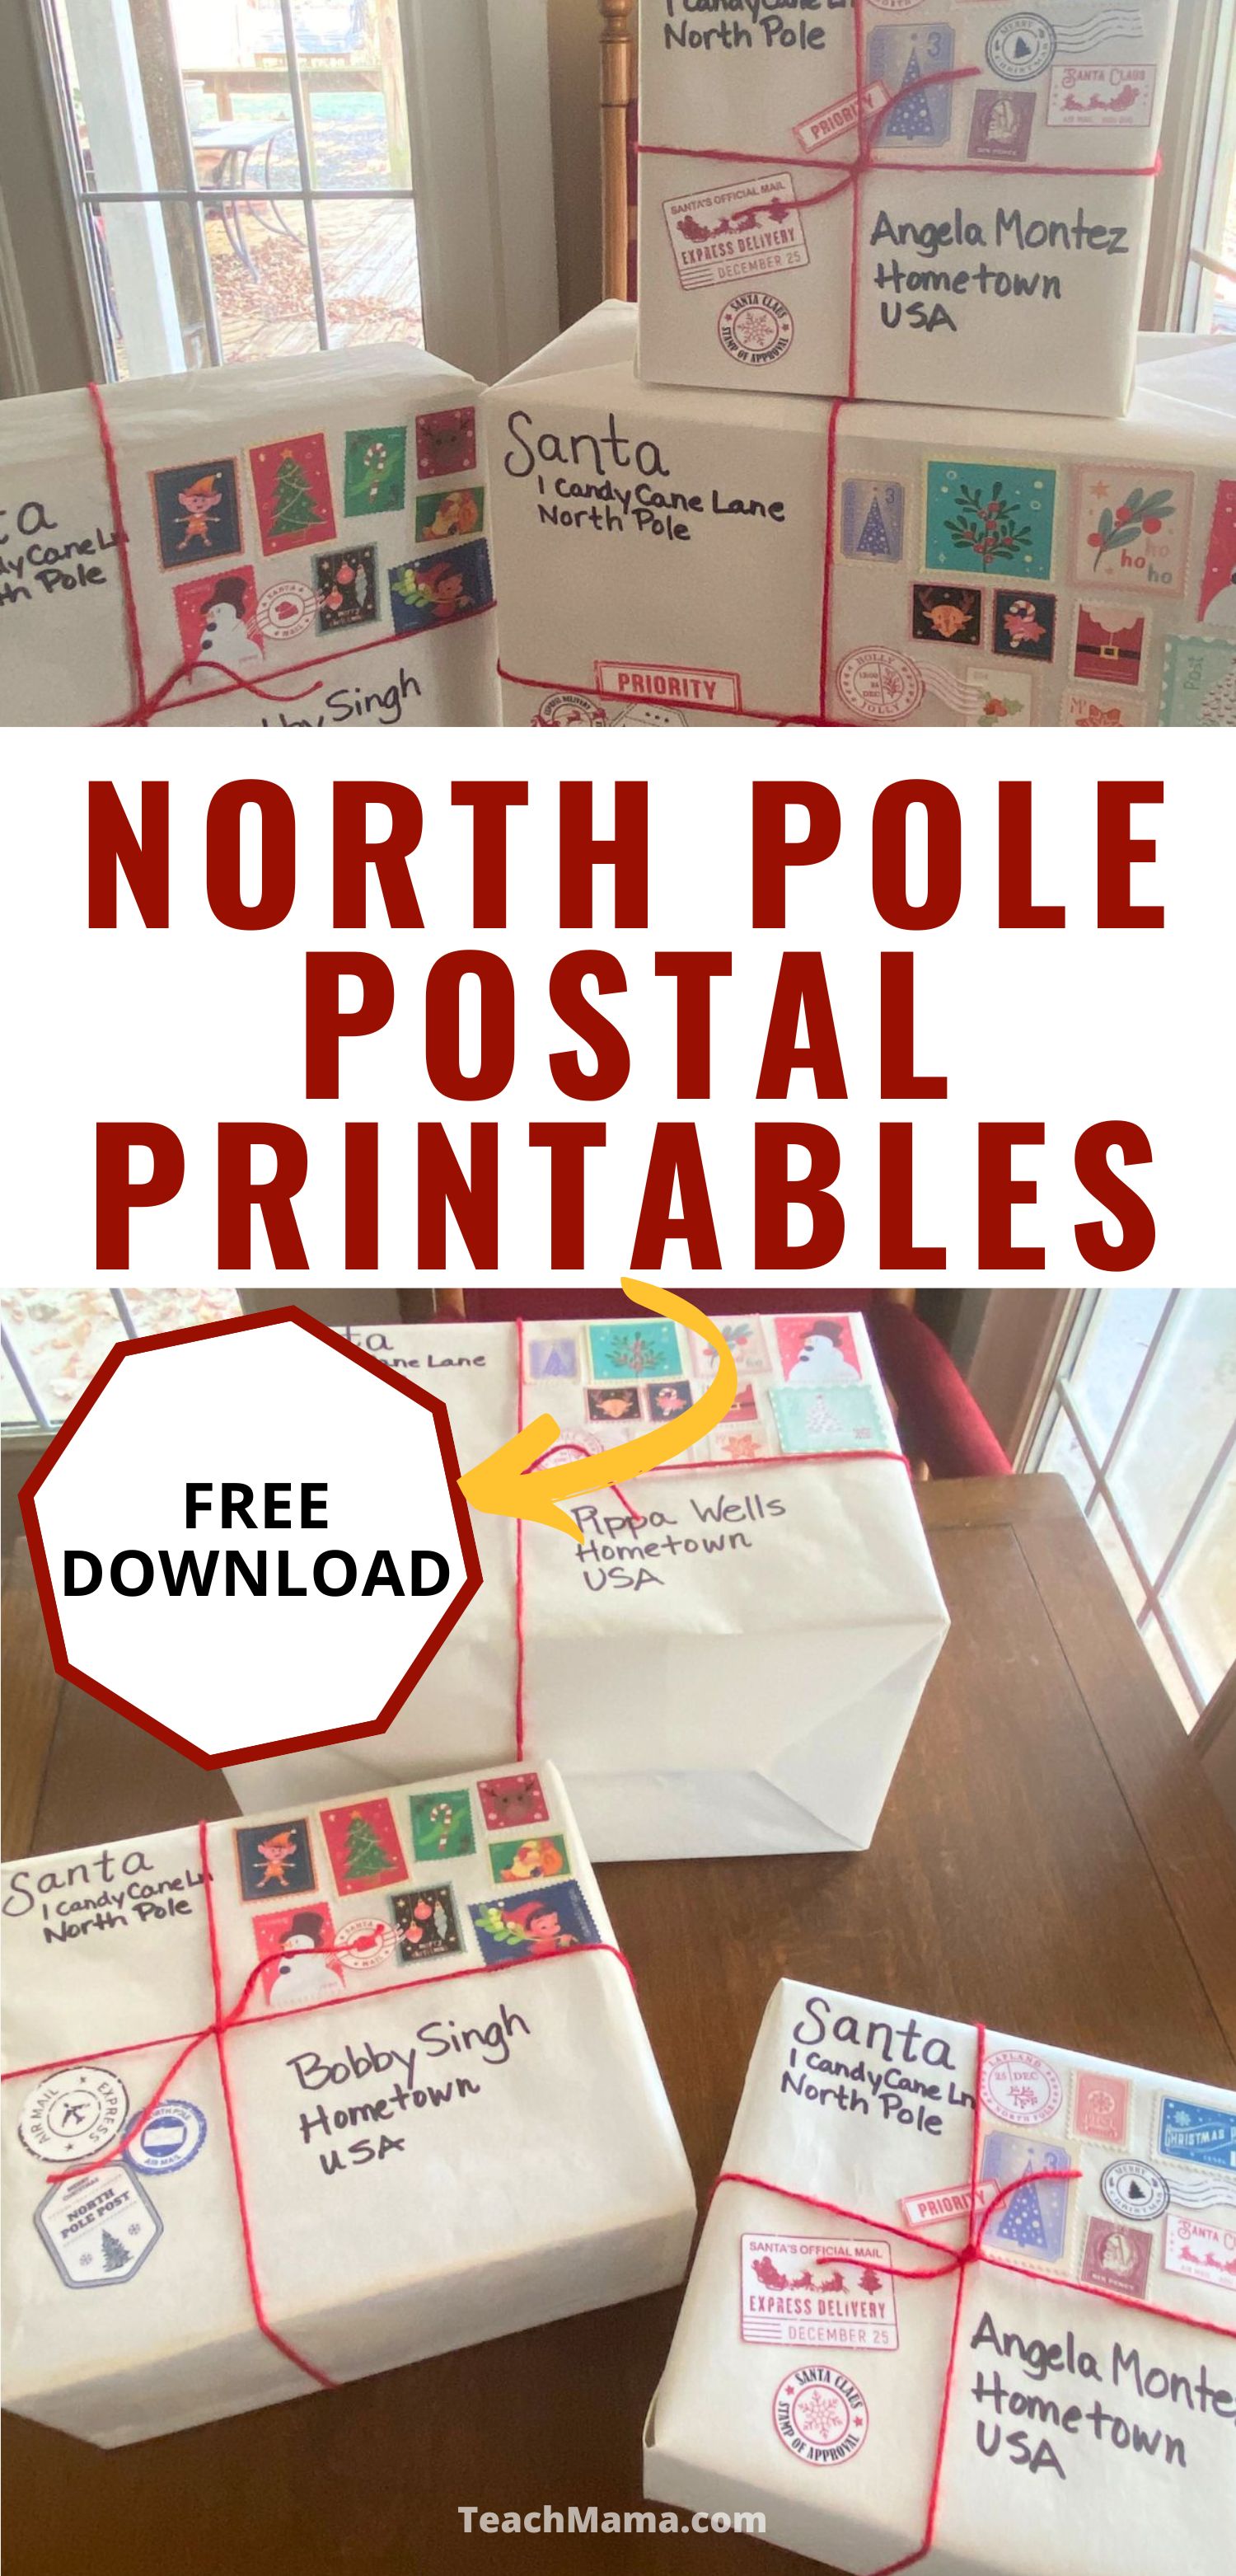
Three boxes wrapped in white paper with red yarn ties and North Pole postal stamps
christmasholidaysreading

North Pole Postal Printables

by Teach Mama November 5, 2024
written by Teach Mama

Add a touch of holiday magic to your gifts with North Pole Postal Printables! Featuring festive postage stamps, frank marks, and special delivery labels, these printables make every present feel like it was mailed straight from Santa’s workshop. Create unforgettable Christmas moments with personalized touches straight from the North Pole!

North Pole Postal Printables: Add a Touch of Magic to Your Holiday Gifts

I started decorating “North Pole Special Delivery” packages when the grandkids were little to add a little something extra for them to enjoy on Christmas morning. One big problem… I couldn’t find appropriately festive oversized Christmas stamps! So I drew some. (They were alright, but not great.)

I’m really excited to offer this printable North Pole Postage set with stamps in various sizes as well as franking and special delivery marks to make your decorating much easier! There are even some blank stamps if you are feeling especially creative!

Make Every Gift Feel Like Santa’s Surprise

Imagine the excitement when kids (and adults!) receive gifts covered with North Pole stamps and official frank marks and addressed to them! Whether it’s a wrapped toy or a gift box, adding these little touches makes every present feel like it was packed and shipped by Santa and his team of elves.

Not only do these printables create a sense of fun, but they also make your holiday wrapping look extra special—like each gift was personally processed at the North Pole Post Office by Santa and his elves!

What’s Included in North Pole Postal Printables?

These printables come with everything you need to bring Santa’s mailroom to life:

  • Festive Postage Stamps – Decorate your gifts with stamps featuring reindeer, candy canes, Santa’s sleigh, and other holiday-themed designs.
  • Frank Marks – Add official “North Pole” postmarks to your gifts, showing the date they “left” Santa’s workshop.
  • Special Delivery Labels – Mark packages with “Express from the North Pole” or “Official Santa Delivery” stickers to make them even more magical.
White boxes wrapped with red yarn ribbon and North Pole postal stamps and marks

I like to wrap those special “mailed” packages in plain brown paper. To make the Special Delivery and franking stamps look like the elves themselves stamped them on the package I cut 8 1/2 x11 inch pieces of the same brown paper then simply print, cut out, and attach these decorations to your packages with glue.

The stamps really *pop* when printed on bright white paper. Or you can print them on cream or brown paper for a vintage look. Whichever you choose is great, but I do recommend matching the wrapping paper to the color printer paper you use.

This will mean you won’t have to fiddle with cutting out all the perforations around the stamps! If you just really want the bright stamps on colored wrapping paper you might try cutting them out with deckle scissors like these. LINK

Easy, Affordable, and Delightfully Festive

These printables are not only affordable (all you have to do is download and print!) but also easy to use. All you need is a printer, paper, and some scissors to get started. For an extra polished look, you could print them on sticker paper, making it easy to peel and stick them right onto your packages.

Bring the Spirit of the Season to Every Gift

North Pole Postal printables add a whimsical touch that turns any present into an experience. Whether it’s under the tree or in the mailbox, these little details will have everyone believing in the magic of Christmas.

Want to grab your own North Pole Postal Printables?

Just throw your email in the box below and a link to download these North Pole Postal Printables will appear in your inbox as if by holiday magic!

Want More Holiday Fun?

  • New Year’s Family Interview
  • Holiday Fun Fact Lunchbox Notes
  • More Holiday Fun Fact and Joke Lunchbox Notes (includes Hanukkah!)
  • Printable Christmas Games for Kids
  • Bake a Scripture Cake this Christmas
  • Sweet Homemade Santa Cookie Tray
  • Christmas Eve Scavenger Hunt
  • Christmas Eve Traditions to Start this Year

PIN THIS FOR LATER

November 5, 2024 0 comments
0 FacebookTwitterPinterestPocketThreadsBlueskyEmail
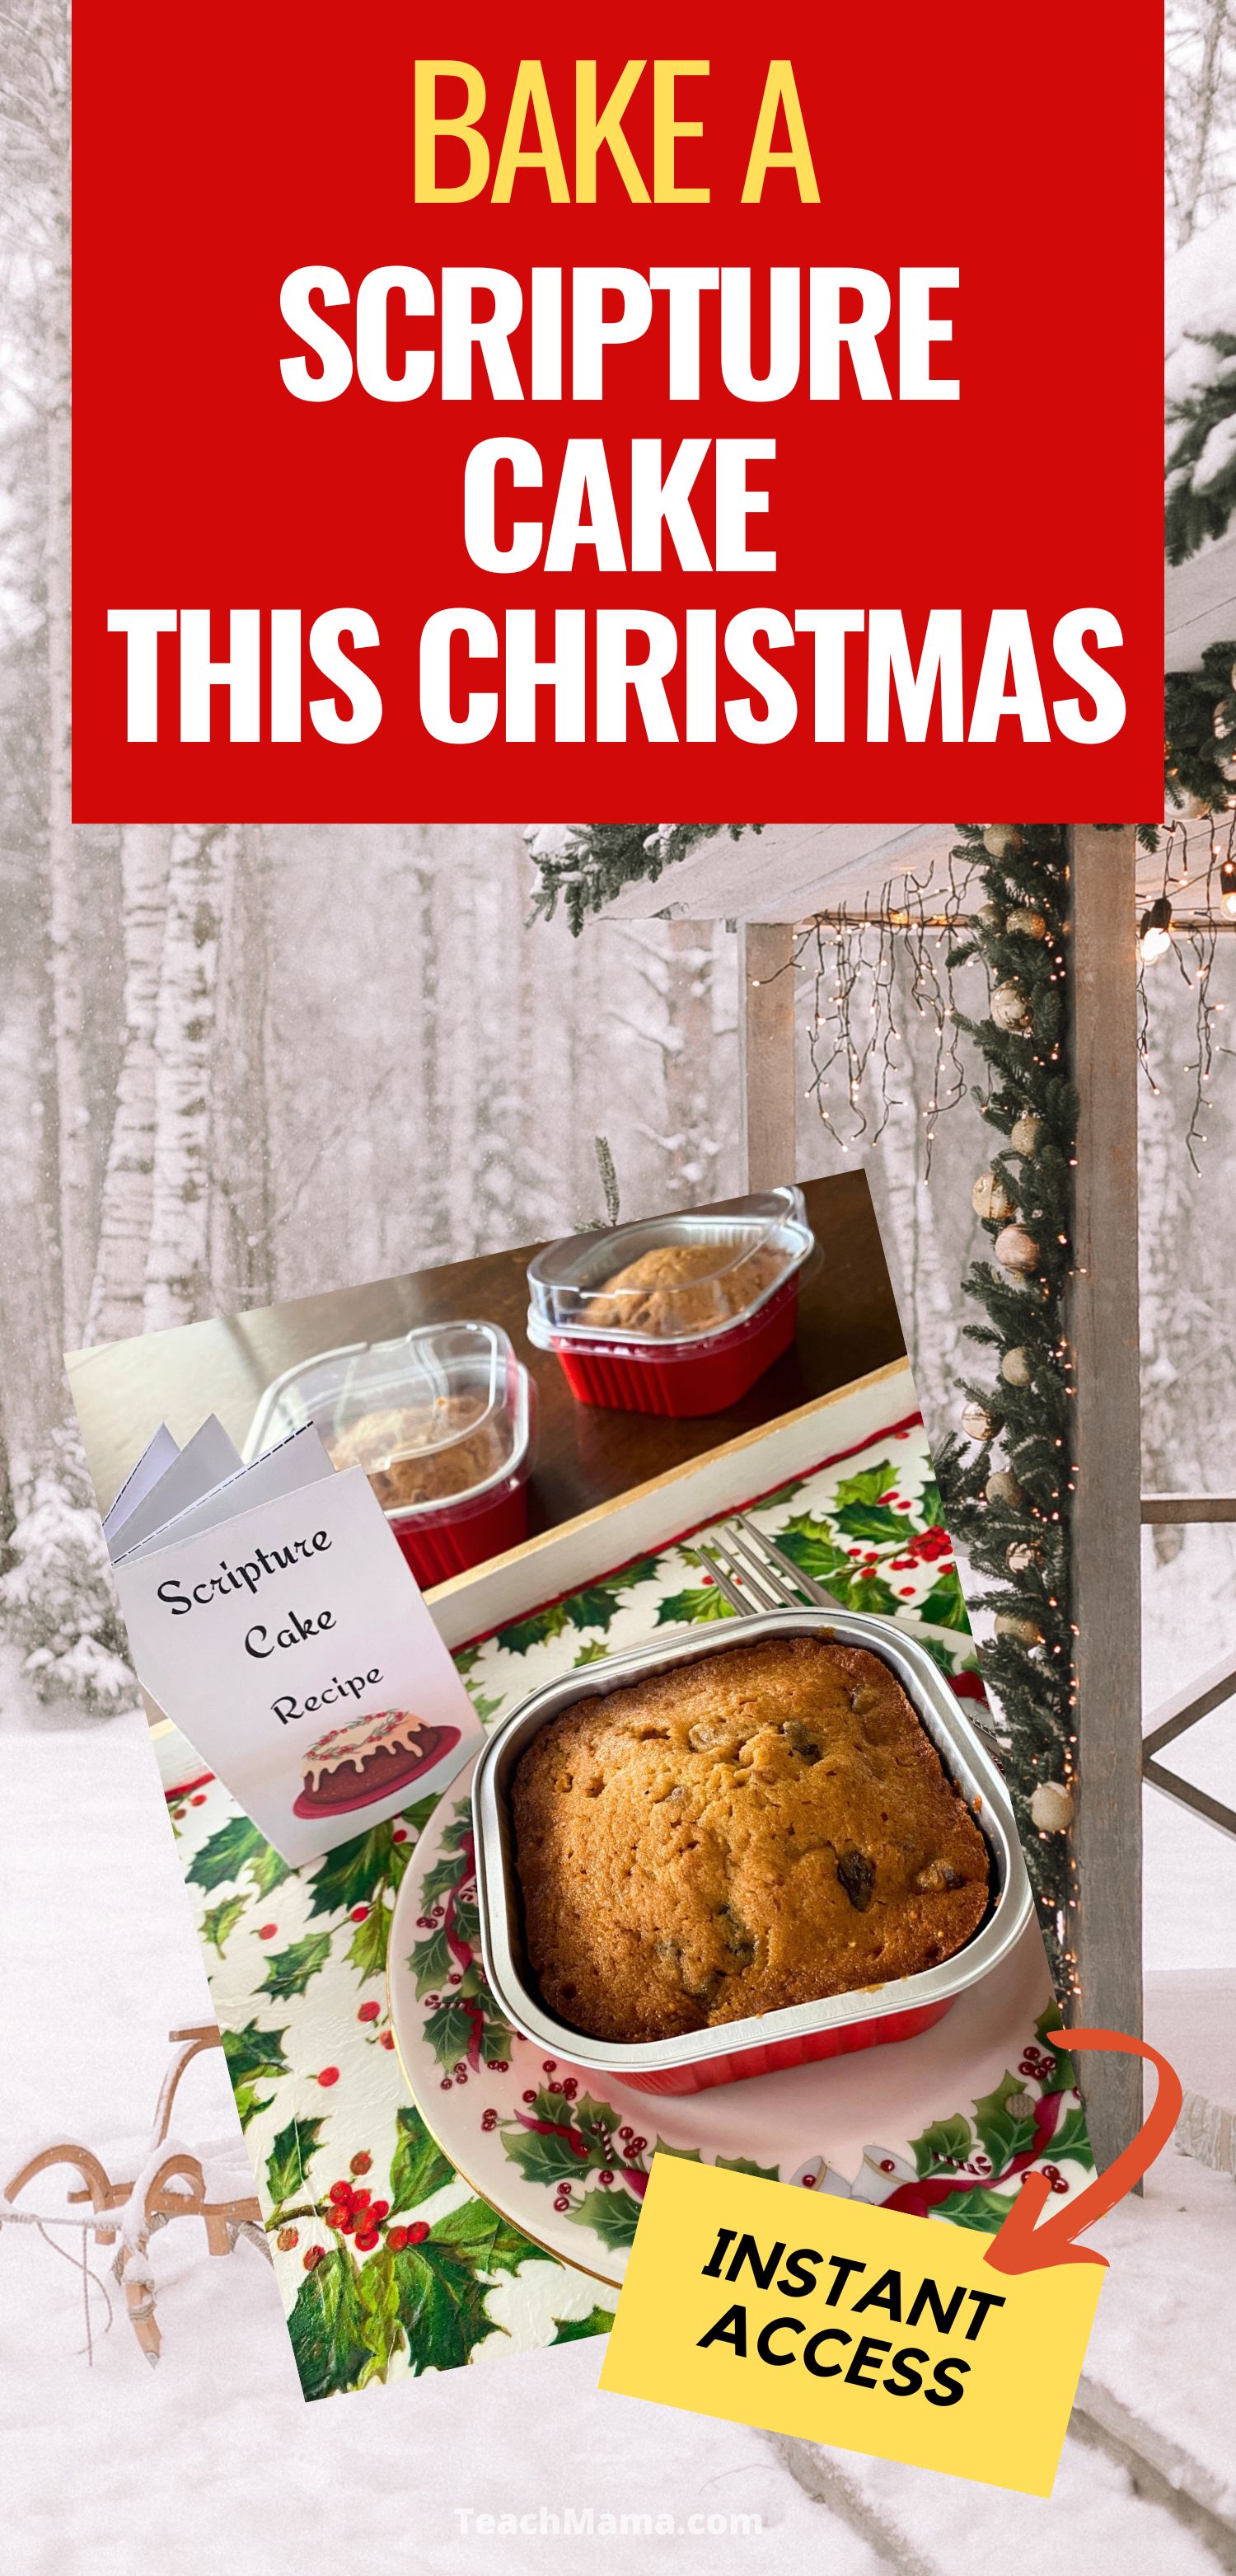
Brown cake with raisins in a square red foil tin on a Christmas plate and fork with two more tins behind on a wooden table
christmasholidaysreading

Bake a Scripture Cake this Christmas

by Teach Mama November 5, 2024
written by Teach Mama

Discover the joy of baking AND Bible study with this unique Christmas Scripture Cake! This recipe doubles as a fun scavenger hunt through the Bible, where each ingredient is hidden within scripture verses. Follow the clues, decode the ingredients, and bake a delicious cake that’s rich in both flavor and meaning—perfect for celebrating the season!

I first came across a mention of Scripture (or Bible) cake when our kids were doing a history unit study. It sounded intriguing but there was no recipe! I started asking around (this was way before the internet). Several older folks had heard of it, but still no recipe. I finally found a recipe in a very old cookbook in a used bookstore! I have since adapted it to use Einkorn flour for health reasons, but regular all-purpose flour may, of course, be used.

Baking a Scripture Cake

With a Scripture Cake, you and your kiddos get to be detectives searching the Bible for the recipe itself! Be sure to use the King James version of the Bible to decode the recipe. Some of the more modern translations leave out the parts you need to understand the recipe! Go figure.

One year we simply couldn’t find figs at all so we substituted fig preserves. It worked fine, but you may want to adjust the liquid or add a bit more flour.

Another time the kids and I made a LOT of little loaves for our family Sunday School class and because there were folks with nut allergies those cakes had no Numbers 17:8 (almonds). Instead we substituted imitation almond extract. Be sure to use imitation almond because it doesn’t contain the protein that triggers a nut allergy response.

Making the Scripture Cake Recipe Book

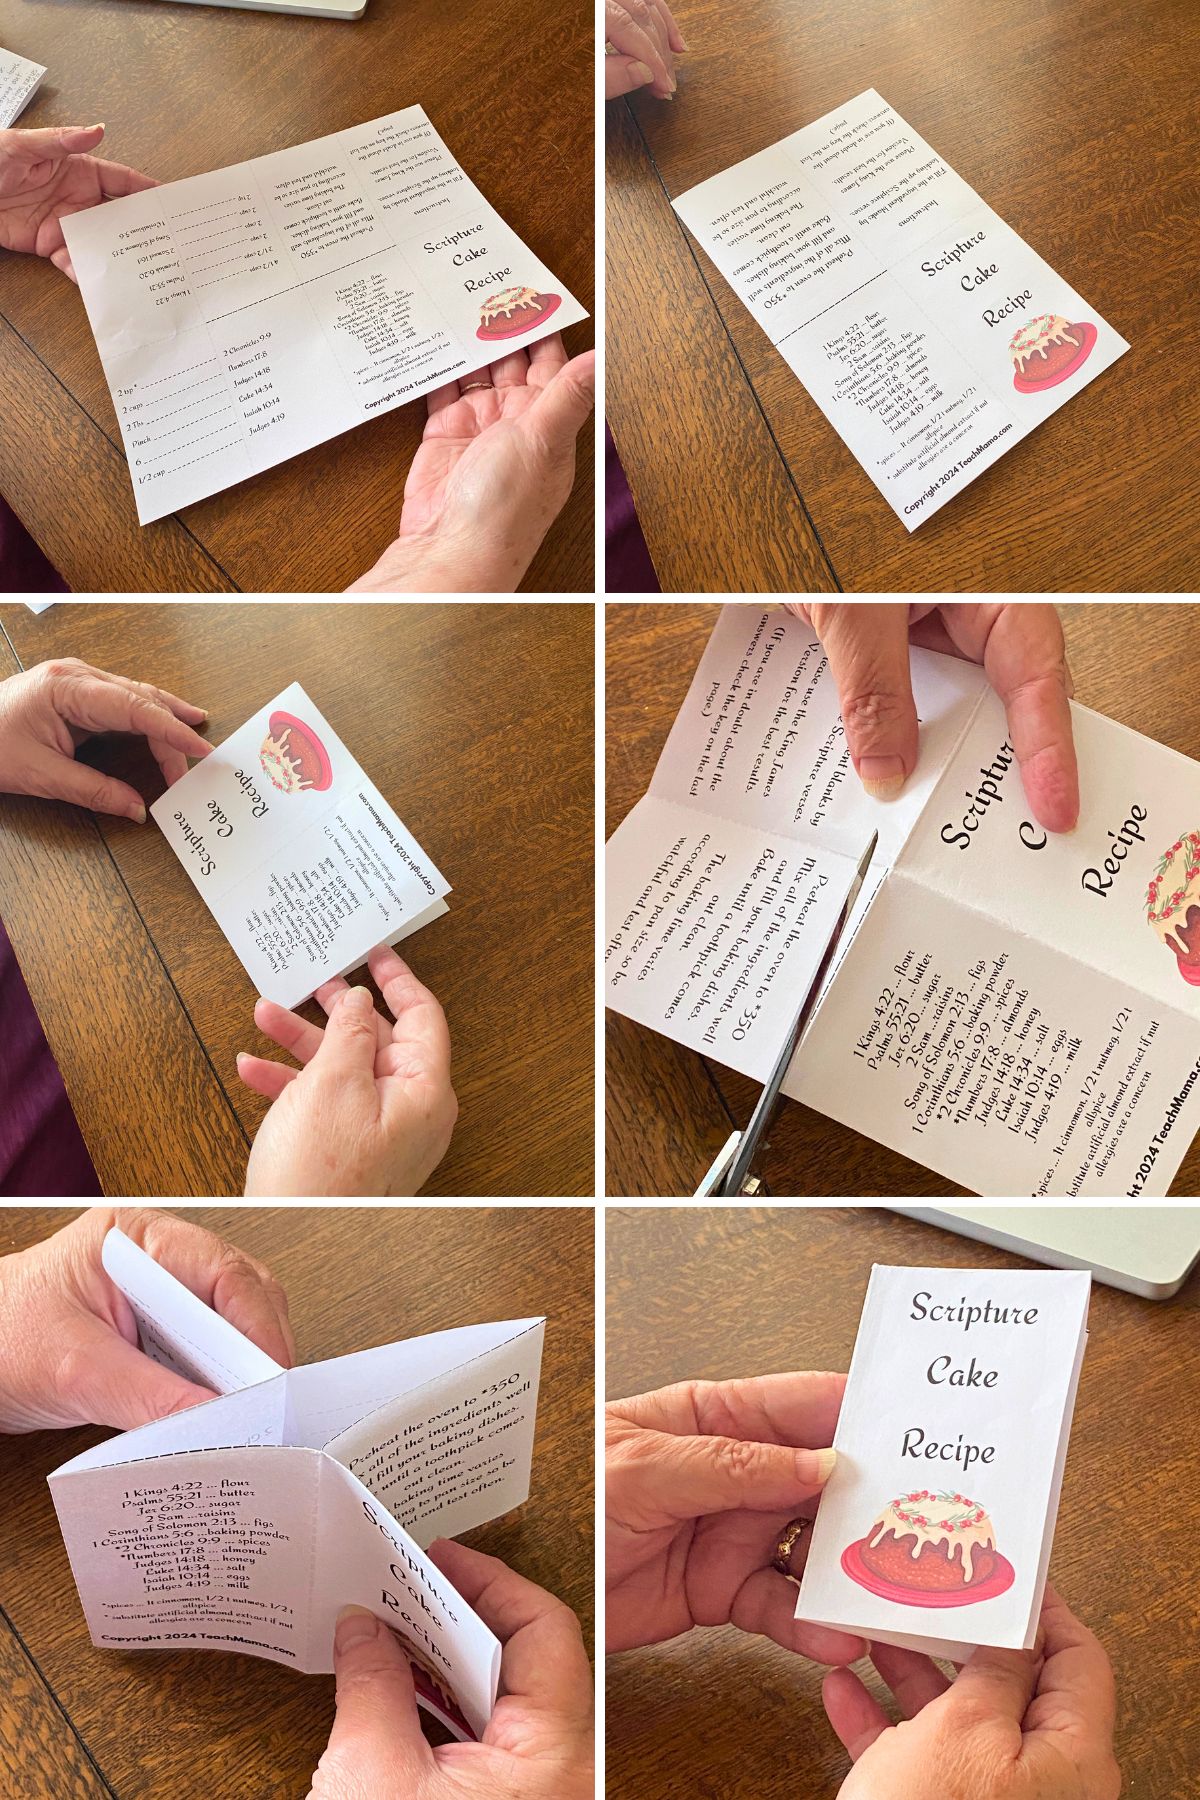
This year’s Scripture Cakes will have a great little mini book you can easily print and make in minutes! Inside you’ll find the recipe and scavenger hunt activity. The mini-book also makes an adorable tag. Just follow the steps in the photo collage below to assemble your own recipe booklet:

Steps for folding and assembling the recipe booklet

I found these festive little red foil pans with lids that make it super easy to give Scripture Cakes as gifts. Check them out!

Want Your Own Scripture Cake Recipe Mini-Book Printable?

Just throw your email in the box below and the download link for your very own Scripture Cake recipe mini-book will appear in your inbox as if by holiday magic!

Looking For More Holiday Fun?

  • New Year’s Family Interview
  • Holiday Fun Fact Lunchbox Notes
  • More Holiday Fun Fact and Joke Lunchbox Notes (includes Hanukkah!)
  • Printable Christmas Games for Kids
  • North Pole Postal Printables
  • Christmas Scavenger Hunt
  • Christmas Eve Traditions to Start this Year

PIN THIS FOR LATER

November 5, 2024 0 comments
0 FacebookTwitterPinterestPocketThreadsBlueskyEmail
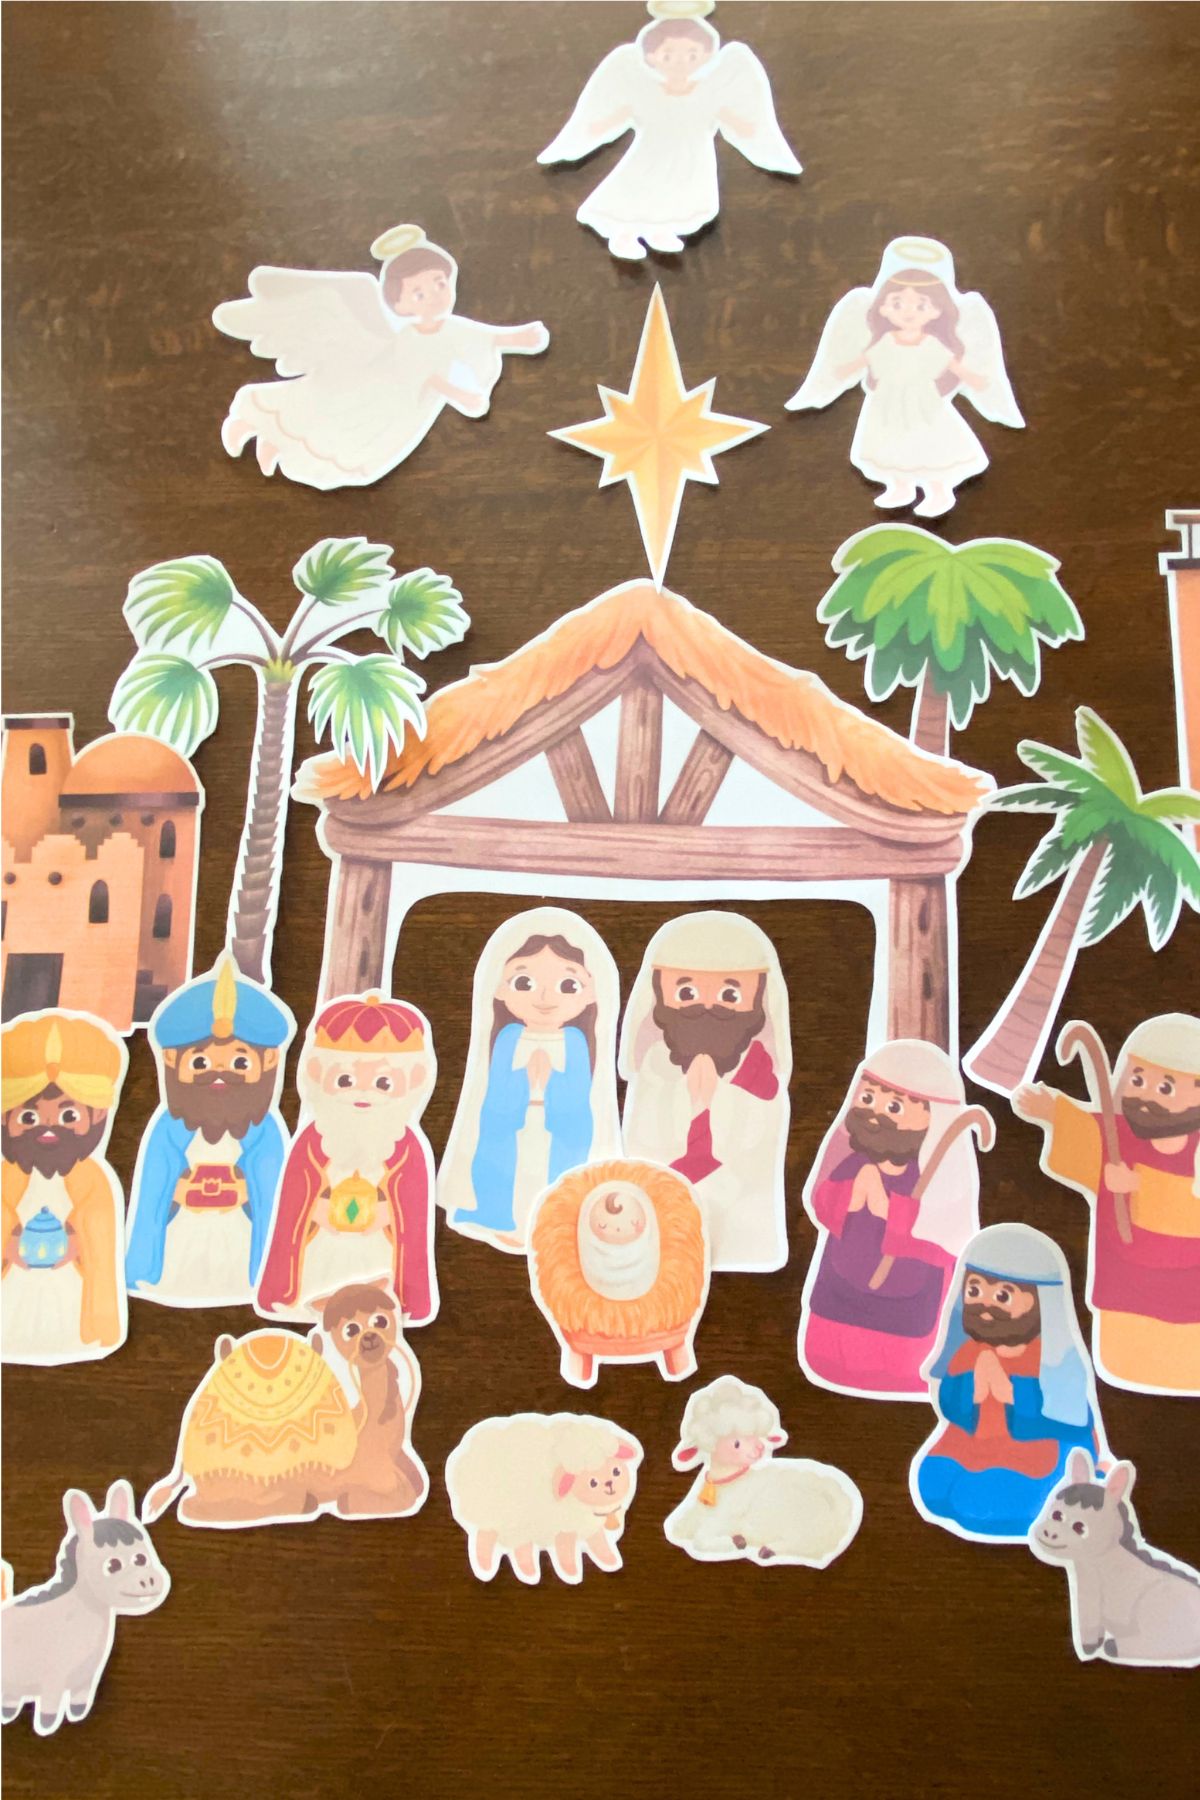
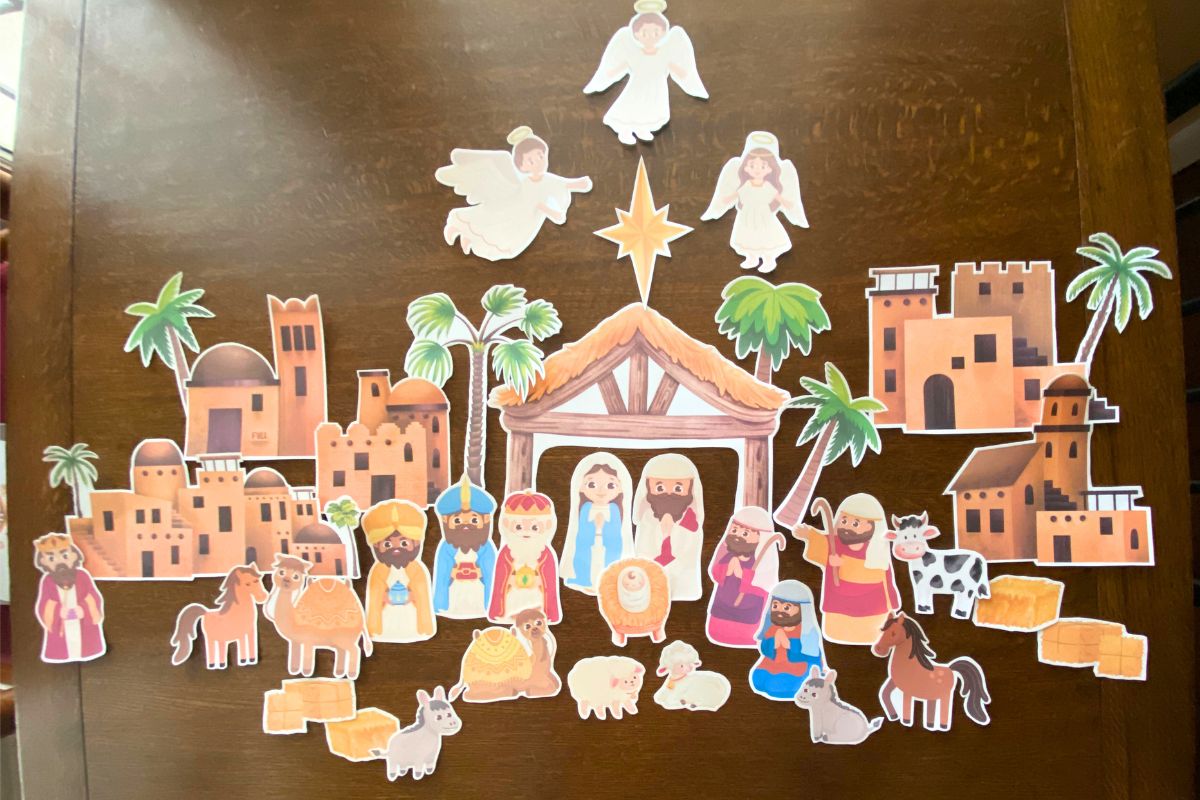
Printable Christmas Story, Star and Holy Family on a wooden background
christmasfamily fungod & goodnessholidaysindoor activitiesprintablesreading

Christmas Eve Scavenger Hunt Printable

by Teach Mama November 5, 2024
written by Teach Mama

Looking to add extra fun and meaning to your Christmas Eve celebration? These Christmas Eve Scavenger Hunt printables are the perfect way to engage the whole family! As everyone hunts for hidden treasures, they’ll piece together the beautiful story of the Nativity, making memories while celebrating the real reason for Christmas.

A Christmas Eve Scavenger Hunt That Brings the Nativity Story to Life

There’s nothing like gathering with family on Christmas Eve, enjoying festive games, and sharing meaningful moments. This Christmas Eve Scavenger Hunt offers the best of both worlds—fun and tradition! As players search for each object or character, they’ll uncover key elements of the Nativity story, from Mary and Joseph’s journey to Bethlehem to the birth of baby Jesus in the manger. It’s a wonderful way to blend excitement with reflection on the true meaning of the season.

How It Works

The scavenger hunt is designed to keep everyone engaged—kids and adults alike! Here’s what you can expect:

Handy Checklist – Use the checklist to guide participants through the hunt, with each discovery revealing a new part of the Christmas story.

Objects to Find – Players will search for familiar Nativity symbols like a manger, a star, a lamb, an angel, and more.

Assembling the Story – We often read the accounts in both Matthew and Luke since each tells a different part of the story. But we’ve very carefully combined the two stories in case you want to read through it all in one place.

Each element that has a scavenger piece is underlined, but there are several pieces included that aren’t actually mentioned in the story. They are all very familiar elements though. When all the pieces are found they can be used to retell the story in your child’s own words as the nativity scene is filled in with the characters.

When our daughter was about five, her retelling included a cat and the old billy goat gruff! You just never know with kids!

This activity works perfectly indoors, but you can mix it up by adding an outdoor search for a little winter adventure. Of course, I recommend laminating the pieces if you plan on using them outdoors.

One year we hid one of the manger animals (I think it was a camel) so well that we didn’t find it until we put up the tree the next Christmas. So now I suggest if you’re hiding stuff a day or two before the actual hunt you might want to print out an extra checklist to jot down where they are… just in case!

Why Families Love This Scavenger Hunt

This Christmas Eve Scavenger Hunt offers more than just fun—it helps create meaningful moments with family. Kids love the excitement of the hunt, and parents appreciate how it keeps everyone entertained while gently focusing on the message of Christmas. Plus, it’s an easy way to keep little ones busy while waiting for Santa!

Easy to Use, Easy to Enjoy

Just download, print on bright white cardstock, laminate – if you want, cut out and hide the pieces! It’s perfect for any family gathering, and you can even make it a new yearly tradition.

Celebrate Christmas Eve with joy, laughter, and meaning this year—one clue at a time!

Want to Grab Your Own Copy of the Christmas Scavenger Hunt?

Just throw your email ii the box below and the link to download the Christmas Eve Scavenger Hunt printable will appear in your inbox like holiday magic!

Looking for Even More Holiday Fun?

  • New Year’s Family Interview
  • Holiday Fun Fact Lunchbox Notes
  • More Holiday Fun Fact and Joke Lunchbox Notes (includes Hanukkah!)
  • Printable Christmas Games for Kids
  • Sweet Homemade Santa Cookie Tray
  • Bake a Scripture Cake this Christmas!
  • Christmas Eve Traditions to Start this Year

PIN THIS FOR LATER
November 5, 2024 0 comments
0 FacebookTwitterPinterestPocketThreadsBlueskyEmail
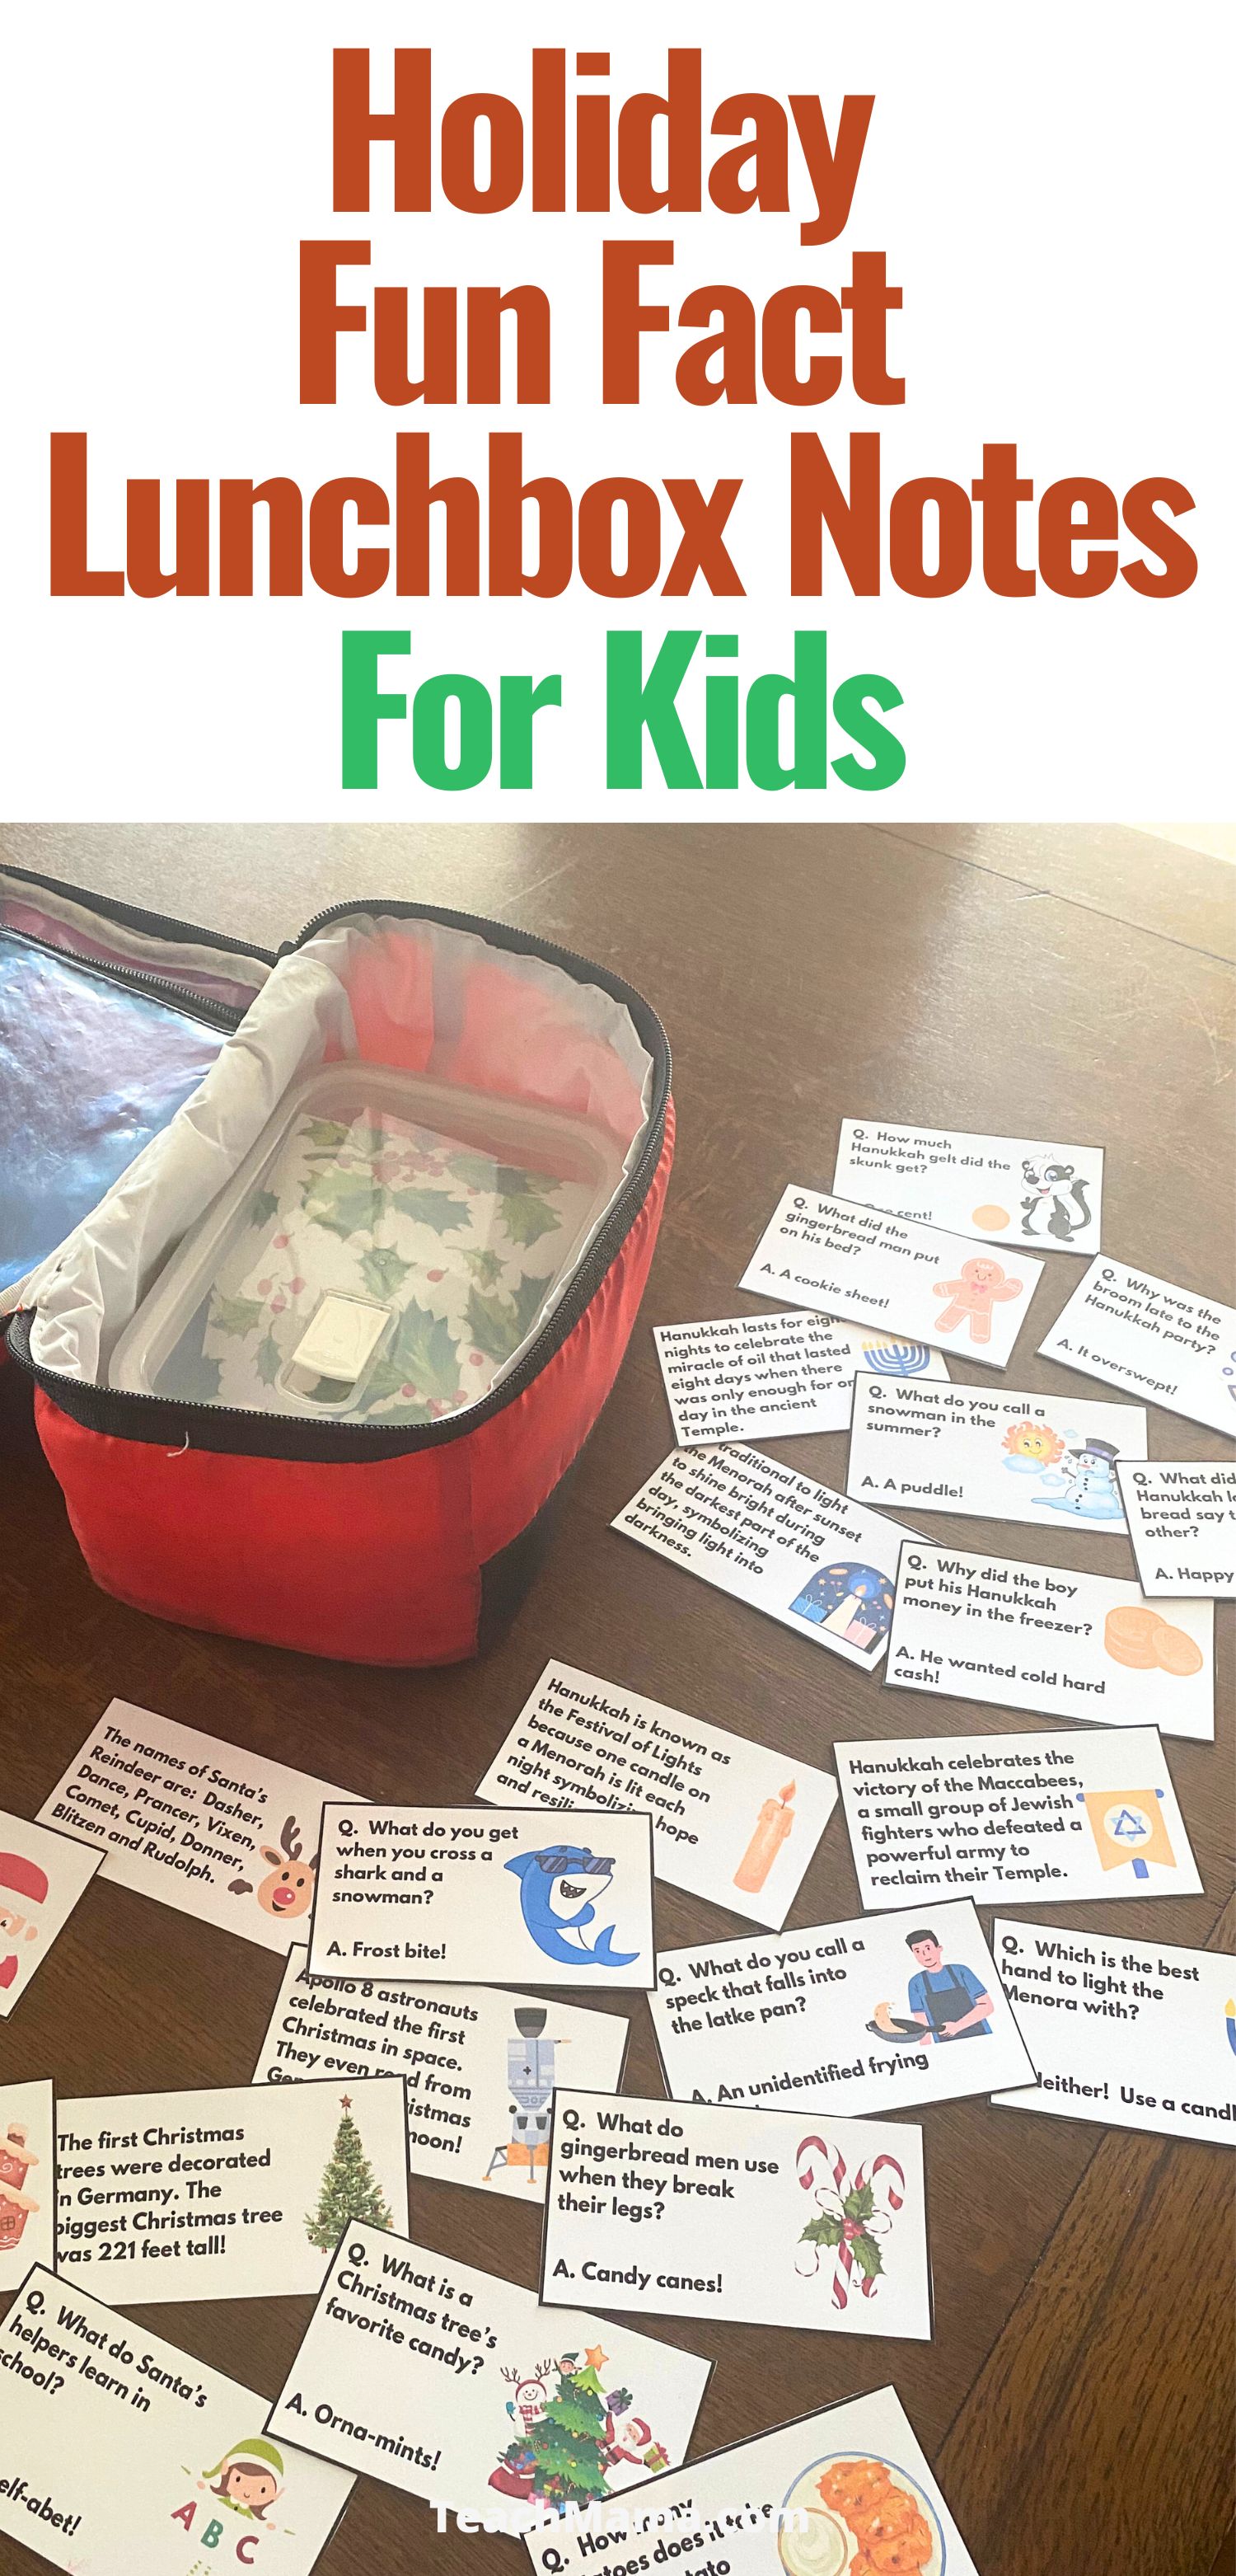
Lunchbox notes on a wooden table next to a red lunch pail
christmasholidayslunchbox love notes

More Holiday Fun Fact And Joke Lunchbox Notes

by Teach Mama November 5, 2024
written by Teach Mama

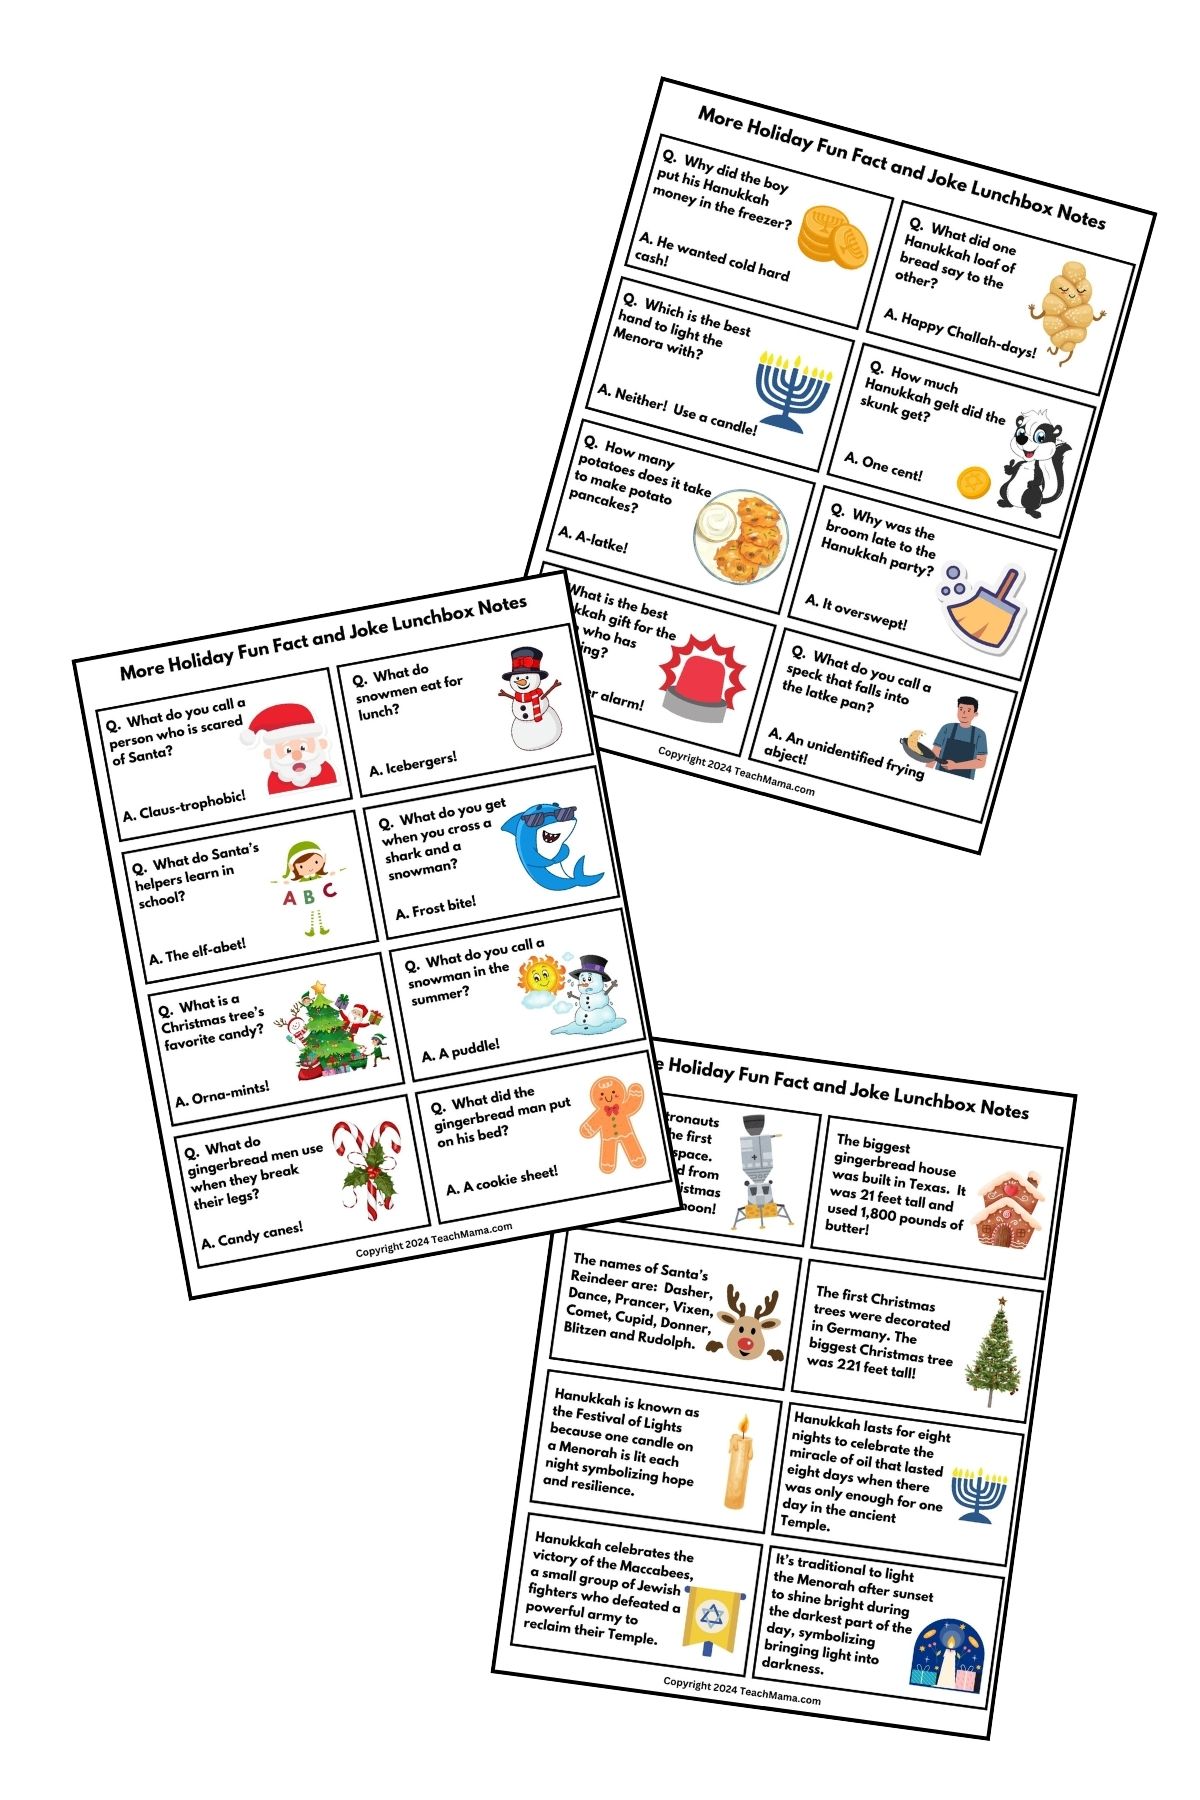
Looking to make holiday lunches extra special? Brighten your kids’ day with MORE Holiday Fun Facts and Joke Lunchbox Notes. Our printable notes are perfect for Christmas and Hanukkah, offering your kiddos some unique facts and giggles and a reminder that you are thinking of them every day!

What’s in the More Holiday Fun Fact and Joke Lunch box Printable?

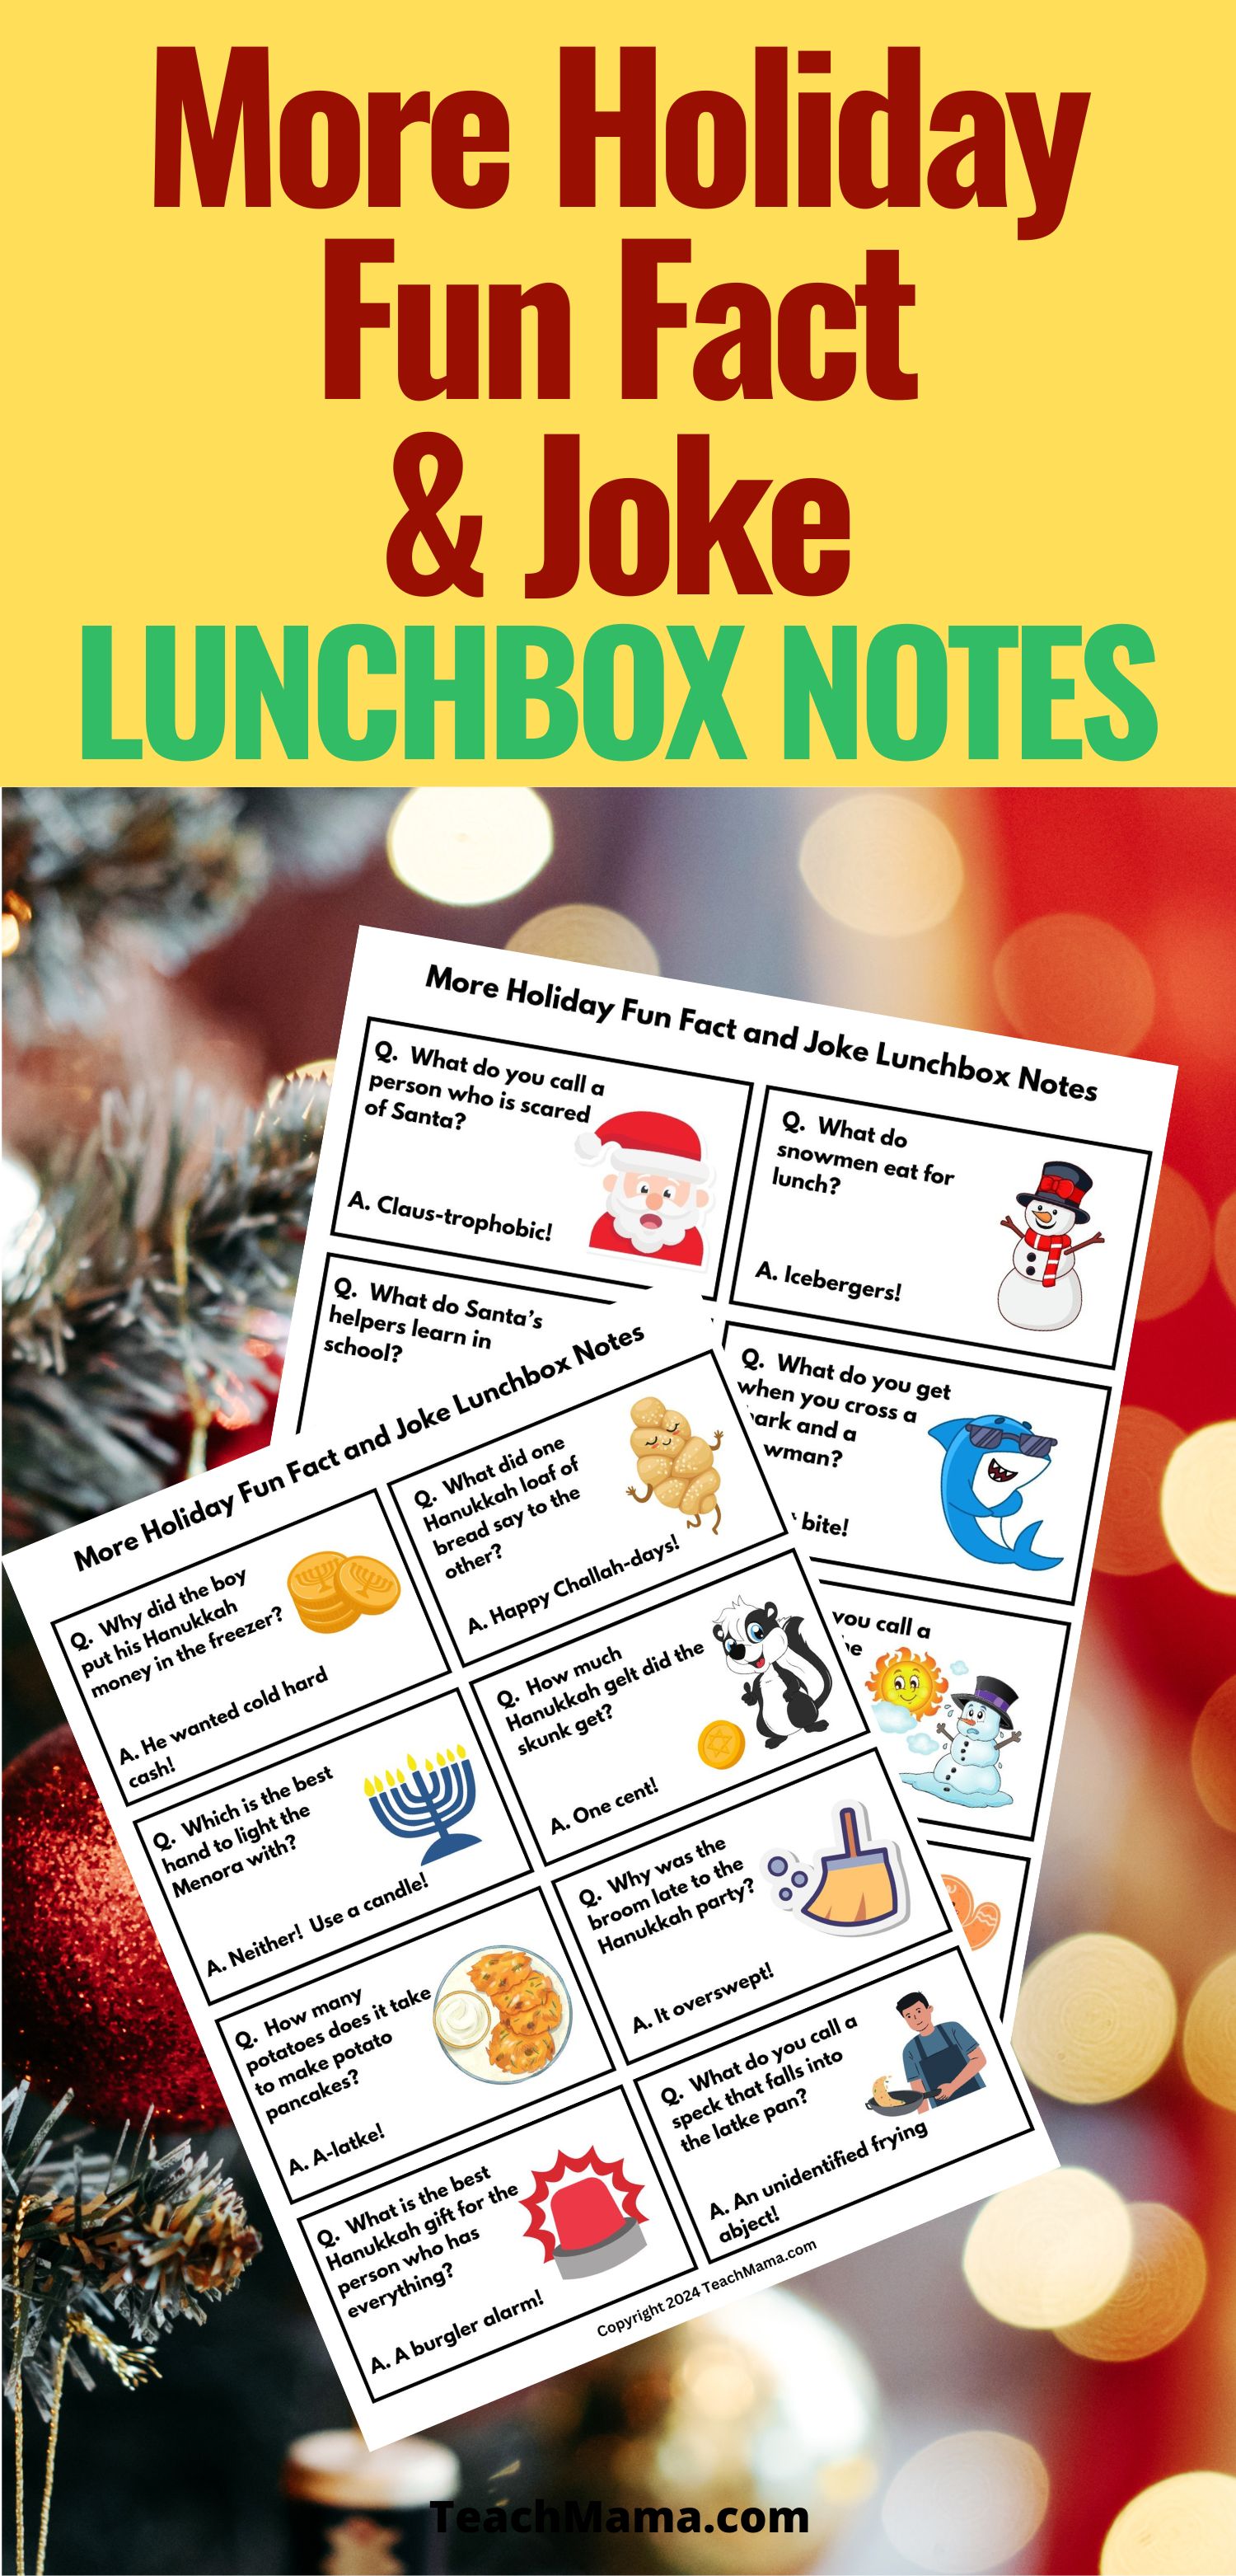
If you love adding a little joy to your child’s lunch, our Holiday Fun Fact and Joke Lunchbox Notes are perfect! This year, we’ve expanded our set to include both Christmas and Hanukkah, adding even more laughs and learning. Each page features eight notes—four Christmas facts, four Hanukkah facts, and eight playful jokes to keep the holiday spirit alive throughout December.

How to use the More Holiday Fun Fact and Joke Lunchbox Notes

Our holiday notes bring variety, from corny jokes to holiday trivia. Simply print them (bright white cardstock or regular paper works great), cut them out, add a quick “love, Mom,” and you’re all set! These notes are an easy way to share fun while letting your little ones know you’re thinking about them.

Holiday Fun Fact and Joke Lunchbox Notes Printable Collage

Grab Your Own Set of More Holiday Fun Fact and Joke Lunchbox Notes

Just throw your email in the box below and the link to download your own set of Holiday Fun Fact and Joke Lunch Box Notes will appear in your inbox like holiday magic!

Want even more holiday-inspired ideas? Check out:

  • New Year’s Family Interview
  • More Holiday Fun Fact and Joke Lunchbox Notes (includes Hanukkah!)
  • Printable Christmas Games for Kids
  • Sweet Homemade Santa Cookie Tray
  • Bake a Scripture Cake this Christmas!
  • Christmas Eve Traditions to Start this Year
  • Christmas Scavenger Hunt

PIN THIS FOR LATER
November 5, 2024 47 comments
0 FacebookTwitterPinterestPocketThreadsBlueskyEmail
Holiday Fun Fact Lunchbox notes on a wooden table next to a red lunch pail
christmasholidayslunchbox love notes

Holiday Fun Fact Lunchbox Notes

by Teach Mama November 5, 2024
written by Teach Mama

Make lunchtime a joyful journey this December with Holiday Fun Fact Lunchbox Notes! Each lunchbox note highlights a unique holiday tradition from different cultures, bringing a daily dose of holiday fun to your kiddo’s lunch time.

Holiday Fun-Fact Lunchbox Notes for Kids

These printable lunchbox notes are a simple yet delightful way to share intriguing Christmas facts from around the globe. Every day, kids can uncover fun traditions from countries like Mexico, China, and Australia, fostering a sense of curiosity and wonder. They’ll be thrilled to learn about festive foods, customs, and celebrations from places they may only dream of visiting!

What’s Inside the Lunchbox Notes Printables?

Our Christmas Around the World Lunchbox Notes offer:

  • Fascinating facts about holiday traditions across various cultures
  • Quick snippets about how Christmas is celebrated worldwide, from festive foods to unique customs
  • Fun tidbits designed to spark conversations and inspire new discoveries about global celebrations

How to Use the Lunchbox Notes

Just print, cut, and tuck these holiday notes into your child’s lunchbox for a delightful surprise. I like to use a bright white cardstock like this. These easy-to-read notes can also make perfect after-school treats alongside a cozy holiday snack!

Holiday Fun Fact Lunchbox Notes Printable Collage

Get Your Holiday Fun Fact Lunchbox Notes Printable!

Want to add some holiday cheer to your kiddo’s lunches? Throw your email into the box below, and these fun facts will arrive straight to your inbox like a bit of holiday magic!

Looking for more holiday learning ideas?

  • New Year’s Family Interview
  • More Holiday Fun Fact and Joke Lunchbox Notes (includes Hanukkah!)
  • Printable Christmas Games for Kids
  • Sweet Homemade Santa Cookie Tray
  • Bake a Scripture Cake this Christmas!
  • Christmas Eve Traditions to Start this Year
  • Christmas Scavenger Hunt

PIN THIS FOR LATER


November 5, 2024 40 comments
0 FacebookTwitterPinterestPocketThreadsBlueskyEmail
A man and two girls, all dressed in white lab coats, with beakers on a table
science

Discovery Education 3M Young Scientist Challenge

by Teach Mama October 17, 2024
written by Teach Mama

The Discovery Education 3M Young Scientist Challenge invites middle school students to unleash their creativity and problem-solving skills. This is a premier science competition offering students the opportunity to innovate, collaborate, and compete for scholarships and the title of America’s Top Young Scientist. By tackling real-world challenges, participants can use their spark of passion for STEM and make a difference.

Unleashing Potential – The Discovery Education 3M Young Scientist Challenge for Middle Schoolers

For parents of middle school students, finding opportunities that match their child’s intellectual curiosity and desire for creative problem-solving can be a challenge. You may be searching for platforms where your child can stretch their abilities, collaborate with peers, and apply their unique talents in meaningful ways.

Enter the Discovery Education 3M Young Scientist Challenge—a nationally recognized competition designed to engage young innovators, like yours, in solving real-world problems through the power of science and technology and their imagination.

For more than a decade, the Young Scientist Challenge has been a leading science competition for students in grades 5 through 8. This program offers a remarkable opportunity for your child to explore their passions, develop their skills, and make a tangible impact on the world, all while competing for national recognition and scholarships.

Here’s why it’s an ideal platform for middle schoolers and how you, as a parent, can support their journey.

What is the Discovery Education 3M Young Scientist Challenge?

The Discovery Education 3M Young Scientist Challenge encourages middle school students to think like “real” scientists, tackling all sorts of global issues such as environmental sustainability, healthcare, energy efficiency, and safety.

Sponsored by Discovery Education and 3M, this competition invites students to submit a video entry showcasing an original idea or innovation that solves a specific problem in their community or beyond.

Students are encouraged to identify an everyday issue and propose an innovative, science-based solution. Whether it’s developing a new way to reduce plastic waste or inventing a more efficient energy source, the challenge taps into the creativity and critical thinking skills that students often possess.

Finalists are paired with 3M scientists as mentors, guiding them through the development process and providing insights into scientific research and innovation.

At the end of the competition, in a grand finale event, top students present their ideas and compete for the coveted title of America’s Top Young Scientist, along with a $25,000 grand prize! But it’s not just about the money (although that is amazing) students also gain invaluable experience in problem-solving, collaboration, and public speaking—skills that will benefit them throughout their academic and professional lives.

Why is This Challenge Perfect for Science Minded Students?

Among other things middle school students are often known for their curiosity, creativity, and ability to think critically about complex issues. These traits make the Discovery Education 3M Young Scientist Challenge an excellent fit. Here’s why:

  • Encouraging Innovation and Problem-Solving

Students tend to excel when they’re given the freedom to explore problems in depth and come up with creative solutions. This challenge provides just that. It encourages the students to think outside the box, push boundaries, and design innovations that address real-world problems.

By entering this competition, your child will have the chance to apply their advanced problem-solving skills in an impactful way, potentially changing the world for the better.

  • Hands-On Learning and Mentorship

One of the key benefits of the Young Scientist Challenge is its focus on hands-on learning. Participants move beyond textbook knowledge and engage in real scientific inquiry. For students who often need more stimulation and hands-on learning opportunities than traditional classrooms can easily provide, this competition offers the perfect outlet.

Additionally, the mentorship component, where finalists are paired with 3M scientists, offers a unique and exciting opportunity to learn from professionals in the field. This can be a life-changing experience for your child, providing them with exposure to real-world science, research methods, and innovation strategies.

  • Cultivating a Passion for STEM

Some kids show an early passion for subjects like math, science, and technology. However, this interest needs to be continually nurtured to flourish. The Young Scientist Challenge encourages students to dig deeply into the world of STEM (Science, Technology, Engineering, and Mathematics).

It can help them develop a passion for scientific discovery and experience its potential to solve local and global challenges. This competition could be your kiddo’s first step toward a lifelong interest in STEM careers and motivate him or her to continue exploring these fields in high school and beyond.

  • Developing Soft Skills

While the competition is science-focused, it also emphasizes the development of essential soft skills that gifted students may need to refine (well anyone really). Public speaking, teamwork, and time management are all critical components in the challenge.

Throughout the process, students must explain their ideas clearly, collaborate with mentors, and present their solutions confidently. These skills are golden and will serve them well in future academic environments but also in any career they choose in the future.

How to Support Your Gifted Child’s Participation in This Challenge

As a parent, you play a crucial role in helping your child maximize the benefits of participating in the Young Scientist Challenge. Here are a few ways you can offer support:

Encourage Exploration of Ideas

Help your child brainstorm potential problems they might be interested in solving. Encourage them to think about issues they encounter in daily life or larger challenges they’ve heard about. You can also prompt them to explore news articles, documentaries, or science publications to spark inspiration. You can help guide them to focus their broad interests into a concrete project idea.

Provide Resources for Research

Once your child has settled on a problem to tackle, make sure they have access to the resources they need to research and develop their solution. That may be access to online research databases, materials for building a prototype, or even a trip to a science museum. Providing the right tools will help them bring their idea to life!

Foster a Growth Mindset

Science is all about experimentation, adjustments and repetitio. So remind your child that failure is a natural part of the learning process and not always a bad thing. Some really terrific discoveries have come about through a “failure!”

Gifted students, for example, can be perfectionists, but it’s important to encourage resilience and a growth mindset. Let them know that setbacks and revisions are common in science and that persistence is key to innovation.

Help with the Video Submission

The entry video is a really important part of the competition. Assist your child in organizing their thoughts and outlining their presentation. While the idea should be their own, you can help by offering feedback on how they present their project in a clear and engaging manner.

Lots of practice runs will help them feel more confident when the camera is actually rolling.

Celebrate the Process

Regardless of the outcome, celebrate your child’s hard work and creativity throughout the process. Participation in the Young Scientist Challenge is an achievement in itself, and the skills and knowledge they gain will be invaluable. Celebrate their curiosity, their willingness to take risks, and their drive to make a difference.

Inspiring and Challenging the Next Generation of Scientists

The Discovery Education 3M Young Scientist Challenge is more than just a competition. It’s a platform that fosters a love for science and innovation. For scientifically minded middle schoolers, it offers an absolutely fabulous opportunity to apply their talents and gain valuable new skills.

But perhaps most importantly, it can show them that they have the potential to make a real difference in the world!

As a parent, you have the unique opportunity to guide and support your child through this incredible journey. By encouraging them to participate, you’re helping them not only explore their passion for science but also unlock their potential as future leaders and problem-solvers.

So, if your child has a passion for STEM and a desire to create change, the Discovery Education 3M Young Scientist Challenge might just be the perfect stage for them to shine!

Check Out Other STEM Related Content:

  • Cyber Monday Educational Deals for Kids
  • How to Raise Kids Who Love Math
  • Color Puzzles: Fun Math and Logic for Kids

PIN THIS FOR LATER

October 17, 2024 0 comments
0 FacebookTwitterPinterestPocketThreadsBlueskyEmail
Hands holding a tablet computer and a credit card over papers and a calculator on a desk
holidayssciencescience experiments for kids

Cyber Monday Educational Deals for Kids

by Teach Mama October 16, 2024
written by Teach Mama

Looking for the perfect time to grab amazing deals on educational items? Cyber Monday is packed with discounts on learning tools, books, STEM kits, and more! Whether you’re shopping for kids, teens, or lifelong learners, this is your chance to stock up on brain-boosting resources without breaking the bank. Get ready to save big!

Unlock the Best Cyber Monday Deals on Educational Items: Perfect for Creative Minds and Budding Scientists

Cyber Monday is the ultimate time to find incredible deals on educational tools and creative supplies for learners of all ages. Whether you’re shopping for a young artist, an aspiring scientist, or a curious little engineer, now’s your chance to stock up on high-quality items without draining your wallet. From crafting essentials to cutting-edge STEM kits, these deals are sure to spark imagination and learning year-round. Ready to dive in? Check out some of the top must-haves available this Cyber Monday!

STEM Kits and Scientific Tools for Future Inventors

Got a little scientist or engineer in your life? These STEM kits and scientific tools will encourage them to explore and innovate:

A boy holding a small microscope up to his eye examining a strawberry
  • Beginner Pocket Microscope – Lightweight and portable, this STEM toy is the perfect low-cost way to introduce kids to the microscopic world.
White table-top microscope with slides and accessories
  • Classroom Microscope and Slides – Dive into the microscopic world with a student-friendly microscope. It’s a fantastic way for kids to explore science hands-on, discovering the tiny wonders in everyday objects through prepared slides.
6-in-1 Electric Robot Kit Box with robotic toys in front of it
  • Robotics Kit – Robotics kits make learning about engineering and programming fun! Kids can build their own robots, explore coding, and develop problem-solving skills through hands-on challenges.
National Geographic Circuit Kit Box with electrical machines and accessories on the cover
  • National Geographic Circuit Maker Kit – This kit introduces children to the basics of electricity and circuits with engaging, interactive projects. It’s a perfect choice for young learners curious about how things work.
Yellow book cover with red and black writing.  Build it Yourself Science Laboratory
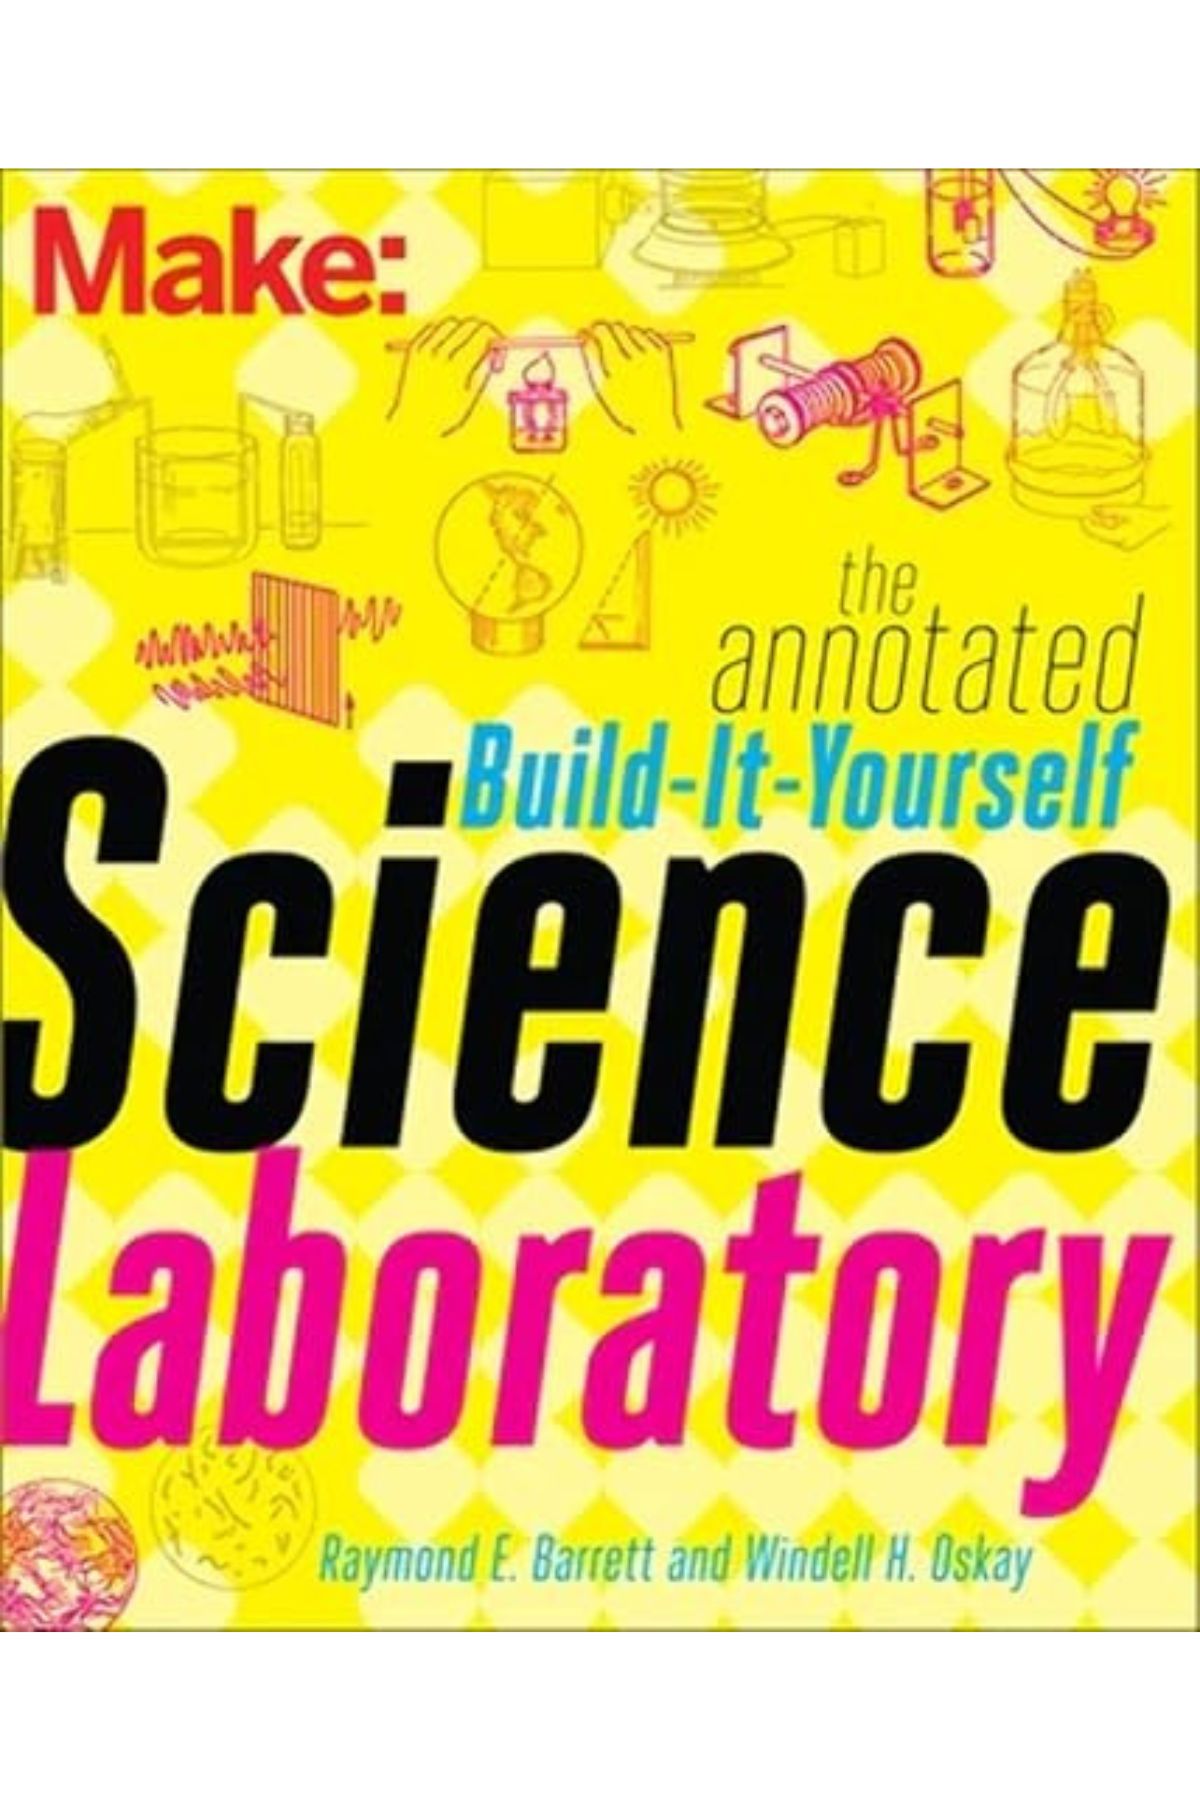
  • Build it Yourself Science Laboratory – Build over 200 laboratory tools with this book first published in the 1960s. Recently updated with suggestions on where to find material and extensive safety notes. From chemistry to physics, this book is chock full of hands-on experiments. Grab a copy for your kids…or do like the engineer did and grab one for yourself!
White model rocket with a blue "Athena" lettering on the side.  Blue fins and nosecone
Red Model Rocket Launcher
Bulk pack of model rocket engines
  • Ready-to-Fly Model Rocket, Launcher and Bulk Engine Pack – This educational combo is from Estes, the leader in model rocketry and will give you and your kids hours of rocketry fun with minimum hassle. Be sure to check out the National Association of Rocketry for safety tips and flying fields near you.

Fun, Functional, and Uniquely Educational Items

Some educational tools go beyond traditional learning materials, offering practical skills and engaging activities in new ways. These Cyber Monday deals are sure to please:

Boy standing behind table-top green game board octagonal game pieces.
  • Logic Games – Perfect for developing critical thinking and problem-solving skills, logic games challenge kids and adults alike to think outside the box. They’re a great way to make learning feel like play.
Book cover with a night sky and constellation background.  The title of the book is Signs and Seasons
  • Signs and Seasons – Okay, maybe it’s not a Cyber Monday deal, but this is a great Classical Astronomy course aimed at helping the reader become an outdoor observer of the sky and to understand the cycles of the Sun, Moon and stars.
White refracting telescope on black tripod
  • Student Telescope – Inspire a love for astronomy with a telescope designed for beginners. It’s a wonderful way to explore the night sky, identify constellations, and learn more about our solar system.
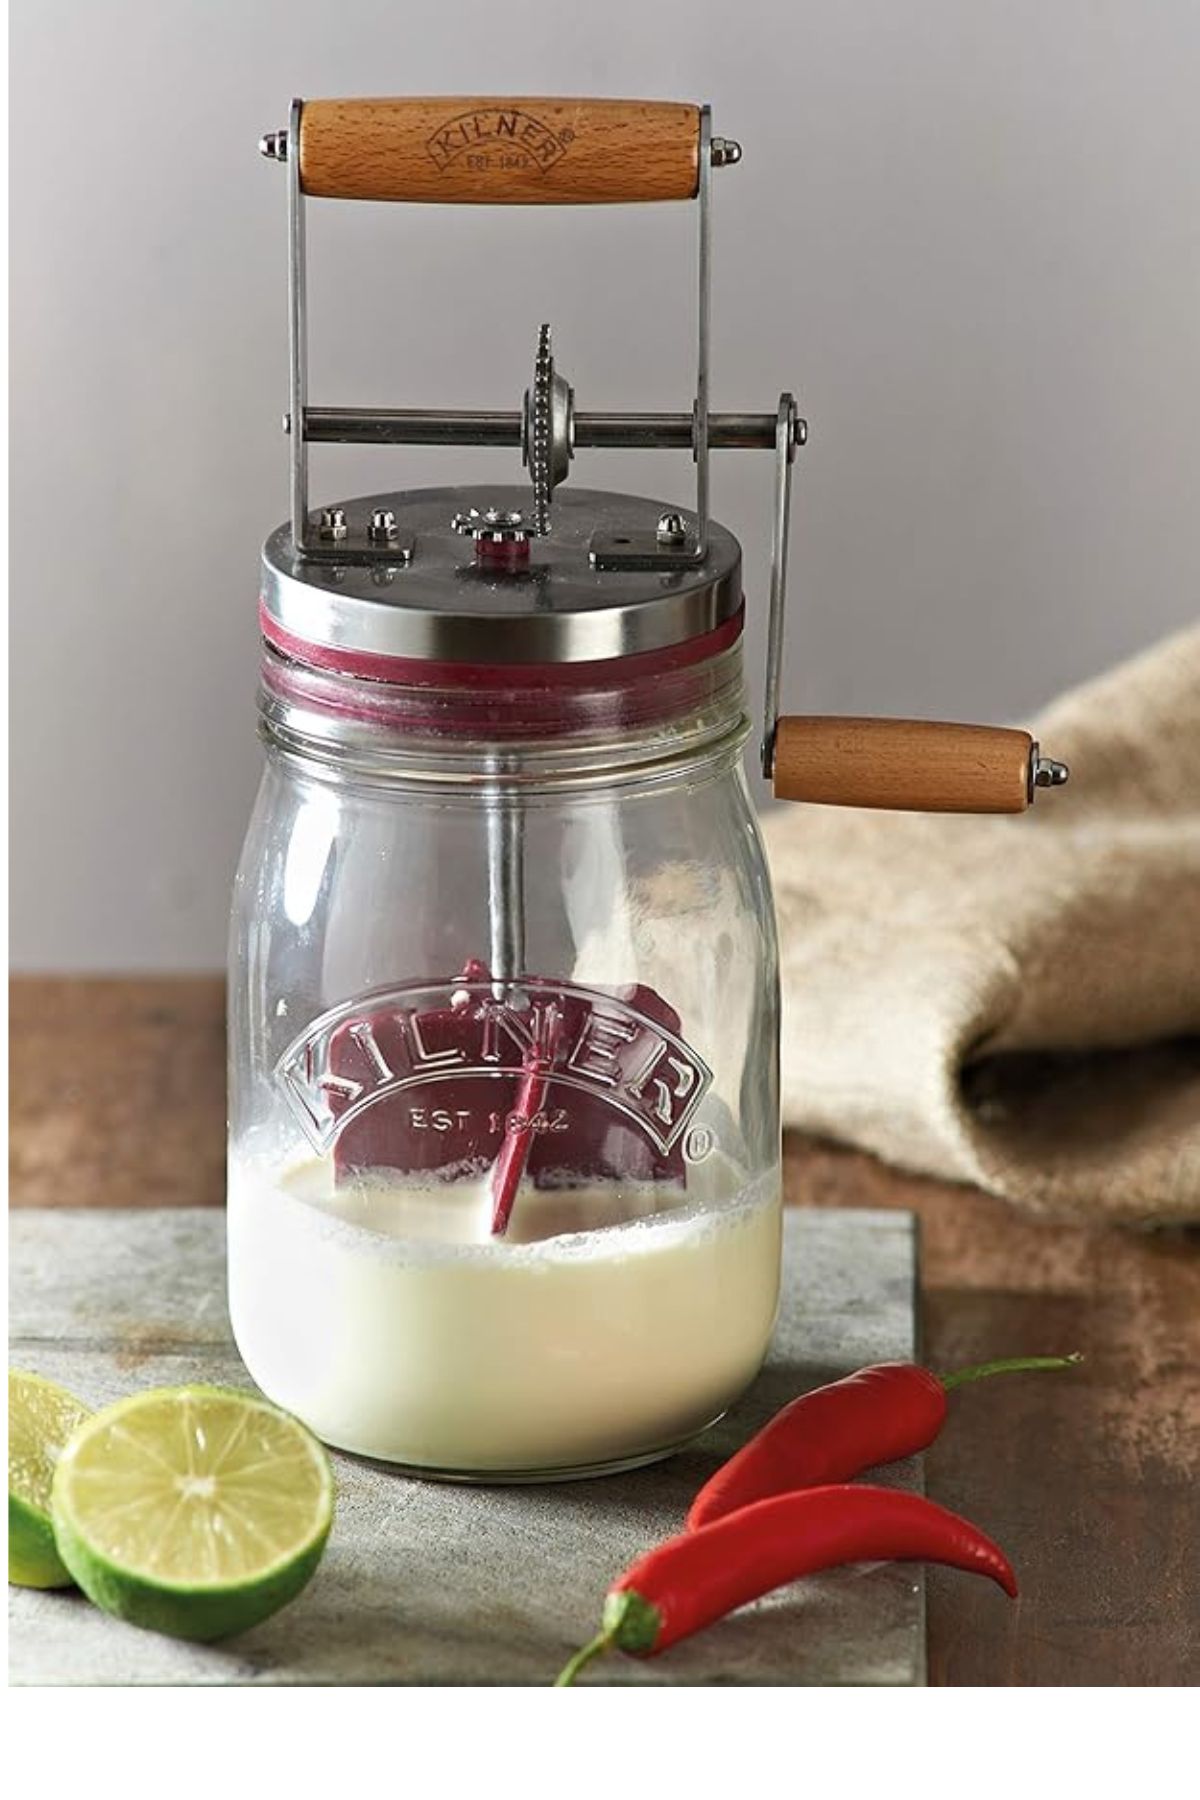
Quart glass jar and lid with a wooden crank handle and plastic dasher inside the jar
  • Glass Butter Churn – Looking for something truly unique? A glass butter churn provides a delicious hands-on lesson in science, history, and cooking. Kids can experience how butter was made in the past while learning the chemistry of emulsions.

Must-Have Creative and Learning Tools to Watch for on Cyber Monday

If you’re looking for both fun and functionality, these educational items are perfect to keep children (and even adults!) engaged and excited about learning. Be sure to snag these items while they’re on sale:

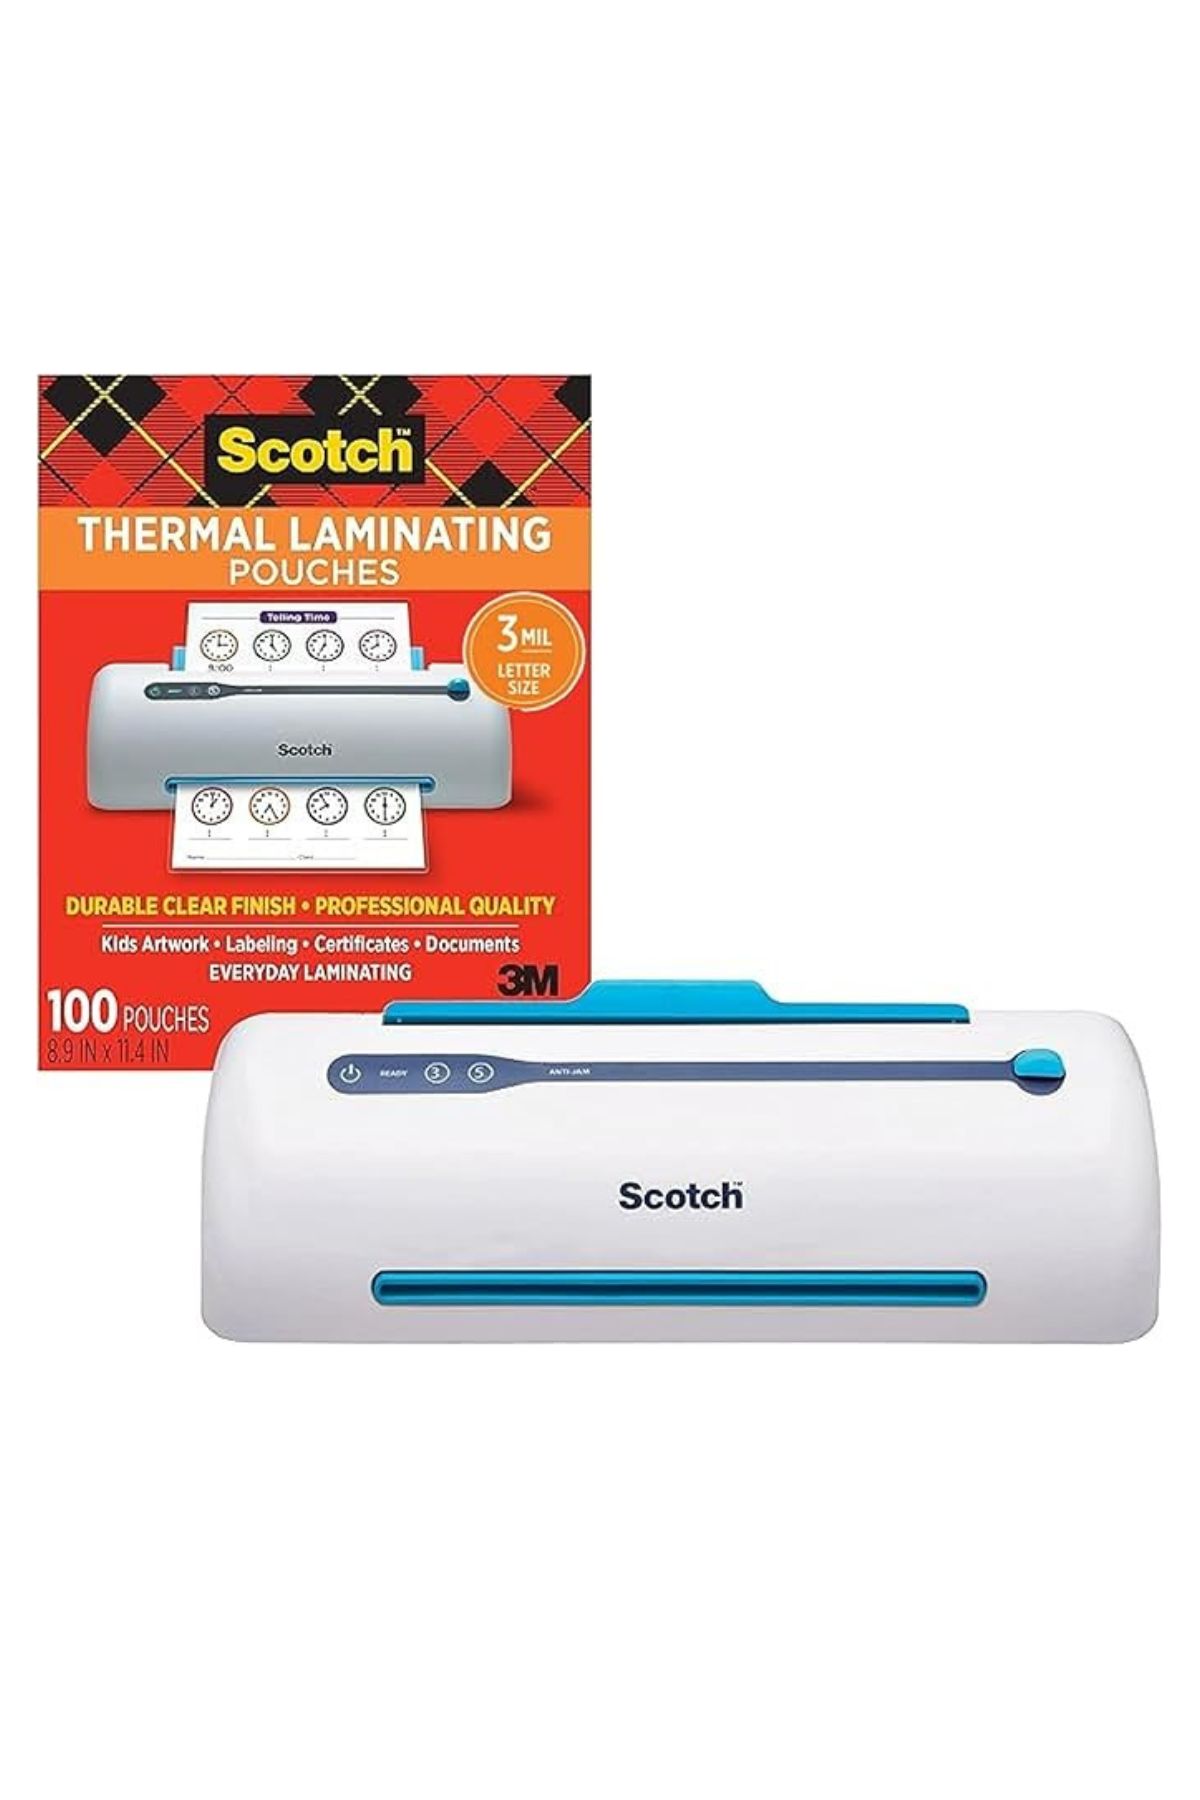
Scotch Brand Laminator with pouches
  • Laminator with Film Pockets – Ideal for teachers, parents, and crafters alike, a laminator helps protect artwork, flashcards, and worksheets for long-term use. Plus, the included film pockets make it easy to get started right out of the box.
Black Paper Cutter
  • Paper Cutter – Save time (and keep lines straight!) with a paper cutter. Whether you’re working on school projects or personal crafts, it’s a must-have tool for every creative workspace.
Pink, blue, red, purple, yellow and green deckle-edged scissors
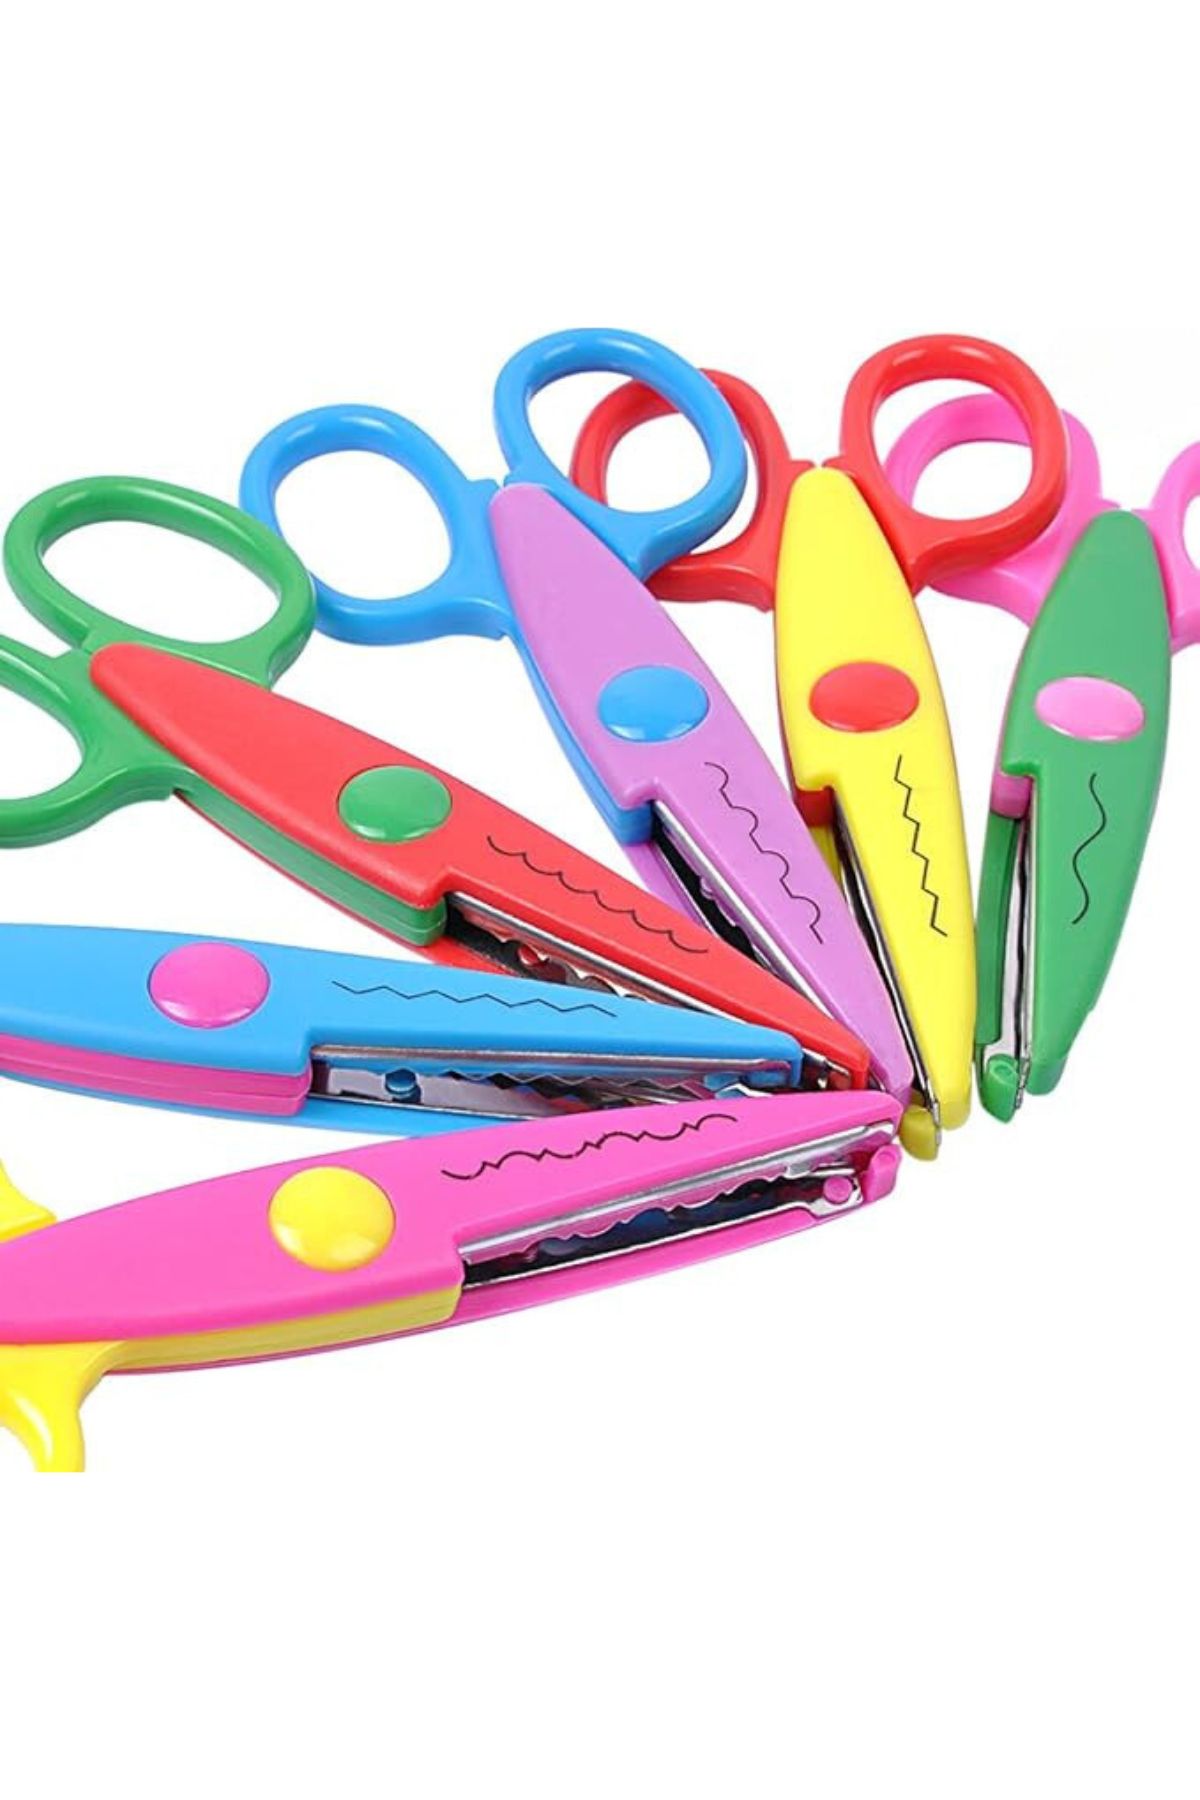
  • Deckle Edge Scissor Sets – Give projects an extra flair with these decorative scissors that create wavy or jagged edges, perfect for scrapbooking, greeting cards, and DIY crafts.
A metal box of oil pastels
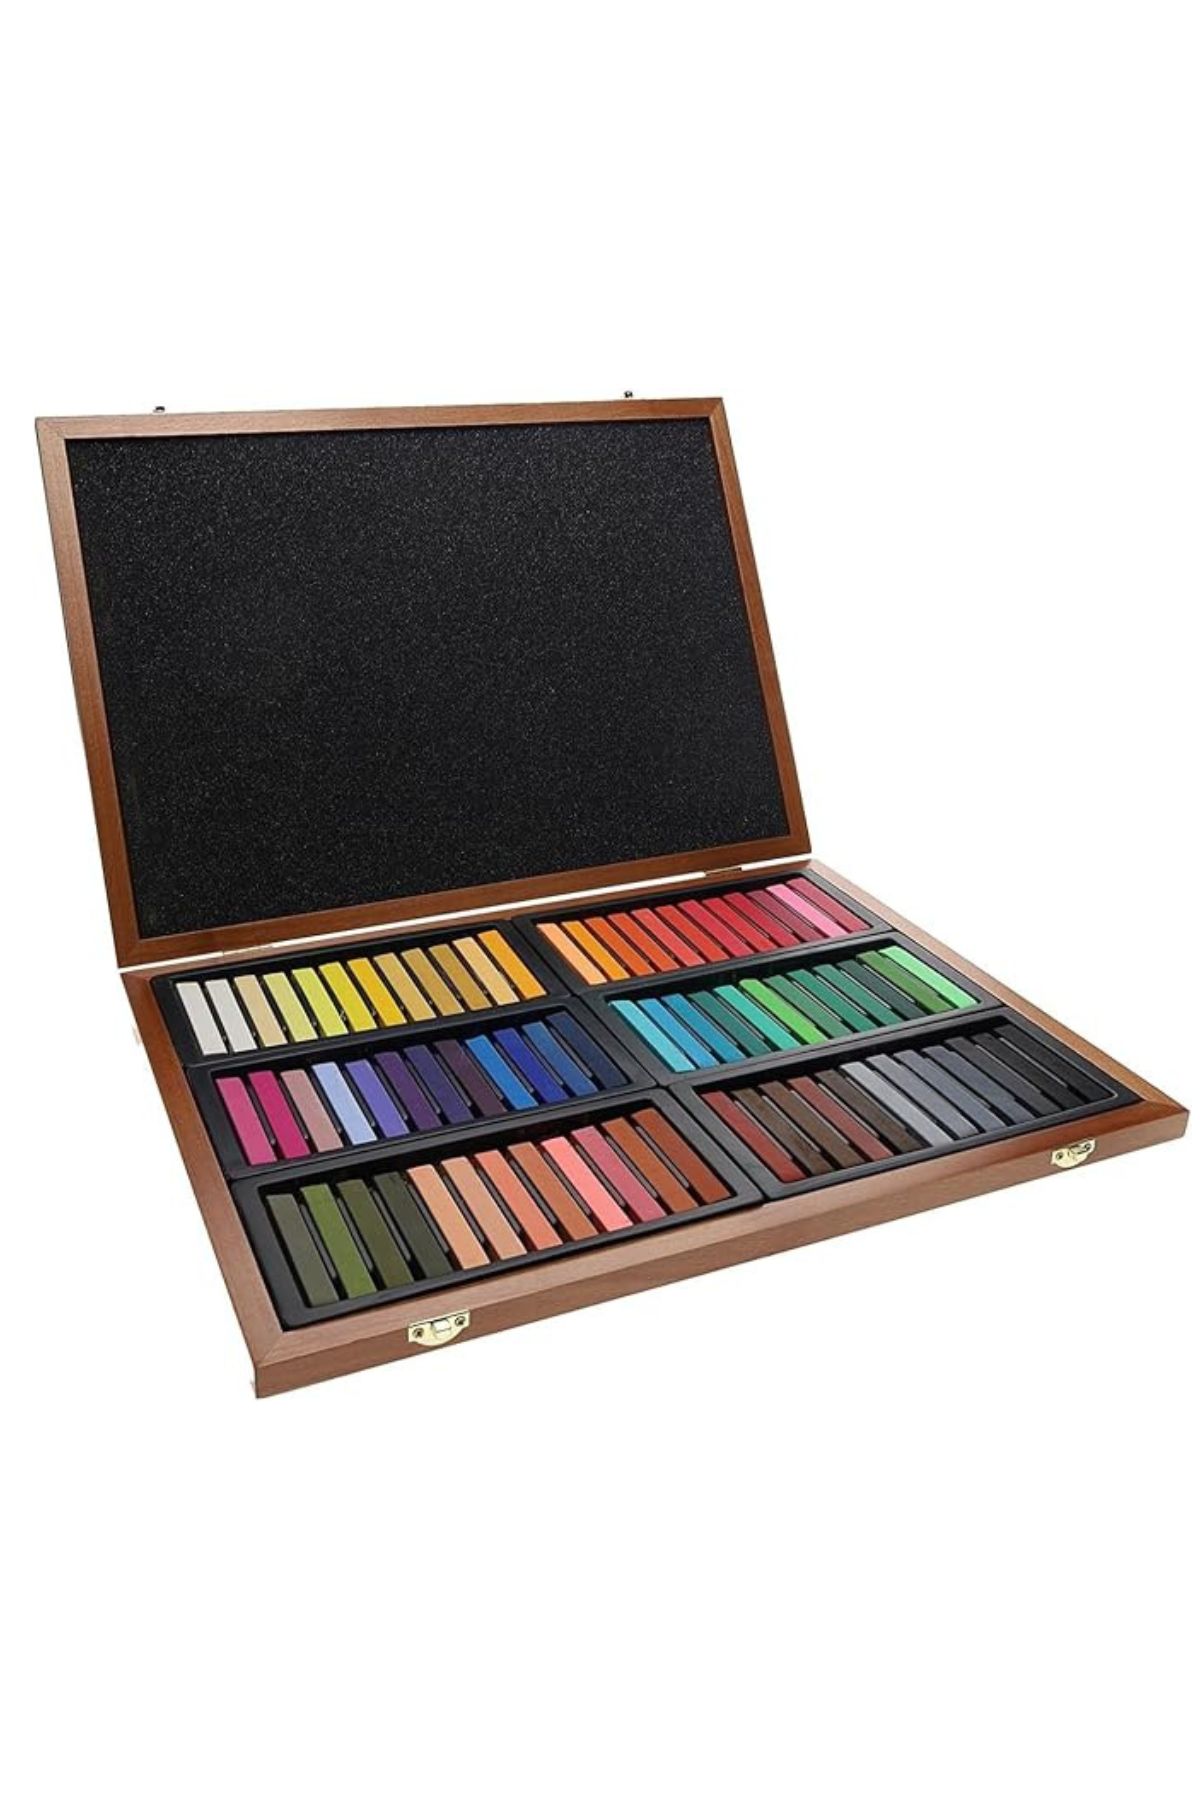
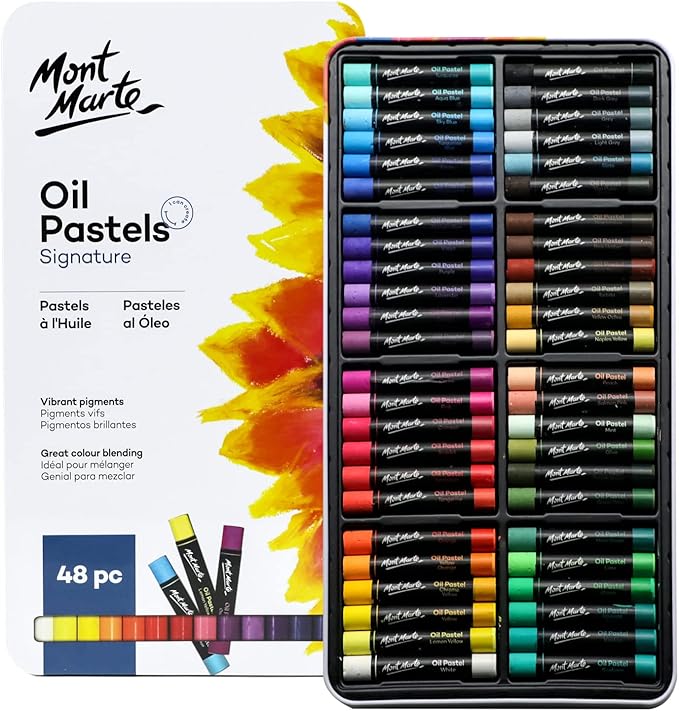
  • Pastel Chalk Set & Oil Pastel Set – For budding artists, pastel sets offer vibrant colors and endless creative possibilities. Whether it’s sidewalk art with chalk or more refined drawings with oil pastels, these sets encourage kids to explore their artistic side.
Watercolor set and pad with brushes
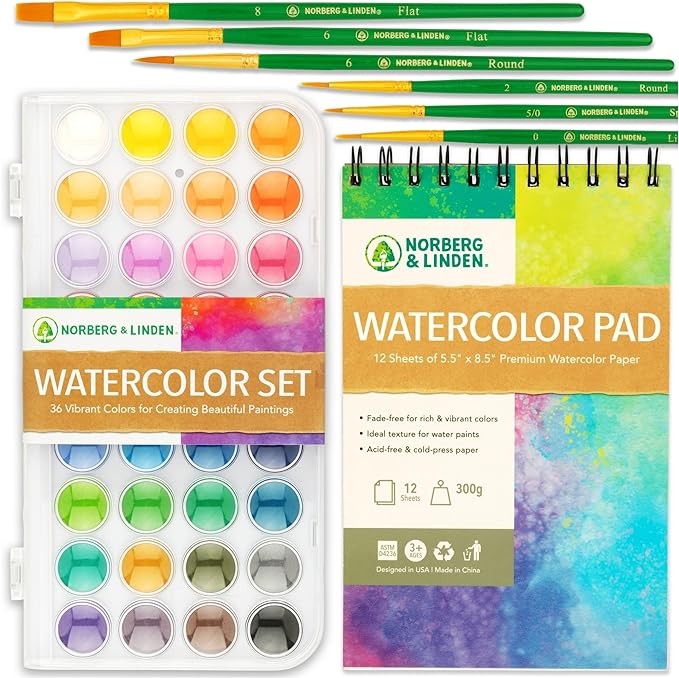
  • Watercolor Set – Watercolors are a fantastic way to introduce young learners to painting. They’re easy to use, forgiving for beginners, and offer a beautiful medium for experimenting with color blending.
White Brother brand beginners sewing machine
  • Beginner Sewing Machine – A perfect introduction to sewing, this machine teaches essential life skills while building creativity and patience. Kids can learn to create their own simple projects, from pillowcases to custom clothing pieces.

Cyber Monday is a prime opportunity to grab these educational items at discounted prices. Whether you’re focused on art, science, or hands-on projects, there’s something for every learner on your list. Don’t miss out—these deals are sure to make learning at home or in the classroom even more exciting!

Happy shopping, and may your Cyber Monday be filled with creativity, exploration, and savings!

Looking for more Seasonal Content?

  • Three Fall Owl Crafts for Kids
  • Making Butter with Kids Like Our Ancestors Did
  • Our Favorite Thanksgiving Printables for Kids
  • Thanksgiving Fun Fact Lunchbox Notes
  • Thanksgiving Thankful Door
  • Thanksgiving Veggie Turkey Tray 

PIN THIS FOR LATER
October 16, 2024 0 comments
0 FacebookTwitterPinterestPocketThreadsBlueskyEmail
talk with kids about emotions: | teachmama.com
behavior managementfamily lifeparenting

Talk with Kids About Emotions: ‘Inside Out’ Mini-Book and Card Game

by Teach Mama October 15, 2024
written by Teach Mama

Wondering how to help your little one understand their emotions? The characters from Inside Out—Joy, Sadness, Fear, Anger, and Disgust—can be a perfect tool for explaining feelings. Here’s a fun, easy way to talk with your kids about emotions and keep the conversation going!

Mom standing behind son

If you’ve watched Inside Out, you know it’s more than just a movie—it’s a way to make emotions relatable and understandable for kids. As a parent of a young child, you might think that identifying feelings would get easier as they grow older, but it’s something we all continue to work on, even as adults.

Using the movie as a guide, you can teach your kids to recognize their emotions and talk about them in positive, healthy ways.

Using Inside Out to Help Kids Understand and Express Their Emotions

Step 1 – Watch Inside Out with Your Child

If you haven’t seen it yet, Inside Out takes place in the mind of 11-year-old Riley, where her emotions—Joy, Sadness, Fear, Anger, and Disgust—guide her through a major life change. Each emotion plays an important role, just like in real life.

Watching this movie with your child opens the door for important conversations about feelings and how they affect us.

You can say something like, “Remember how Joy helped Riley feel happy when she was playing? But sometimes Sadness showed up when things were hard. That’s normal!”

Step 2 – Download and Print the Cards

Grab the printable below to print on white cardstock and laminate if you want to make the set last. Print one set of character cards, cut them out and punch a small hole in the top left corner.

Step 3 – Create the Inside Out Mini-Book

After watching the movie, you can create a simple mini-book by using a jump ring through the hole you punched in the cards. You and your child can then use the mini-book to explore their emotions. Each page features a character from the movie, like Joy or Anger, and there’s space to add new ones. This mini-book is a fun way for kids to personalize their emotional experiences.

I added a few pages of blank faces. Here, kiddos can draw in faces of other emotions they might be feeling. Because kids have less life experience, sometimes they may not even have a word for what it is they are feeling.

I’ve included a list of emotions for just that reason. With young clients I’ve made a game out of exploring that list by each of us taking turns making a face for each emotion. Sometimes I’ll make a face and they guess what the emotion is.

The boys always like the “Constipation” face (which is really either concentration or straining, but well, you know … boys!) If you can’t think of how to draw a certain emotion, Google and Pinterest have a wealth ideas!

Print out blank faces, and let your child draw expressions for emotions not shown in the movie, like confusion or excitement. Some kids don’t always know the words for what they’re feeling, so this activity helps them visualize and name their emotions.

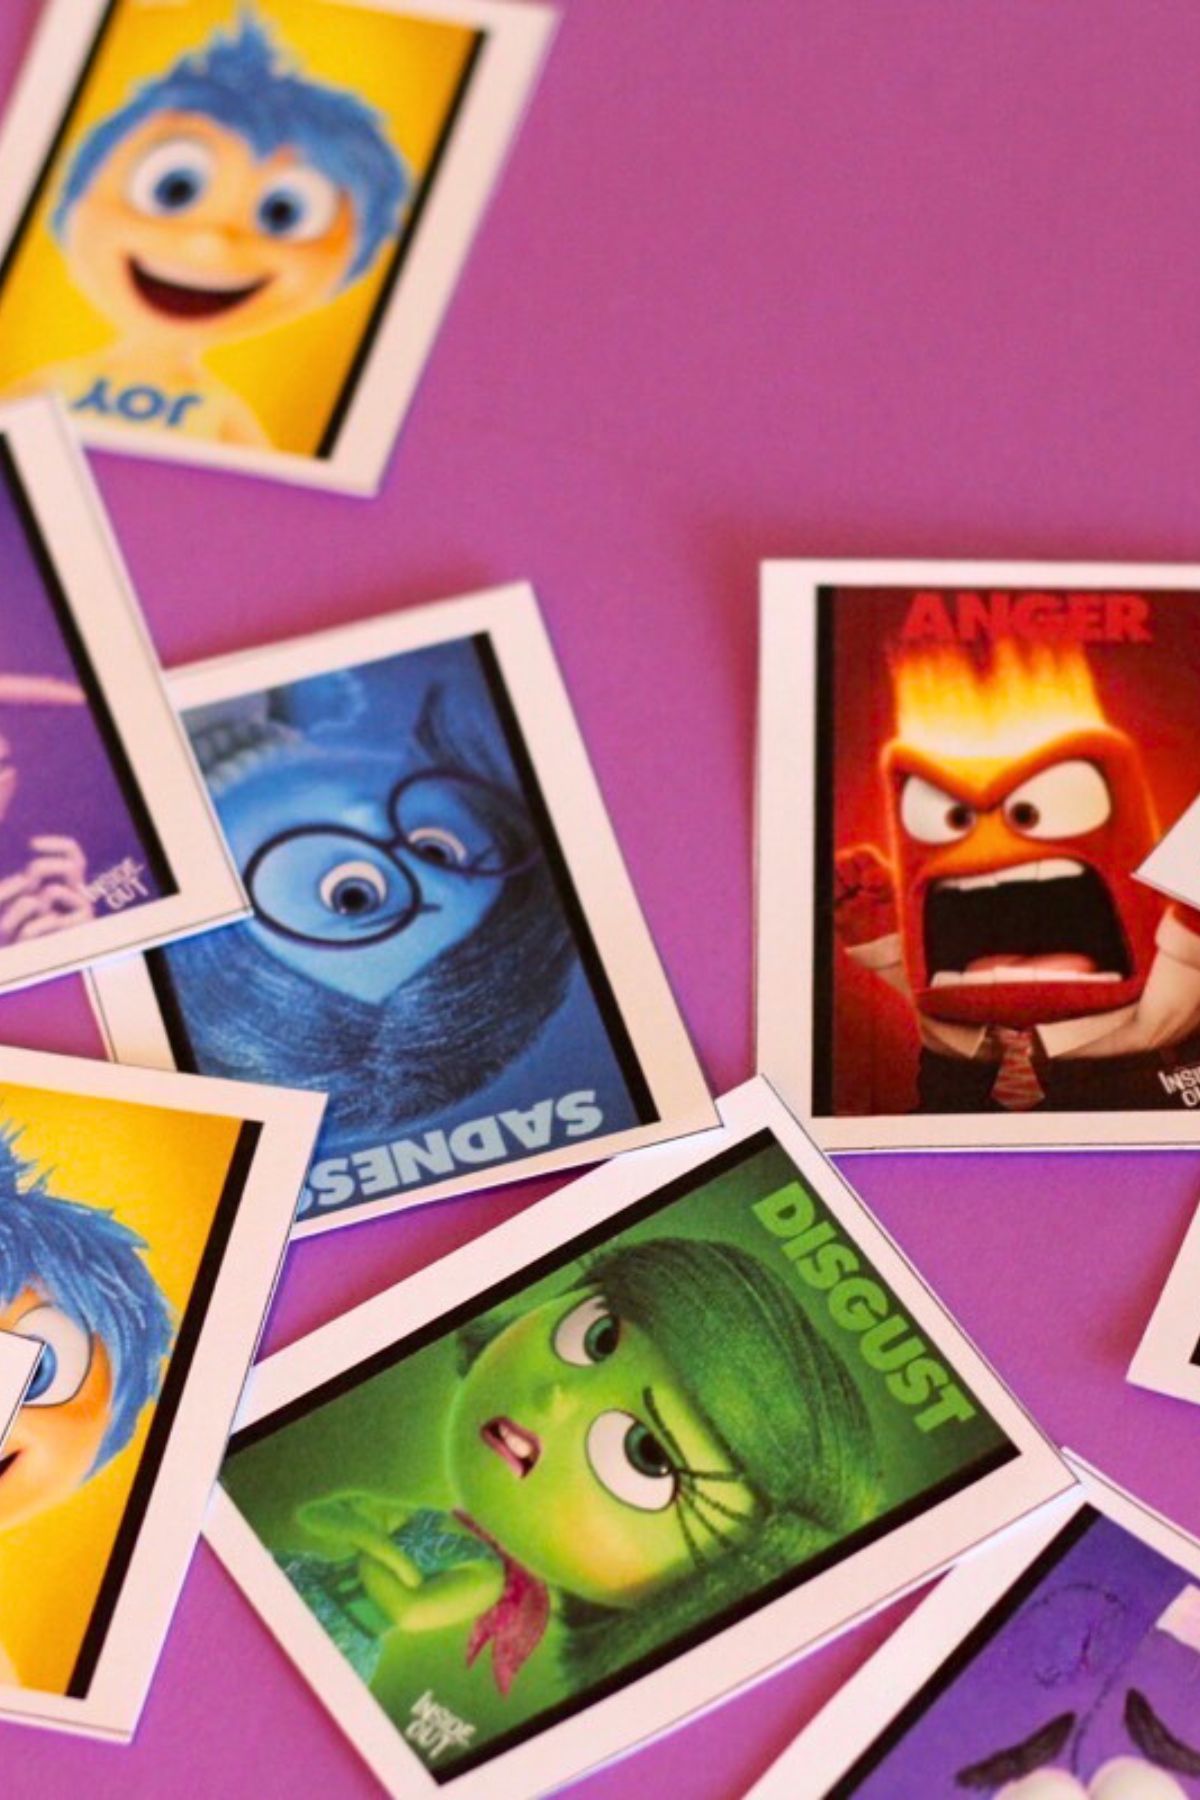
Inside Out Character Cards

Step 4 – Keep the Conversation Going with Fun Games

The mini-book doesn’t have to be something you pull out every day, but it’s a great tool to keep handy for when your child is feeling a bit overwhelmed. You can also print out cards featuring the Inside Out characters and turn it into a game of memory. This makes the conversation about emotions playful and light-hearted, but still effective.

When your child is feeling an emotion like Anger or Sadness, bring out the cards and say, “Who do you feel like right now? Maybe a little like Anger?” This helps them connect the feeling to a character they’re familiar with and makes talking about tough emotions a little easier.

Step 5 – Teach Kids How to Handle Their Emotions

The most important lesson you can teach your child is that no emotion is bad—it’s what we do with those emotions that matters. It’s okay to feel sad one day and happy the next. The key is learning how to express those feelings in a healthy way.

When Anger shows up, maybe you take a few deep breaths like Riley does in the movie before reacting. Talking about emotions regularly helps your child learn that they’re not alone in how they feel, and it gives them the tools to deal with those feelings in positive ways.

Emotions Are a Lifelong Conversation

Remember, talking about emotions isn’t something we outgrow—it’s a lifelong process. The cool thing is that Inside Out gives us a fun, relatable way to keep that conversation going with our kids.

So the next time your child is struggling with a big feeling, pull out the mini-book or play the card game, and keep the conversation flowing.

To grab a copy of the Talking About Emotions Printable throw your email in the box below:

More Resources for Helping Your Child Navigate Emotions:

  • How To Get Your Kids To Open Up
  • Handling Sadness, Tragedy And Grief As A Family
  • Helping Kids Manage Anxiety
  • Noticing your Kids…in a Good Way!

PIN THIS FOR LATER

TeachMama is grateful to Disney for the opportunity to attend the 2015 Disney Social Media Moms Conference and for the opportunity to create this helpful tool for parents.

October 15, 2024 18 comments
0 FacebookTwitterPinterestPocketThreadsBlueskyEmail
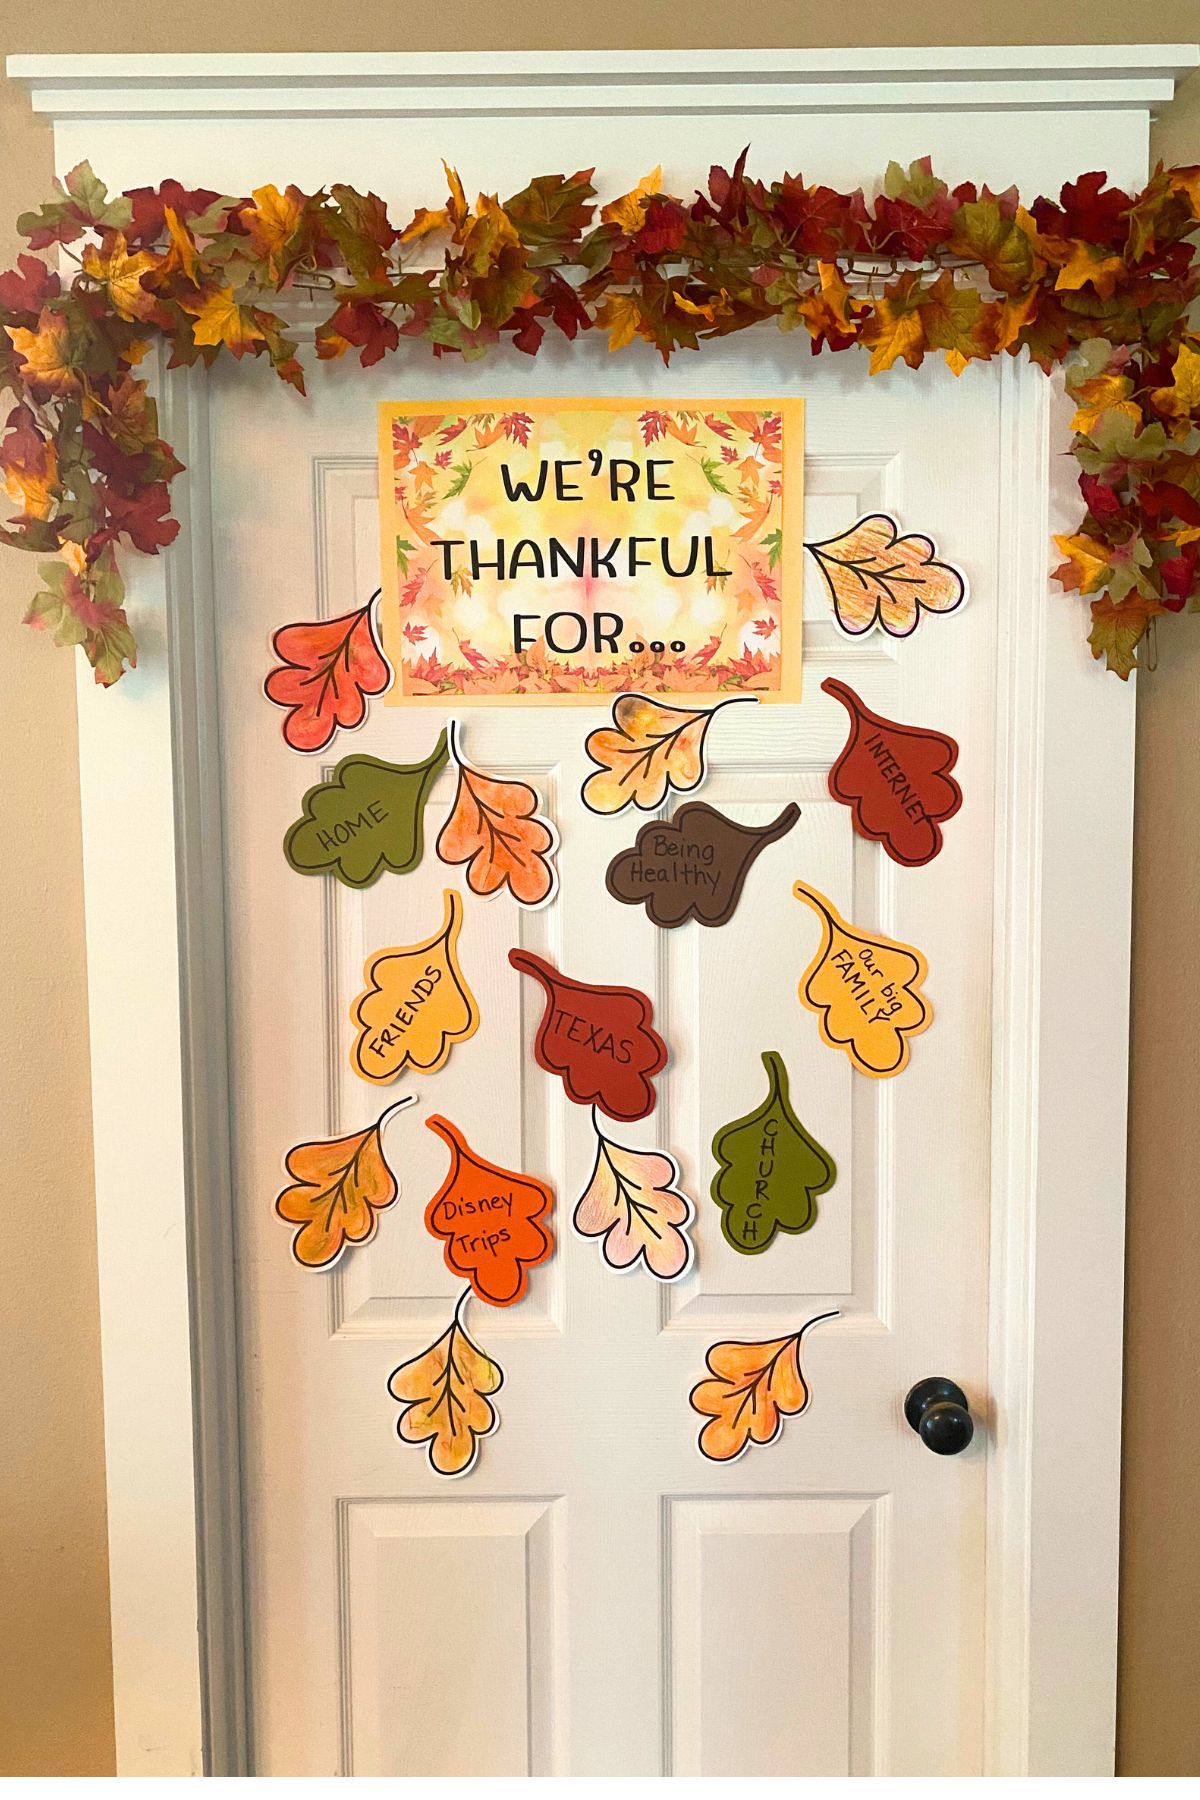
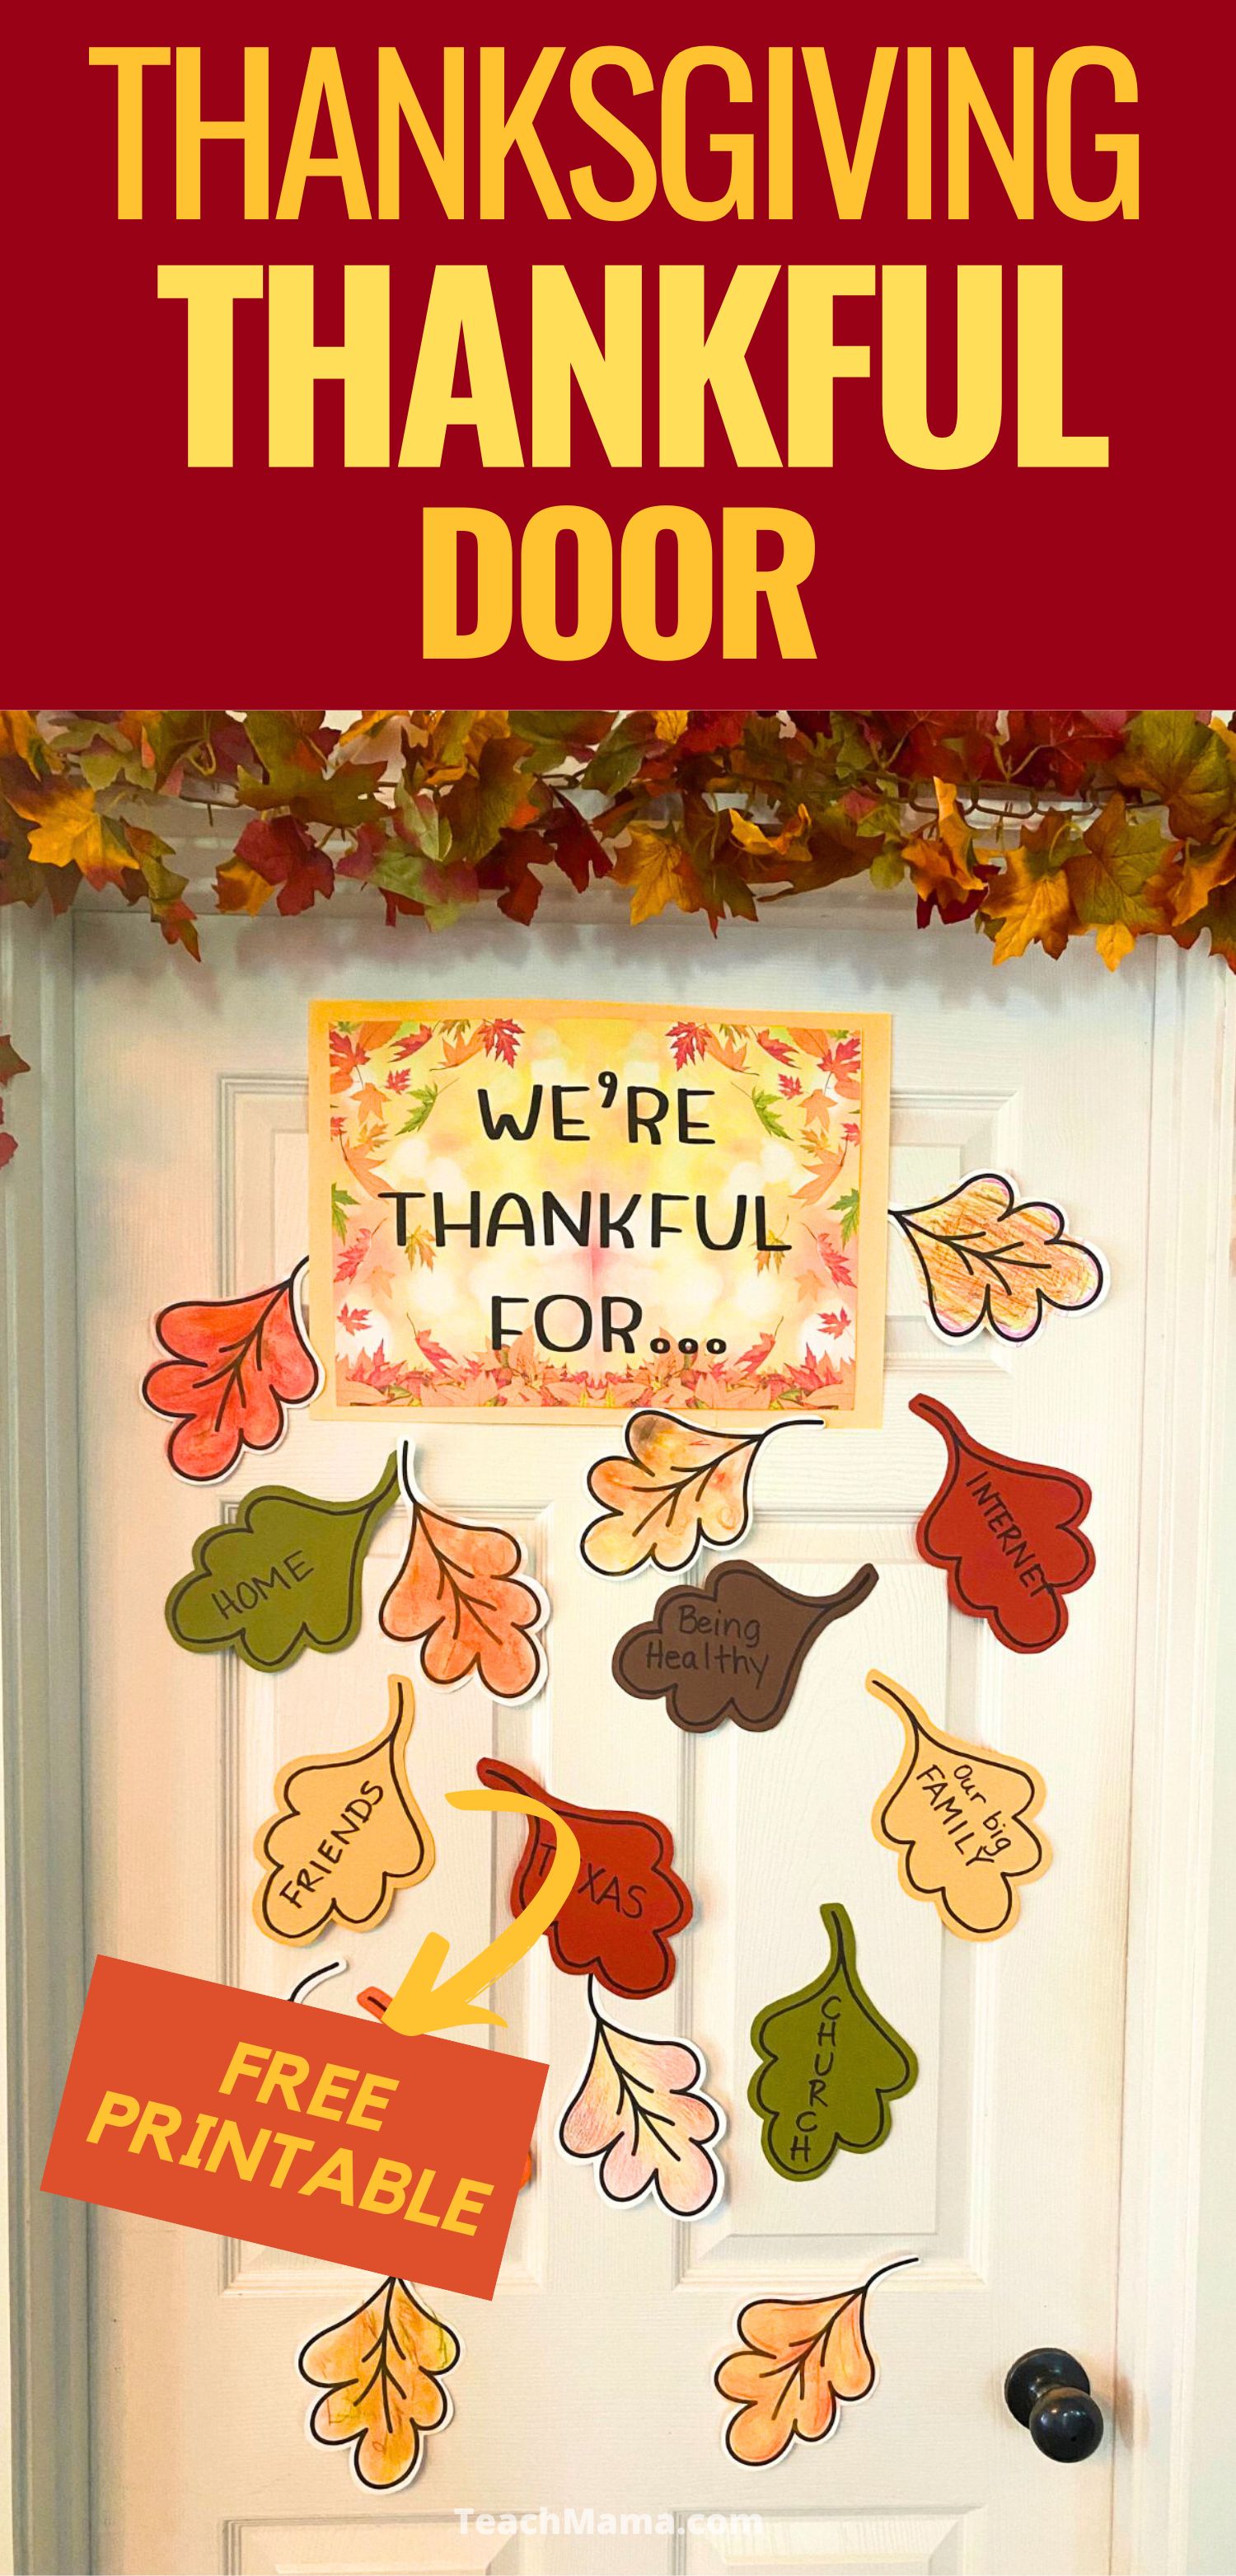
Door with a fall leaf garland across the top and colored leaf taped to the door with blessing written on the leaves
holidaysthanksgiving

DIY Thanksgiving Thankful Door Decor – Being Grateful Everyday

by Teach Mama September 29, 2024
written by Teach Mama

Looking for a simple way to celebrate gratitude this Thanksgiving? This easy Thanksgiving Thankful Door activity is perfect for the whole family! Help your kids reflect on what they’re thankful for and make gratitude a daily habit with this fun, creative, and heartwarming project.

The Thanksgiving Thankful Door is a great way to focus on gratitude, not just on Thanksgiving but all year round. This activity encourages the entire family to reflect on the people, things, and experiences they’re grateful for. It’s not only about acknowledging blessings but also about teaching kids the importance of appreciation and mindfulness.

Thanksgiving Thankful Door: A Fun and Easy Gratitude Activity for Families

How to Create a Thanksgiving Thankful Door

There are many ways to create your Thanksgiving Door, so feel free to get creative! The goal is to create a visual reminder of gratitude that can grow over the days or weeks leading up to Thanksgiving.

Gather Your Supplies

  • “>Fall leaf garland like this one
  • White Card Stock
  • Fall Colored Card Stock
  • Laminator (if you choose to laminate for reuse)
  • Colored Pencils or Markers
  • Clear Tape

Talking About Gratitude

Before you start crafting, take time to talk with your kids about what they’re grateful for. Kids may need a little help getting started. These conversations will help your kiddos recognize the blessings in their lives beyond material things.

Encourage them to think about the people they appreciate, from family and friends to teachers and clergy…even the neighbors who challenge their patience!

Discuss personal qualities as well. For example, you might say, “I’m thankful for Dad’s sense of humor,” or “I’m grateful for your determination.” These conversations can also touch on events, like a special vacation or a new skill they learned, showing that gratitude goes beyond tangible items.

Don’t forget to highlight everyday blessings we often take for granted. Share stories from your own life, like how your grandmother was always thankful for hot water because she didn’t always have it, or how Grandpa was grateful for a roof over his head after growing up in a tent in the west Texas oil patch.

These examples help children see the bigger picture of gratitude. Sometimes all this gratitude can take a funny turn and that’s okay too. One young mom I know said she was most grateful for disposable diapers! Amen!

Writing Down Your Blessings

Now that you’ve talked about what your family is thankful for, it’s time to write them down! You can use seasonal notepads with sticky backs, or for a more creative option, print out fall leaves using our free fall leaf printable (download below).

Let your kids color and decorate the leaves with crayons, watercolors, or even chalk. If you have fall-colored cardstock, that can add a special touch to the activity. Encourage everyone to add their name, age, and the year to their leaf—especially if the kids are writing their own with adorable backward letters and “unique” spelling.

For younger ones, you can add a translation for clarity!

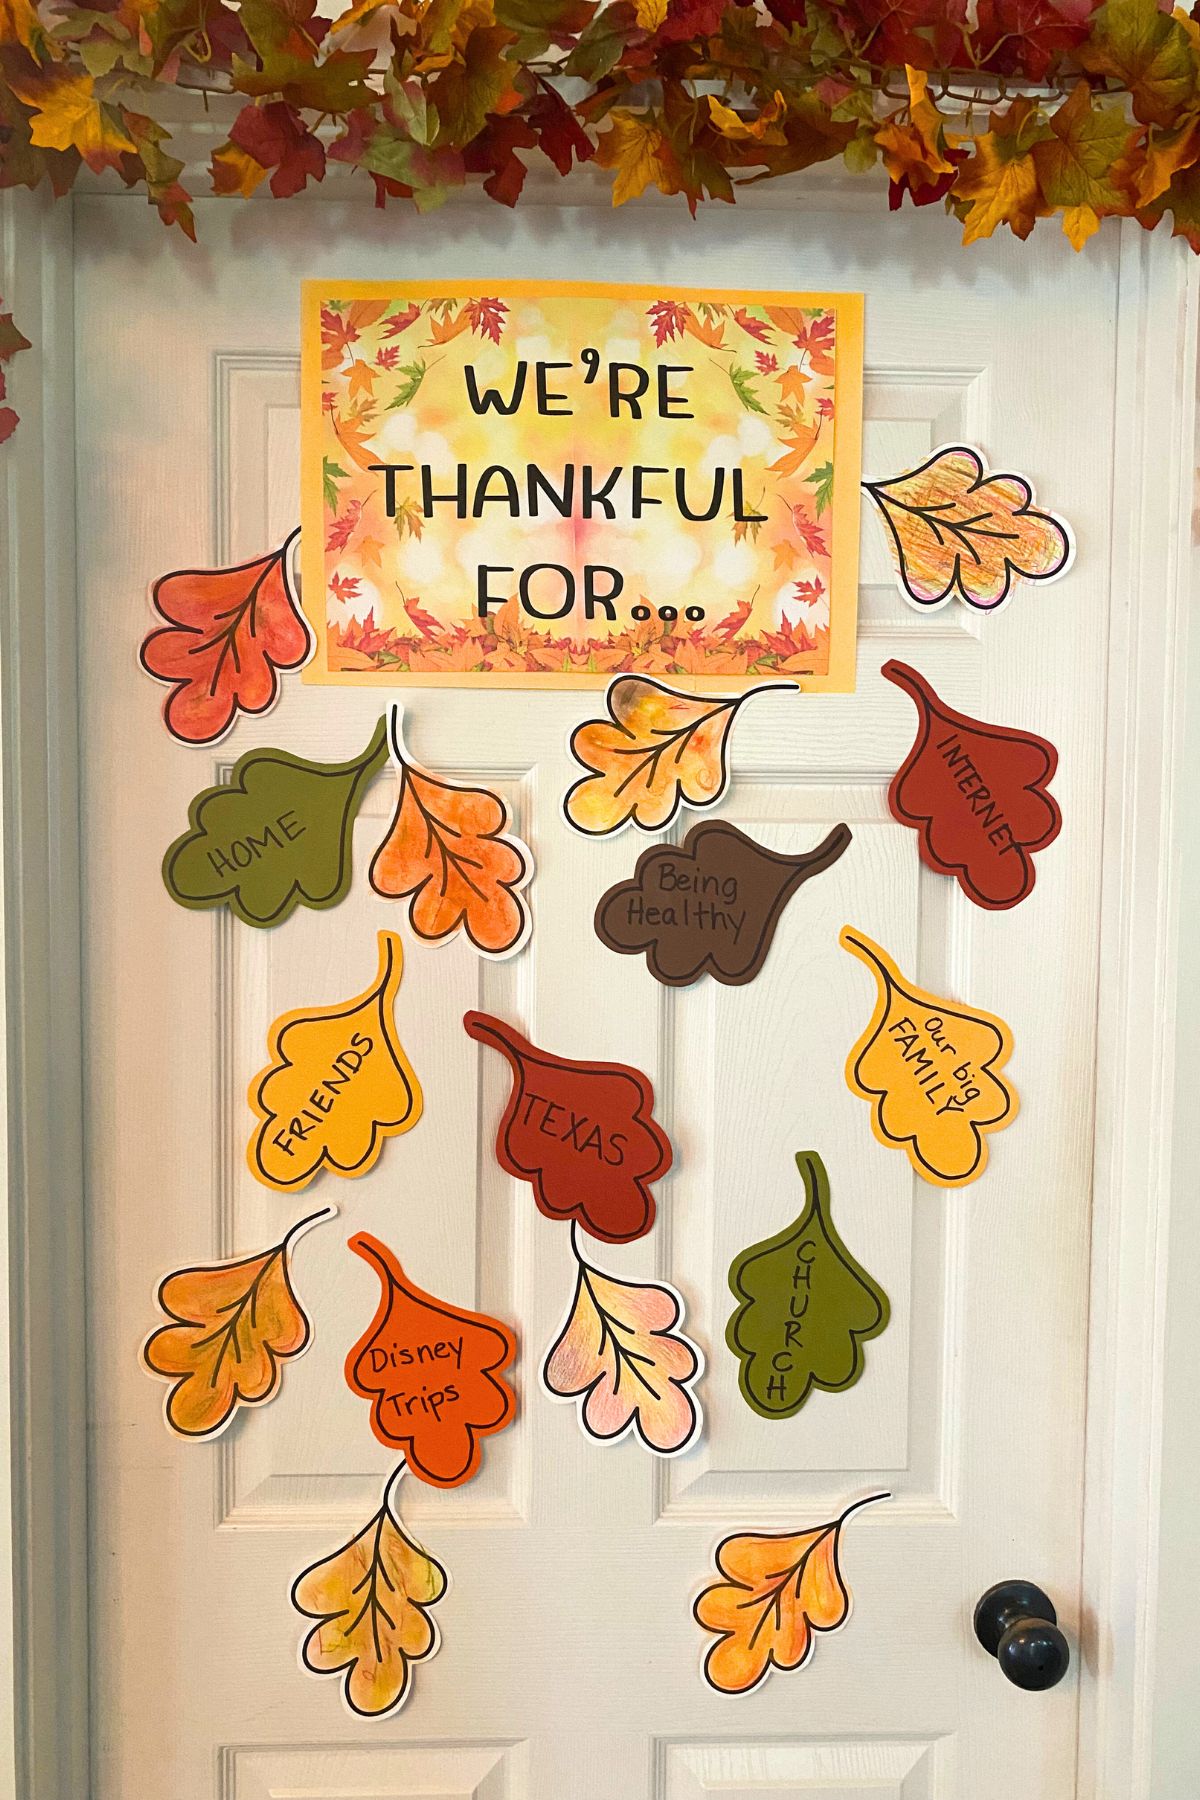
Close up of door with a fall leaf garland across the top and colored leaf taped to the door with blessing written on the leaves

Starting a Gratitude Tradition

Once your leaves are ready, it’s time to display them. You can tape them on or around your door, create a garland, or hang them from a decorative branch. One of my grandmothers even spray-painted her branch gold for extra sparkle!

After Thanksgiving, consider laminating the leaves to preserve them for future years. (I love laminating!). Each Thanksgiving, you can add more leaves, making it a cherished family tradition that reflects the growth of gratitude in your home. Seeing what everyone was grateful for last year is an added reminder going forward and is an important part of your child’s continuing emotional development.

With this simple Thanksgiving door activity, you’ll help your kids focus on gratitude, making Thanksgiving more meaningful and special. It’s a wonderful way to teach appreciation while creating lasting memories!

Here is an easy Thanksgiving activity for everyone in the family to remind us of all the things, people and experiences we are grateful for. After all, that is what the holiday is about!

Throw your email in the box below to receive your free Thanksgiving Thankful Door printable!

Looking for more fun Thanksgiving activities?

  • Thanksgiving Thankful Door
  • Make a Veggie Turkey Platter
  • Making Homemade Butter Like Our Ancestors Did
  • Fall Owl Craft
  • Thanksgiving Printables for Kids
  • Our Favorite Cyber Monday Buys

PIN THIS FOR LATER

September 29, 2024 2 comments
0 FacebookTwitterPinterestPocketThreadsBlueskyEmail
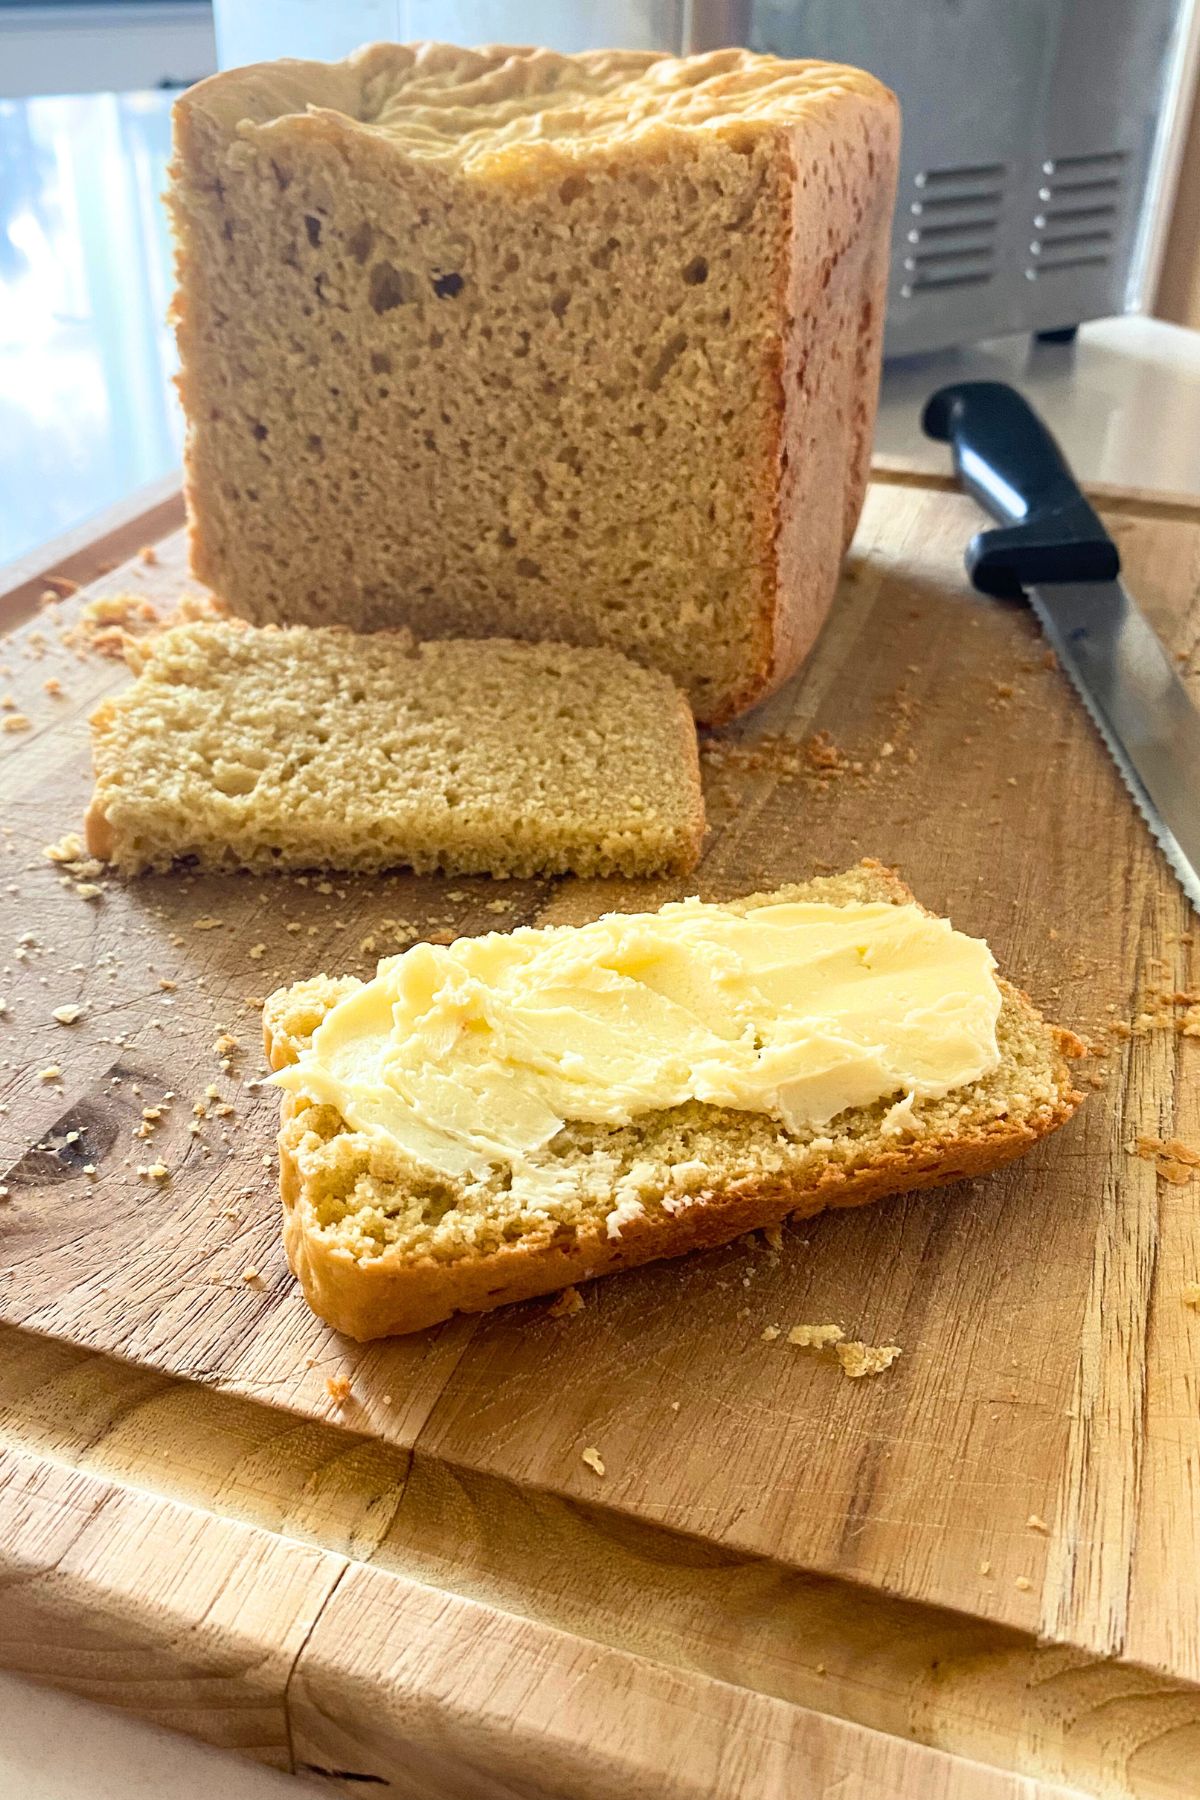
Homemade bread with butter on a wooden cutting baord
sciencescience experiments for kids

Making Homemade Butter Like Our Ancestors Did

by Teach Mama September 29, 2024
written by Teach Mama

Looking for a way to give your kids an appreciation for how our ancestors did things before there were grocery stores full of fast and packaged foods? Making homemade butter is a great way to combine science and history that is also very tasty on fresh bread!

We live thirty minutes from the nearest grocery store so when we needed butter we decided to see if we could make homemade butter faster than we could buy it!

Homemade Butter– Easy, Fun and Delicious

You may already have all the ingredients and tools to make delicious fresh homemade butter (almost) the same way your great great (great?) grandmother did!

Ingredients and Supplies You Will Need:

  • Heavy whipping cream
  • Sea salt
  • A one-quart mason jar or other jar with a tight screw on lid or a small butter churn
  • Ice in water in a large bowl
  • Slotted spatula or slotted spoon
  • Bowl for the finished butter

How to Make Butter

Way back in the day, the cream was skimmed off the top of milk fresh from the family cow and put into a wooden churn. Well, other than my homesteading friends, I don’t know too many people these days who have a milk cow in their backyard, HOA’s being what they are.

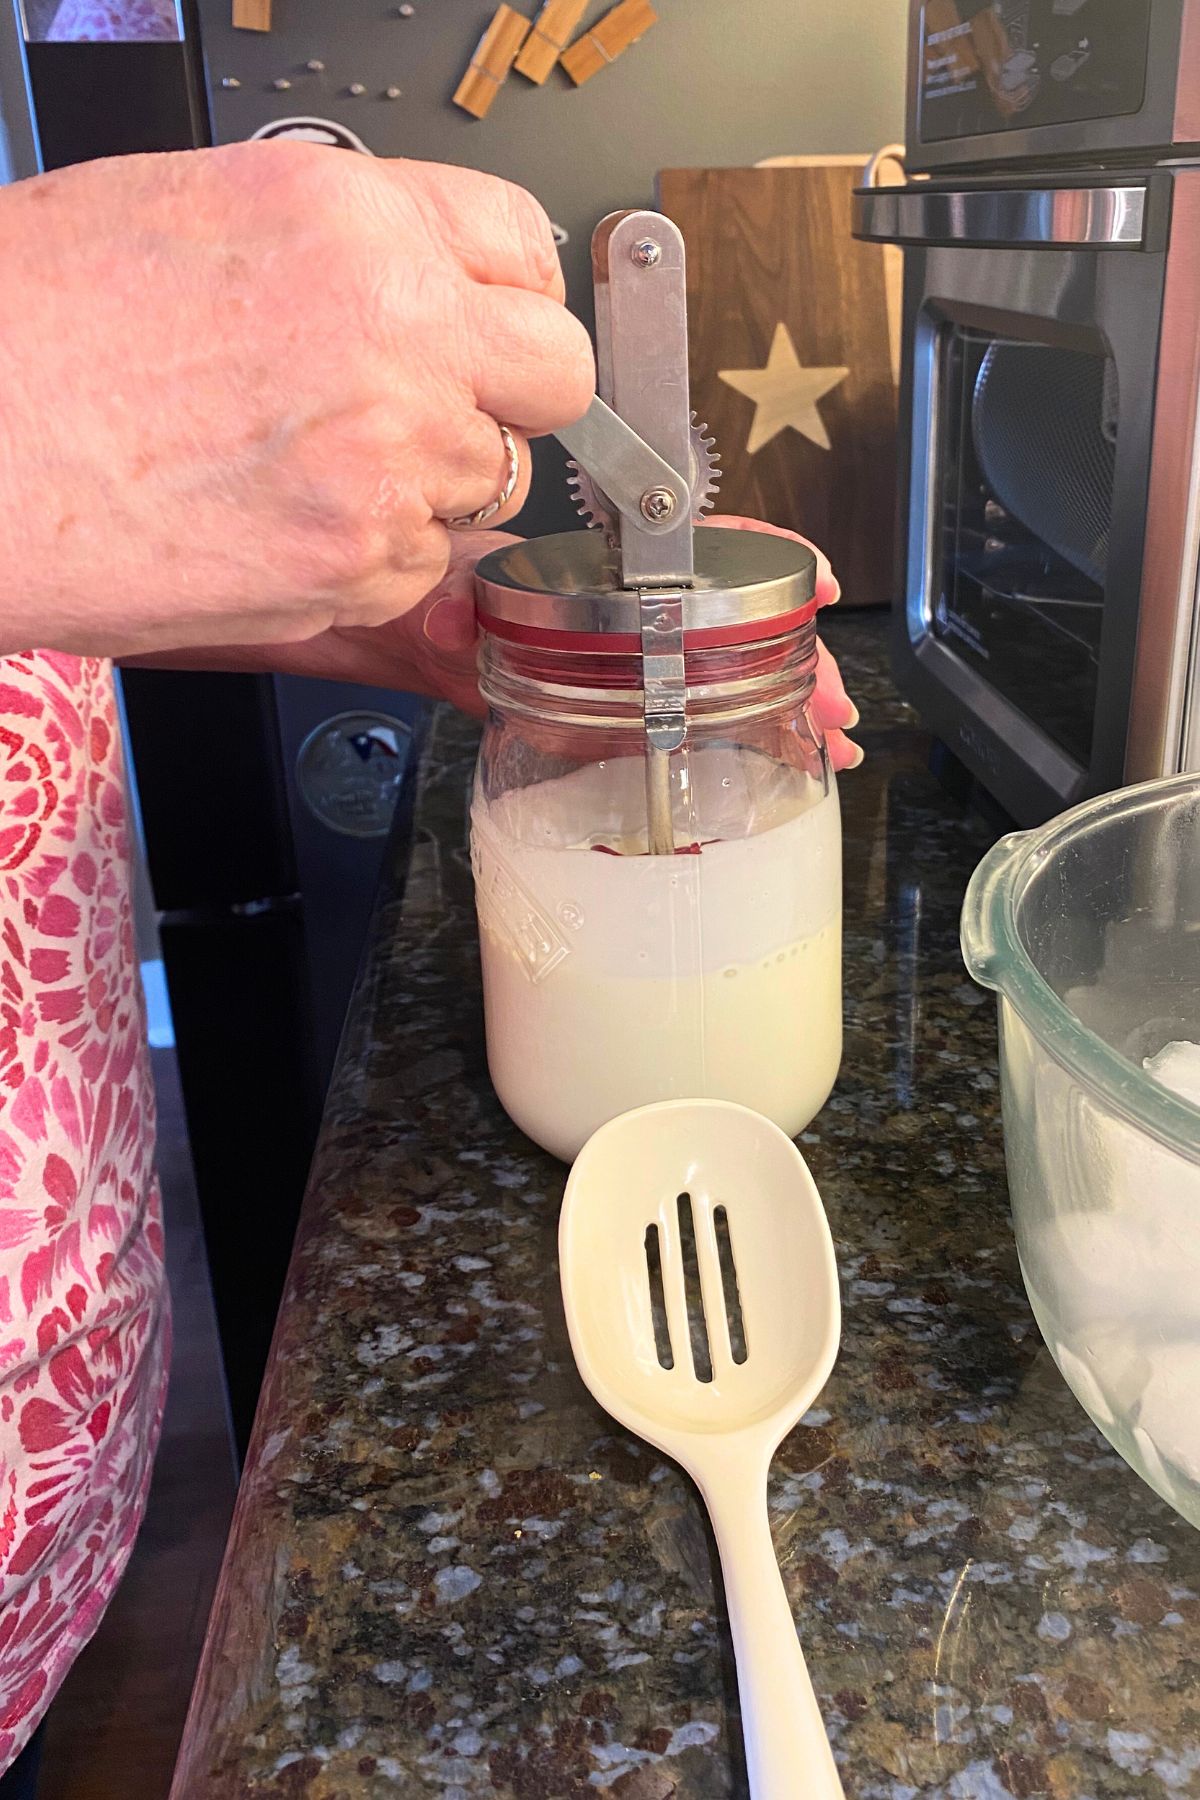
So we will be using heavy cream from the store right out of the carton instead. I also don’t know anyone with a real honest-to-goodness wooden churn so we’re going to substitute a jar. I do have a wonderful churn device which fits onto a mason jar. Using the churn is totally optional, but it is kind of fun.

Hand turning a small butter churn set on top of a mason jar
  • Fill the mason jar only about half full of the cream. This is so there is enough room for it to turn into first whipped cream and then lovely butter as your child shakes the jar or turns the crank.
  • Screw the lid on very tightly and start shaking or cranking. It will take about 15-20 minutes of energetic shaking or cranking for the butter to form. It will seem like nothing is happening and then there is a delightful thump when it suddenly turns into butter!
  • Drain off the liquid (the buttermilk … now you know why it’s called that!) You can drink it or use it in cooking.
  • Rinse the lump of butter in ice cold water and place in a bowl.
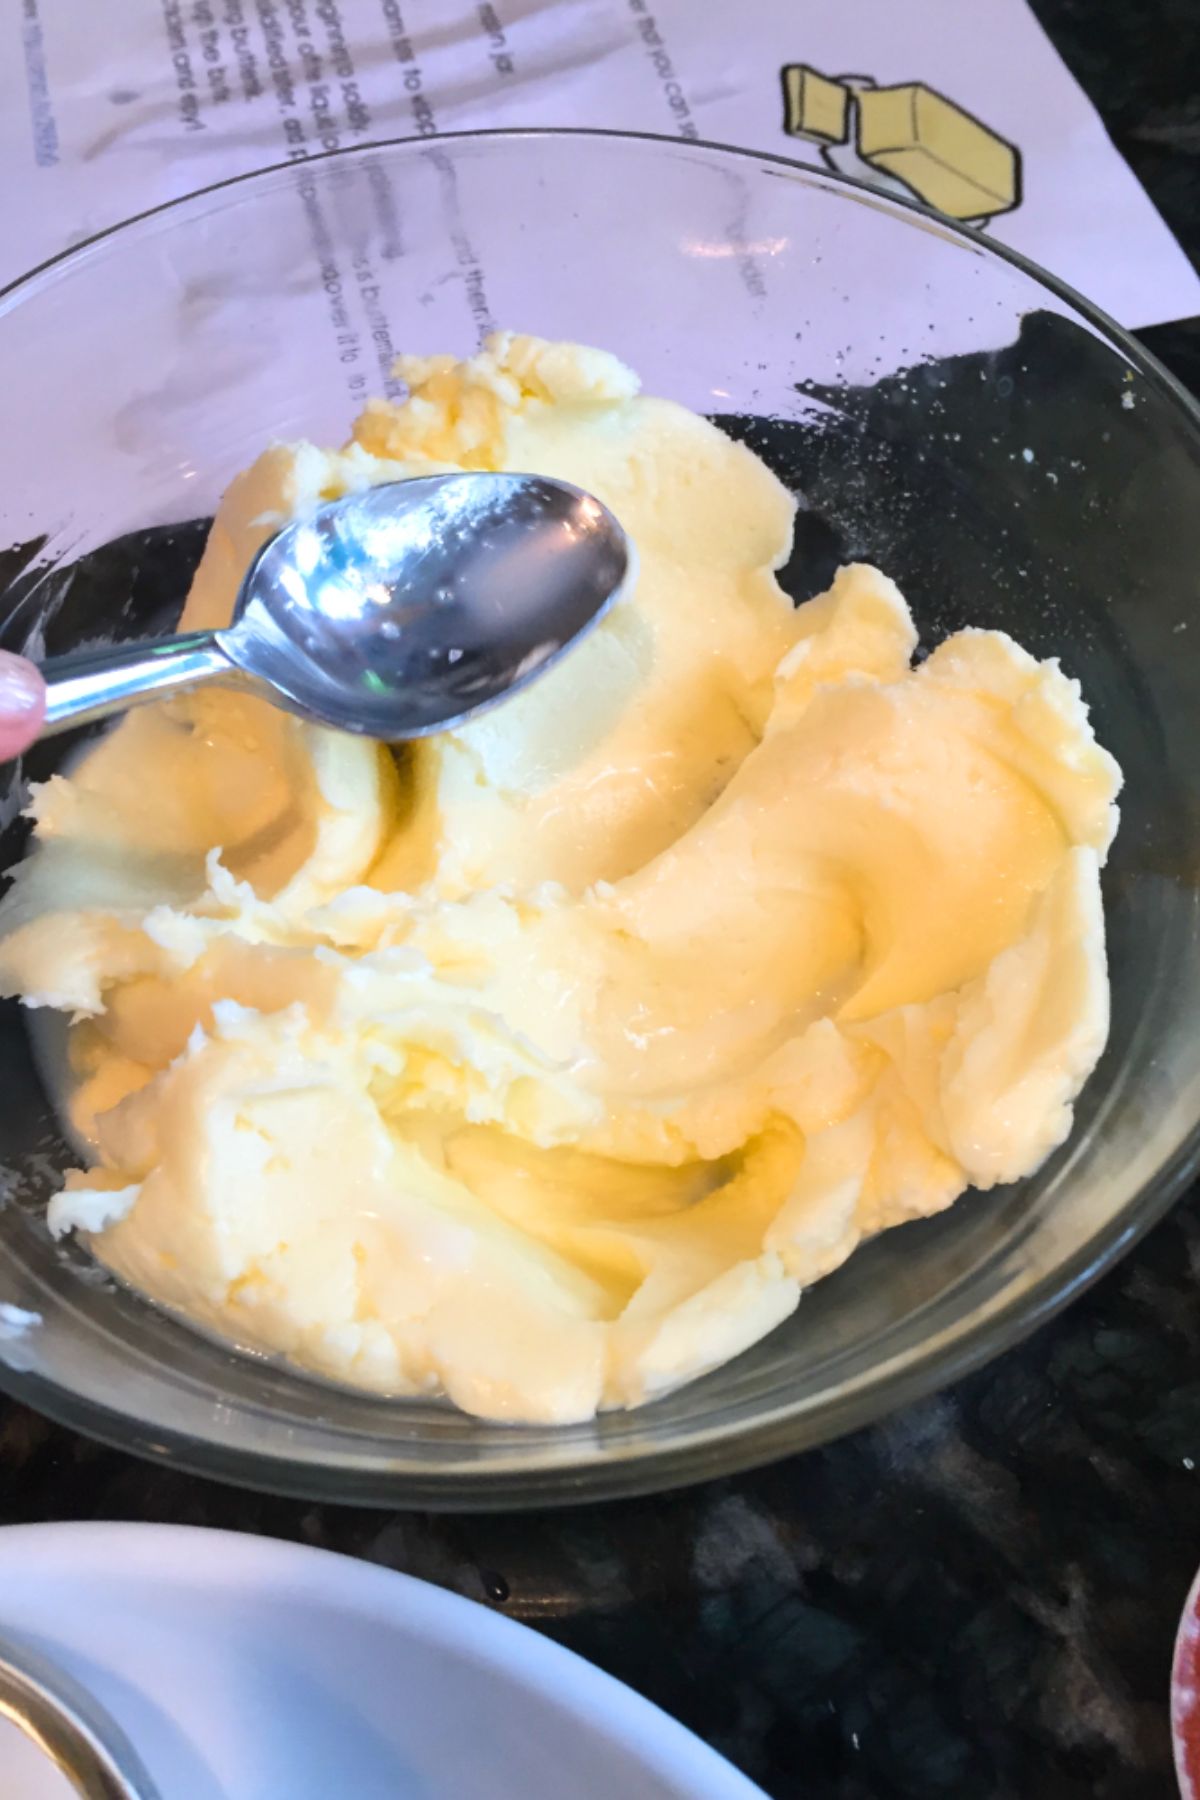
  • Add a pinch of salt and then use a slotted spatula or spoon to mash the butter. This helps release any extra buttermilk within the butter. If you leave it in it can cause the butter to go bad quickly. As fast as we eat it this has never been a problem, but if you aren’t going to eat it right away you need to be aware.
  • Rinse it one more time in ice water and store in a tightly sealed container in the refrigerator.
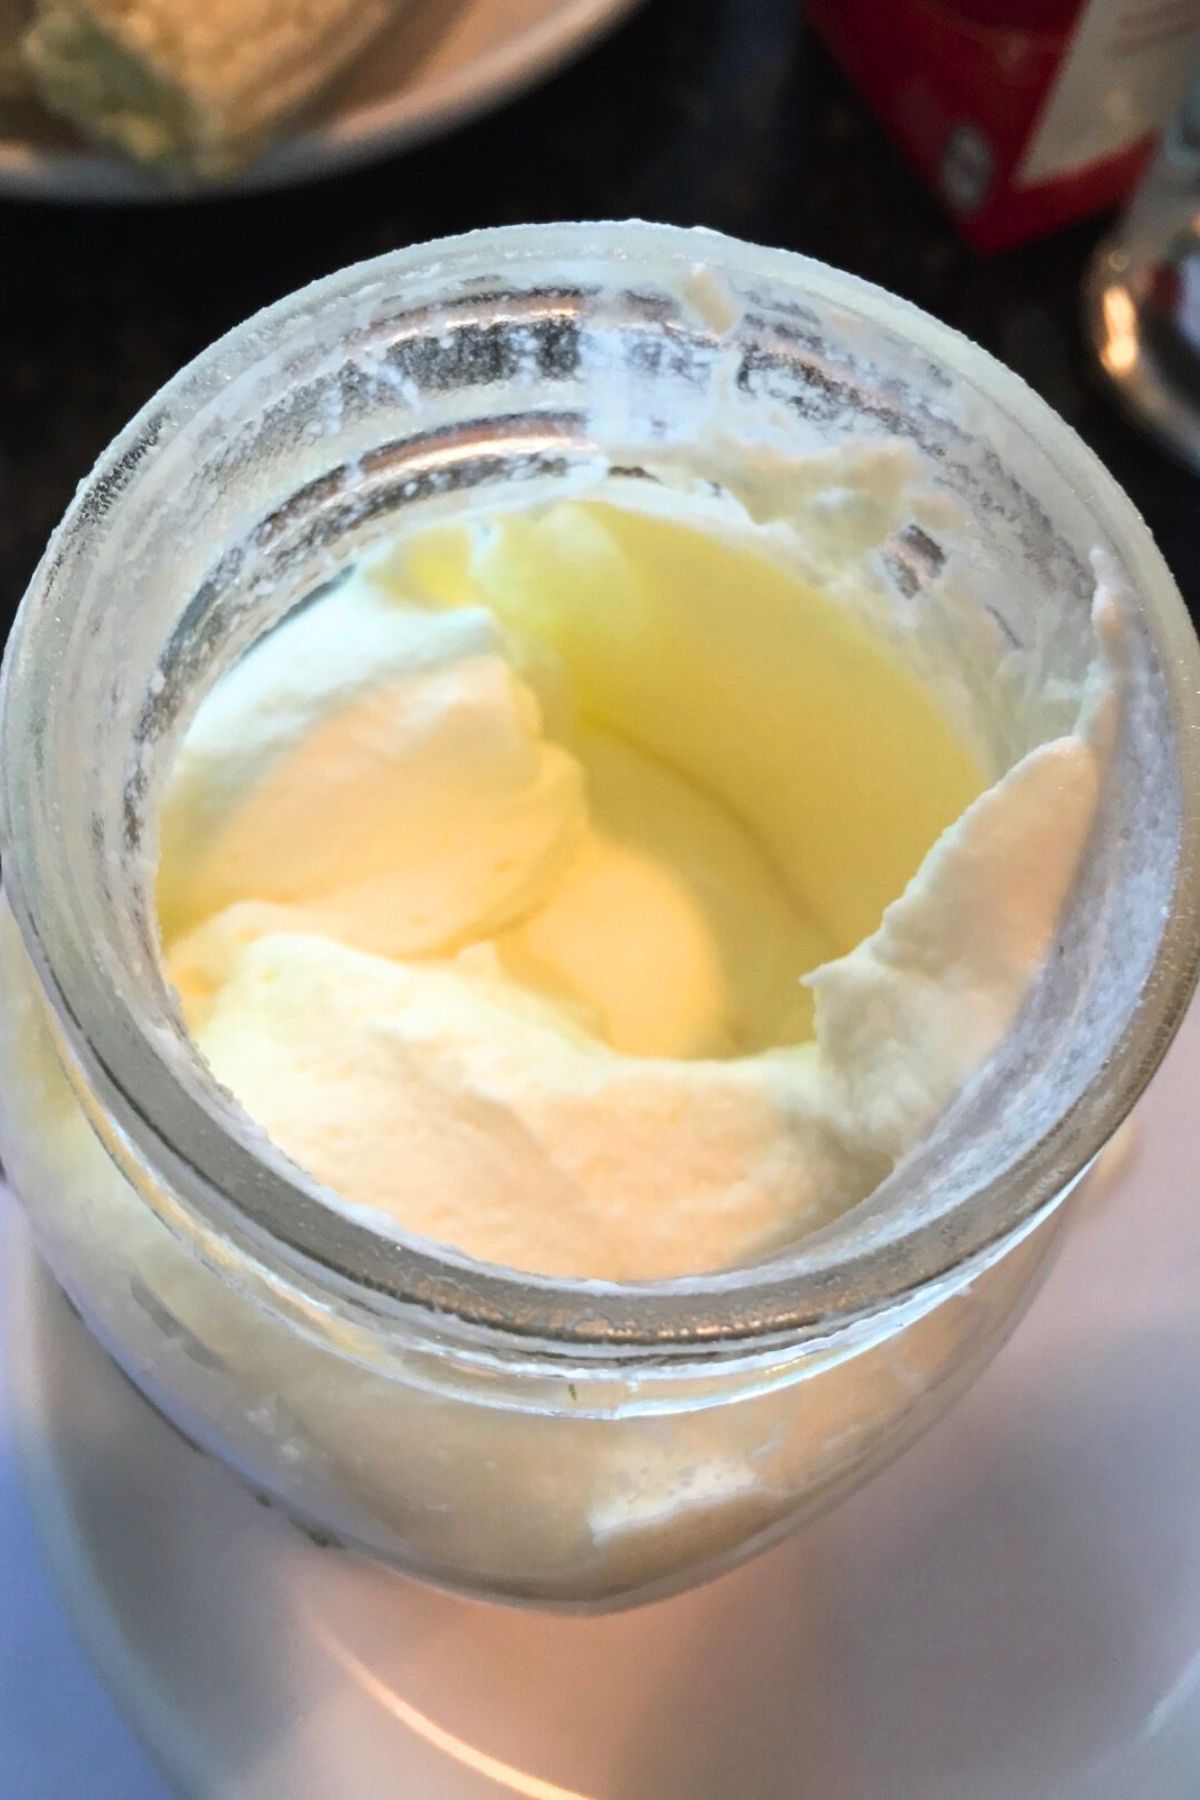
Freshly churned butter still in the glass jar

The first time I made this with kids they were upset the butter wasn’t the familiar yellow they were used to. My homesteader friends assure me that milk from the family cow who has been happily munching on good grasses will produce light yellow butter.

Seems like there is more beta-carotene stored in the milk fat than what is commercially produced today. I’m happy the bright yellow dye of my childhood isn’t used as much these days. (Artificial dyes in food is a soapbox for another time though!)

Finished butter on a glass plate

Want to grab a free printable instruction sheet for making your own sweet cream butter? Throw your email in the box below and the download will appear in your inbox:

How about some great homemade bread to go with that fresh butter?

Here is a bread maker recipe from our friends at A Modern Homestead that works every time I use it…which is about once a week!

  • Great Bread Machine Bread

Looking for some other fun Fall activities? Check these out:

  • Thanksgiving Thankful Door
  • Make a Veggie Turkey Platter
  • Fall Owl Craft
  • Thanksgiving Printables for Kids
  • Our Favorite Cyber Monday Buys

PIN THIS FOR LATER

September 29, 2024 13 comments
0 FacebookTwitterPinterestPocketThreadsBlueskyEmail
Box of 64 crayons with a few crayons laying in front of it on a wooden table
beginning soundscolorsearly literacyword buildingwriting

Teach Early Reader Skills with Crayons!

by Teach Mama September 29, 2024
written by Teach Mama

Learning to read is one of the most important milestones in a child’s life, and as parents or educators, we want to make that process as engaging and enjoyable as possible. One of the simplest yet most effective tools you can use to teach early reader skills is something you likely already have at home—crayons!

Crayons aren’t just for coloring; they can be a powerful resource for teaching reading skills in a fun, hands-on way. In this post, I’ll share how you can use crayons to enhance your child’s reading journey, drawing from my own experiences as a homeschool mom.

Using Crayons to Help Teach Reading Skills to Early Readers

Why Crayons Are Perfect for Early Readers

Crayons are more than just colorful sticks of wax. They are tactile, easy to hold, and come in a variety of vibrant colors that naturally draw children’s attention. The act of holding a crayon and applying it to paper helps develop fine motor skills, which are crucial for writing. But beyond that, crayons can make learning to read an interactive and creative experience.

Tip 1: Color-Coding Words for Visual Learning

One of the first things you can do with crayons is to color-code words. Children often struggle with recognizing different parts of a word, especially in the early stages of reading. By using crayons, you can help them visually separate letters, sounds, and syllables.

For example, if you’re teaching your child to read the word “cat,” you can have them write the word with a crayon. Then, use a different color to underline the “c,” “a,” and “t” separately. This method not only reinforces the individual sounds each letter makes but also helps them see how those sounds come together to form a word.

My son, for instance, loved using red for consonants and blue for vowels. It was a simple system, but it worked wonders in helping him recognize and remember different sounds.

Tip 2: Making Sight Words Stick with Crayon Art

Sight words are a cornerstone of early reading. These are common words like “the,” “and,” or “is” that children need to recognize by sight rather than by sounding them out. Crayons can be a fantastic way to help these words stick in your child’s memory.

One activity we enjoyed was creating “sight word art.” I would write a sight word on a piece of paper, and then my son would use crayons to decorate around the word. He’d draw pictures that related to the word or just color the letters in fun, creative ways. The key was repetition—each time he saw the word, it became more familiar, and associating it with something fun made it easier to remember.

Tip 3: Building Vocabulary with a Crayon Word Wall

A word wall is another great way to use crayons to build reading skills. Choose a wall or a section of a wall in your home, and dedicate it to words your child is learning. Write each word on a piece of paper with a crayon, and let your child help you put it up on the wall.

To make it even more engaging, you can color-code the words based on categories like nouns, verbs, or adjectives, or even by difficulty level. Every time your child learns a new word, they can add it to the wall. Over time, they’ll have a visual representation of all the words they’ve mastered.

In our home, we had a “rainbow word wall,” where each category of words was a different color of the rainbow. It was a simple idea, but it brought so much joy and pride to my son as he saw his vocabulary grow.

Tip 4: Encouraging Creativity Through Crayon Storytelling

Reading and storytelling go hand-in-hand. Encouraging your child to tell their own stories using crayons can be a powerful way to develop their reading skills. Give them a simple prompt, like “draw a picture of a dog going on an adventure,” and then ask them to tell you the story behind the picture.

As they describe the picture, write down their words using crayons, allowing them to see the connection between spoken and written language. You can even work together to add labels or captions to their drawings, reinforcing the words they’re learning.

When my son was younger, we created an entire book of “crayon stories,” each page featuring one of his drawings and a short story he dictated to me. It was a wonderful way to blend creativity with reading practice.

The Bottom Line

Using crayons to teach reading skills is a simple, affordable, and effective method that makes learning to read a creative and enjoyable experience. By incorporating crayons into your early reading activities, you can help your child develop a love for reading while also strengthening their understanding of letters, sounds, and words.

Remember, the goal isn’t just to teach your child to read, but to help them fall in love with reading. Crayons, with their endless possibilities for fun and creativity, can play a big role in that journey. So grab a box of crayons, and let the learning begin!

Other Ways to Help and Encourage Young Readers:

  • Important Early Literacy Terms That Every Parent Needs to Know
  • Tips for Helping Early Readers
  • Reading Assessments for Reading Success

PIN THIS FOR LATER

September 29, 2024 2 comments
0 FacebookTwitterPinterestPocketThreadsBlueskyEmail
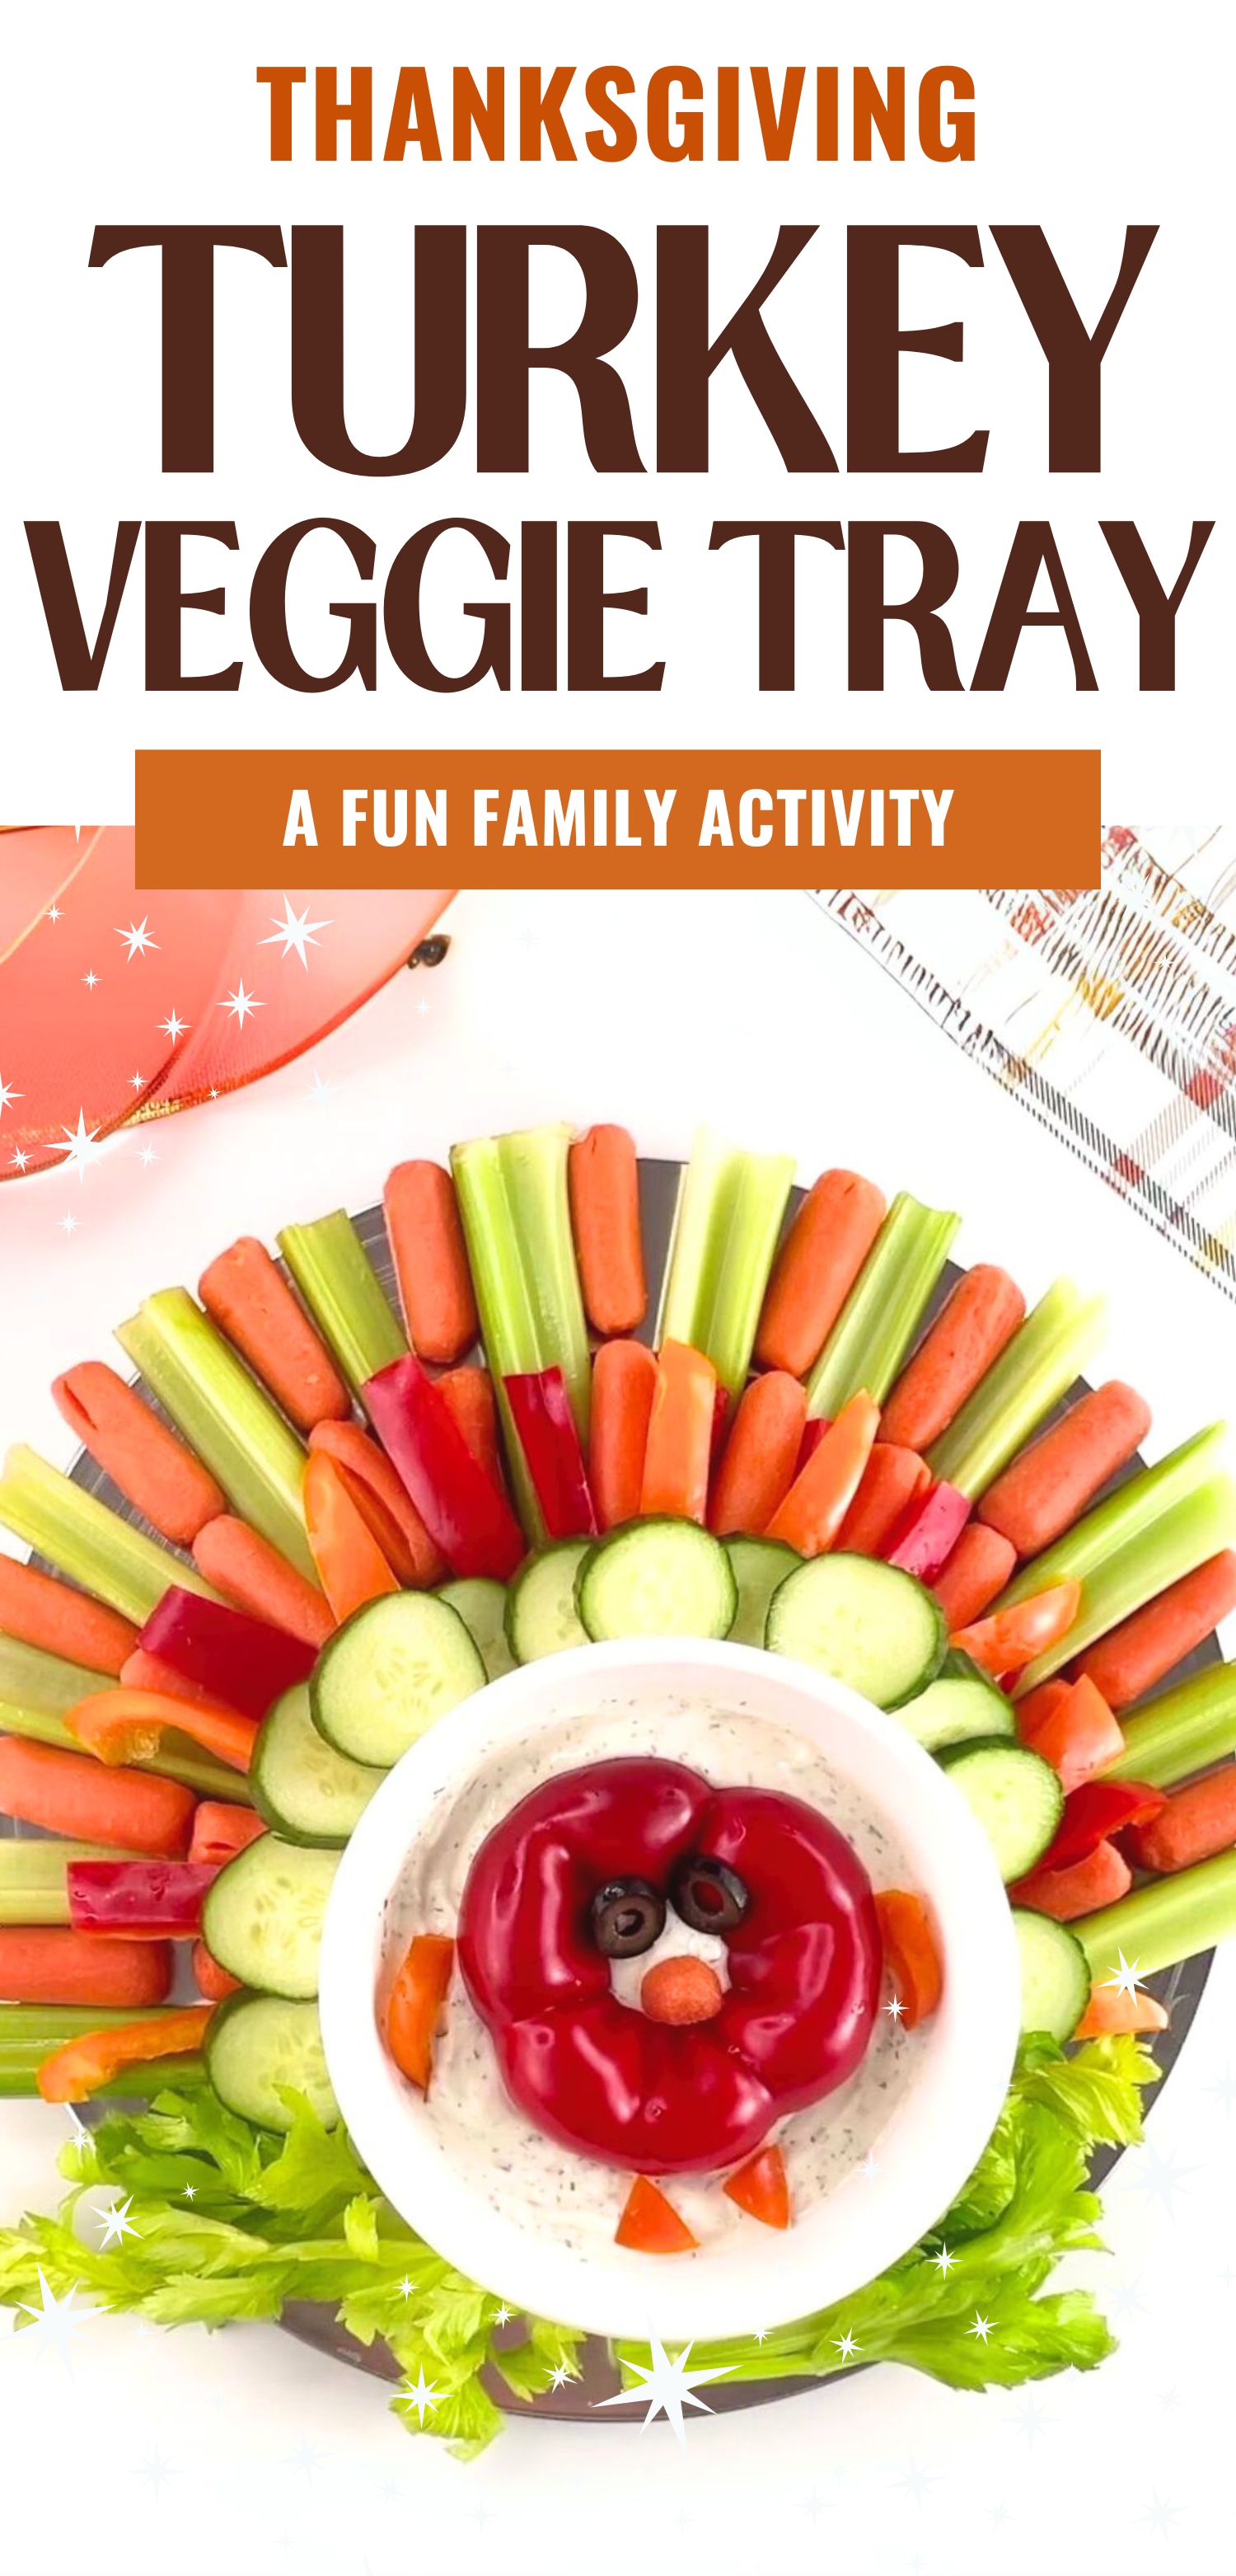
finished turkey veggie platter tray
Activitiescookingfamily funfamily lifeholidaysthanksgiving

Fun Thanksgiving Turkey Veggie Tray

by Teach Mama September 29, 2024
written by Teach Mama

Looking to make Thanksgiving dinner fun and festive for your little ones? This veggie turkey platter is not only a healthy addition to the table but also a creative activity your kids will love! With a few simple veggies, you can turn your appetizer tray into a turkey that’s kid-approved and dinner-ready!

Thanksgiving dinner is all about family, and what better way to involve your kids than with a fun veggie turkey project? This easy Thanksgiving craft doubles as a healthy dish, bringing creativity and fresh flavors to the table. No more boring vegetable trays—let’s make a veggie turkey that will impress everyone!

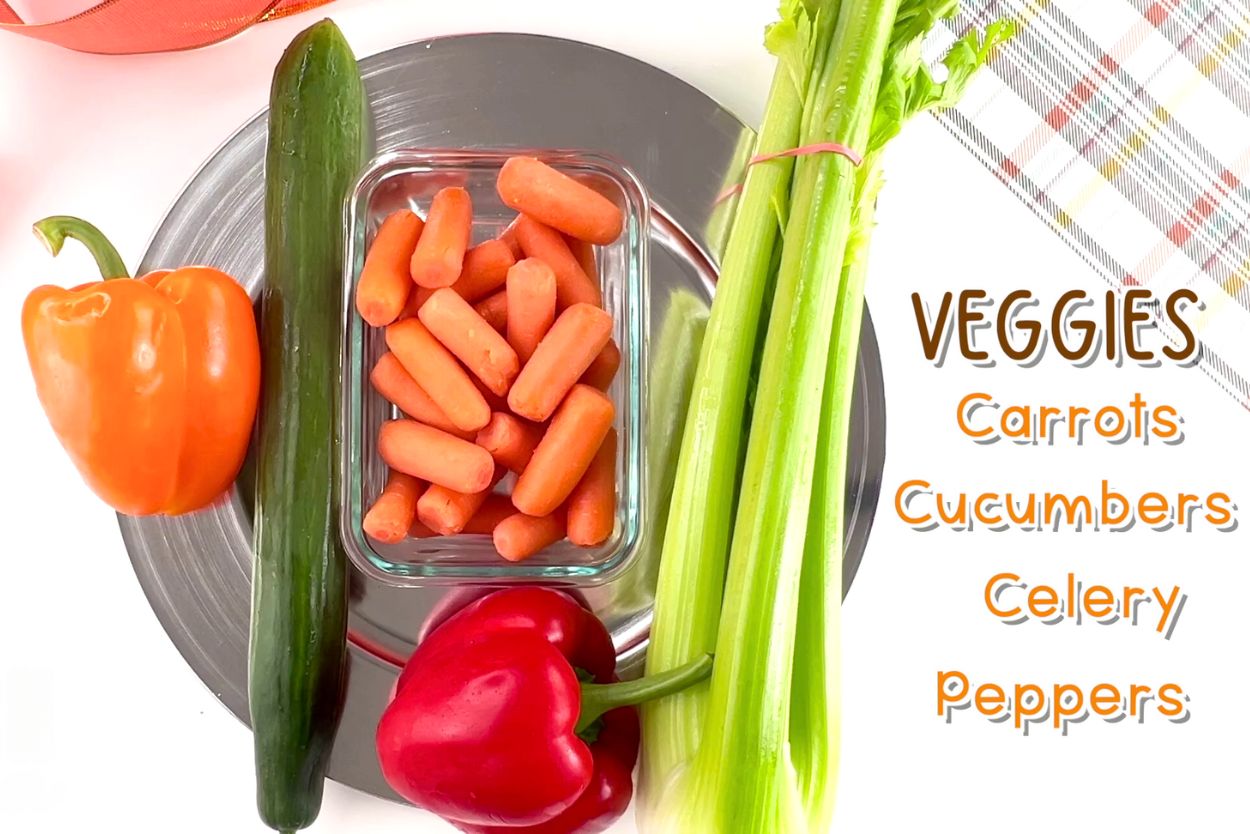
vegetables needed to make a turkey veggie platter tray, including carrots, cucumbers, celery, and peppers

How to Make a Turkey Veggie Platter

The process of making this turkey veggie platter couldn’t be easier! It’s an adorable activity for the whole family that literally turns into something good to eat!

Here is a quick video of the process, from making the dip to arranging the veggies! Check it out and you’ll be ready to make your own turkey veggie tray in no time!

Turkey Veggie Tray Video

[adthrive-in-post-video-player video-id=”vVHpCJ3Q” upload-date=”2024-10-10T00:17:20+00:00″ name=”Easy Turkey Veggie Tray” description=”” player-type=”default” override-embed=”default”]

Step 1: Gather Your Ingredients

Get ready to build your turkey! Start with these simple, healthy ingredients for a colorful and creative platter.

  • Cucumber – Leave the peels on for a nice contrast on the tray.
  • Carrots – Baby carrots are easy to use, but you can also grab whole carrots and slice them!
  • Celery – Use the stalks for the platter and the leaves for the grass under the turkey!
  • Bell pepper – Grab several different colors, but use red for the turkey face for the best contrast against the dip.
  • Black Olives – These are optional, but they make super cute turkey eyes!
  • Ranch Dip – We use this easy Ranch Dip that can be made without sour cream and is literally SO delicious!
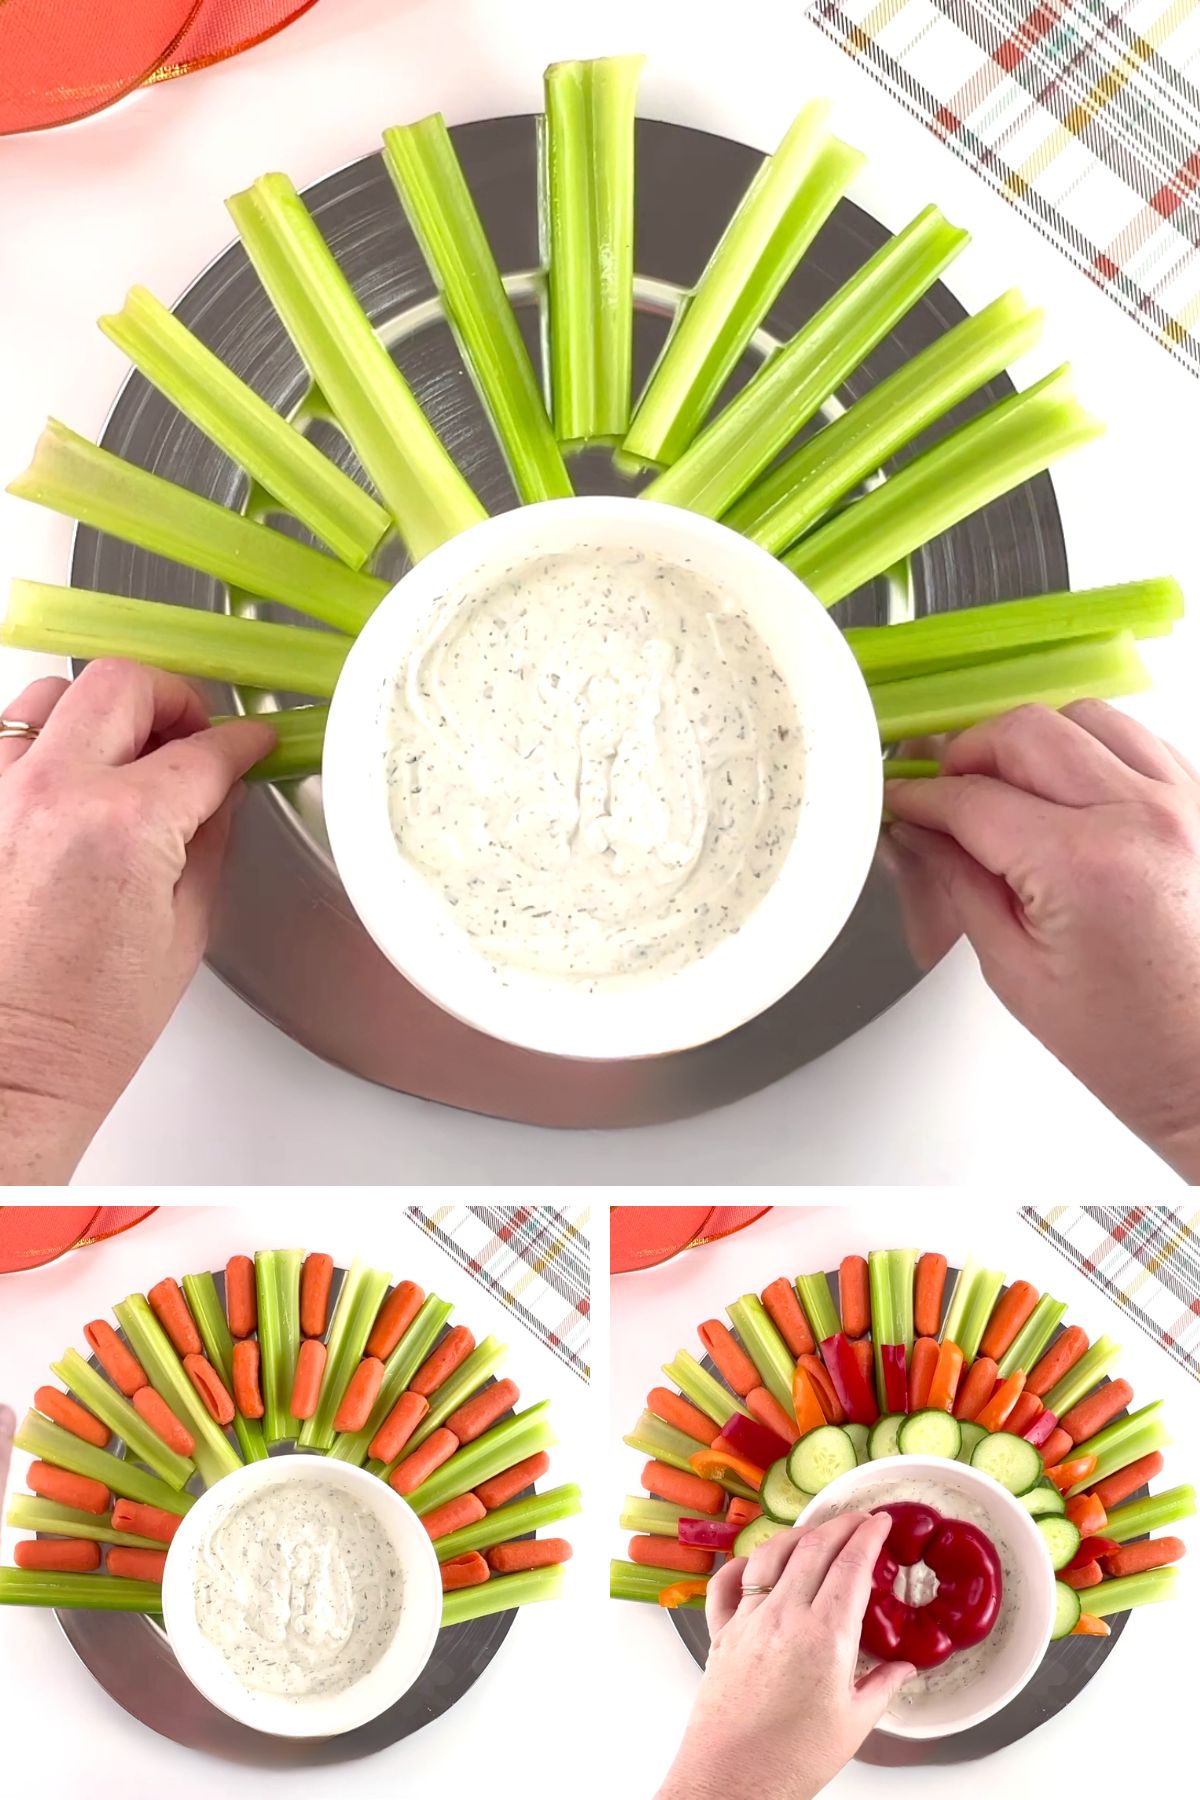
3 image collage of arranging the dip and veggies to make a turkey tray for thanksgiving

Step 2: Start Building the Turkey

Now comes the fun part—assembling your turkey! Let your kids take the lead as they piece together the veggie turkey on a festive tray. It’s like painting, but with food!

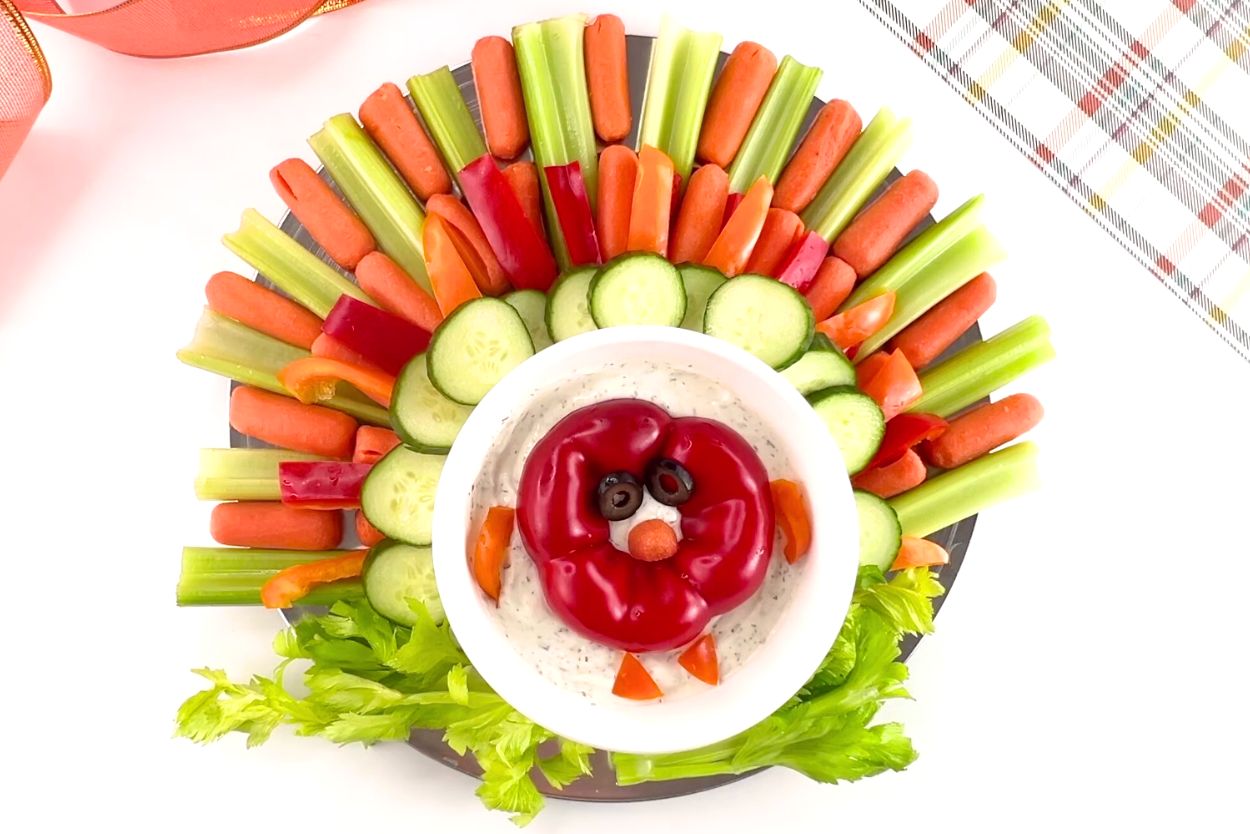
First, thoroughly wash all of the veggies. I like to use a vegetable scrubber on the carrots rather than peel them but suit yourself! Then quarter one pepper and or ring-slice the rest, slice the carrots into strips lengthwise for feathers and separate the broccoli florets.

I like to let the kids cut the eyes, beak, wattle and feet…under close supervision, of course! Then you build your turkey!

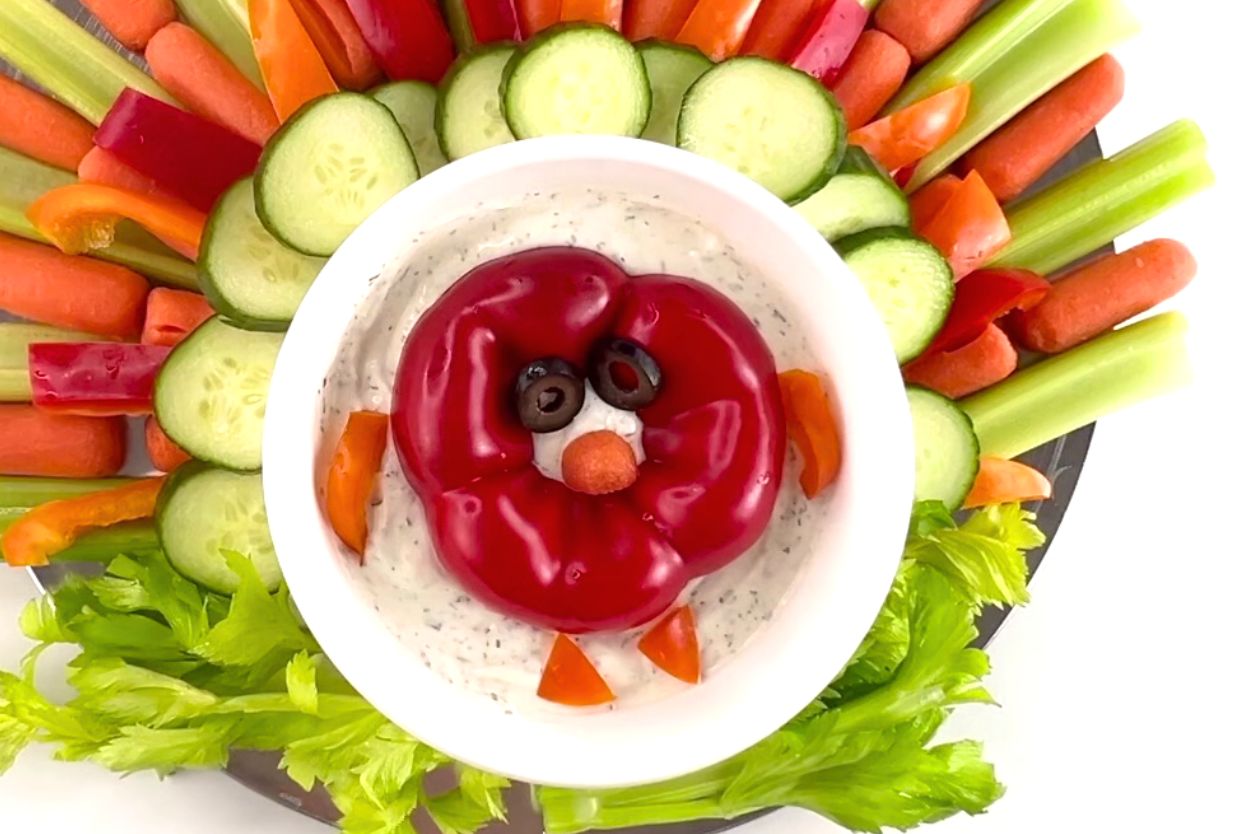
close-up of the turkey face made of bell peppers, carrots, and olives
  1. Create the body: Place the quartered yellow pepper in the center of the tray.
  2. Add the face: Stick mini cucumber wedges into the pepper for eyes and place the orange pepper triangle as the beak.
  3. Form the feathers: Arrange carrot sticks, bell peppers, and tomatoes behind the body like a fan, creating a colorful display.
  4. Complete the details: Use orange peppers for the feet and red pepper for the turkey’s waddle. Add broccoli for grass and scatter pepper and tomato “flowers” for a finishing touch.
The finished turkey veggie tray made from celery, carrots, bell pepper, cucumbers, surrounding a bowl of ranch dip.

Step 3: Let Your Kids Get Creative

The best part about this project is watching your kids use their imaginations! They can create patterns with the vegetables and choose their own favorite colors and textures. It’s a fun, hands-on way for them to contribute to the Thanksgiving spread while learning about healthy food choices.

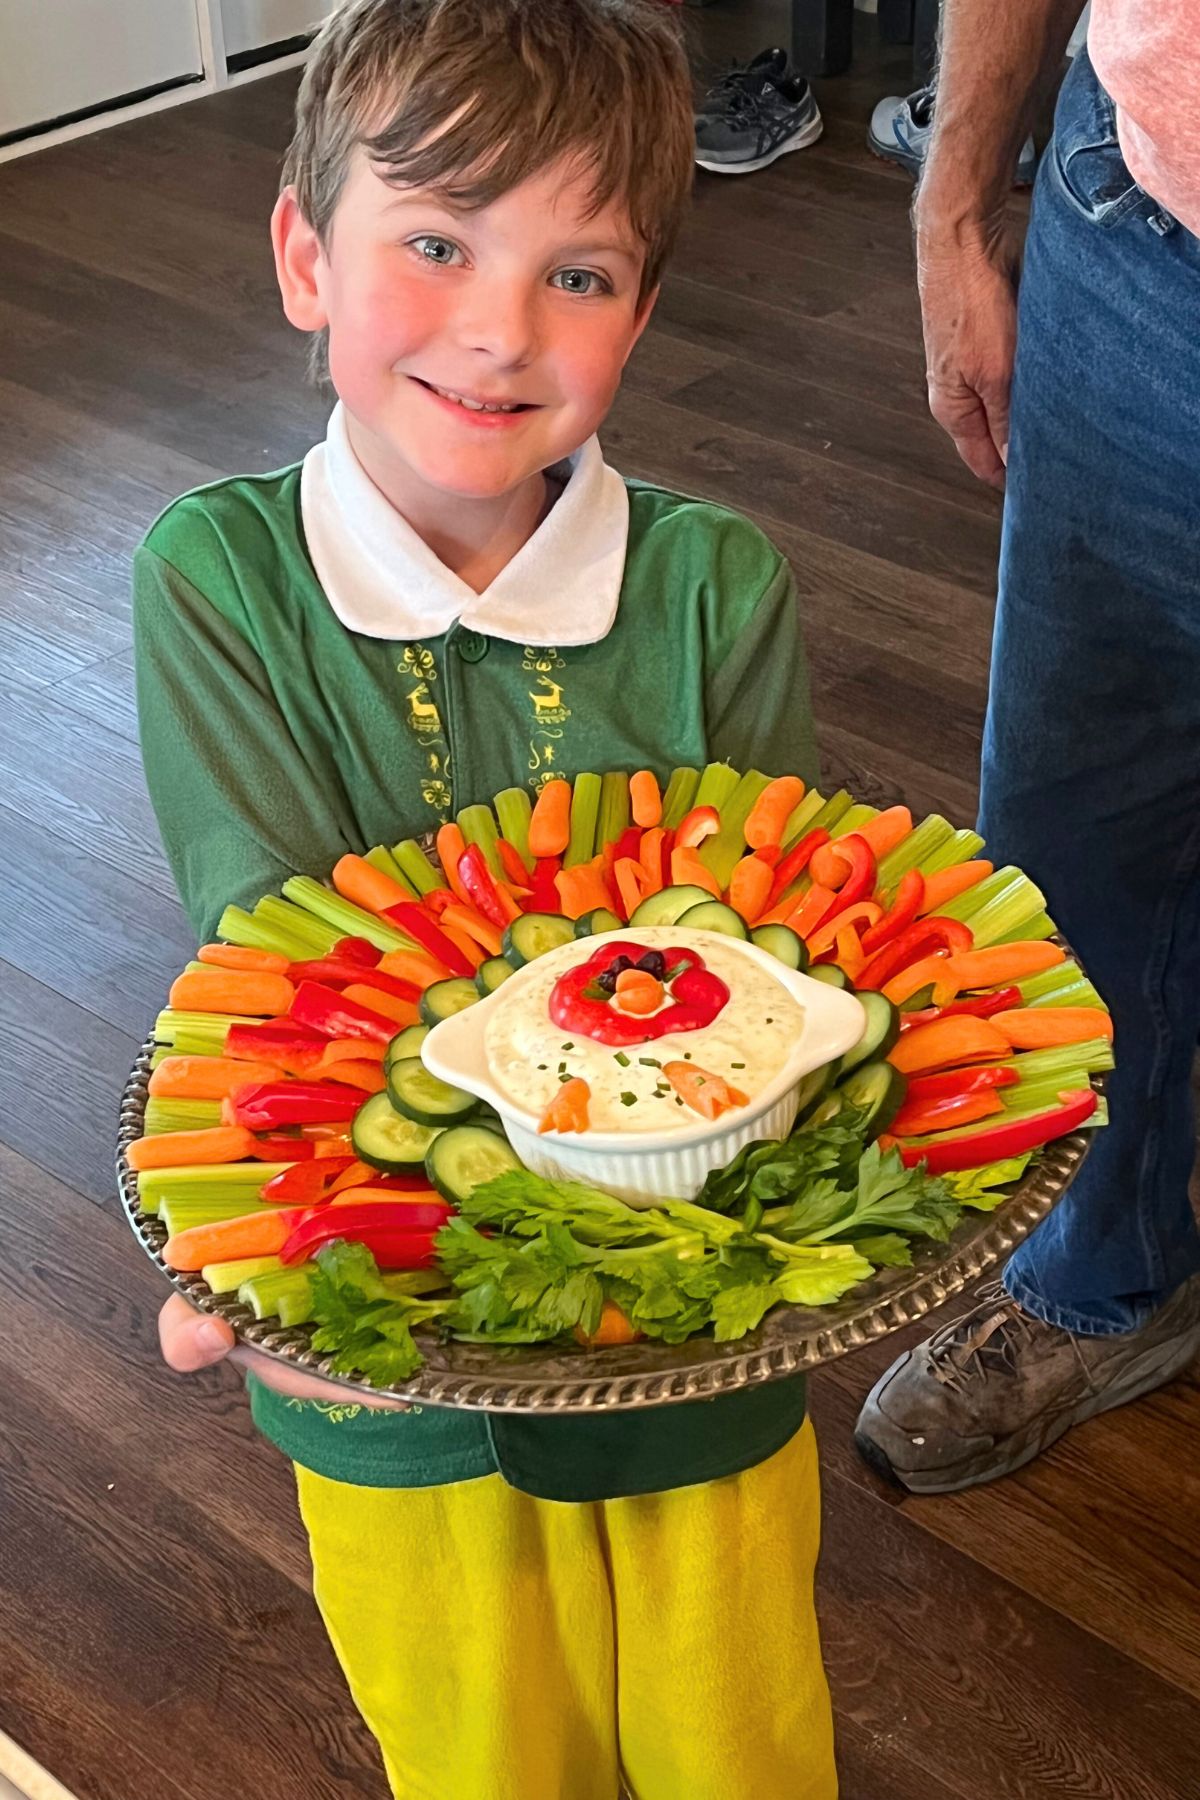
A year or two ago, our daughter and grandson made this beautiful veggie turkey!

A young boy dressed in an elf costume holding a veggie turkey platter

The Finished Turkey: A Colorful, Fun, and Healthy Centerpiece

Your veggie turkey is now complete, and it’s sure to be the star of the Thanksgiving appetizer table. The kids will be proud of their creation, and you’ll love serving a healthy, colorful dish that’s bursting with fresh vegetables.

Don’t forget to serve the dip on the side—our turkey was way too big to fit it on the same tray! (Delicious Ranch Dressing recipe below!)

Looking for some Thanksgiving Go-Withs?

Try These Delicious Side Dishes From Our Friends at A Modern Homestead!

  • Two-Minute Ranch Dressing
  • Homemade Jellied Cranberry Sauce
  • Homemade Dinner Rolls

More Awesome Thanksgiving Ideas

Looking for more fun ways to celebrate Thanksgiving with your family? Check out these favorites:

  • Thanksgiving Thankful Door
  • Make Your Own Butter – Holiday Science and Fun for the Kids
  • Fall Owl Craft
  • Thanksgiving Printables for Kids
  • Our Favorite Cyber Monday Buys

PIN THIS FOR LATER

Closeup image of the finished turkey veggie tray with a text overlay that says thanksgiving turkey veggie tray a fun family activity
September 29, 2024 2 comments
0 FacebookTwitterPinterestPocketThreadsBlueskyEmail
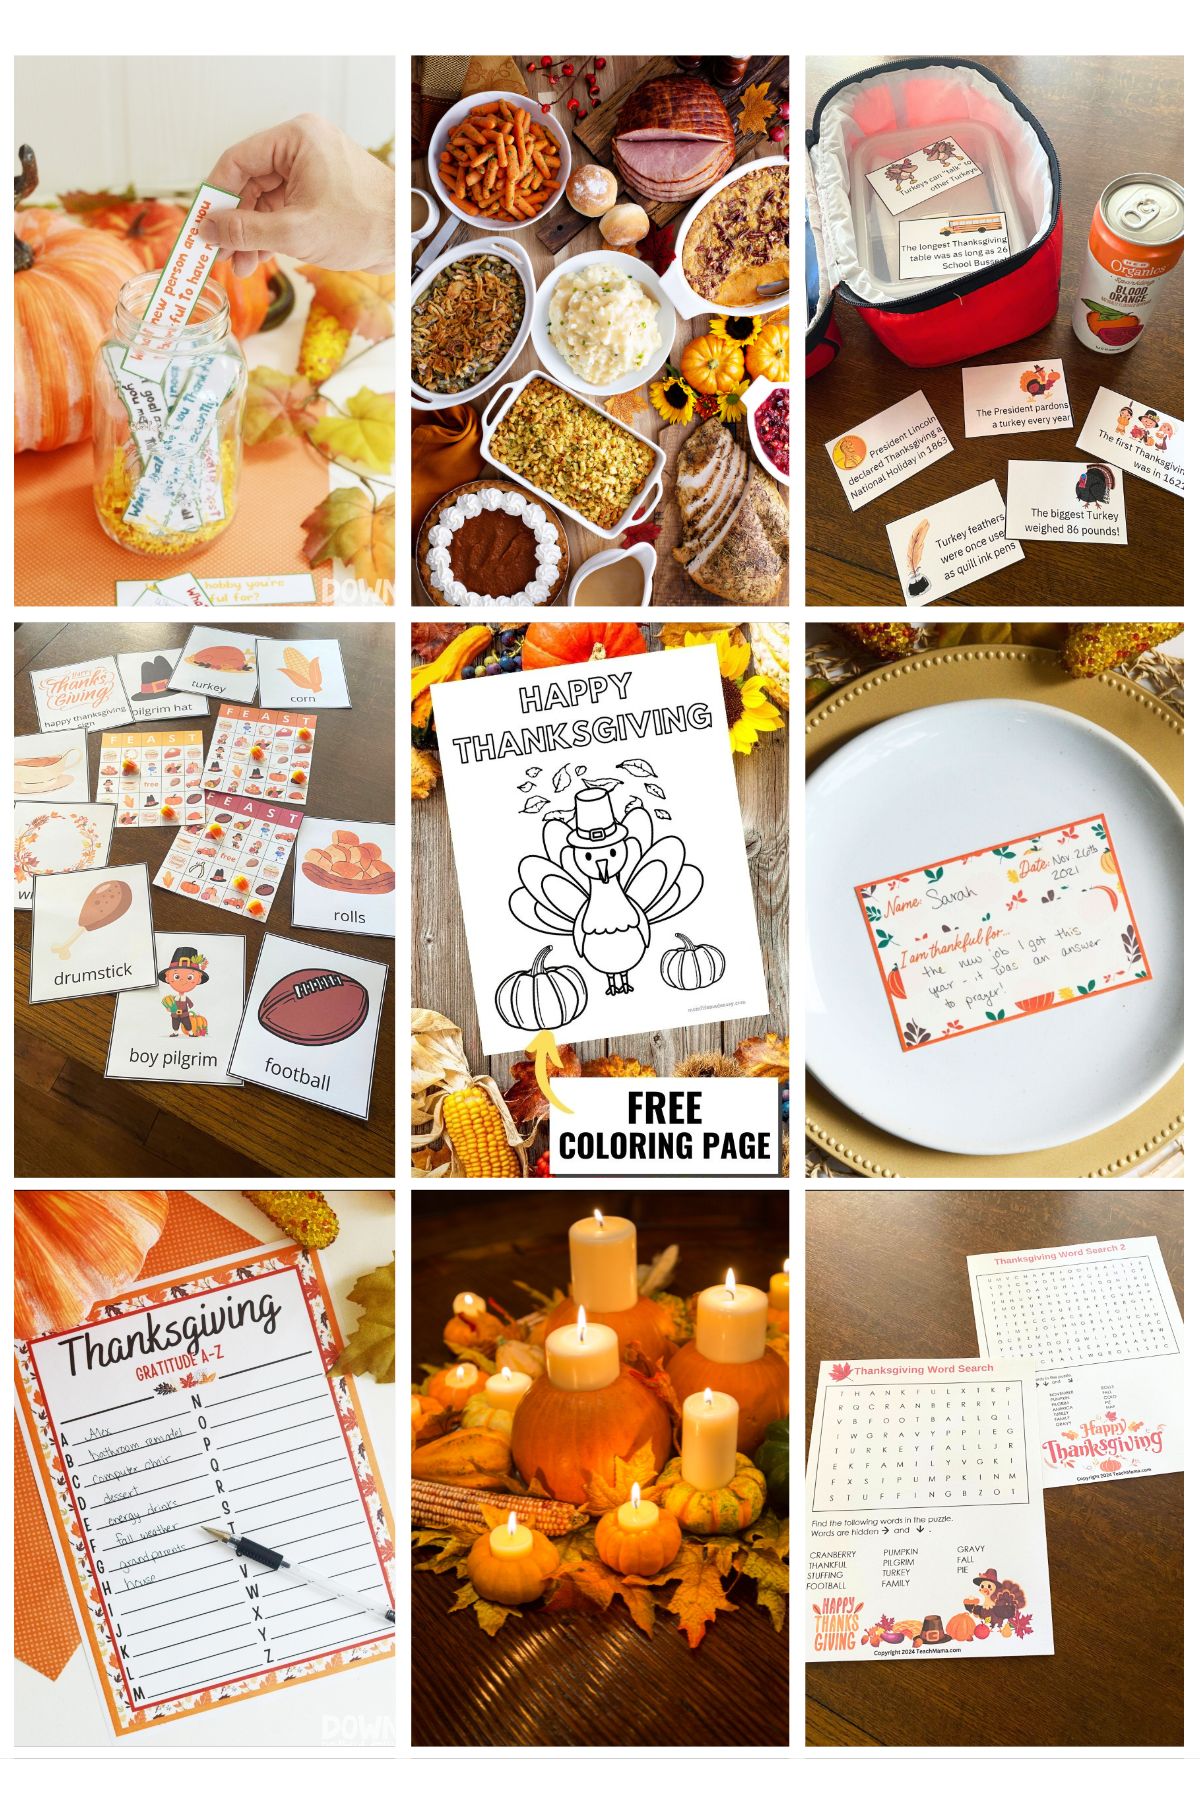
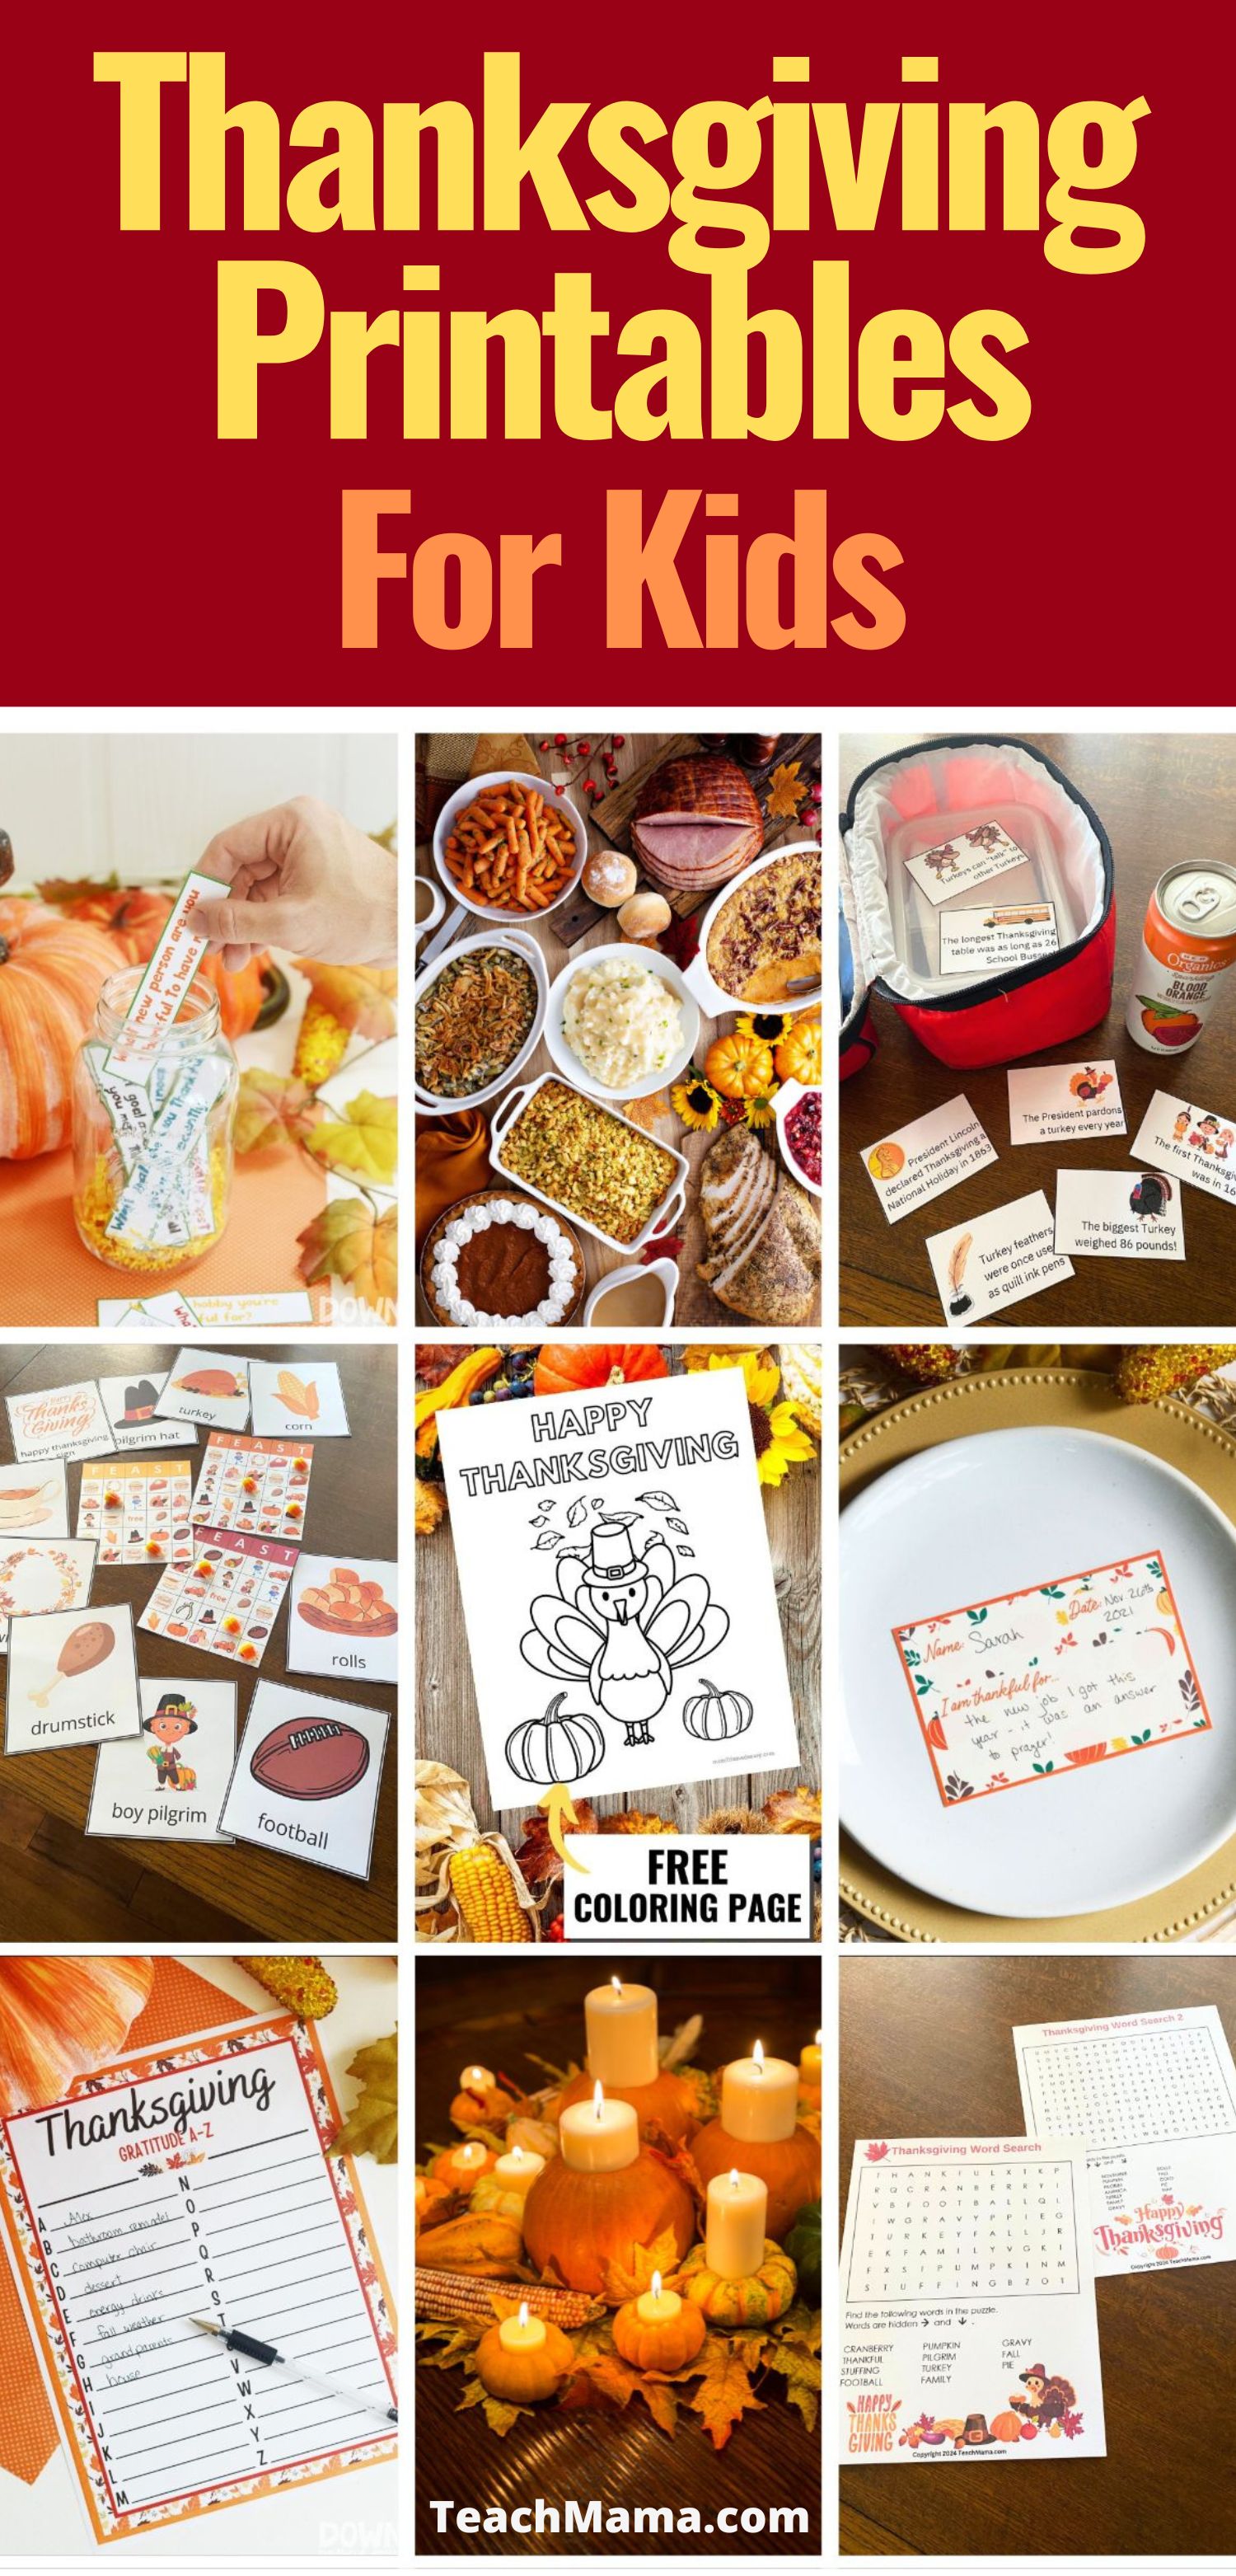
9 square grid with images of Thanksgiving printables
Activitiesholidaysthanksgiving

Our Favorite Thanksgiving Printables for Kids!

by Teach Mama September 29, 2024
written by Teach Mama

Looking for fun and creative Thanksgiving printables to keep your kids entertained? These Thanksgiving activities will engage and entertain your kids while giving them some much-needed downtime (and maybe you a little peace and quiet!). From conversation starters to fun puzzles, these printables will make Thanksgiving even more special!

We love swinging into the holiday spirit and what could be better than these fun and colorful Thanksgiving printables?

Easy and Engaging Thanksgiving Printables for Kids

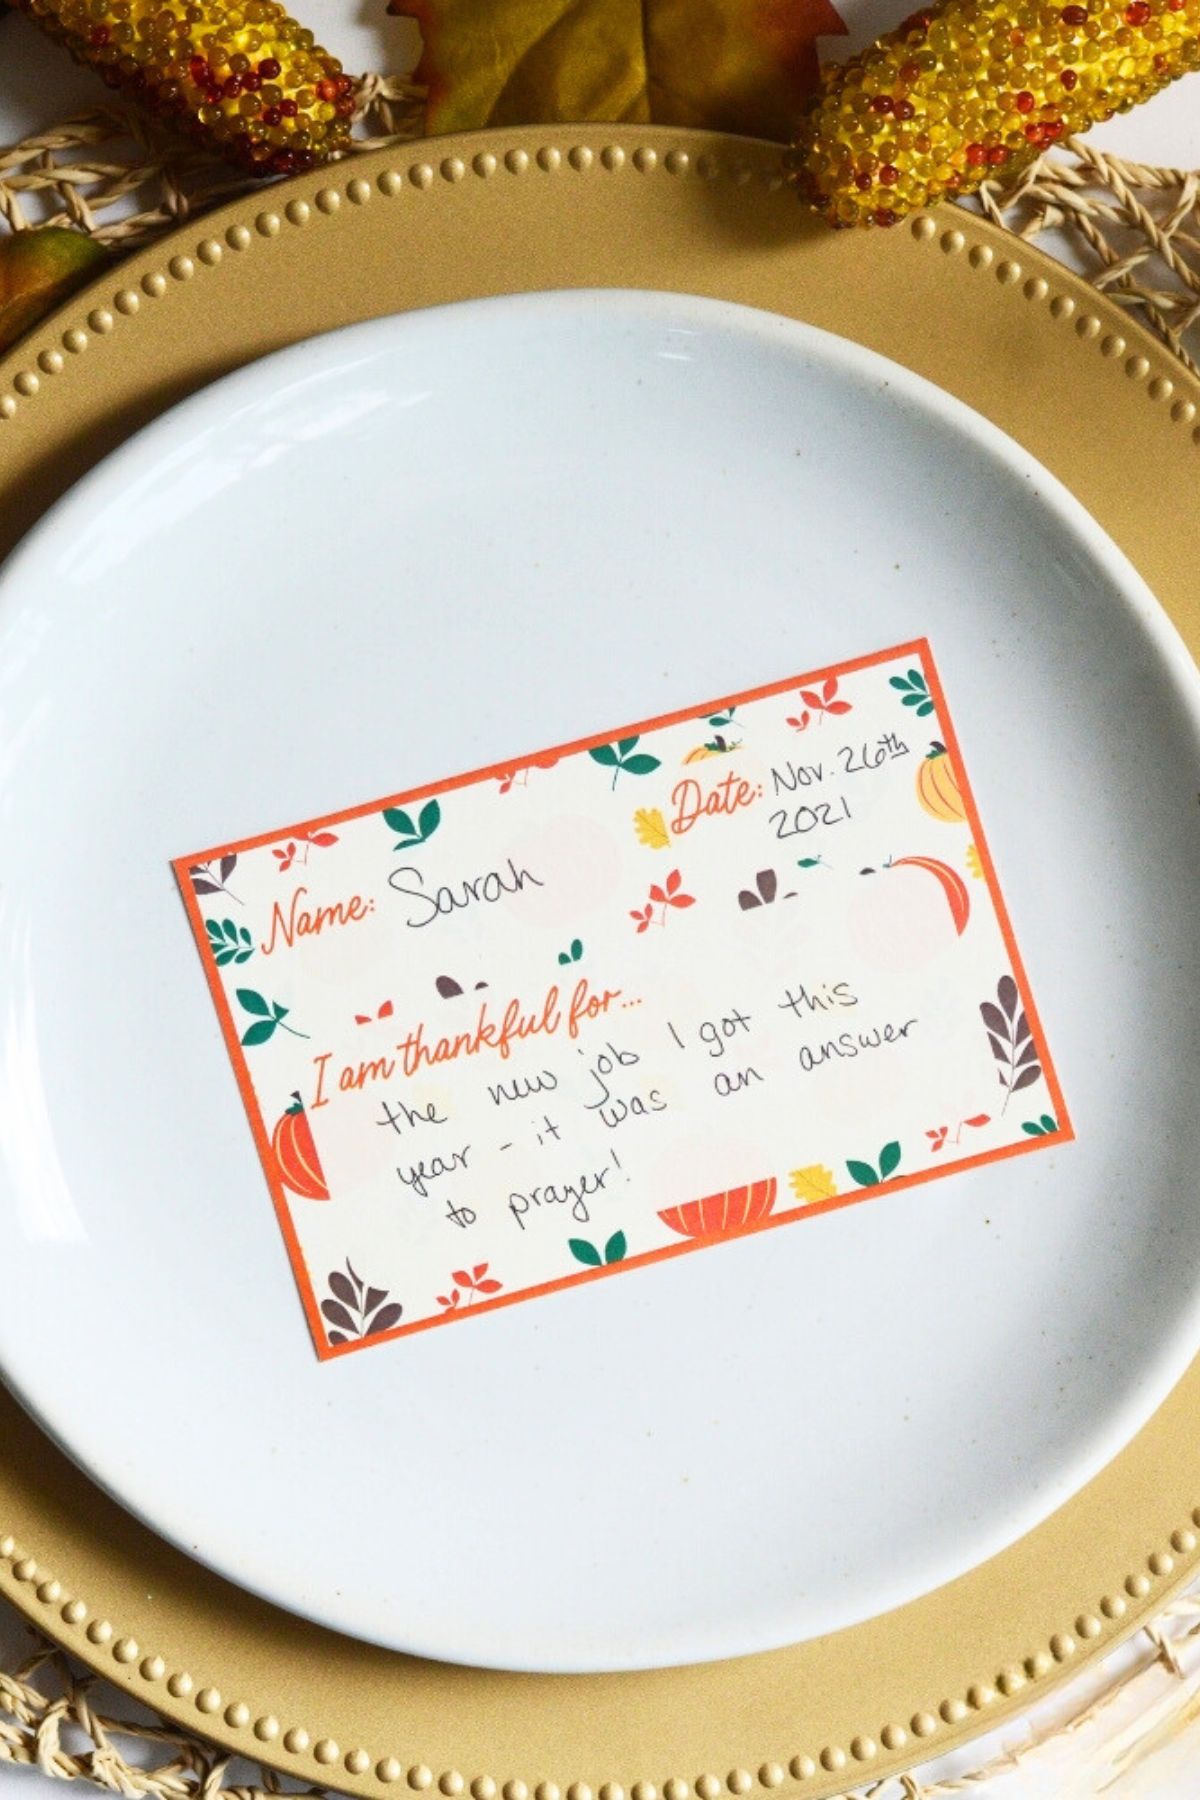
Printed place card on a gold-rimmed plate with a space for name, date and what the person is thankful for

1. Printable Thanksgiving Thankful Place Cards from Down Redbud Drive

Use these Thanksgiving Thankful Place Cards this year to put the focus on what you’re thankful for at the dinner table! This Thanksgiving don’t take your get-together for granted! Family is so precious, and I have always loved Thanksgiving for that.

Make something this year that you can all fill out, and then look back on. This is such a simple way to have written memories of friends and family that you can cherish forever.

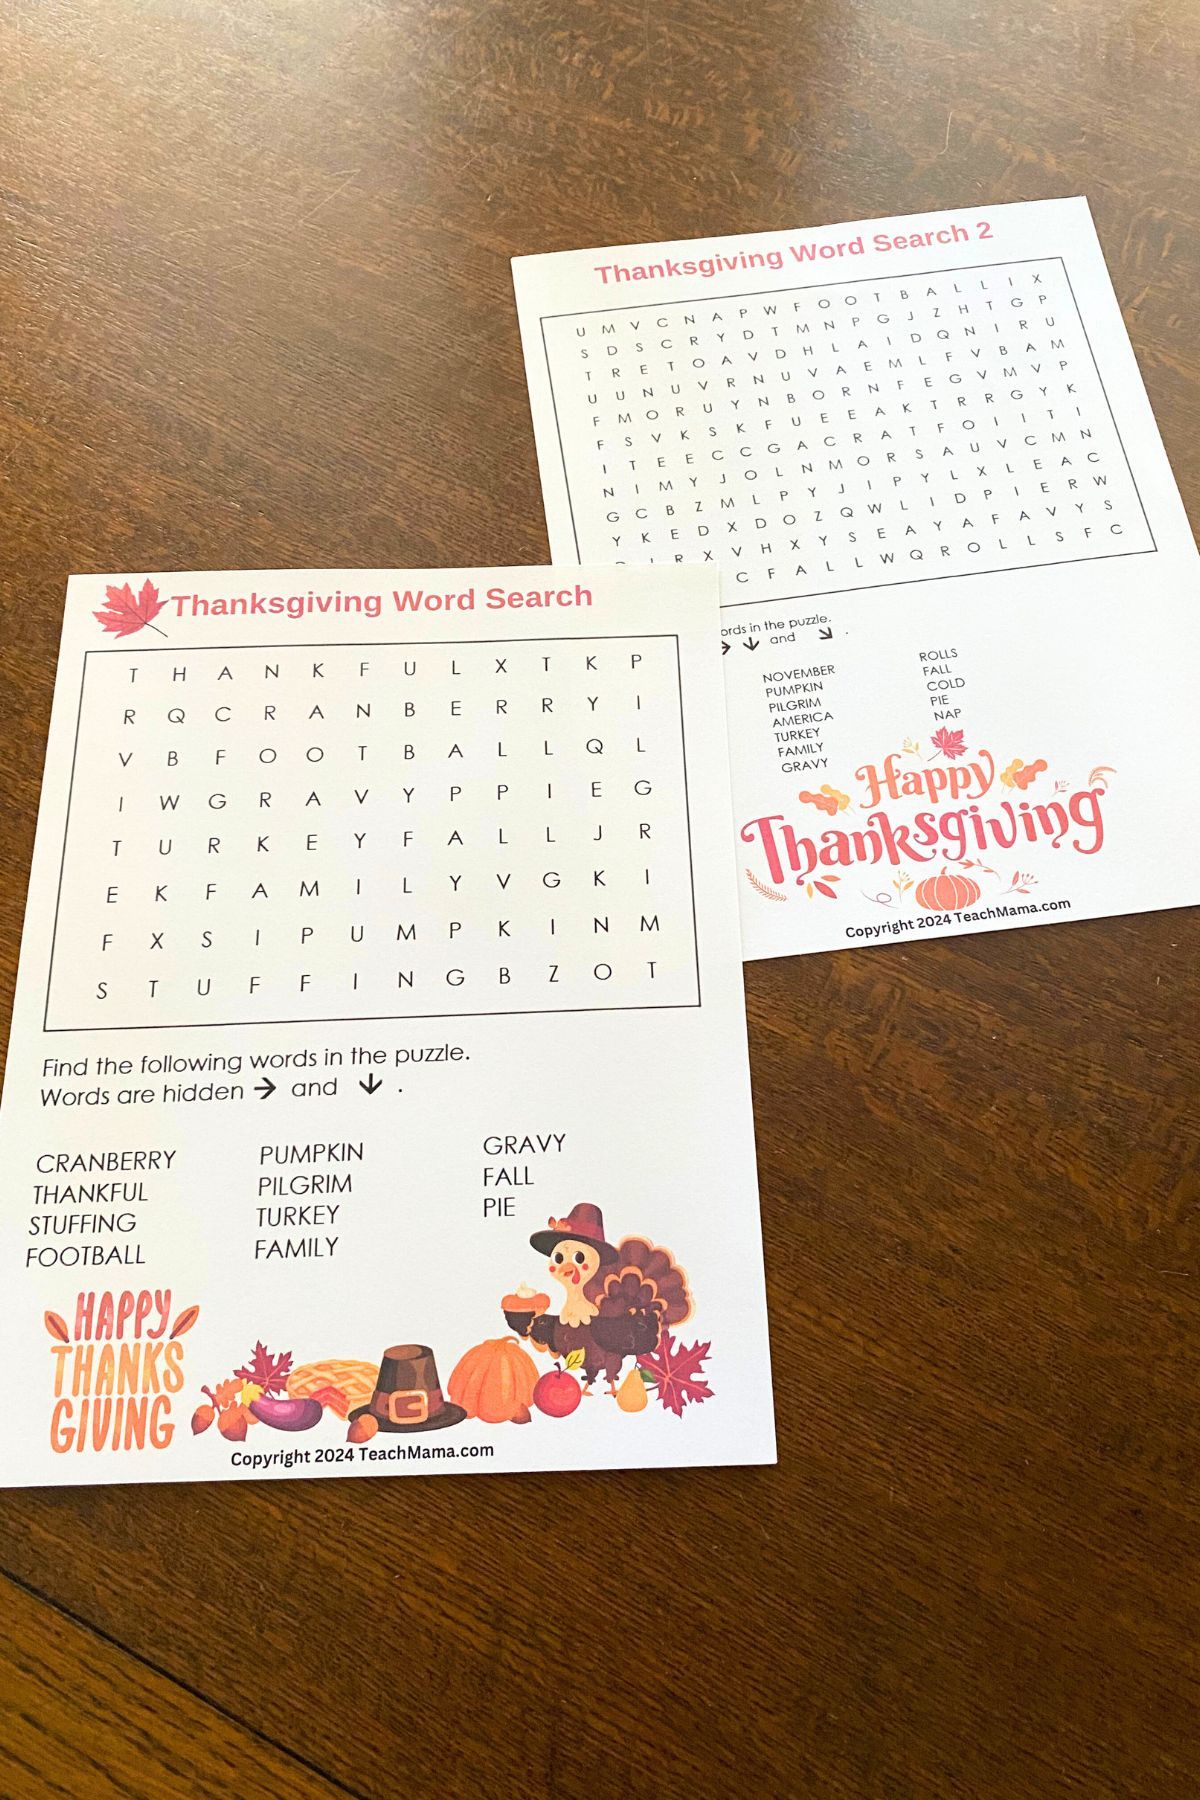
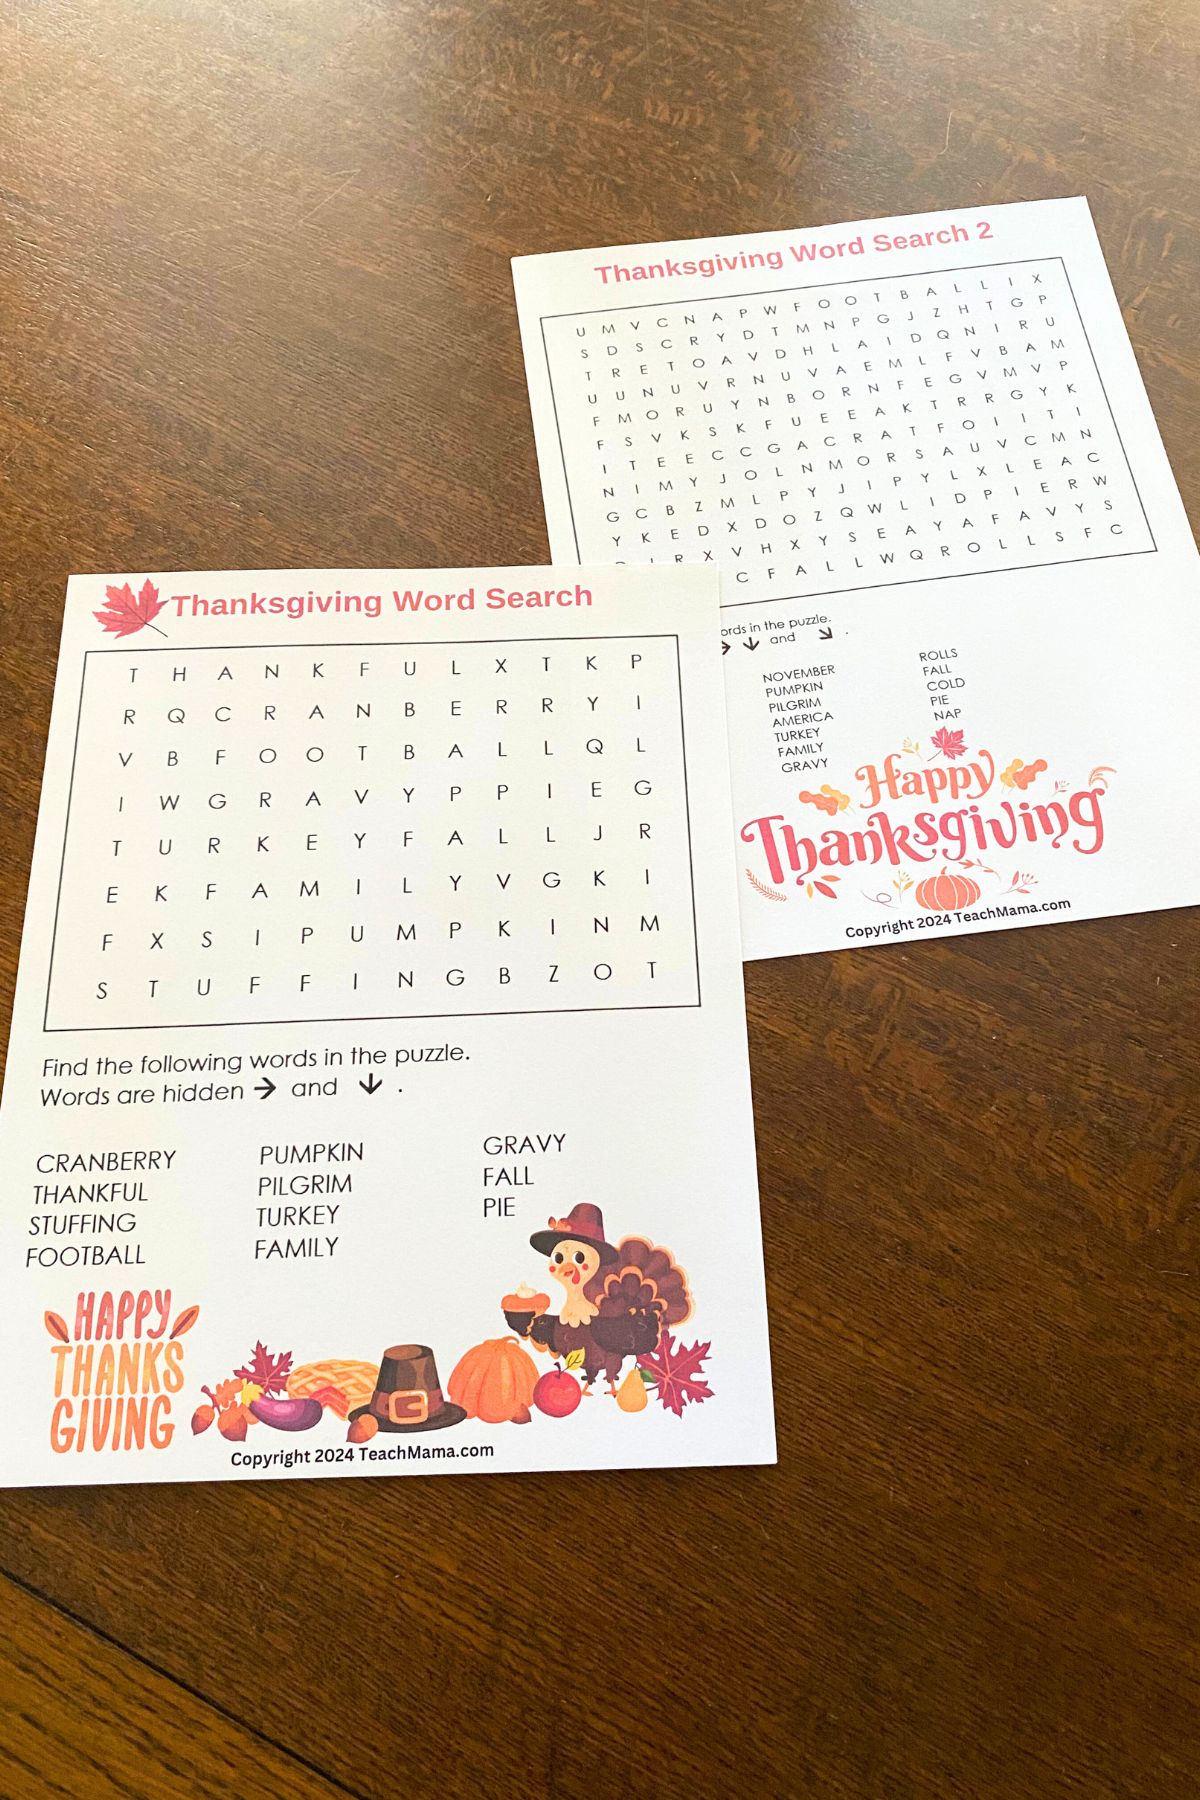
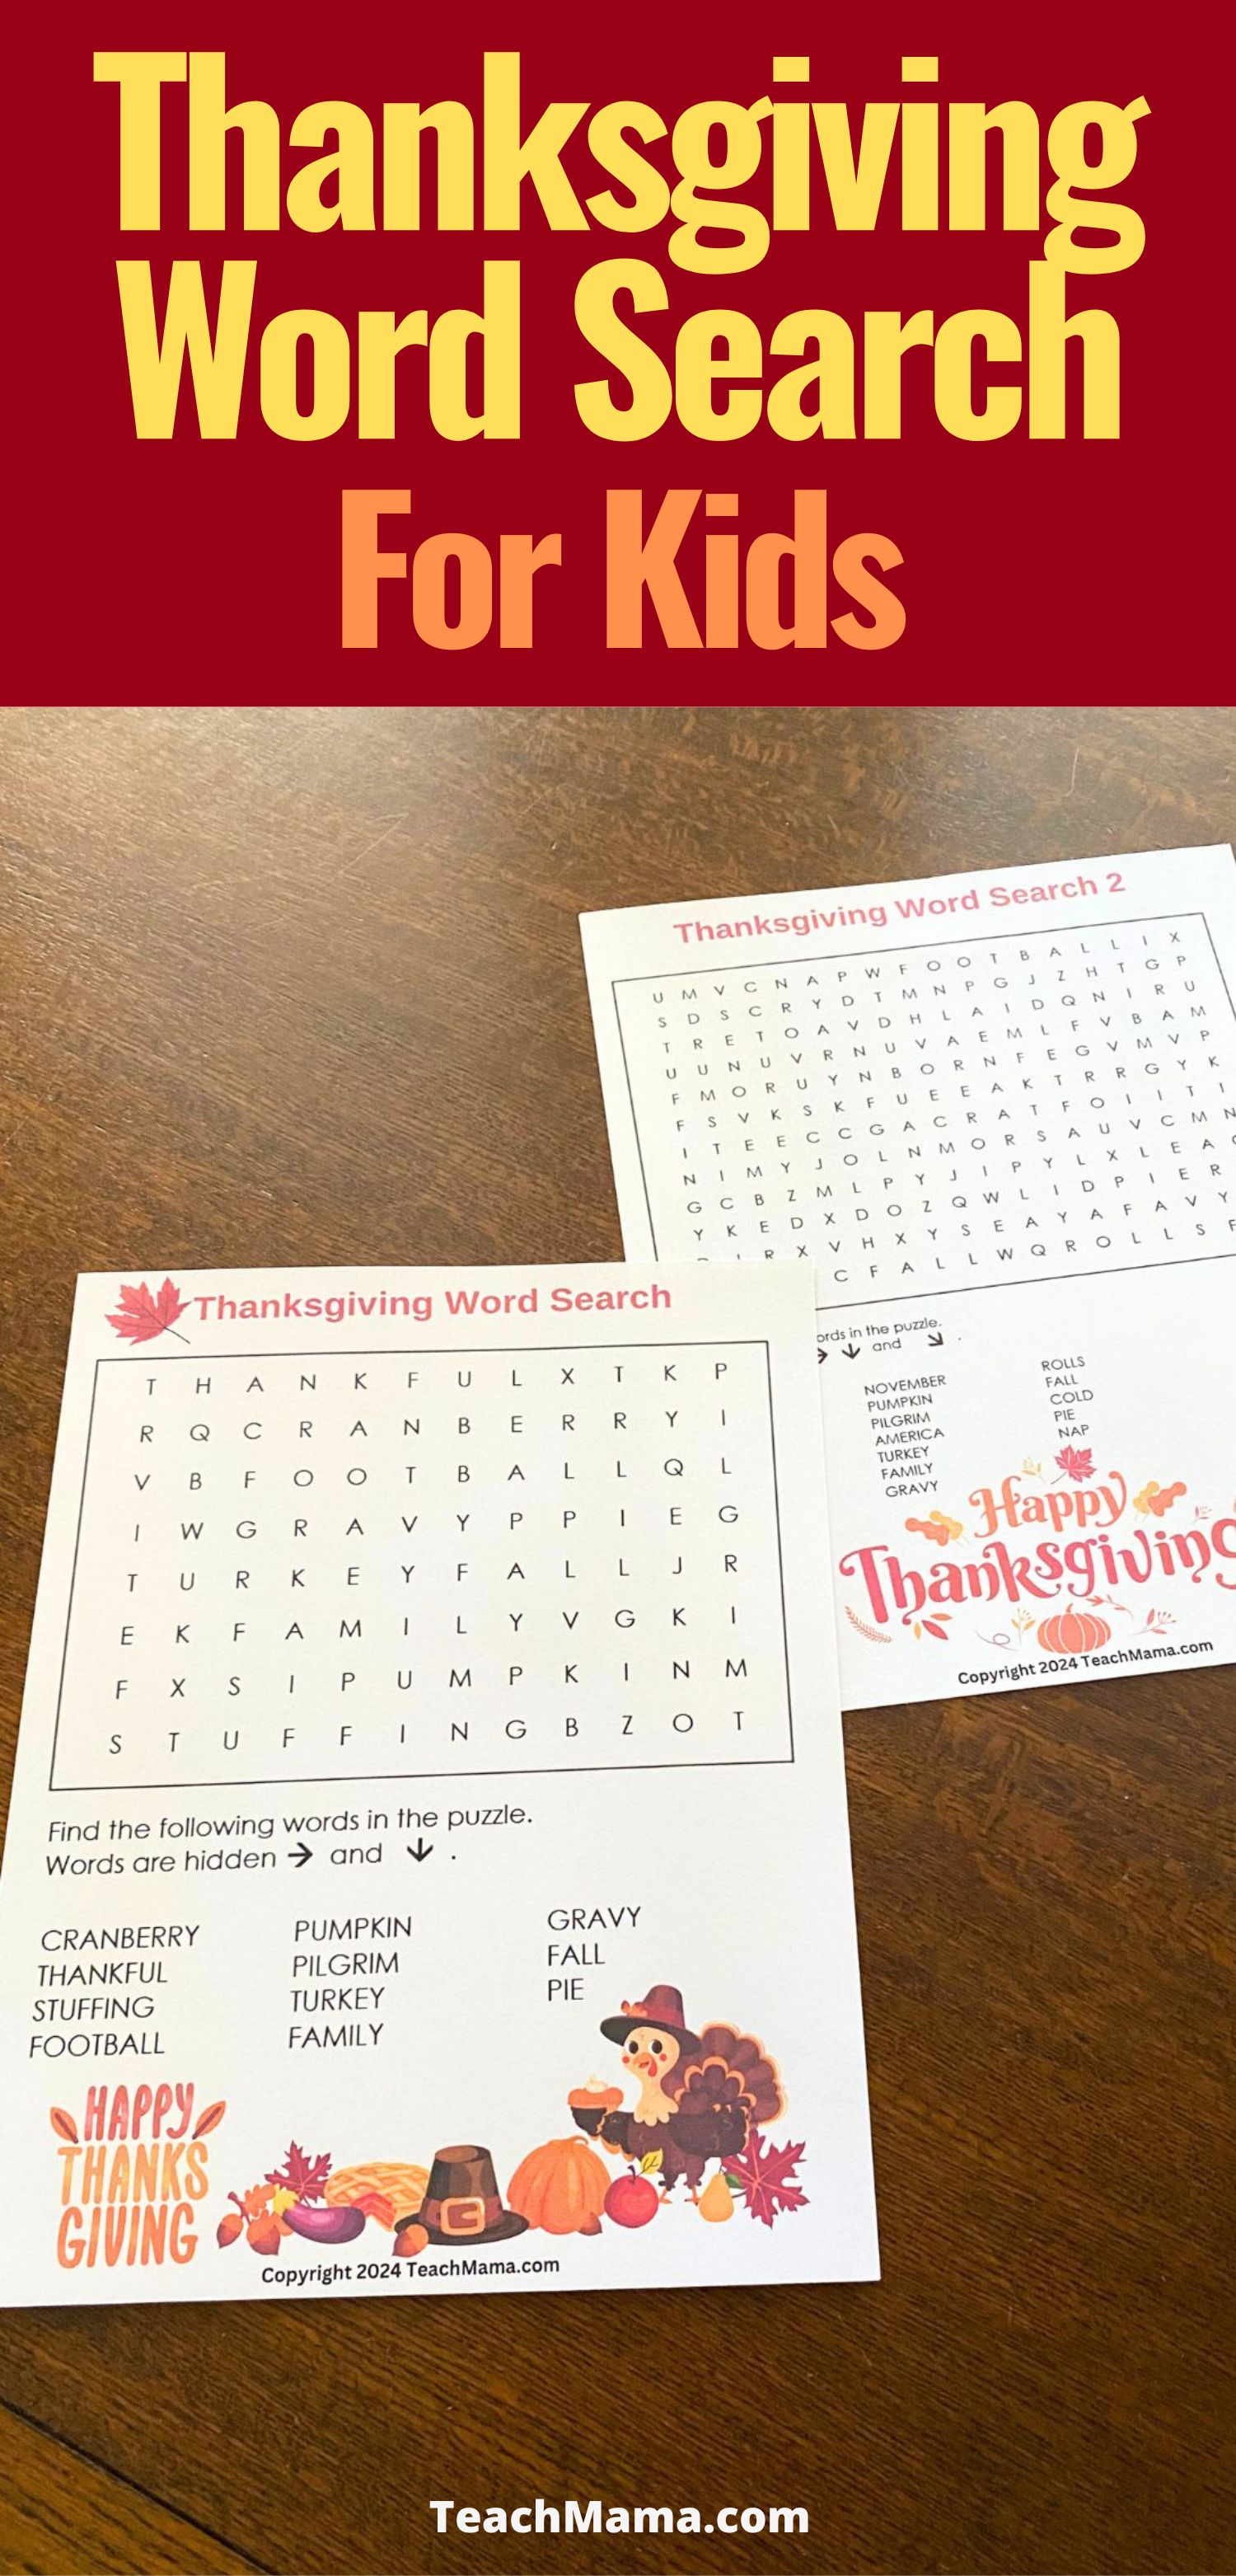
Thanksgiving-themed word search sheets on a wooden table

2. Thanksgiving Word Search from Teach Mama

Keep your kids entertained and learning this holiday season with a Thanksgiving Word Search! Perfect for cozy afternoons, Thanksgiving break, or while waiting for the big feast, this word search is a fun way to engage kids with Thanksgiving-themed vocabulary.

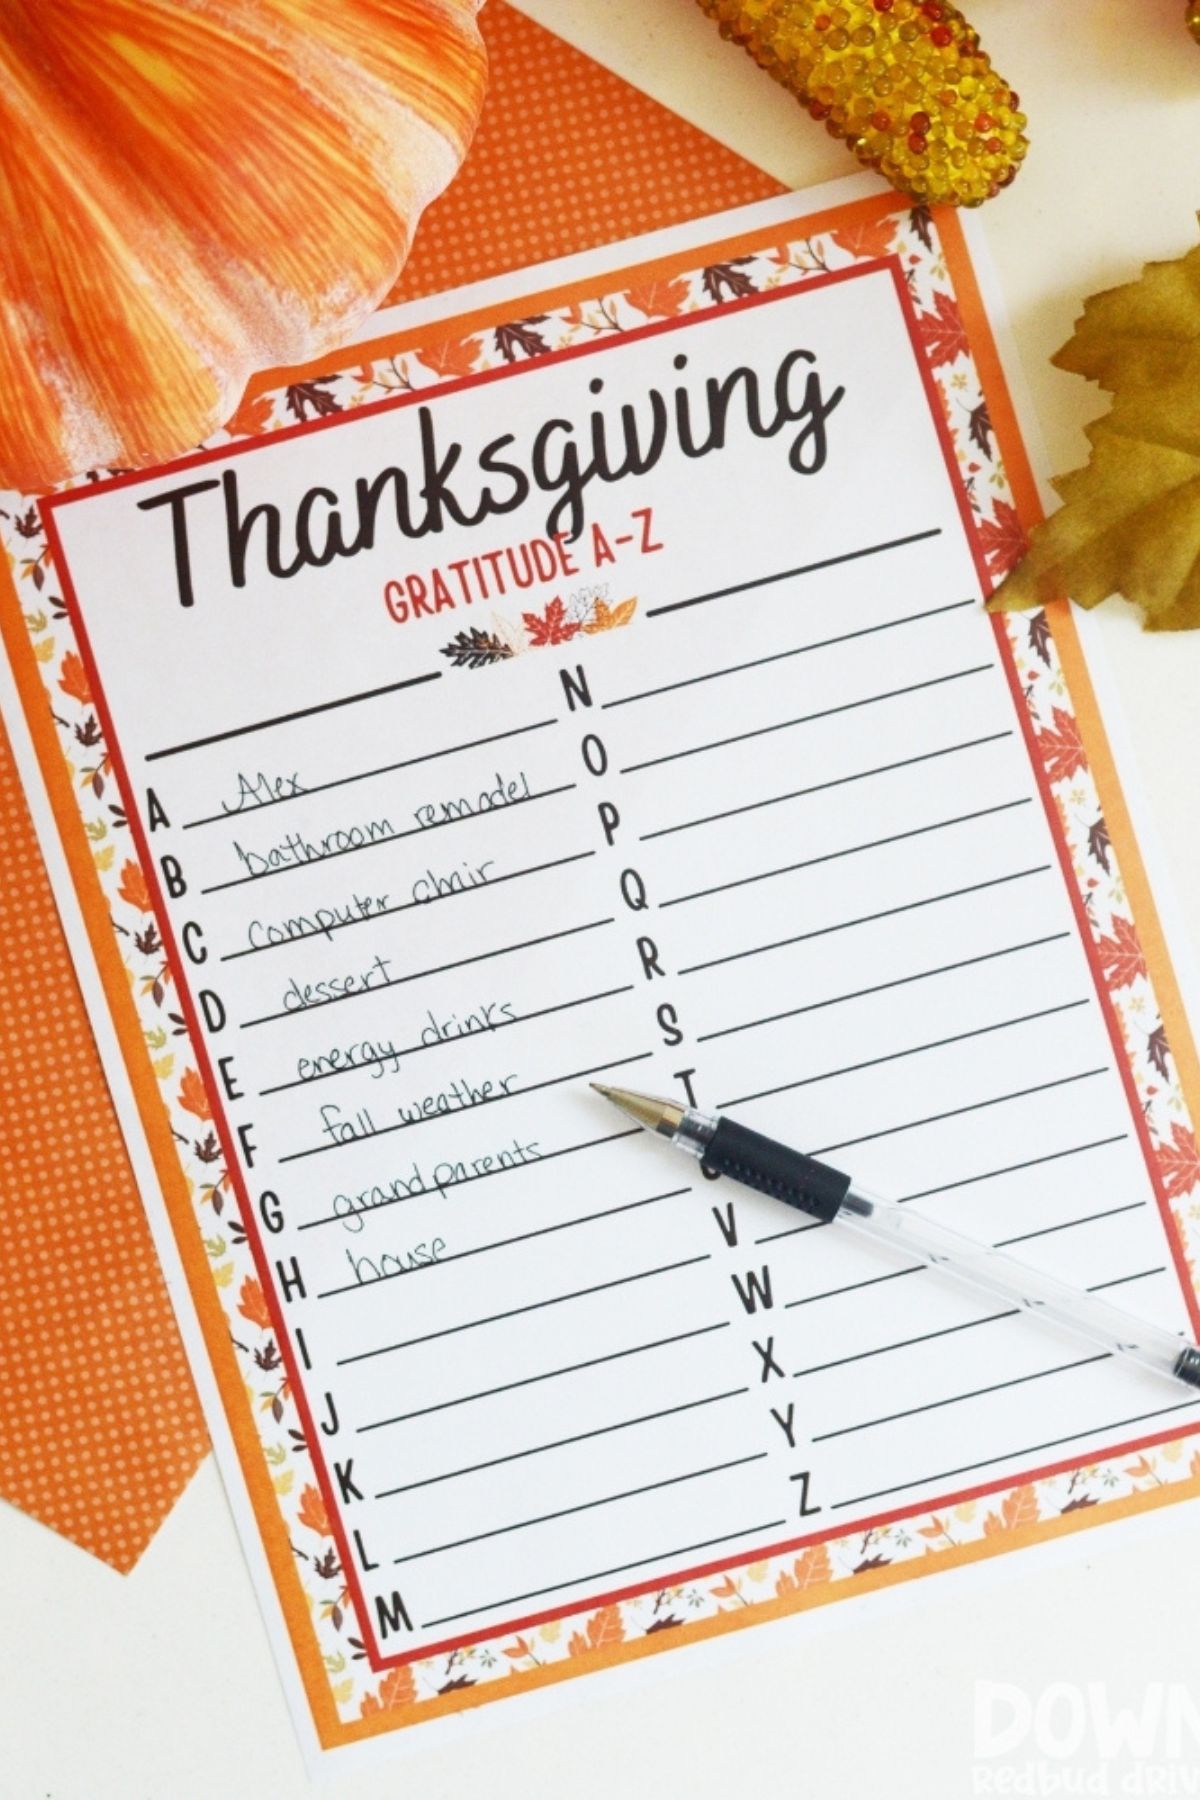
Printed Thanksgiving Gratitude A to Z list with fall color leaves and outline for the border

3. Thanksgiving A-Z Gratitude List from Down Redbud Drive

This Thanksgiving A to Z gratitude list printable is a great way to put the focus on what you’re thankful for! It’s free to print, and would even make a great activity for Thanksgiving day for the whole family!

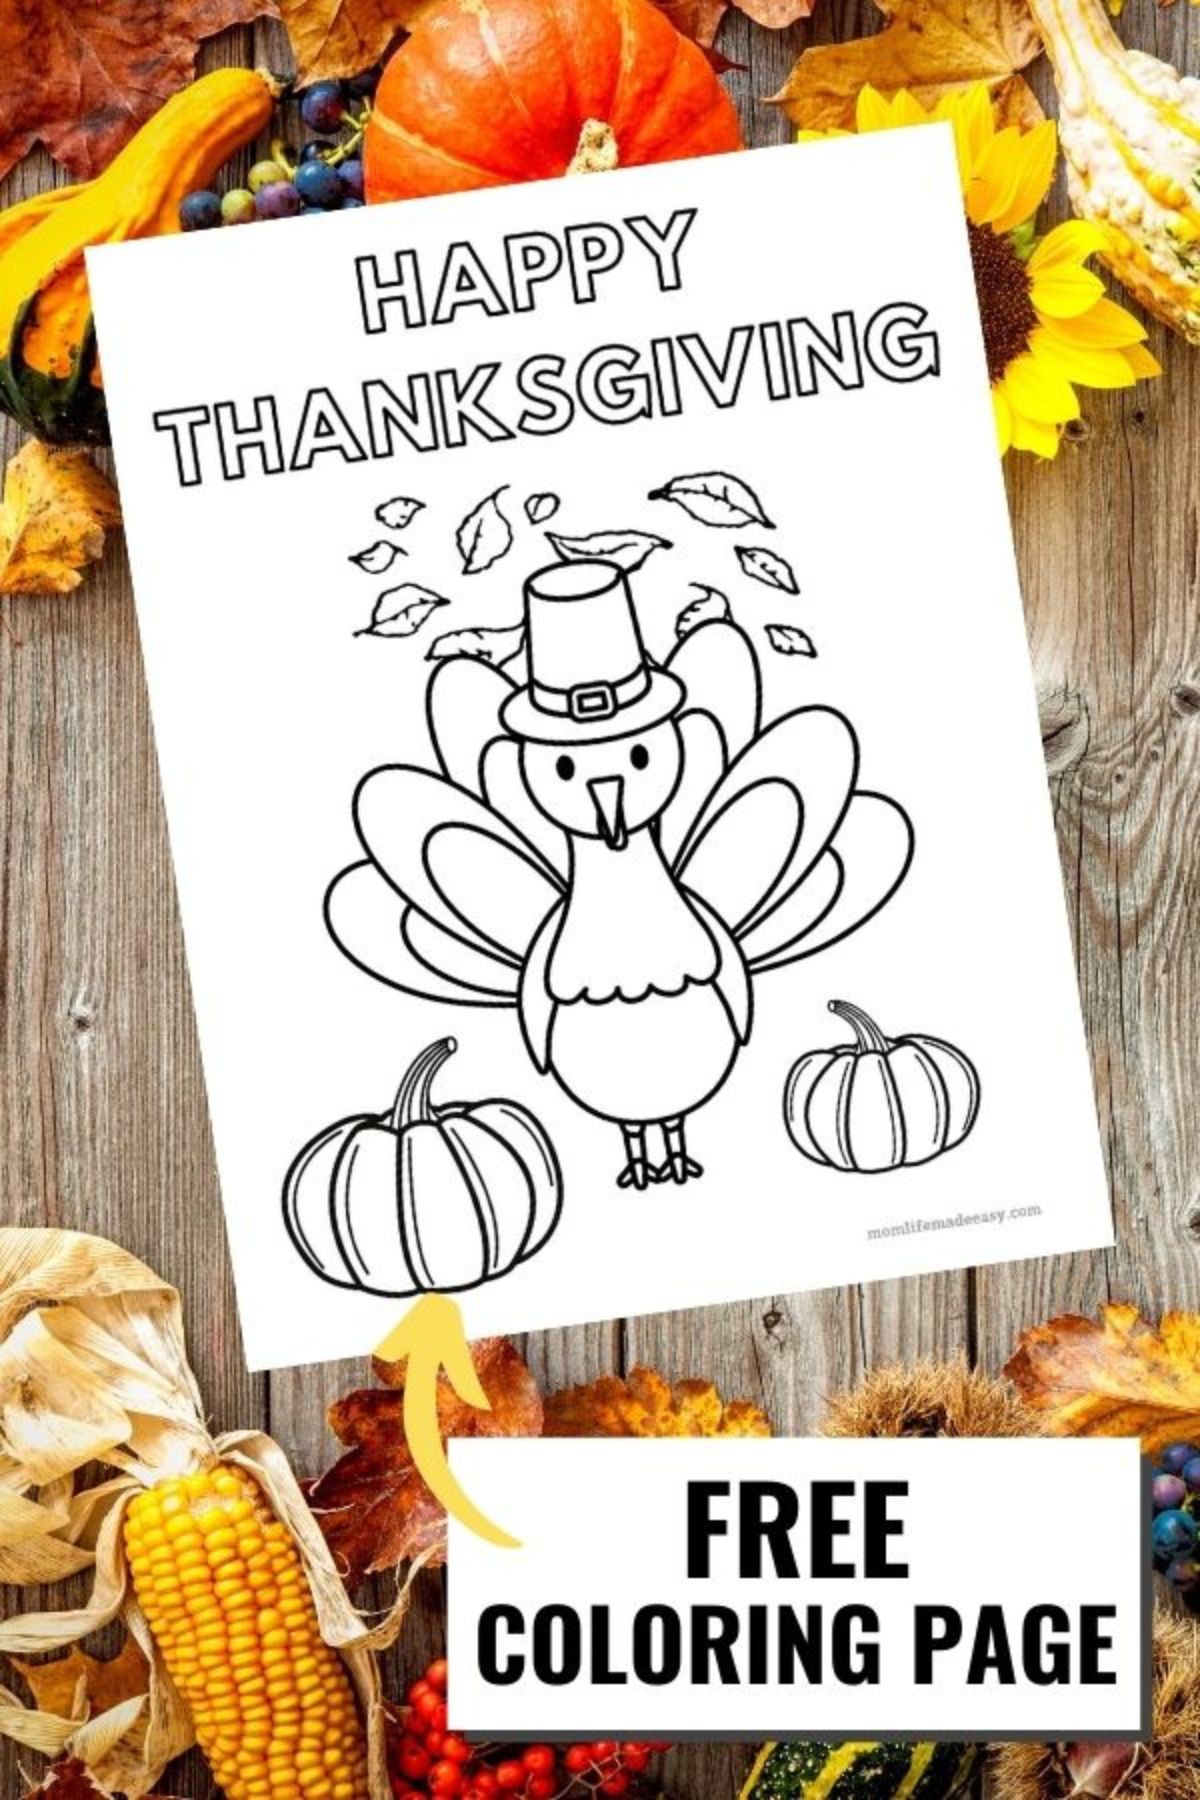
Black and white coloring sheet with a turkey and two pumpkins with swirling leaves

4. Happy Thanksgiving Coloring Sheets from Mom’s Life Made Easy

Download this cute Happy Thanksgiving Coloring Page FREE for kids! It’s a wonderful way to keep kids busy while you are prepping for the holidays! Great for toddlers, preschool, and for kids elementary age too!

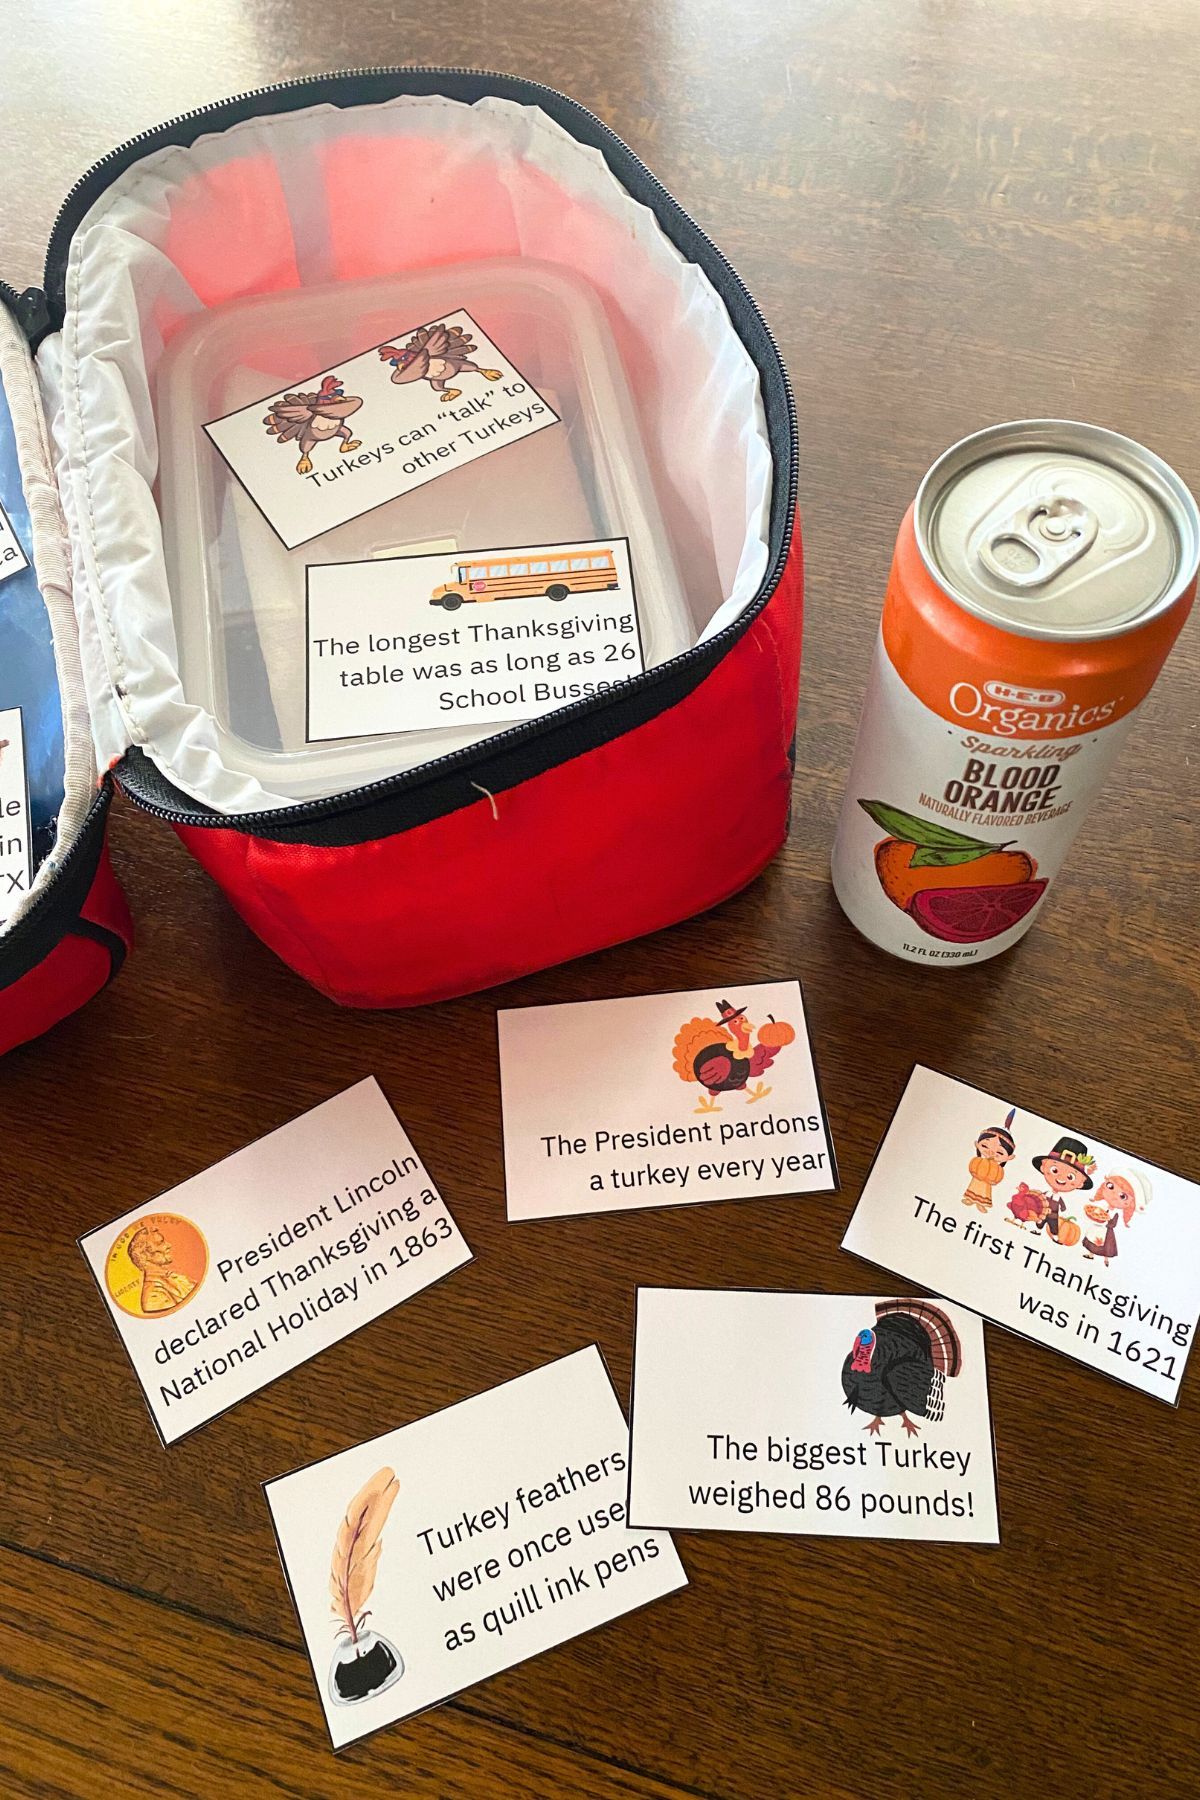
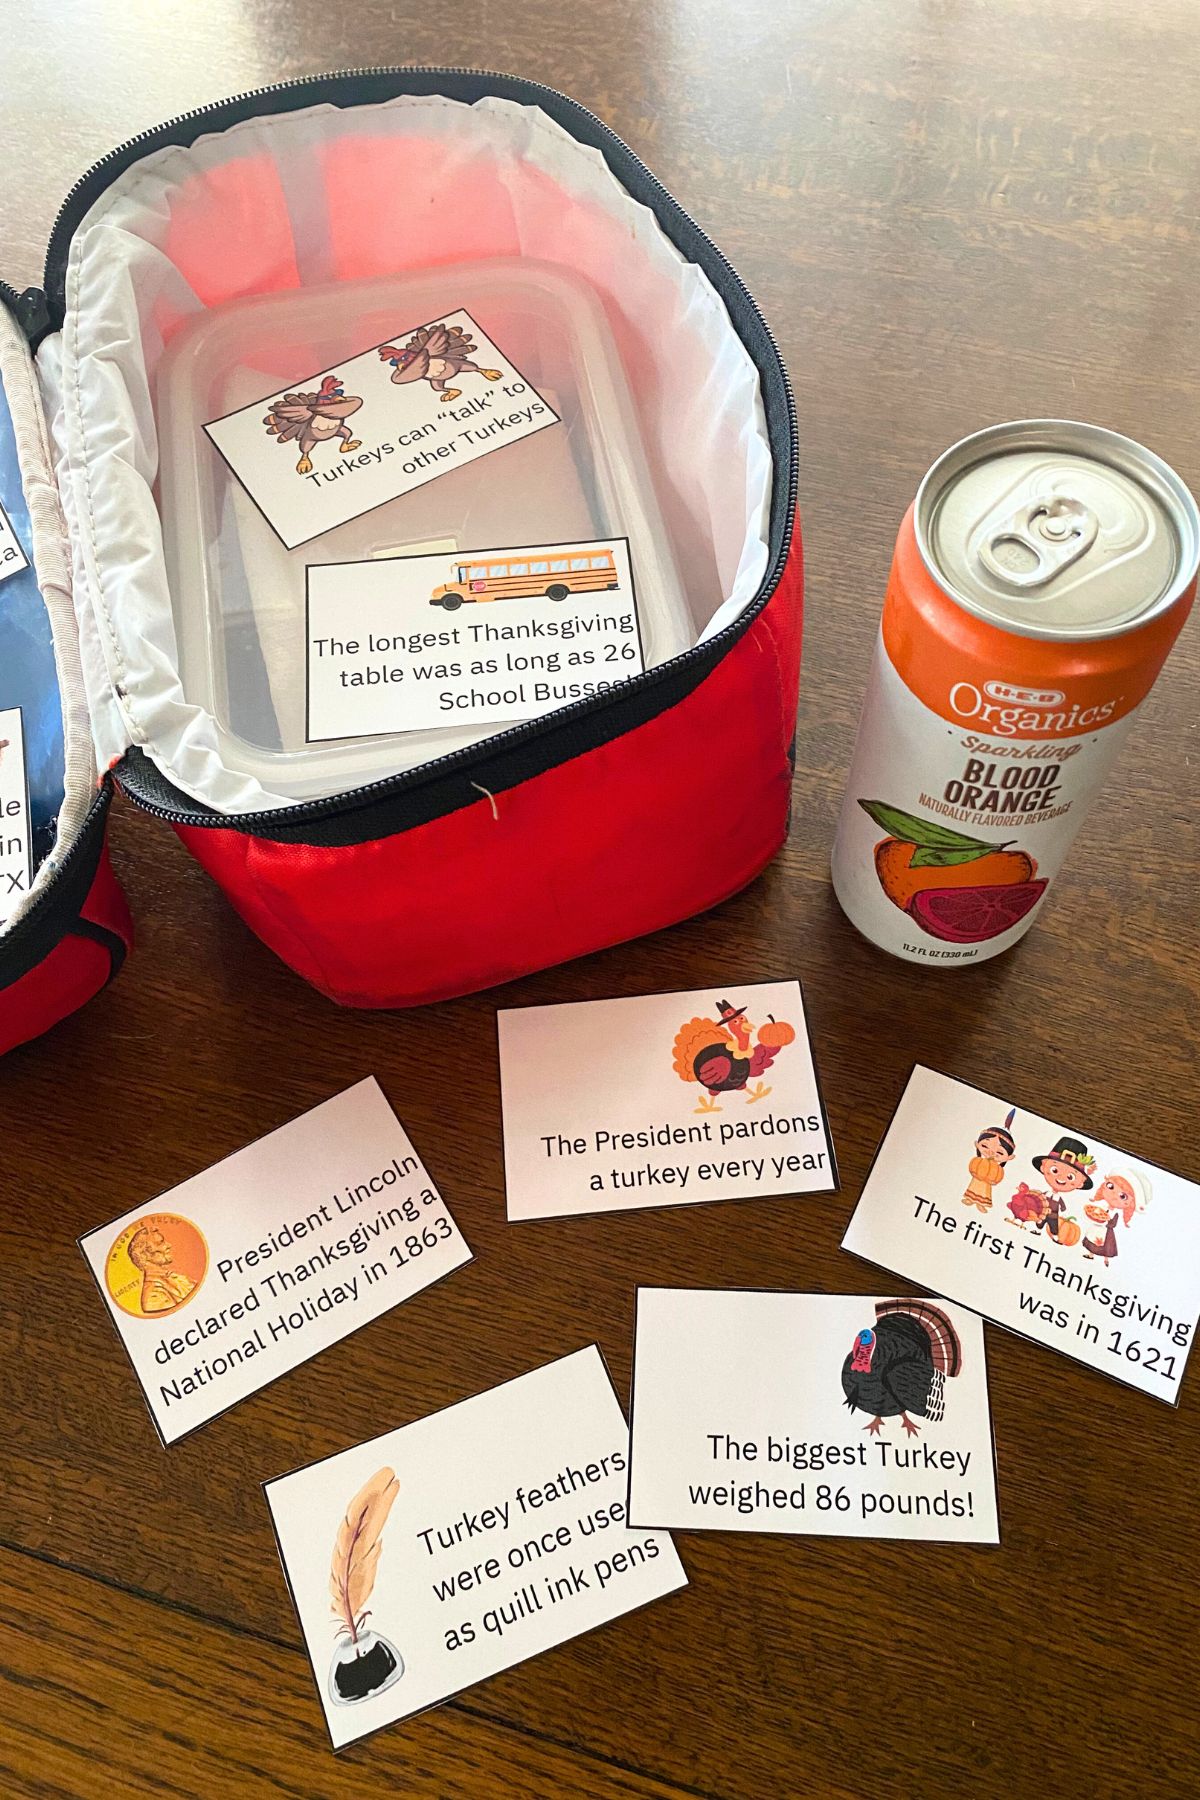
Red lunchbox with printed fun fact notes scattered in and around

6. Fun Thanksgiving Fact Lunchbox Notes from Teach Mama

Add a dash of learning and fun to your child’s lunch this Thanksgiving with Fun Thanksgiving Fact Lunchbox Notes! These printable notes are packed with fascinating Thanksgiving trivia that will keep your kids entertained and let them know you are thinking of them during lunchtime.

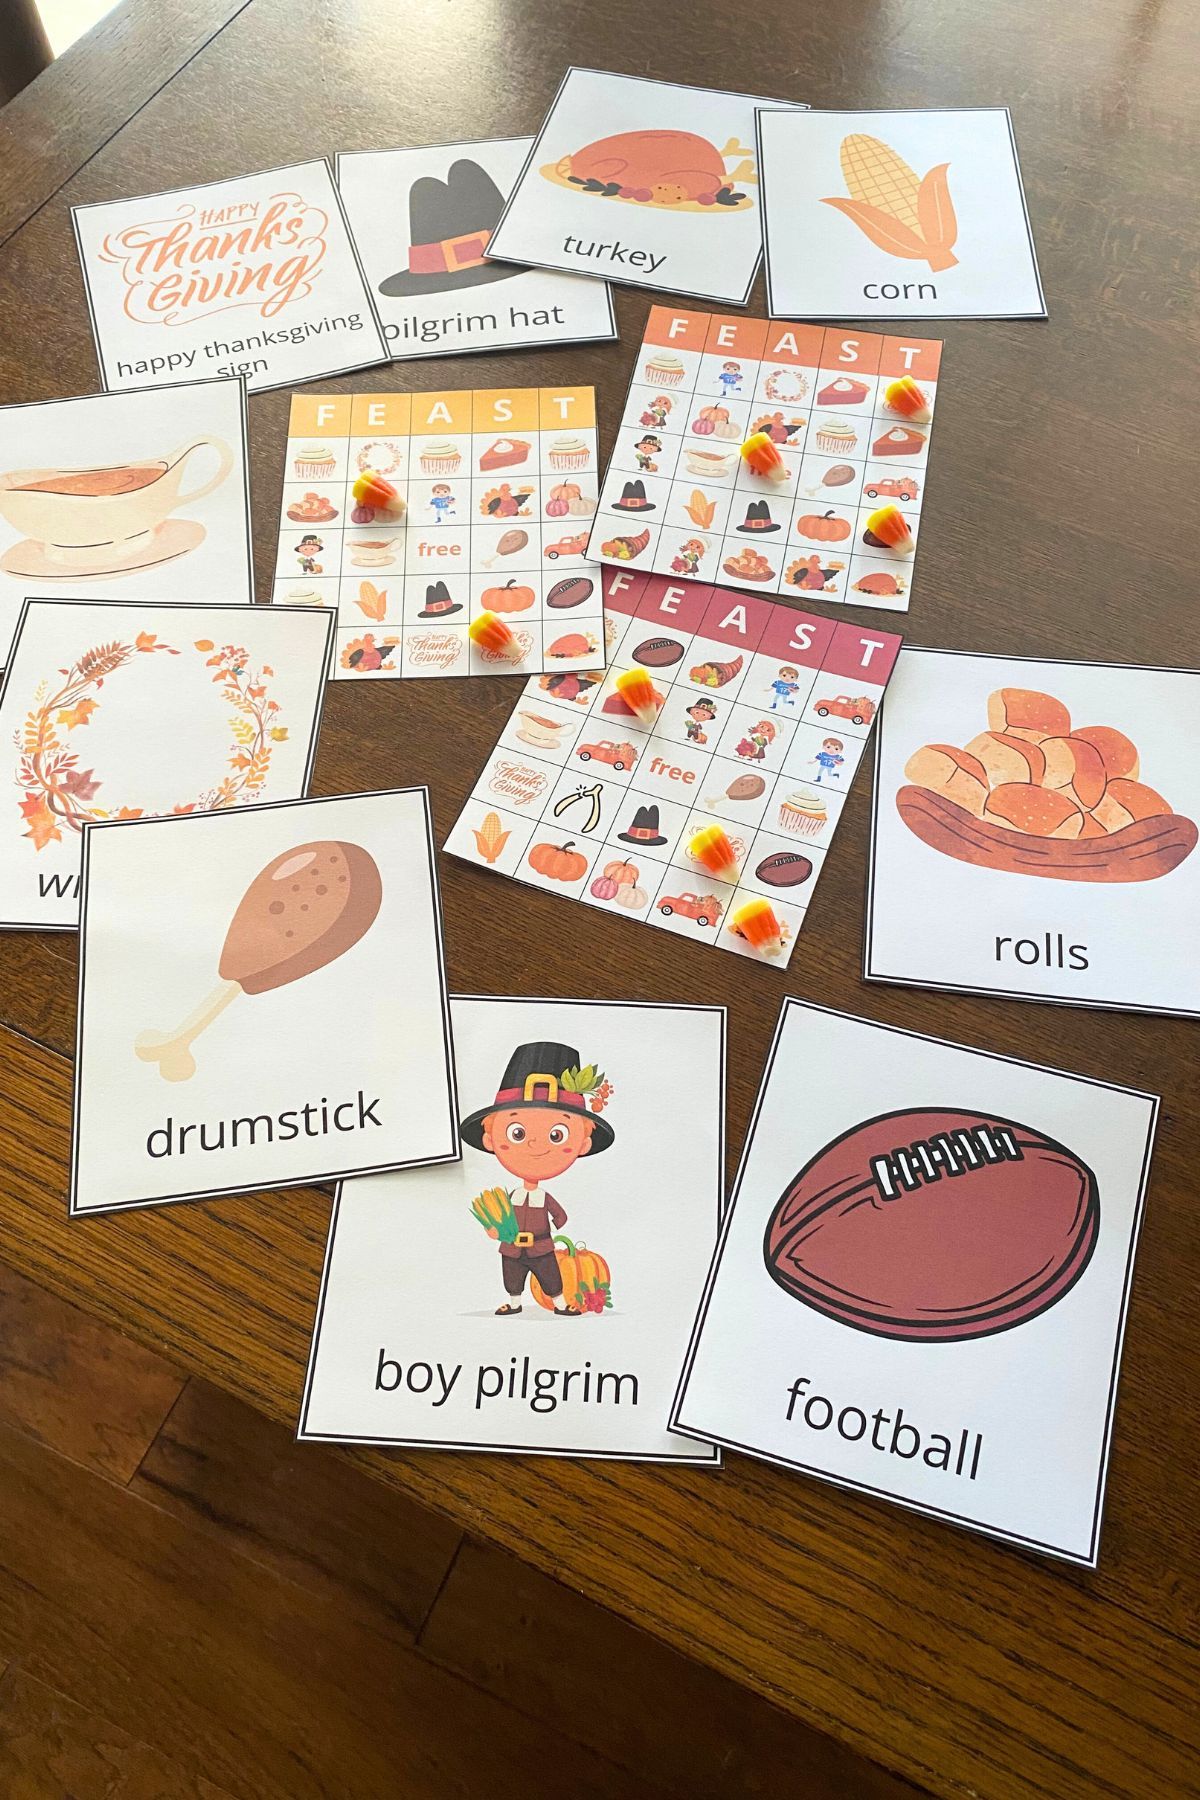
Three Bingo cards with colorful Thanksgiving graphics surrounded by character cards, each containing one of the Bingo card graphics

7. Thanksgiving Gobble-Gobble Bingo from Teach Mama

Thanksgiving Bingo is a great way to fill extra moments with some light-hearted fun. Whether you use Gobble-Gobble Bingo for Thanksgiving parties or as a quick activity to play at home, it’s a wonderful way to add some festive fun to the season.

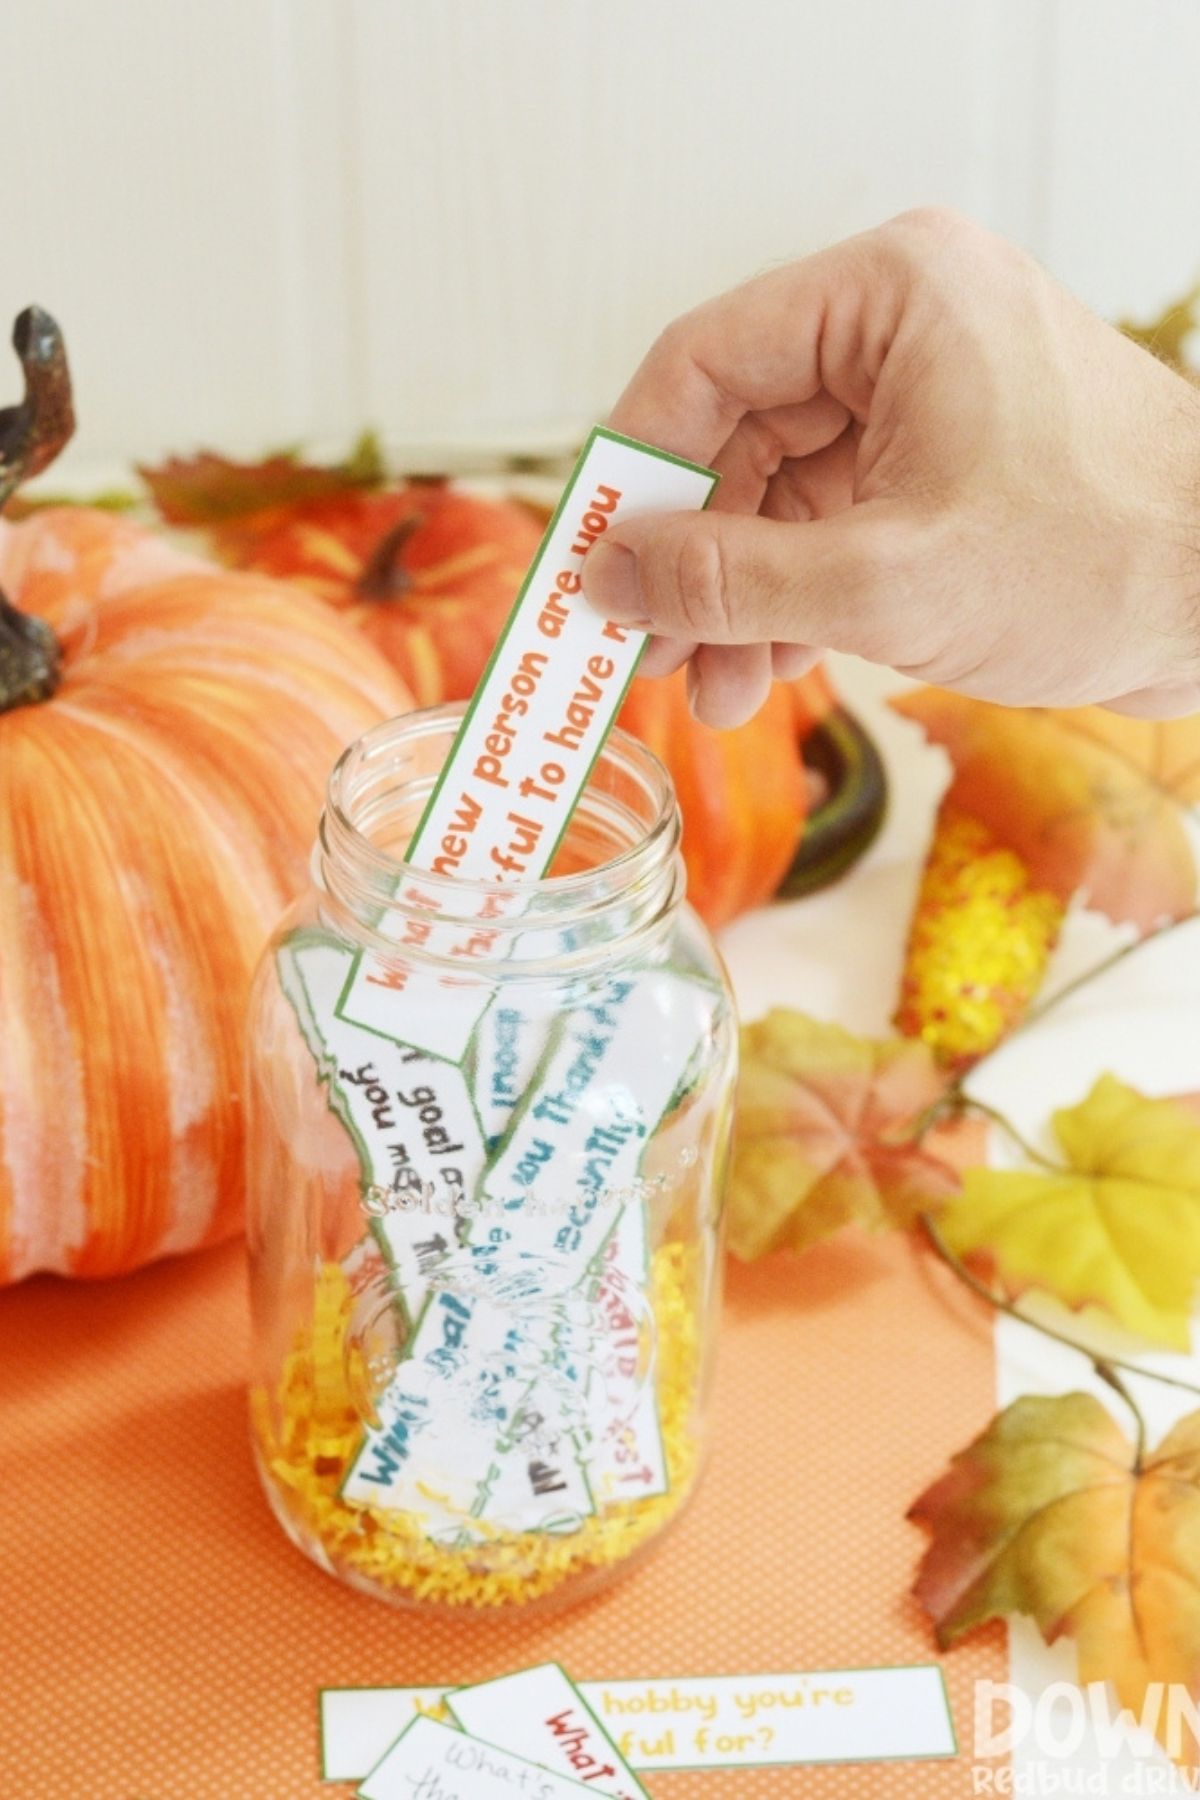
Paper slips printed with gratitude questions in a mason jar.  A hand is pulling one slip from the jar

8. Thanksgiving Gratitude Game from Down Redbud Drive

Play this Thanksgiving gratitude game at your family gathering this year! Focus on all the things you’re thankful for and learn more about your friends and family with this free printable Thanksgiving activity!

Even More Thanksgiving Themed Fun and Learning!

  • Thanksgiving Thankful Door
  • Veggie Turkey Plate
  • Making Butter Like Our Ancestors Did
  • Fall Owl Craft

PIN THIS FOR LATER

September 29, 2024 4 comments
0 FacebookTwitterPinterestPocketThreadsBlueskyEmail
Two Thanksgiving-themed word search puzzles with colorful Thanksgiving images sitting on a wooden table
holidaysindoor activitiesreadingvalentine's dayword consciousness

Thanksgiving Word Search: Free Download

by Teach Mama September 29, 2024
written by Teach Mama

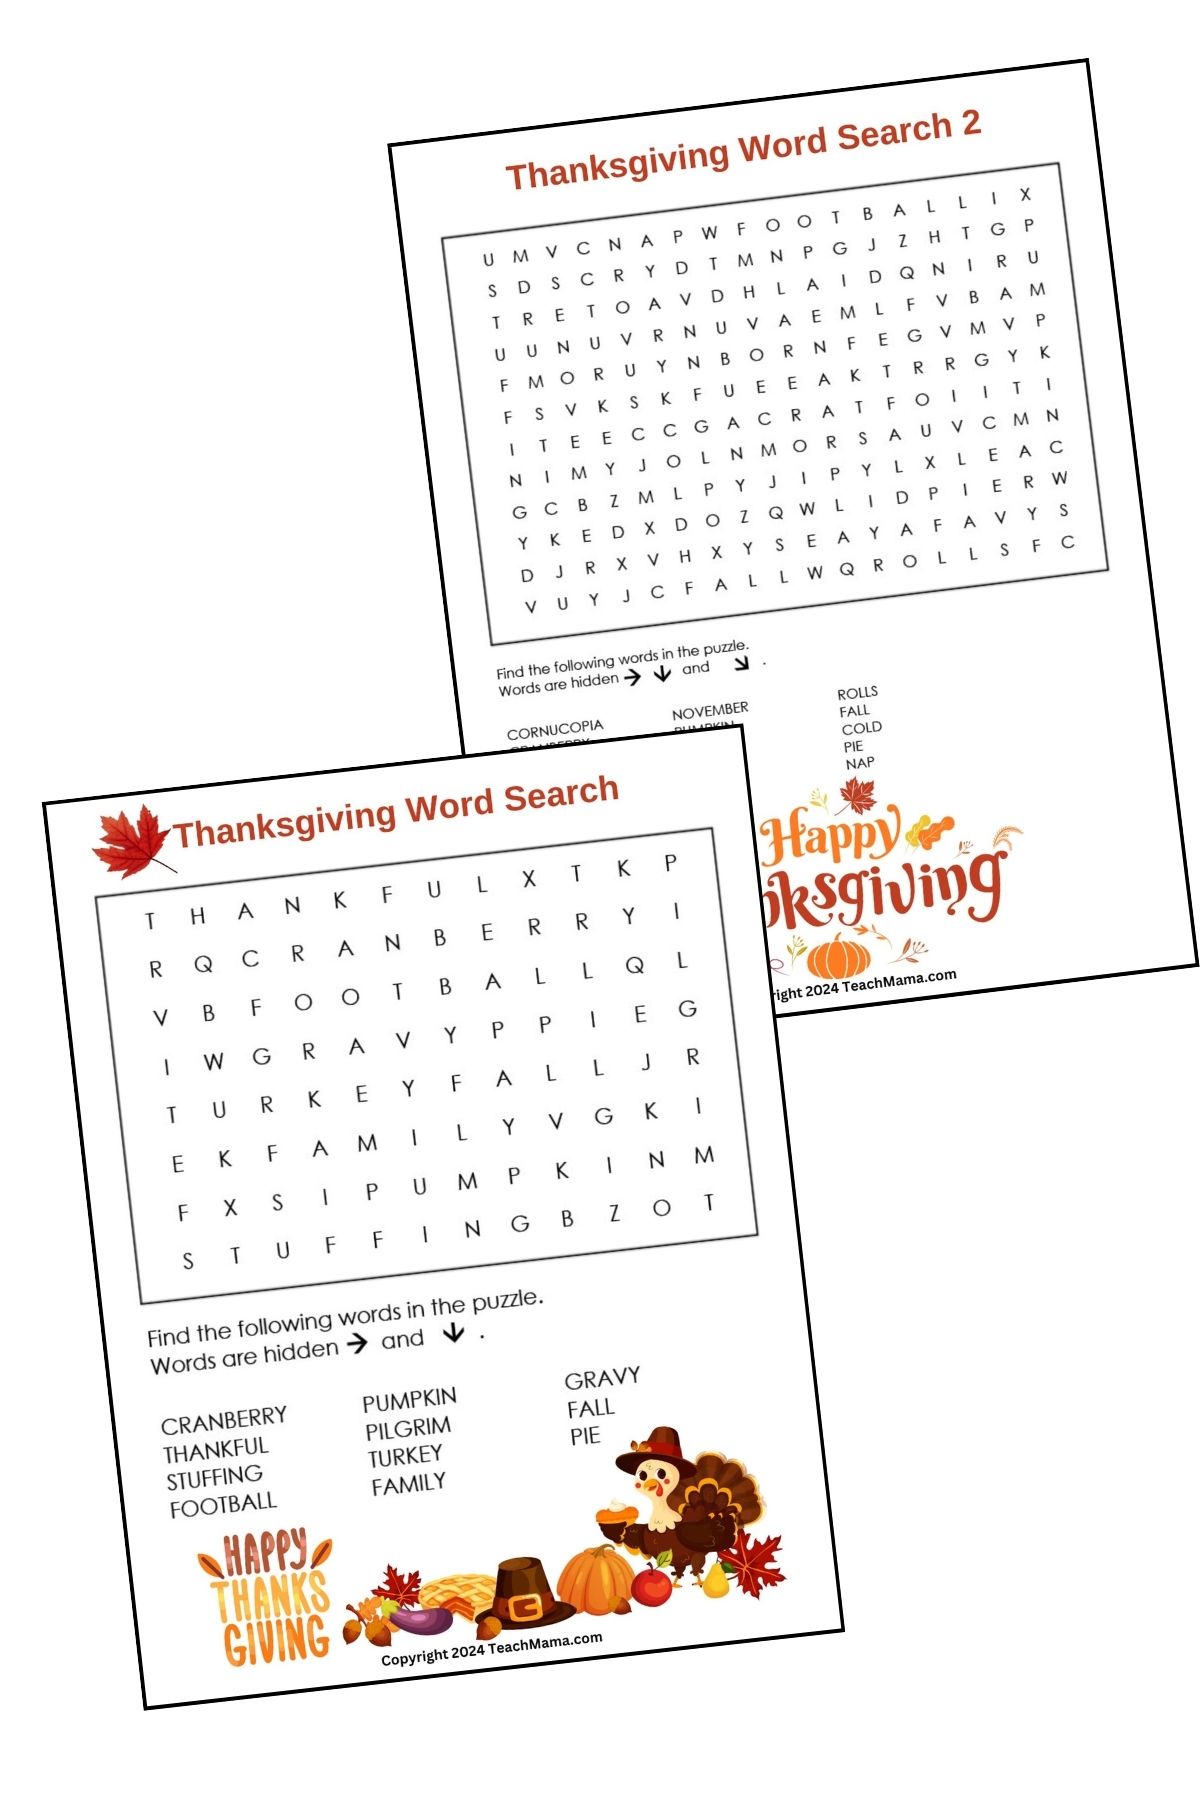
Keep your kids entertained and learning this holiday season with two free printable Thanksgiving Word Searches! Perfect for cozy afternoons, Thanksgiving break, or while waiting for the big feast, these word search puzzles are a fun way to engage kids with Thanksgiving-themed vocabulary fun.

Thanksgiving is a wonderful time for family, food, and festive activities. While you’re preparing the meal or relaxing after a busy day, a Thanksgiving word search is a great way to keep your kids entertained and focused. They’ll have a blast searching for holiday-themed words like “turkey,” “pilgrims” and “thankful.” Don’t worry, I have included an answer key!

Thanksgiving Word Search Fun

Getting Ready to Search

  • Print these colorful word search puzzles on bright white cardstock to make them “pop.” Be sure to have plenty! Kids of all ages will want to take a crack!
  • Have colored pencils and markers on hand to add to the fun!
  • Put some blank cardstock out with the puzzles for the younger kids to use as guides for their search.

Easy to Play, Easy to Love

Word searches might seem like a jumble of letters at first, but with some strategies, kids can quickly become pros! Here are a few tips for making the most of their Thanksgiving word search:

  • Search Line by Line: Have your child focus on one line at a time, looking for the first letter of the word and then finding the second and so on.
  • Use a Paper Guide: Slide a piece of paper down each line to help them focus on just the letters they’re scanning.
  • Repeat the First Letter: For younger children, saying the first letter out loud as they search can help them stay focused.
  • Spot Double Letters: Encourage them to find double letters—words like “pumpkin” are easier to spot because of the repeated letters!

Add Extra Fun to the Word Search

To make things even more interesting, try these creative twists:

  • Use a highlighter to highlight each word.
  • Choose a different color for each word found.
  • Paint over the words with watercolors for an artsy touch.
  • Circle each letter of the word or circle the entire word.
  • Let your child draw a picture of each word beside it on the word list.
Thanksgiving Word Search Printables each with colorful Thanksgiving-themed graphics

Grab Your Free Thanksgiving Word Search Printable

Throw your email in the box below to receive the free download:

Here is some more Thanksgiving-themed fun for kids:

  • Thanksgiving Thankful Door
  • Turkey Veggie Plate
  • Make Butter Like Our Ancestors Did
  • Fall Owl Craft
  • Our Favorite Thanksgiving Printables for Kids
  • Thanksgiving Gobble-Gobble Bingo
  • Fuun Thanksgiving Fact Lunchbox Notes

PIN THIS FOR LATER

September 29, 2024 0 comments
0 FacebookTwitterPinterestPocketThreadsBlueskyEmail
Red lunchbox with printed thanksgiving fun fact notes scattered around on a wooden table
holidaysreadingthanksgiving

Fun Thanksgiving Fact Lunchbox Notes

by Teach Mama September 29, 2024
written by Teach Mama

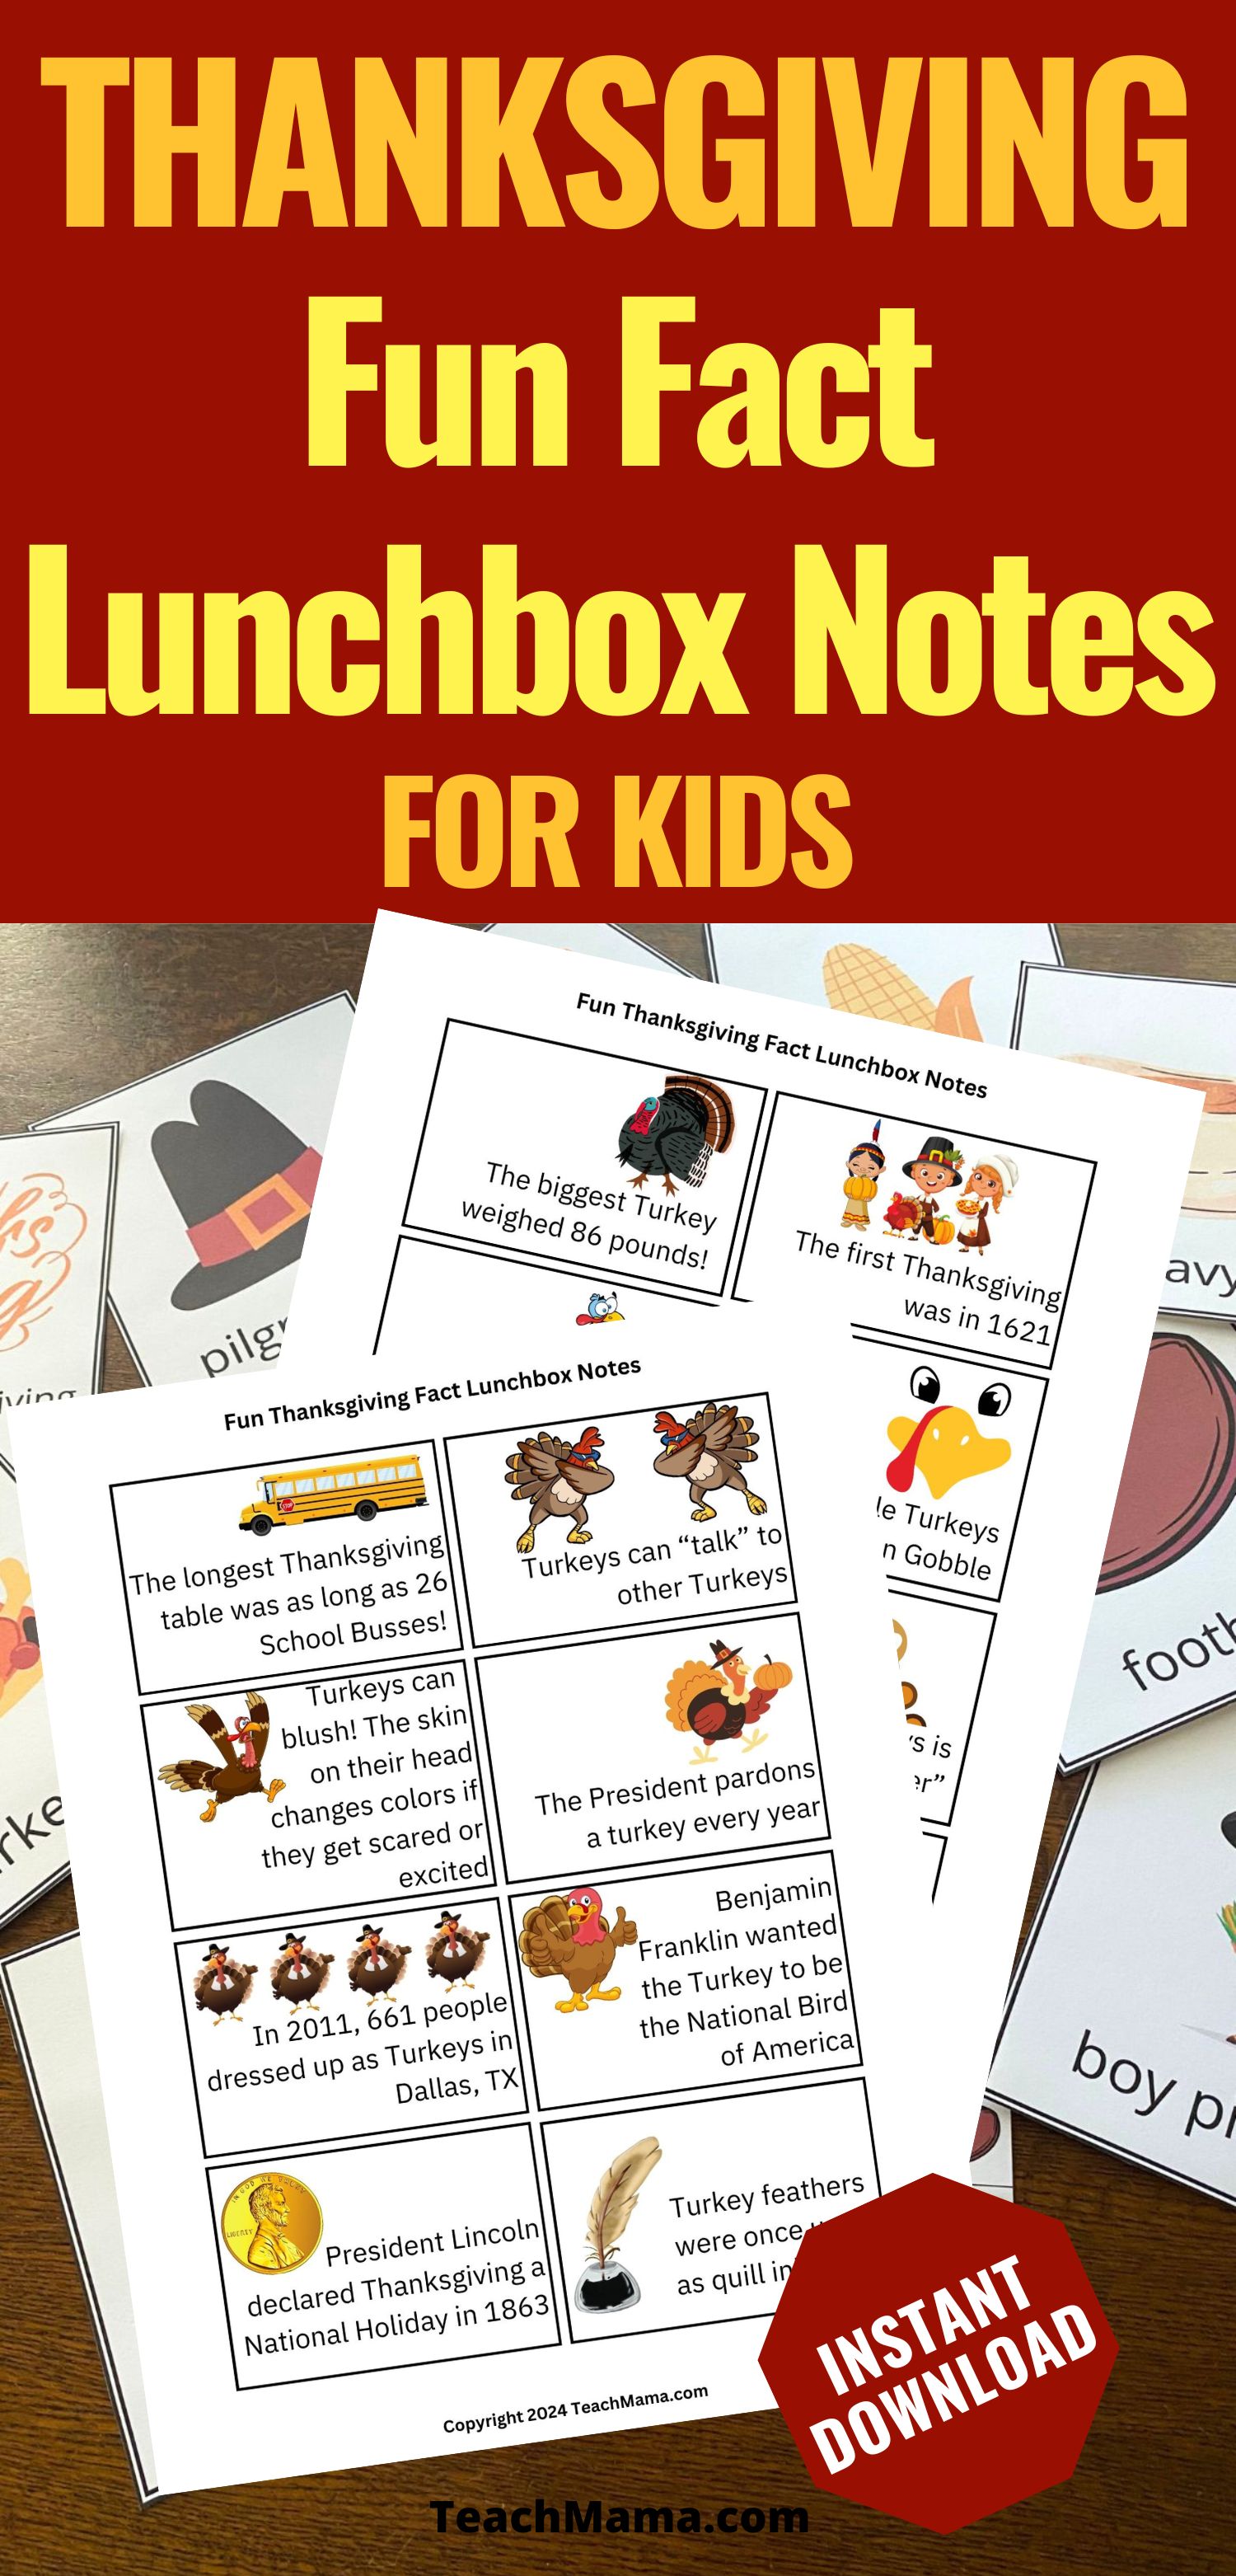
Make lunchtime extra special this November with Fun Thanksgiving Fact Lunchbox Notes! These easy-to-print notes will entertain your kids while they learn cool turkey day trivia. Add some seasonal fun to their lunchboxes with these quick, fun facts about Thanksgiving!

Thanksgiving-themed lunchbox notes are a creative way to connect with your child during their school day. They’ll love discovering new facts about Thanksgiving traditions, food, and history while enjoying their meal. Plus, these notes spark curiosity and can even be shared with friends!

Fun Thanksgiving Fact Lunchbox Notes for Kids: Printable and Ready to Go!

What’s Included in the Printables?

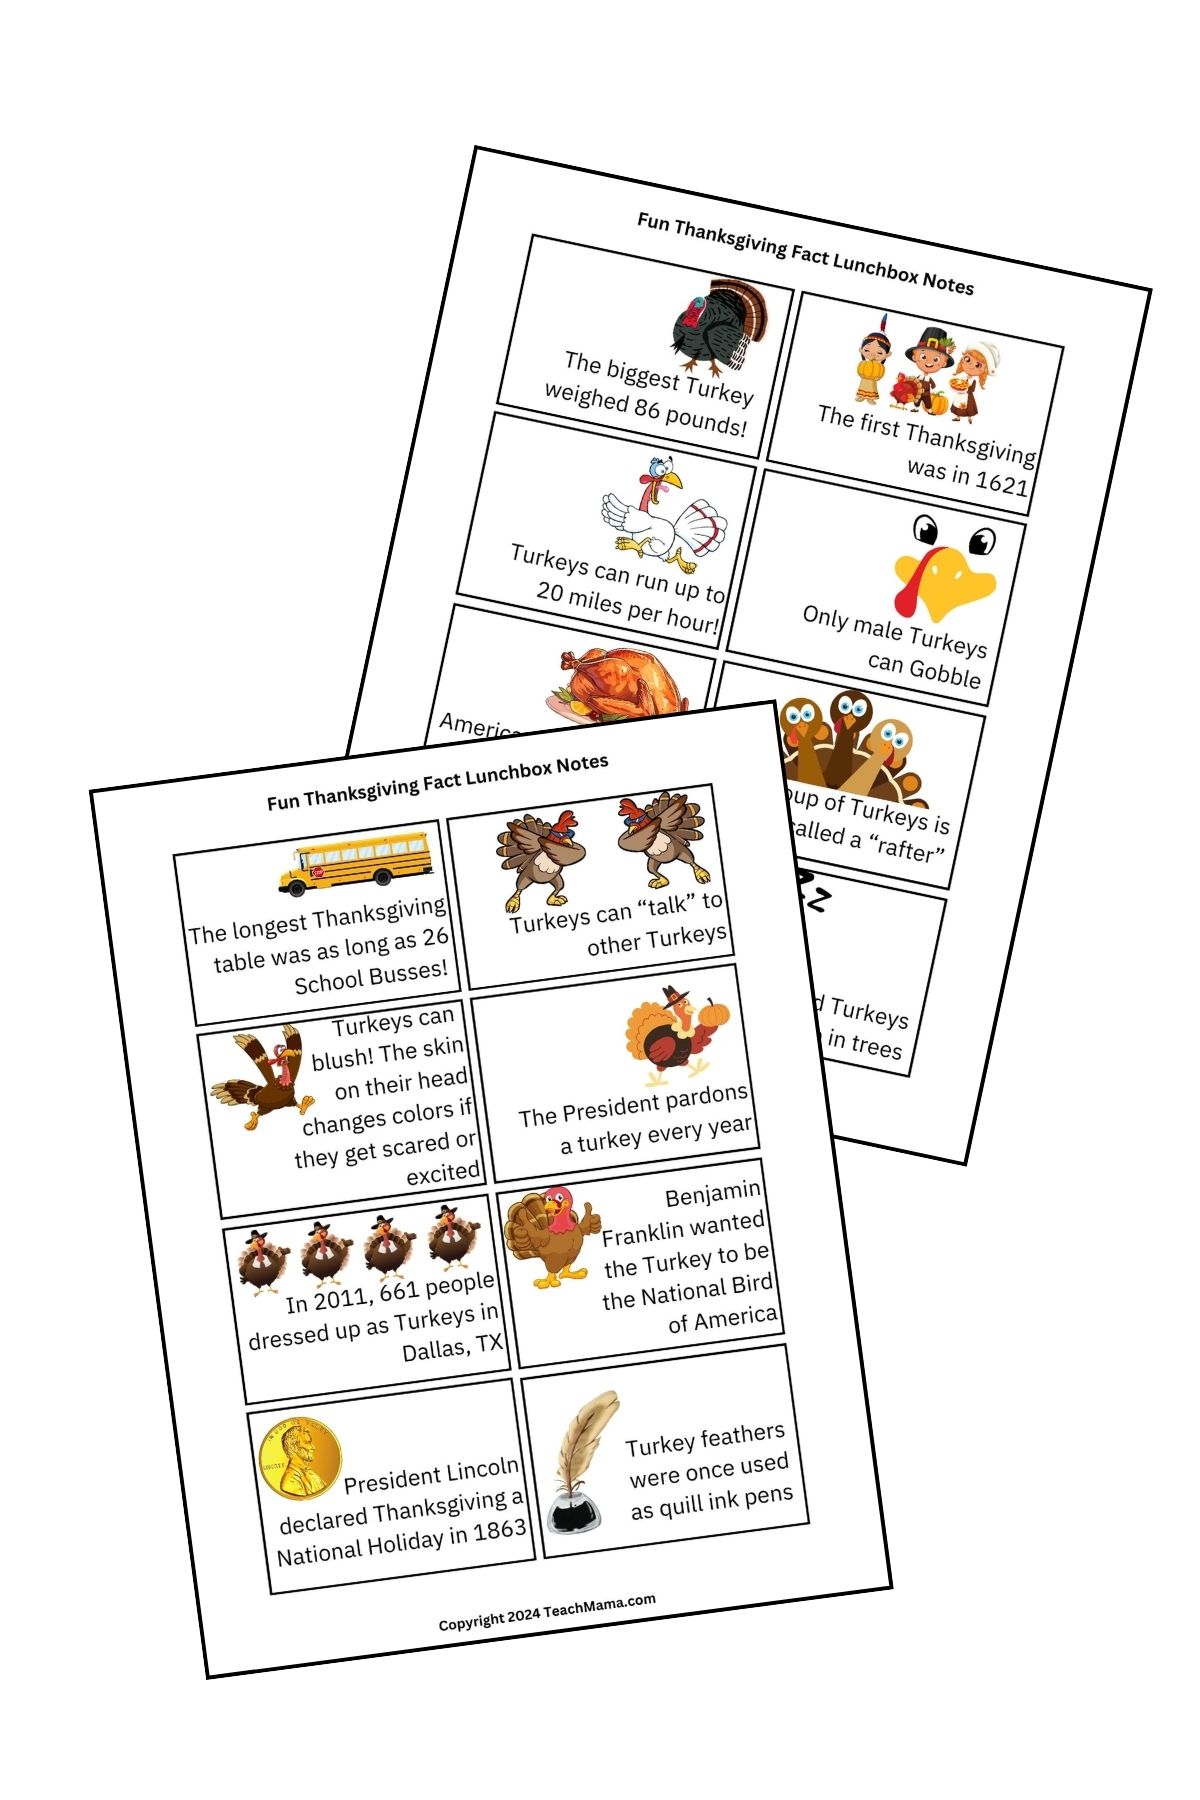
Our printables include a variety of kid-friendly facts, such as:

  • Fun turkey trivia. Did you know that Turkeys can run up to 20 mph?
  • The history of the first Thanksgiving
  • Silly Thanksgiving records
  • Fun food facts like how many turkeys are eaten each year

How to Use the Lunchbox Notes

Simply print, cut, and tuck these Thanksgiving fun facts into your child’s lunchbox. You can also include them with snacks for an after-school treat! To really make the colorful graphics pop, use a bright, white cardstock.

Printed Fun Thanksgiving Fact Lunchbox Notes with colorful Thanksgiving-themed graphics

Get Your Thanksgiving Printables Today! Throw your email in the box below and the download will appear in your inbox.

Here is some more Thanksgiving-themed fun for kids:

  • Thanksgiving Thankful Door
  • Turkey Veggie Plate
  • Make Butter Like Our Ancestors Did
  • Fall Owl Craft
  • Our Favorite Thanksgiving Printables for Kids
  • Thanksgiving Gobble-Gobble Bingo
  • Thanksgiving Word Search

PIN THIS FOR LATER
September 29, 2024 0 comments
0 FacebookTwitterPinterestPocketThreadsBlueskyEmail
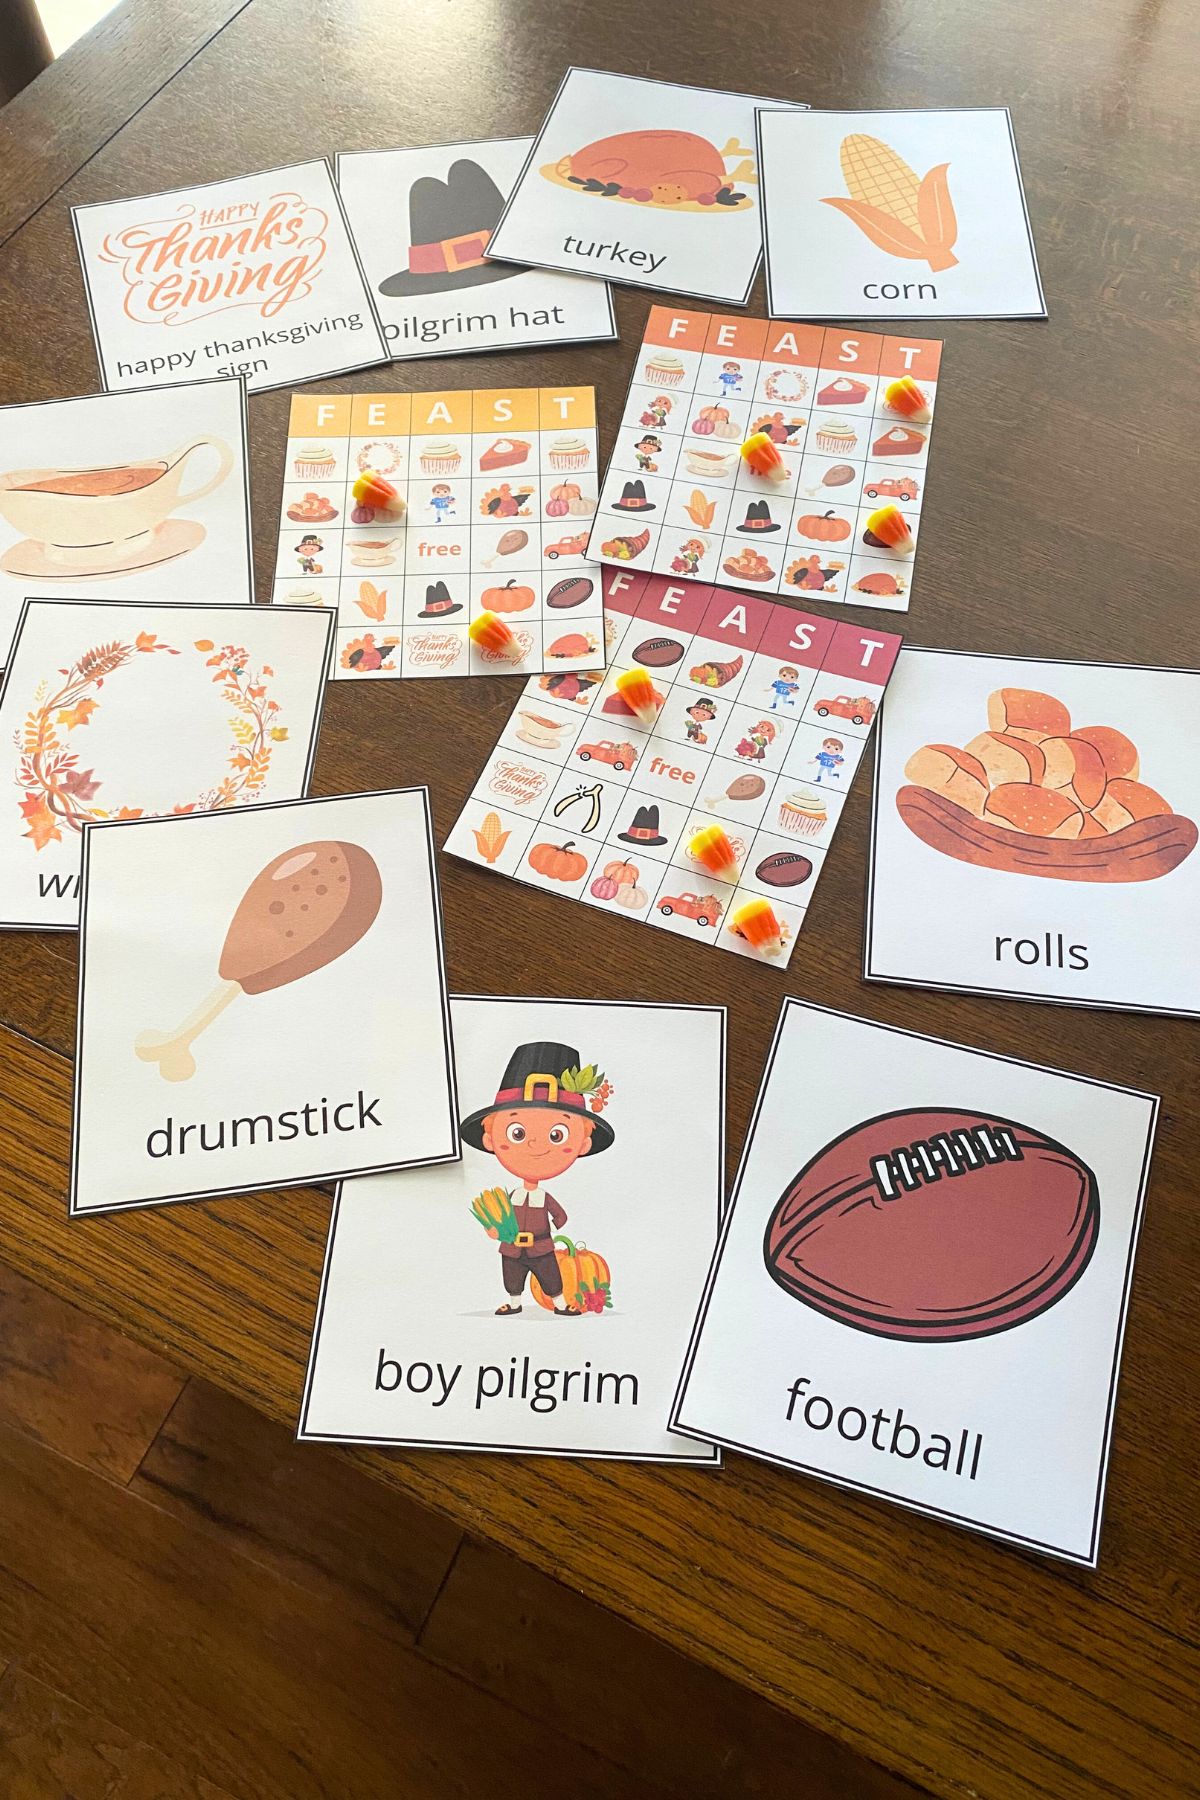
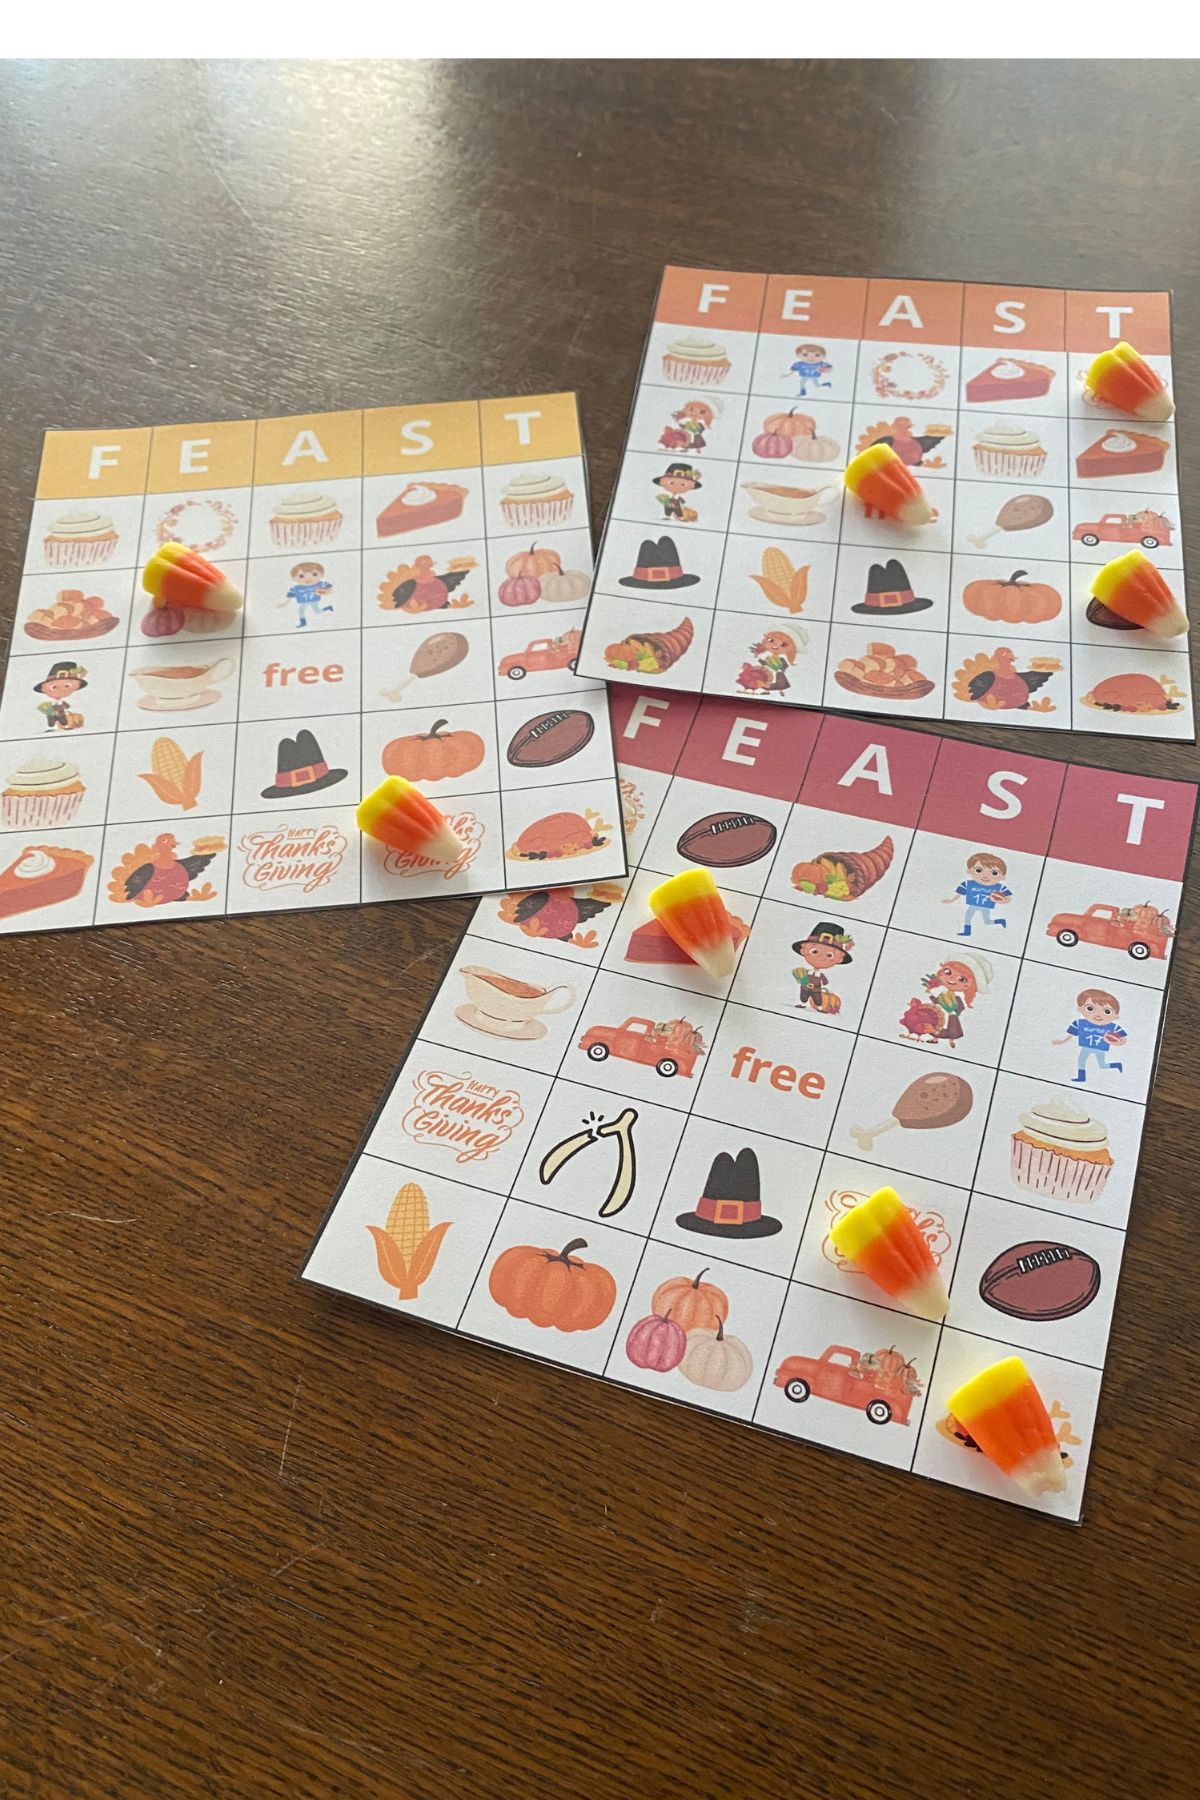
Colorful Thanksgiving-themed Bingo boards surrounded by Thanksgiving character cards on a wooden table
holidaysprintablesreadingthanksgiving

Thanksgiving Gobble-Gobble Bingo Game

by Teach Mama September 29, 2024
written by Teach Mama

Get ready to add some festive fun to your Thanksgiving celebrations with this Thanksgiving Gobble-Gobble Bingo game! Perfect for classroom parties, family gatherings, or just a fun at-home activity, this game is easy to set up and sure to bring Thanksgiving joy. Whether you’re planning a class party or a cozy family game night, this free printable will be a hit!

Because we homeschooled, we didn’t have big class parties like in public schools. Instead, we created our own fun to celebrate the Thanksgiving season. Games like Thanksgiving Gobble-Gobble Bingo are a quick and easy way to bring a little holiday excitement into your day!

Gobble-Gobble Bingo is Turkey Day Fun for Everyone!

Get Ready to Play Gobble-Gobble Bingo:

Step 1: Gather Your Supplies

To play Thanksgiving FEAST Bingo, you’ll need a few simple supplies:

  • Free Printable Thanksgiving FEAST Bingo Boards (download below)
  • White Cardstock (for printing the boards and cards)
  • Scissors (to cut out the bingo cards)
  • A Container (like a mason jar or Thanksgiving-themed basket to hold the picture cards)
  • Game Markers (you can use gems, candy, or any small items)

Step 2: Prep Your Container

Add a festive touch by storing the bingo cards and markers in a fun container. A mason jar filled with crinkle paper works great, or you could reuse a small basket or Thanksgiving decoration. Keep it handy, and you can use the container year after year!

Step 3: Cut Out the Bingo Cards

Print your Thanksgiving Gobble-Gobble Bingo boards and picture cards onto white cardstock. For durability, consider laminating the cards to protect them from spills and sticky fingers. Once printed, cut out the bingo cards and add them to your container.

Let the Game Begin!

OPTION 1 – Pass the Jar

Pass the jar around and have each player draw a card and call out the image and the letter (F, E, A, S, or T). Players then check their boards to see if they have the image in the corresponding column. If they do, they can place a marker on that spot. Keep playing until someone fills a row and shouts “Bingo!”

OPTION 2 – Roll the Die

Create a foam die with the letters F-E-A-S-T on five sides, and a turkey symbol on the sixth side. If the turkey symbol comes up on a roll, that’s a “freebie,” and the player can place a marker wherever they like on their board.

OPTION 3 – Group Play

In a classroom or large group setting, designate one person to draw the cards and call out the images and letters. Players mark their boards as the game progresses. For extra fun, let the players customize their own Bingo cards with Thanksgiving-themed images before the game begins!

Make It Extra Fun!

For an added twist, try using themed markers like candy corn, cranberries, or autumn-colored buttons. At home, you can even use small toys or Thanksgiving-themed trinkets. And don’t forget, if you roll a “freebie” turkey, you can place your marker anywhere on your board that matches the picture!

Instead of shouting “Bingo!” when they have all the pictures in a row covered, have the kids shout “Gobble-Gobble!” in their best turkey voice!

Three Thanksgiving themed Bingo boards on a wooden table

Download Your Free Thanksgiving Gobble-Gobble Bingo Game

The free download includes six different Bingo boards, each with a colorful Thanksgiving theme. The set also includes the F-E-A-S-T cards and picture cards needed to play the game.

For markers, you can use buttons, pennies, or fun items like candy corn. If you’re using this game for a classroom or party, enlarge the picture cards so all the players can easily see which cards are drawn.

Make sure you print enough boards for everyone, and have a couple of copies of the picture cards ready for group play. Using big cards will help everyone follow along during the game!

Get your Gobble-Gobble Bingo fun started! Just pop your email into the box below, and the download will be sent straight to your inbox, ready to bring some Thanksgiving fun.

For More Thanksgiving Fun, Check Out These Great Ideas:

  • Thanksgiving Thankful Door
  • Turkey Veggie Plate
  • Make Butter Like Our Ancestors Did
  • Fall Owl Craft
  • Our Favorite Thanksgiving Printables for Kids
  • Fun Thanksgiving Fact Lunchbox Notes
  • Thanksgiving Word Search

Happy, Happy Thanksgiving!

PIN THIS FOR LATER!

September 29, 2024 0 comments
0 FacebookTwitterPinterestPocketThreadsBlueskyEmail
Card Owl craft printable on white and brown cardstock
craftsfamily funfamily lifethanksgiving

Three Fall Owl Crafts for Kids

by Teach Mama September 13, 2024
written by Teach Mama

Get ready for some autumn creativity with these adorable fall owl-themed fall crafts! Perfect for kids and adults alike, these easy and fun projects will bring a touch of whimsy to your seasonal décor. Whether you’re using paper rolls or yarn, these fall owl crafts are a hoot to make!

Growing up I remember making small craft projects with my mom around the holidays and these bring back memories of those times. Now I’m doing the same thing with my grandkids! Join the fun!

How to Make a Fall Owl Craft

These charming fall owl crafts can be made with just a few supplies you likely already have on hand! From yarn-wrapped owls to cute paper roll creations, these fun fall crafts will keep everyone entertained. Easy-peasy when you follow the step-by-step instructions below.

Three paper roll craft owls.  One with brown yarn for the body, one with cupcake wrappers for wings and the third with construction paper wings and body sitting on a wooden table with yarn in the background

Easy Owl Crafts for Kids VIDEO

Check out this quick video with a few different ways to make these adorable owls! Then grab the download below and get started!

[adthrive-in-post-video-player video-id=”mp6mfMJ9″ upload-date=”2024-10-10T00:17:20+00:00″ name=”Easy Fall Owl Craft for Kids” description=”” player-type=”default” override-embed=”default”]

Paper Roll Owls

With a simple paper towel or toilet paper roll and some decorative paper, you can make the cutest little fall owl in no time!

Step 1: Flatten the Roll

Flatten the paper towel or toilet paper roll by pressing down on the top and bottom. Then, score a half-circle on both sides of the top with a blunt object like an empty pen.

Step 2: Cover with Paper

Wrap the tube with construction or scrapbook paper for a decorative touch. Carefully fold the scored tops inward to create the owl’s ears.

Step 3: Add Wings and Decorations

If you want, you can cut wings directly into the tube. Otherwise, attach your wings using items like cupcake cups, tissue paper, or whatever you have on hand. Decorate the body with patterns or markers, and don’t forget to add a small triangle for the beak.

Step 4: Attach the Eyes

Glue googly eyes above the beak, letting them overlap the top just a little for a whimsical look!

A mason jar wrapped in gray yarn with cupcake wrappers for wings, an orange paper triangle for a beak, bottle-cap google eyes sitting on a wooden table in front of yarn

Yarn Owl

This yarn owl craft is perfect for adding texture to your seasonal décor. All you need is a jar, some glue, and a ball of yarn!

Step 1: Wrap the Yarn Around the Jar

Start by covering a jar (plastic preferred for kids) with liquid glue up to the threads. The wrapp the yarn around the jar about 1/4″ below the threads. Wrap upwards and then back down over the beginning of the yarn.

This will cover the cut edge and prevent unraveling. Wrap the yarn all the way down the jar. (go back over the middle several times if you want a fatter owl)

Step 2: Attach the Beak and Eyes

Use a drop of hot glue to attach a small triangle for the beak. Make your eyes however you want—bottle-caps and googly eyes are always a favorite! Hot glue them just above the beak.

Step 3: Add Wings

The last step is to attach the wings. We used mini cupcake wrappers folded in half that I had left over in the back of a drawer. If you want to try something different, you could cut out ovals and decorate them before attaching them with hot glue.

Optional:

Decorate the jar lid with yarn, or even turn it into a cute little hat!

What Will You Store Inside?

Fill your fall owl jar with candy corn, M&Ms, mints, or maybe a homemade treat to surprise your guests!

Printable card stock owl crafts.  One on brown card stock with pink yarn stitched around the wings and tummy and one with cupcake wrappers for wings and a body colored with crayon sitting on a wooden table in front of yarn

Owl Card Craft

This craft combines a little sewing and coloring for a beautiful fall owl card with a fun twist. For best results print on bright white cardstock for creative coloring or even fall colors cardstock.

Step 1: Decorate Your Card

If you are going to use watercolors, pens, pencils, colors or tissue paper then do that before cutting out the card, the window and punching the sewing holes. If you’re going to use acrylic paint, you’ll need to cut out the card, punch out the holes and the window before painting since the paint will cover up those markings.

Step 2: Punch Sewing Holes

Use a 1/8″ hole punch to punch the sewing holes around the window. We also eyeballed some holes around the edge of the wings. Totally optional!

Step 3: Sew Around the Window

Thread a tapestry needle with your yarn. Leave a 2″ tail of yarn when you start sewing from the side that will be inside the card–you’re going to tie the ends together when you’re done.

We chose to make a woven grid pattern on our card, but you could do it however strikes your fancy. then we finished up the edge of the window with a simple embroidery back stitch. Again very optional!

Optional:

Another option would be to cover the window with bits of colored tissue paper for a stain glass effect. We found it was easier to cover the window with a single piece of tissue paper first and then layer bits of torn tissue on top of that.

Step 4: Assemble the Owl’s Face

Glue on a small triangle for the beak and attach the eyes. You can use soda bottle caps filled with googly eyes or just the eyes themselves!

Step 5: Add Wings

Almost finished… decorate the wings included in the printable or use folded cupcake wrappers, or maybe a couple of colorful fall leaves. Hot glue the wings in place and you’re done!

Card Owl craft printable on white and brown cardstock

Want your own card owl printable? Just throw your email in the box below and the download will appear in your inbox.

Even More Fun Fall Activities!

Looking for more fall-themed ideas? Check out these other activities and adorable projects:

  • Our Favorite Thanksgiving Printables for Kids
  • How to Make Homemade Butter
  • Leafy Indoor/Outdoor Alphabet Hunt
  • Musical Leaves – Fun Fall Indoor Activity
  • Fun Fall Leaves Math Grid Game

PIN THIS FOR LATER

September 13, 2024 1 comment
0 FacebookTwitterPinterestPocketThreadsBlueskyEmail
Child dressed as a clown holding a red balloon
Mental Healthparenting

Dealing With Childhood Fears – A Parent’s Guide

by Teach Mama September 8, 2024
written by Teach Mama

Fear is a normal and unavoidable part of childhood. As parents it’s important to know how to support our kids through those childhood fears to safety on the other side. Here are some practical tips for addressing those monsters under the bed in a way that empowers your child to feel safe, secure and confident.

Child dressed as a clown standing on a driveway looking up at the moon

I remember seeing “Dark Shadows” (a very dark soap opera from my childhood) as a kid at my cousins’ house. I didn’t tell anyone how scared I was, but let me tell you, I had a serious problem with vampires for years as a result!

Childhood Fears

Let’s face it, our kids don’t have much life experience. So for a while everything is new and potentially dangerous and scary. They don’t know yet what things really are scary and which things aren’t. We can help them with that. So let’s talk about FEAR.

Where Does Fear Come From?

That’s a great question and an important place to start. Unfortunately it’s not easy to answer because fear can come from all sorts of places.

Specific Incidents That Create Fear

Fear may result from being involved in an incident of some sort they don’t understand or haven’t processed. Car wrecks, abuse, violence, tornadoes and other natural disasters are examples of the kind of incidents kids may need help processing.

TV, Movies and the News

Like my brush with the horror genre at a very young age, fear doesn’t have to be logical or about real things. In fact, it often isn’t. Like vampires.

But in today’s world there are a lot of scary real things being reported on the 24 hour news cycle every day. Movies can also pose a problem for children who may not be able to tell the difference between reality and fiction.

Our brains aren’t really wired to tell the difference easily. That’s why you jump at horror or suspenseful programs!

Misunderstanding a Conversation or Situation

I had a young client who screamed in terror every morning when her mom dropped her off at daycare. Her terror was so overwhelming that school was impossible. We did all the things and finally she started making progress.

But I didn’t know where the fear came from until our last session when her mom casually mentioned a fire in their neighborhood. That little girl had watched firemen bring the old woman who made her cookies out on a gurney! Ding Ding Ding!

All that time she had been terrified to leave her mom because she thought something awful would happen to her while she was at daycare! Remember, just because you understand something doesn’t mean your child does. Check in often and explain what they don’t understand.

Common Fears

Here are some common fears experienced by children:

  • The dark
  • Unfamiliar noises at night
  • Monsters, ghosts and vampires etc
  • Big animals – dogs, dinosaurs, horses etc
  • Snakes and spiders
  • Storms
  • Being alone
  • Angry adults – parents, teachers, even actors on the screen
  • Strangers
  • Scary TV, movies, news
  • Doctors, dentists, shots and needles
  • Failure and rejection

Understanding the Fear

Before you can conquer something you have to understand it. Whether it’s that terrifying IRS form or an equally terrifying souffle recipe. A child’s fear is no different.

Does the fear interfere with your child’s life (or yours)? — Since you’re reading this post I’m going to assume the answer is “yes” and move on to the second question.

What purpose does the fear seem to serve? — Often it’s just to avoid, or be reassured and comforted. But sometimes fear serves other purposes. Like protecting them from something they may not have language to talk about.

I knew a girl who developed a fear of bathing. She would go swimming but soap and water, no way! She became very isolated because in a word, she stunk. Her fear of bathing kept her stinky which in turn kept her abuser uninterested! Look for fear’s purpose.

When did the fear start? Try to pinpoint when a fear started. Then think about what was happening around that time in the home, at school, in the community. Is there a connection?

Mom and child talking on a sofa in watercolor style

Dealing With Fear

Remember that getting rid of the fear is only part of the solution. We want our kids to know how to deal with it on their own at some point. Fortunately it’s a skill we can model, teach and learn.

  • Normalize and validate – Everyone has fears, they are normal. Say, “I understand how that could be frightening.”
  • Model coping skills – You can tell children how you deal with fear, but it’s much more meaningful if they see you coping. Talk with them about how they that might do the same thing. Help them connect the dots..
  • Understand your own fears – What are you afraid of? Is your fear being communicated to your child?
  • Be aware of outside influences – This includes media, people and situations that may be causing the fear.
  • Minimize avoidance – I know this sounds wrong, but avoidance alone is not the answer. It teaches running away as the answer to fear instead of actually dealing with it.
  • Externalize the fear – This is a fancy way of saying make the fear separate from them. Sometimes I have kids draw what their fear looks like. Not necessarily the object of the fear, but the emotion or feeling of fear itself. When its separate from them it’s easier to talk about… and conquer.
  • Talk about the externalized fear – “Play” is the native language of children! So young kids may not have adequate words to actually “talk” about what’s bothering them. Try playing it out with toys instead.
  • Give the child control over the fear – This is an important step in teaching anyone to deal with fear! This is a place where a child’s native imagination can be a HUGE help. Do they have superhuman powers to defeat fear? Or do they pray for angels to stand guard over them? But then again it might also be as simple a matter as putting a lamp beside their bed. Then they have the power to reassure themselves there are no monsters in the room.
  • Prayer – For believing and observant families a practice of praying for strength, calm, peace and protection may be helpful.

The Don’ts in Dealing with Your Child’s Fear

Your child needs to know you are there to help and support them. They need to know you take them seriously. In short, they need to be able to trust you. This is a list of trust killers. Avoid them like the plague!

  • Don’t use shame! – It won’t work and will make the problem even bigger! You don’t want to do anything to make your child hesitate to come to you with a problem.
  • Don’t diminish or make light of their fear – Even if the fear doesn’t seem like a big deal to you, I guarantee it feels HUGE to your child.
  • Don’t make fun of them for having a fear – This one makes your child feel small and unimportant.
  • Don’t force them to confront their fear head on – I’m fearful of snakes. I’m not going to be helped by being forced to go to a rattlesnake round-up. In fact it’s probably going to make the problem a lot worse.
  • Don’t (as in never) share or discuss your child’s fears in front of others – At least not without their expressed permission. You may need to talk to a doctor or counselor at some point, but that’s an entirely different thing than discussing their fear at the pool with your buddies or over a family meal.

This is Your Time to SHINE as a Parent!

More Parenting Resources That You May Find Helpful:

  • Help Your Kids Build Life Skills This Summer
  • Helping Your Kids Manage Anxiety
  • The Importance of Unstructured Play for Kids
  • Make the End of School Special with a Family Dinner to Remember
  • Noticing Your Kids…In a Good Way!
  • Handling Sadness, Tragedy and Grief as a Family
  • How to Get Your Kids to Open-Up
  • 9 Things All Kids Must Hear Their Parents Say

PIN THIS FOR LATER


September 8, 2024 0 comments
0 FacebookTwitterPinterestPocketThreadsBlueskyEmail
Newer Posts
Older Posts

About Me

About Me

Hi! I'm Hannah.

A mother of one, I am passionate about inspiring mamas and educators with hands-on, meaningful learning ideas that make everyday moments fun, purposeful, and filled with curiosity.

Follow Teach Mama

13.5K Fans Like
2.8K Subscribers Subscribe
132K Followers Follow Us

Recent Posts

  • Best Slime Bundles for Creative Play: 5 Must-Have Collections in 2025

    October 13, 2025
  • Learning Through Everyday Routines and Special Adventures

    September 19, 2025
  • How to Talk to Kids About Goals and Future Dreams

    September 19, 2025
  • Making Everyday Learning Count: Turning Small Moments Into Big Lessons

    September 19, 2025
  • Raising Kids Who Understand the Balance Between Needs and Wants

    September 19, 2025
  • Family Learning Projects That Spark Conversations About Money

    September 19, 2025

LEARN

PLAY

CRAFTS

PRINTABLES

About Me

A mother of one, I am passionate about inspiring mamas and educators with hands-on, meaningful learning ideas that make everyday moments fun, purposeful, and filled with curiosity.

Useful Links

  • About
  • Contact

Popular Posts

  • words 3 ways: learning sight words for kindergarten

    May 17, 2012
  • quick trick: magnetic letters (how to use them with your kids!)

    December 1, 2010

Recent Posts

  • Best Slime Bundles for Creative Play: 5 Must-Have Collections in 2025

    October 13, 2025
  • Learning Through Everyday Routines and Special Adventures

    September 19, 2025
  • Facebook
  • Pinterest
  • Youtube
Teach Mama
  • Reading
  • Early Literacy
  • Writing
  • STEM
  • Activities
  • Digital Literacy

Shopping Cart

Close

No products in the cart.

Close