This week our Smart Summer Challenge theme is Government–and what better way to start the week off than by playing with money? Okay, so we really started the week off with a flag cake, but who’s really keeping track?
We’ve had a huge jug in our craft room, just sitting there collecting loose change for months and months and months so I thought it would be a perfect day and unload those coins so Maddy, Owen, and Cora could practice some counting, estimating, and wrapping.
We skipped swim and dive today because Maddy and Owen are still not 100%, but before we took Cora to her ‘mini-team’, we did some serious money-playing. . .
Playing With Money–Counting, Wrapping, and Estimating: We started off by sorting the coins, and in order to keep things separate, I put a piece of colored construction paper in front of Maddy, Owen, Cora, and myself.
I said, Okay, we’ve got soooo many coins in here, and they’re just sitting here waiting to be counted and wrapped. How about we sort and count this money and then use it to go out tonight to celebrate Mommy and Daddy’s anniversary?
Yeeeesssss! Hoooray! Let’s go out for dinner–a family date! Woooo-hoooo! It was unanimous. We were counting and spending.
Super. Each one of us is going to be in charge of one coin–either a quarter, dime, nickel, or penny. Who wants what?
They decided that Cora would do quarters, Maddy pennies, Owen dimes, and I’d do nickels.
We dumped the coins on the dining room table, and started sorting, each person putting his or her coin on the paper in front of them.
We sorted and sorted and sorted some more.
We sorted and chatted, sorted and chatted, and we sorted some more until all of the coins were in the correct spot and we had a huge pile of ‘extras’–random coins from other countries, paper clips, beads, and other funny things that somehow found a home in our coin jar.
The Uglies. And they were realllly ugly.
Before we started counting and wrapping, we really examined and talked about the coins:
We went on an ‘Ugly Hunt‘–we all searched for the absolute most dirty, beat-up, and ugly coin;
We hunted for the mostperfectly perfect, shiny and sparkly coin;
We studied on our coin for 3 cool things to share with everyone–a picture, word, or something unusual or awesome about your coin;
We shared our ‘cool things’ with each other and looked at each other’s coin;
We talked about how many cents each coin was worth (this was obviously hard for Cora to understand, but Owen’s slowly getting it, and Maddy learned about money last year, so it was a great review for her);
We looked at the wrappers and figured out how many we needed of each coin so that the appropriate amount was in each wrapper;
We estimated–we each took a guess at how much money we had total, and wrote down our predictions (Maddy guessed $175; Owen guessed $820; Cora guessed $85; and I guessed $60).
Owen counts his dimes–five rows of ten.
And then we started counting.
I modeled for each kiddo how to do it in an organized way–Maddy put her pennies in five piles of ten; Owen placed his dimes in rows of ten; Cora put her quarters in ten rows of four.
And then they were on their own.
One row is wrapped, and he’s got four to go!
We double-checked their rows before we wrapped, and then I started the wrapping for the kids–it’s very difficult at first to fold and get it started.
And after the coins were lined up and ready, they wrapped and wrapped and wrapped.
We took a big break for Cora’s mini-team and then lunch, and after lunch we finished it up.
And then. . . for the finale–counting our wrapped coins! We organized the coins by type and added it all together. As much as I truly wished that Owen was closest in his estimation, I was the closest (boo).
But no complaints here–we were all totally excited to use our $58.00 on a happy anniversary family dinner tonight! Woo-hoo!
Our wrapped coins, ready to get cashed in at the bank and our final tally. . .
And that’s it for today–with two kids on the mend, counting and wrapping coins was about all we could do. . . but it was a blast! We all had fun, and Maddy, Owen, and Cora had no idea that they were practicing their math and fine motor skills today–I love it!
You can follow our calendar if you’d like, but you don’t have to. You can get really crazy, but you don’t have to do that either.
It can be simple learning–even 5 or 10 minutes a day. Anything and everything counts, and all we ask is that you link up here on Fridays and share what you’ve done (meaning: share one way you participated). Each Friday for the next six weeks, we’ll choose one participant to receive an awesome (and I mean totally worth your time awesome) prize.
Our goal is to show all parents that if we can do it, anyone can do it. And if we want our kids meet with success in school and to enjoy learning about the world around them, it’s our job to create a lifestyle of learning for our families. Join us!
I’m not going to lie–some summer days, I really think that if it weren’t for the 15 minutes of Adult Swim, my kids wouldn’t stop moving all day long.
Even the rest times that I once relied on as a definite break to our day, Maddy has renamed as ‘play time’. (It’s still in their rooms, but she thought ‘rest time’ sounded too babyish.)
So I have to try very hard to make reading–especially summer reading–engaging, relaxing, and inviting. I’ve mixed it up so far: some days I do the reading (modeling fluency is muy importante), some days we take turns, some days Maddy or Owen reads, and some days we all read silently.
It doesn’t matter what we do as long as we’re reading. Period.
For this Smart Summer Challenge day, I’m sharing one easy, sneaky way we threw in some reading comprehension strategy learning–some questioning and connecting–this week before we headed over to swim team.
We used two books that focused on the idea of ‘home’, since the theme this past week was ‘Me on the Map’–and everyone needs a starting point, a place to call home, right?
Questioning and Connecting During Read-Alouds: I’ve waxed on about the importance of sneaking in reading comprehension strategies during read-alouds, especially with our little guys–the ones who aren’t decoding the text themselves–because with our modeling of these strategies, kiddos will see what strong readers do as they read and will make these behaviors habitual as they do start reading on their own.
Questioning, simply asking questions about a text as its read, is an incredibly powerful strategy. According to Harvey and Goudvis “questions propel us forward and take us deeper into reading” (2000, Strategies That Work), and it’s totally true. When kids ask questions, they want to read on to find answers, and ultimately, they can make better connections with the text.
Fly Away Home is a perfect text for questioning and connecting.
When we sat down to read, I grabbed Eve Bunting’s Fly Away Home, a really thought-provoking and moving book about a homeless boy and his father who live in an airport. Ronald Himler’s illustrations are fantastic, and I love this book, the story and the message so much, I used it to teach theme when I taught high school English. I thought it would be worthwhile for Maddy, Owen, and Cora to read because it’s really grounding.
Questioning started from the minute we sat down. I held the book, and as I looked at the cover, I said, The title of this book by Eve Bunting is ‘Fly Away Home’. I notice an airplane in the background, and it looks like these people are going on a trip. I wonder where ‘home’ is for them. I also wonder why they have such sad faces. What questions do you wonder about this book before I read?
Simple–and I did this kind of thinking out loud every few pages–enough to ask some questions, have the kids ask questions, but not totally interrupt the flow of the story.
We asked things like:
I wonder how they feel about living in an airport?
Do they feel scared every day?
Where are his toys?
Where is the boy’s mom and grandma?
How does he feel when he sees other kids leaving the airport?
Will they ever leave?
I wonder if they ever watch tv or go to a movie?
And as we found answers to our questions, I’d make mention of it. And by the end, they were doing the same.
It was inevitable that we’d make connections as we read, because connecting is so natural for kids (who often love, love, love any chance to talk about themselves). Connections were along the lines of:
If I lived there, I’d feel. . .
Remember that homeless person we saw. . .
I’d feel sad if I wore only blue like they do. . .
It would scare me if I slept there. . .
As our next book, Owen vehemently requested we read Corduroy, by Don Freeman, and it turned out it was a great pairing for Fly Away Home–perfect for making text-to-text connections.
Because this was a familiar book to the kids, I didn’t do the pre-reading questioning like before. They know the gist of the story, so there was no need for it. Instead, as I read the first page, “Corduroy is a bear who once lived in the toy department. . . Day after day he waited with all the other animals and dolls for somebody to come along and take him home,” I saw a light go on in the kids’ heads.
Hey–this is similar to what we just read in ‘Fly Away Home’, I said. Corduroy is looking for a home, and Andrew and his dad are hoping to find a new home. Let’s read on to find other ways the books are alike and different. . .
And that’s it–connections are easy, really, and can be done on a number of levels:
text to self:How does the text relate to you?
text to text:How does the text relate to other books, plays, poems, etc. you’ve read?
text to world:How does the text relate to events or ideas or situations in the world around you?
Playing with each type of connection helps deepen a reader’s understanding of a text, and seriously, kids. love. connecting. They’re learning and they don’t even realize it. And they love talking about themselves, so connecting is usually easy for them.
And that’s it–two simple but totally important reading comprehension strategies as part of my Read-Aloud Learning series (that I sneaked into our Me on the Map week of the Smart Summer Challenge.)
Please join Candace of Naturally Educational, MaryLea of Pink and Green Mama, and me for the Smart Summer Challenge, a six-week campaign where we all pledging to sneak in some sort of fun learning into our children’s summer days.
You can follow our calendar if you’d like, but you don’t have to. You can get really crazy, but you don’t have to do that either.
It can be simple learning–even 5 or 10 minutes a day. Anything and everything counts, and all we ask is that you link up here on Fridays and share what you’ve done (meaning: share one way you participated). Each Friday for the next six weeks, we’ll choose one participant to receive an awesome (and I mean totally worth your time awesome) prize.
Our goal is to show all parents that if we can do it, anyone can do it. And if we want our kids meet with success in school and to enjoy learning about the world around them, it’s our job to create a lifestyle of learning for our families. Join us!
Our very first day of the Smart Summer Challenge found us lazying around at home because Owen returned from swim and dive feeling really under the weather.
So while he caught up on some telly and gave his body a rest, Maddy, Cora, and I did some reading, puzzles, and organizing.
But before our plans hit the fan, we walked into the Smart Summer Challenge bright-eyed and bushy-tailed at breakfast time. We started our day with some fancy new words– a Word a Day, summer style.
Nothing nuts, crazy, or difficult–just a word a day from now until the end of the summer.
A Word a Day: I know that tons of people do this, from classroom teachers to at-home parents, and in fact Roger Rosenblatt writes about how he does this with his grandchildren in his memoir (that I literally ugly-cried my way through), Making Toast.
I am too much of a planner to write a word on an index card every day, so I put mine in a document and added some pictures that will help my kids remember each word.
A Word a Day Cards fresh off the printing press
I‘m creating the word a day cards set 1 teachmama.com in sets of 10-14 so that I can add relevant words for our family. I hope to include new and fun words that we encounter in our summer reading books, movies, shows, and life in general.
I printed these on cardstock–a mix of white, tan, and grey because that’s all we had left–and then I hole punched one corner. I connected them via a binder ring, and that’s it.
I used a bright blue ribbon to hang them right there in our kitchen so that our Word of the Day will be the first thing we tackle every morning–and something we revisit throughout the day.
I wanted to start with ‘aspire’ because the sentence I wrote dealt with summer reading, and I knew I wanted to begin some ‘official’ summer reading today. So at breakfast I said, Hey! Did anyone even notice our brand new, totally fancy wall hanging?
Our brand-new, totally fancy wall hanging: Word of the Day Cards
Owen glanced up from his Honey Nutters and said, I do! Hey! It’s right there.
I grabbed the cards and said, Yep. Here are our incredibly fancy Word a Day Cards. Each and every day this summer, we’re going to rock out a new word so our brains stay sharp and so we can ‘wow!’ our friends and family with our advanced vocabulary. How cool is that? You are so lucky to have a mom who cares so much about you.
Our first word is ‘aspire’. Anyone ever hear the word used before?
Maddy said, I do! My teacher aspired me to write a story this year. He gave me great ideas and helped me. That’s aspire.
I know your teacher did inspire you to write your book this past year, but can you hear the difference between the word.
I said and the word you said? Listen: [Maddy’s teacher] inspired you to write your book this year by teaching you strong writing skills and by helping you come up with a great idea.
Our word today is ‘aspire’. ‘Aspire’ means to have a strong desire to do something or attain something. You may aspire to be a doctor or a teacher or the President of the United States, or you may aspire to one day speak another language. Here’s a sentence to help make it more clear: I aspire to read at least 20 books this summer, and with hard work, I know I can do it.
Got it? Okay–now here’s the challenge: if you can find this word anywhere today–in a book, on tv, on a sign, anywhere–or if you use this word, you get an extra gem. Easy as pie.
Throughout the day we mentioned ‘aspire’--when we sat down to do some reading and I said, Remember, I aspire to be a busy reader this summer. I need help. Big-time. So let’s get started.
We also chatted ‘aspire’ when we were talking about what Maddy, Owen, and Cora aspired to be when they grow up. Maddy aspires to be in art school, Owen aspires to be a Mario Kart expert, and Cora aspires to have sparkly lip gloss and very long hair. Okay, so we can all dream, right?
with Post-It’s hiding our activities, it’s like a surprise every day to see what fun is to be had!
I did create a sheet–word of the day list–that I’ll hang on our fridge next to our top-secret Smart Summer Challenge Calendar. The A Word a Day: Words to Include is a list where anyone can write a word they want me to include in our next batch of word a day cards set 1 teachmama.com. Hopefully, since we’ve got huge Word Girl fans over here, they’ll add some and I can add some, and we’ll all be more invested in the end.
Want a little more? Click on the image for more word-consciousness fun!
And that’s it for day #1–Happy Smart Summer Word Learning!
Please join us for the Smart Summer Challenge, a six-week campaign where we all pledging to sneak in some sort of fun learning into our children’s summer days.
You can follow our calendar if you’d like, but you don’t have to. You can get really crazy, but you don’t have to do that either. It can be simple learning–even 5 or 10 minutes a day. Anything and everything counts.
Our goal is to show all parents that if we can do it, anyone can do it. And if we want our kids to do well in school and to enjoy learning about the world around them, we have to create a lifestyle of learning for our families. Join us!
Sometimes it’s very easy for teachers and parents to feel impatient with emerging readers.
It’s hard to listen to kids sound out every word on a page and get through only five words a minute.
It’s hard to know what to do when kids insist on reading books that aren’t the ‘right fit’ –either too easy or too difficult.
It’s hard to sit still when a kiddo reads a whole page of nonsense rhyming words.
Or when he reads a whole page fluently and is completely unable to tell you anything about what he just read.
It’s also frustrating when you sit down to read with a child and he refuses to read out loud, saying, I’m not in school, and I’m not a good reader. I’m not reading to you.
In the Read-Aloud Learning Series I’ve been doing, I’ve tackled some easy and very cool strategies that any parent can sneak in during the short span of a read-aloud. And the feedback I’ve received has been awesome–I definitely plan to continue it. But as parents, it needs to be our number one priority to make our kiddos comfortable reading with us–and want to read with us–especially in the summer. They need the practice, and they need to know that reading with mom and dad is a safe, enjoyable, natural thing.
So before our Smart Summer Challenge begins, I wanted to throw in a post that I’ve been working on for some time because it’s just that important and because so many people have asked me, emailed me, and questioned me about: What should parents NEVER say to their child during a read-aloud?
So here we go, in no particular order — What Not to Say to an Emerging Reader:
DON’T SAY: Stop. Re-read this line correctly.
DON’T SAY: Stop. Re-read this line correctly.
INSTEAD: If the mistake didn’t interfere with the meaning of the text (like if it was ‘a’ for ‘the’ or ‘fine’ for ‘fun’) let it go.
Do. Not. Interrupt. Your. Child’s. Reading.
Period.
How would you feel if you were putting your heart out on the line, trying something you weren’t totally comfortable with, in front of someone who you were afraid would challenge you, only to have that person stop you, interrupt your flow, and make you start over before you even finished? Over and over and over again?
Right. So that’s why if your kiddo’s reading and makes a mistake in reading a word, let it go. We want our kids to be comfortable reading with us–we want them to feel safe–so let it go.
Just make the correction when you read it the next time.
DON’T SAY:Speed up! OR Slow down!!
DON’T SAY: C’mon, speed up–you have to read a little faster! OR Slow down–you’re zipping through this!!
INSTEAD: Model appropriate pacing and fluency.
Fluency–or reading with appropriate speed, pacing, and intonation–is something that is best taught through parent or teacher modeling and tons of reader practice. Seriously. Fluent reading sounds like conversation, or natural speaking, and it’s something that has to be learned.
So if your kiddo is a total speed-reader or if, at this point, she’s as slow as molasses, it’s time to switch gears. Grab a level-appropriate book and say, Hey! I found this awesome book for us, and it’s going to be our book this week. We’re going to read this book until we become experts on this book– we’ll be book-reading super-stars by the end of this week, mark my word. . .
And the first day, you read the whole thing in its entirety. And then do an echo read, page by page. An echo read is really just like an echo–a portion of a text is read and then re-read by a second person (or class if you’re in the classroom). You can echo words, phrases, or whole pages. In this case, with an early-emergent text, it’s great to echo read page-by-page. First, you read a page and then your emerging reader reads that same page. And then you read the next page and she reads that very same page, like an echo.
And on day two, you read it in its entirety the first time, and then together, you echo read every two pages. Or every three pages.
Day three, you read it the first time, and either echo read by three pages or try a chorus read. A chorus read is where you read it together, in unison, like a chorus. Sometimes these are hard, but for pacing, it helps.
Day four, you read it the first time then hand the book over to your kiddo for an entire kid-read. Give her specific praises for her super-star parts: I really like how you paid close attention to the punctuation here (point to the specific part). You noticed the question mark, and you knew that meant that [the character] was asking a question, so you made your voice go higher at the end. Awesome.
Maybe on day four, you can tape yourselves reading or put it on video (not a big deal–just grab your flip cam or camera–it doesn’t have to be a huge, complicated video production) and talk about what sounded great and what you both need to work on.
Day five, it’s showtime. You both give yourselves ‘practice reads’– start by reading the book yourself and then give it to your child. Then it’s the BEST READ EVER–you both get to go on ‘stage’ for the most awesome, perfect, wonderful read ever. Video tape it, audio tape it, or Skype-read with your faraway aunts, cousins, grandparents, or friends. You both practiced all week–now show off your skills!
DON’T:Laugh.
DON’T: Laugh.
INSTEAD: Think about something serious and ugly and breathe deeply until you regain composure.
Even if your kiddo replaces ‘bat’ with ‘butt’ or ‘fact’ with ‘fart’ don’t laugh. The fastest way to kill confidence is to have the person a kiddo loves and trusts the most laugh in his face.
If you can laugh together, that’s one thing; most likely if your kid is reading aloud and says ‘butt’, he’ll break out into hysterics and you will too. But if he’s working hard, concentrating, and trying his best and still managed to make a mistake that tickles your funny bone, then just move on.
DON’T SAY:You know this. . .
DON’T SAY: You know this. . .
INSTEAD SAY: What part of the word do you recognize? If you get no response, say, Do you recognize this part (point to the beginning chunk or letter) or this part (point to the ending chunk or letter)?
Three things here:
1. If the kid knew it, she would have read it.
2. We all hate to be reminded that we knew something but forgot it.
3. By picking out two parts of the word, you’re setting her up for success. It all goes back to the choices thing that really helps with kids. Most likely she will recognize either the ‘b’ or ‘-at’ part of ‘bat’ or the ‘th’ or ‘-ick’ parts of ‘thick’. If she can pick up either part, say, You got it! That does say ‘ick’. Now let’s put the first part, (give it to her and pronounce it) ‘th’ together with ‘ick’: th-ick. Thick!
Then put that new word into the sentence and give her a high-five for getting through it.
DON’T SAY:You’re wrong. That says, . . .
DON’T SAY: You’re wrong. That says, . . .
INSTEAD SAY: Nothing. Really. Remain silent. As hard as that may be.
It goes back to the very first thing I said about stopping kids as they read and making them re-read.
Let. Them. Read.
And unless it’s a mistake that interferes with the meaning of the text, let it go. And even more importantly, if every time your child gets stuck, he looks at you and you give him the word, then he’ll have a pretty easy time reading with you and won’t get to practice any decoding skills.
Now, that being said, if he did make a huge meaning-changing mistake, at the end of the page, go back and say,
Are you correct? (And if he says Yes! then say. . . )
Read it again and check closely. (If he reads it again incorrectly, say. . . )
Can you use the picture to help you figure it out?
Does it make sense?
Does it sound right?
(And if he looks at it again and still misses the error, say. . . )
Can you find the tricky part? (And if not. . . )
It’s in this line.
I’ll point it out and help you find it. (And then go back to pointing out the two chunks he may know. . . )
After kids become more comfortable reading with you, then hit them with an Are you correct? every so often on a page that he did read correctly. It’s not to make kids think you’re a pain in the neck; it’s to help them become better self-monitors. And as self-monitors, we’re constantly checking and re-checking to make sure that what we read made sense.
And that’s my initial list of what not to say to emerging reader: which can be downloaded below:
My amazing friends have helped me with this post, giving me feedback on my ideas and also adding some other things never to say to our little emerging readers. They’ve added:
Good readers say the first sound in the word. . . . Good readers do this (or that. . . )
Come on, try harder!
You should already know that!
All the other kids can do this!
Why aren’t you paying attention?
Didn’t we just go over this yesterday?
You’ll thank me for making you read this when you grow up.
I loved this book when I was a kid; you’ll love it too.
That’s an easy word.
That’s a Kindergarten word; you should already know it.
Cheers, and happy reading during this incredibly exciting journey!
One of the best activities for practicing early word learning is the picture-word sort.
Nothing takes the pressure off of reading like adding pictures since a huuuuge chunk of early reading involves kids using the pictures to help them figure out words. It’s a natural partnership.
So while Maddy worked on her last (woooo-hoooo!) homework packet of the year, Owen got busy with some work that will help prepare him for kindergarten: the short e picture and word sort.
Here’s the skinny (and it’s much easier than you may think!):
Short e Picture-Word Sort: Owen tackled the short a word/ picture sort a few weeks ago, and he asked to do ‘e words’ numerous times, so it was time to bring them out.
Though I used the short e sort from Words Their Way, I do have a short e picture-word sort to download and try yourself.
We followed the same basic system as we’ve done in the past, but this time Owen’s extension was really simple–he copied the words in his notebook. Pretty easy.
Owen sorts the short e pictures first. . .
I started by saying, Okay, Owen, today while Maddy works and Cora paints, you’re going to rock out the short e words. First we’ll organize and sort these pictures that have the short e (I demonstrated the sound ‘eh’) in the middle. We’re going to listen closely for the end sounds of these words and then we’ll put them in family groups.
Listen as I say these three words: pet, beg, ten. Pet, beg, ten. I can hear a different end sound in each word. Pet. What sound do you hear at the end of ‘pet’?
‘T’–it’s the ‘t’.
Right. ‘Pet’ ends with a ‘ttt’ sound, so I’ll put it here. Listen to ‘beg’. Can you hear a different sound? Can you hear the ‘ggg’ sound?
Yes, it’s ‘ggg’ for ‘g’. And ‘ten’ has an ‘nnn’ sound. It’s an ‘n’ at the end.
You got it. So we’ll put ‘pet’ in the middle and ‘ten’ right here. Listen as I say each of the other pictures. When I’m finished, I’ll help Maddy with her work and you can put these picture cards in the right family group. Okay?
. . . and then he matches the words to the pictures.
I checked back with him after just a few minutes, once I saw he had three columns (kind of) of pictures.
I said, Looks like you’re finished. Why don’t you say the words you put in each group so we can make sure everyone fits.
He did, and he was on target. He was ready for the next step: picture and word matching.
Okay, Owen, you know the next step, and it’s a toughie: matching the correct word to the picture. Here are the teeny short e word cards. Take a few minutes to match each word to its picture and let me know when you’re ready for me to check.
He gave me the signal a few minutes later, and he read each word. I pointed to each word as he read.
OH my goodness, Owen, you are rocking it today, my friend. What do you notice about the sounds of the words in each column?
He said, They’re mostly rhyming, and we talked about the rhyme sounds a bit. Then I said,
Okay, after we match the words and pictures, we always do one last activity. Today, let’s just have you write each word in your red notebook. (His red notebook is just a spiral notebook that’s ‘his’.)
I’ve made three columns, one for each word family. In this first one, you can write down words from the ‘-et’ family. In the middle one, you can write words from the ‘-eg’ family, and in the last one, you can write the words from the ‘-en’ family. After you write the word, just flip the card over, and when I see all blank cards, I’ll come back over.
I came back over when he was finished, and I read each word in each column. Then I said, Awesome. Can you think of any other words that aren’t here that fit into the ‘-et’ family? I can–I’m thinking of ‘bet’. He came up with ‘zet’ and ‘vet’–and I gave him a high five for each one. Okay, we came up with ‘bet’, ‘zet’, and ‘vet’. Pick one and write it on the bottom of the list.
We did the same for each family, and he was done. He grabbed a coloring book and colored a bit until we headed over to the pool.
Super-quick, super-worthwhile picture and word sorting in a really, really short amount of time and with four distinct steps that are predictable and keep things moving for kids:
Demonstrate: introduce the sort, the focus, and anchor words or pictures
Sort and check: sort away! check back and encourage self-monitoring
Reflect: take a second and have kiddos think about the words, sounds, patterns, etc.
Extend: take the sort a step further by writing words and adding to list, playing with the words, searching for the words in a text, etc.
I didn’t this time, but it’s always wise to throw in an ‘oddball’ words that ‘are at odds with the consistencies within each category‘ (I love the way it’s described in Words Their Way, 2004). The oddball might be something like the word ‘have’ in a short -a / long -a sort–a word that doesn’t follow the rules of pronunciation. I usually just make a big question mark on a card for any words that might cause confusion for students when they’re sorting, but, of course, I forgot this time for Owen.
Anyway, thanks to Bear’s Words Their Way (2004) for the fabulous sorting information and for Rockingham k-12 site for providing the images I used in the short -e picture/ word sort I created. Happy sorting!
We are huge weather fans over here. Looking at the day’s forecast has become a regular part of our morning ever since the kids were really little.
Though our family may be a growing minority of people who are still getting it delivered on a daily basis, I love getting the paper, not only because in my mind there’s nothing like relaxing (even if it’s only for two minutes) with a cup of java over the day’s news, but also because the newspaper offers a wealth of learning opportunities for kids.
This past week, we all went nuts crazy because we saw for the first time in ages that the temperature was predicted to be 100 degrees. It. Was. Totally. Exciting.
Here’s how we use the weather section of the paper first thing in the morning to throw in a little math learning and some conversation before we hit the Kids Post:
Weather Forecast Math Learning: It really evolved naturally over time, beginning when Maddy was teeny and I checked the weather to make sure I could take her for a walk around the neighborhood and then becoming the partner to our day of the week vitamins.
But now if my husband forgets to bring in the paper or if we are moving slowly (or if I’m scrambling to pack three lunches) and we don’t sit down and open up the paper, the kids get really funny: Mom! What’s the weather today??! Where’s the newspaper!! Wait! We didn’t check the weather!!
Our weather forecast conversation takes all of two minutes in the morning–if that. Unless there’s something really crazy, like the 100 degree day, or five sunny/rainy’s in a row (everyone’s favorite!), it goes a little something like this:
Me: Okay, today is Monday (pointing to each day’s weather as I read) then we have Tuesday, Wednesday, Thursday, and Friday. Take a look at what we have going today and tell me what you think.
Maddy: HOT! 92 degrees! I have to wear flip-flops to school because I’ll be sweating. (She always wants to wear flips to school and I always say ‘No’ and it’s an ongoing challenge.)
Me: You’re right–92 degrees is hot, but flip-flops aren’t great shoes for the playground. You’ll be fine in sneakers until you get home. (Please note: she often ends up wearing flip-flops by the time we exit the house.)
Owen: Ahhh! Two rainy’s this week. Not bad.
Cora: Sunny, sunny, and sunny! Three sunny days!!
OR. . .
Me: (After I read through the days of the week) Take a look at all the temperature highs and lows and tell me which day will be the warmest.
Or I’ll say something like:
Take a look at all of the temperature lows and let’s figure out which day will be the coolest.
Wow! One day this week will be in the 80’s–which day will that be?
Who can tell me if there’s a pattern in the week’s weather?
What do we need to wear on Thursday, with the temperature just over 60 degrees and rain predicted?
Let’s put the days in order from highest temperature to lowest.
What weather would come next in this pattern: rainy, sunny, sunny, rainy. . . ?
Or for Cora (or Owen or Maddy when they were younger):
Today it will be sunny and tomorrow will be sunny. What will the weather be on Wednesday (as I point)?
How many rainy days will we have this week?
Will there be more rainy days or more sunny days this week?
What kind of shoes should we wear on this day (pointing to a rain cloud or big sun)?
That’s it. Just a teeny bit of sneaky learning over Cheerios, juice, and yogurt before the days starts and life gets crazy.
My focus is to get the kids thinking about the day, looking forward toward the week, and talking (a little bit) about numbers, math, and (okay) a little bit of science. And really, the non-fiction reading practice and interest in news doesn’t hurt, either. Happy newspaper reading!
With summer right around the corner and kids home a lot more than usual, many of us need to keep a few tricks in our back pocket for rainy days or those occasions when we feel like we might lose our minds.
This Quick Trick is certainly a keeper; it’s all about what kinds of recyclables parents should keep–and how they can use them with their kids–for unusual, free, earth-friendly fun.
Many of my friends have said, Seriously, Amy, why didn’t I think of saving those yogurt cups? or Smart idea to use those play-doh containers for sand toys–who cares if you lose one, right? And I’m totally not sharing this to toot my own horn; I’m sharing it because these are things we all can do–things we all can save and bring back to life in new and exciting ways for our kids.
I grew up with an extremely creative and resourceful mom–she kept things most people didn’t keep and taught us to use them in cool, new ways. We played with buttons, ribbons, material, and boxes like they were million dollar toys. Don’t get me wrong; we had Cabbage Patch Kids and Barbies and Legos, but sometimes, the ‘untoys’ were just as cool.
So here are the things you should consider keeping instead of immediately throwing into the recycling bin, starting now.
And if you are interested in having this in one happy, printable list, either print the post or scroll to the end.
Lids: Any and all lids, from milk cartons to juice containers, from peanut butter jars to fluff containers.
Why: They live a double life–no joking. They start out as lids and then morph into toys and learning games. Use them for:
Sorting: by colors, shapes, sizes, textures. Throw pieces of colored construction paper on the floor and help your little one match the colored lids to the correct color paper.
Throwing: experiment with gross motor practice (in a safe environment). Use some bowls or plates as targets, and see how many make it to the designated point.
Playing math games: assign bowls, cups, and containers point values, put initials inside the lids, and keep score!
Letter games and word building: with a few alphabet stickers stuck on (or written on with a permanent marker) these little lids spells F-U-N.
Building: throw a pile on the table or floor and challenge your kids to create. They will.
Kids can build words with letter lids. . .
. . . or just build sculptures with them.
Play-doh Containers: If you buy the stuff in the yellow containers, keep them.
Why: Kids not only love cleaning them in a big, soapy celebration on a hot summer day, but these things are perfect for:
Using in the sand or dirt: who cares if you lose them or if another family takes them home?
Holding beads, sequins, stickers-anything small: use chopsticks or tongs to move objects from one place to another for fine motor practice. Have kids move pom-poms, beads, buttons, cottonballs, whatever.
Taking them to the pool: throw these pups into your pool bag for baby pool especially–because, again, you won’t care if you lose them, and it will boggle your mind how kids will reach for them.
Clean the play-doh containers and save the lids–add them to your lid collection!
Yogurt Containers: Any size, but we love the small Yoplait and Danonino ones
Why: Run them through the dishwasher, and the possibilities for these guys are endless:
Snack holders: perfect for tiny hands, stacking together, throwing in a ziplock, and dishing out at park playdates.
Stackables, pyramid-builders: how many can your kids stack up and how sturdy can they make a pyramid on the kitchen floor?
Counting games: throw numbers on the bottom, mix them up, and have kids put them in order!
Spelling, and letter games: same as with numbers, but add letters!
Tissue paper flower vases: when you want to make flowers that last forever, you can make a little something pretty with them.
Yogurt cup counting games
Who knew fruit containers could become so darn pretty?
Apple sauce or mixed fruit containers: Love these.
Why: Use them for:
Water dishes for painting or crafting: they hold up remarkably well, and everyone knows when it’s time to change the water.
Shakers: add some tiny beads, some ribbon, and stick two together for a shakin’ good time.
Pretend play: add these to your play kitchen as bowls for kids or pets!
Don’t be afraid–these helped us talk about emotions!
Paper rolls: Paper towel rolls, toilet paper rolls, any rolls will do
Why: Use them for fun, crafty, unusual ways:
Making family dolls: print out pictures or glue old ones onto a paper roll and have a few good laughs
Talking about emotions with kids: same as above but make sure the photos show different emotions–happy, angry, sad, surprised–and do some role-playing, talking about emotions and how to handle them
Print making: (again, thanks to MaryLea) cut rolls into about 4-5 pieces, fold into different shapes (think diamond, clover, flower petal, etc) dip in paint, and print!
Kids have to be so careful with them when they’re full that they love to have egg cartons as playthings. . .
Why: With the tiny little compartments already built in, these are great for sorting, playing, cutting, and combining.
Color sorting: you know we love any excuse to play with candy over here, so this combined candy, colors, and chopsticks and let the kids move candy from one bowl to designated compartments inside an egg carton.
Tiny things holder: Cora loves to cut paper and store the pieces inside, in different compartments
Color Hunts are more fun with recycled jars to keep colors separate.
Jars: From pickles, rice, peppers, baby food, whatever, whether glass or plastic, jars can–and have–been re-used for years.
Why: Have kids clean them out in soapy water, and let them start collecting!
Outside color hunt: (or inside, if you choose!) Label each jar a different color and hunt for items outside to put into each jar. Perfect for a cooler day or one that’s rainy and grey–just bring in inside.
Spend, Save, and Give jars: to teach your kiddos smart money sense and have them put aside a certain percent of their money in each jar–maybe 60% save; 30% spend; 10% give?
Gem Jars: play on positive behavior and try something new. Award kiddos a ‘gem’ for each awesome behavior caught by you! When gem jars are full, it’s time for a small celebration or reward.
Once, a coffee can. Now, a park explorer kit. . .
Coffee Cans: plastic or tin, keep these for sure.
Why: They’re big, sturdy, and they’ve got tight-fitting lids. Just make sure to clean them thoroughly so that kids don’t complain about coffee smell.
Coffee-can stilts: poke holes through the bottom of the can and tie strong yarn or string through, making sure it reaches hands. Then–with support and watchful eyes–let your kids try to walk! (Gulp.)
Park explorer kits: soon to be shared on PBS Parents, essentially this is an all-in-one park explorer kit that fits happily inside a coffee can.
a cardboard box, or a sensory box?!
Cardboard Box: In any size, these are more fun than you’d expect for kids of almost any age.
Why: Either with some prompting and focus, or just with free play, boxes can be houses, cars, games, or learning materials.
Sensory Box: one of my kids’ favorite guessing games, playing with senses. Players take turns hiding an object in the box and having their friend guess what’s inside, using only their sense of touch.
Shoelace Box: teach little ones to tie shoes or even to braid using a cardboard shoe box (and check out the linky below the shoelace box post to read 50 other ways of using cardboard boxes for learning and play!
oh, the fun to be had with a lonely sock
A few other things to think about before you toss them:
Kid plates: we love these as divided craft palates, as holders for paint and/or water, or for bead sorting.
Bottle caps: for ornaments, for bingo markers, for pretty ornaments or bookmarks.
Tiny tins: from mints, sweets, or gum, these are great to keep. Who knows when your kids will ask to go on a teeny, tiny hunt?
Toothbrushes: yes, for making painting CRA-ZY fun! Draw a big, ole mouth and have kids paint really clean teeth–or really dirty teeth.
Milk cartons: the gallon ones, to make bird feeders, of course.
Paint swatches: from the paint store, from the days of trying desperately to figure out the best color for your playroom. I used cardstock in this activity with paperclips, but use paint swatches!
What recyclables does your family keep and how do you use them?
Let’s make this Quick Trick everyone’s Quick Trick and share your ways of using recyclables for games, crafts, and learning. Take a sec to leave a comment here or link back to one of your recycled-item posts!
According to Rachel and Mary Gabriel, the “schema theory tells us that prior knowledge is essential for comprehension of new knowledge and that learning difficulties can often be traced back to insufficient background knowledge” (Gabriel & Gabriel, “Power in Pictures: How a Schoolwide Photo Library Can Build a Community of Readers and Writers.” The Reading Teacher, 63(8), pp. 679.).
Parents and teachers can help our little ones pull from their growing schema so that they can better understand and appreciate the texts we’re reading to them in read-alouds. Activating their prior knowledge or experience with a certain topic will increase their comprehension even before the children are reading the text themselves.
We can do this with ease, and it won’t take too much time at all.
And watching that lightbulb go off for your kiddo when she picks up a book about animal footprints and you remind her about the time she found raccoon prints (or whatever they were!), on the walk to the park last spring–it’ll be worth a million bucks. Not to mention that it’ll make her even more invested in the book and more able to make connections to the concepts, which will help her to understand everything that much better!
Activating Schema: Activating schema is just a fancy schmancy way of saying that a person is pulling from prior experience or involvement with a topic in order to better understand a new subject.
We can show children how to activate schema in the short span of one read-aloud, and if we deliberately model and practice the technique, it can become a strategy kiddos will begin to use automatically!
Everyone knows that certain textures, tastes, sounds, or smells have the power to bring us back to an experience that may seem long forgotten. Maybe it’s the woman on the train wearing your grandmother’s perfume or the smell of your great-aunt’s famous pumpkin muffins wafting from a neighborhood bakery. Whatever it may be, one little spark can trigger an avalanche of memories, so it only makes sense to draw on those pieces of information (called, “schemata”) in order for our children to create new and fuller understandings.
Reading a book about a bakery?
Talk about the times you’ve spent in bakeries, the foods you ate,
the smells, the sounds.
Depending on how much time, effort, and preparation you have, activating schema can be done with low-prep, medium-prep, or high-prep manner. Here are just a few of the many ways to activate prior knowledge:
Low-Prep: Just talk about what your child knows about a subject before you read the text. Ask him, What do you remember about being on a plane? How did it sound? What did you eat? How did you feel? Then introduce the text and start reading!
Medium-Prep: Gather several photos of your child from a time when she was in a situation similar to what he will read about in the text. Look at the pictures together and talk about what she sees in the photos, what she remembers personally from the experience, and what she liked–or disliked–about the experience.
High-Prep: Create a box or bag filled with items that relate to the subject of a text. For a book about the beach, grab some seashells, sand, a towel, and sunscreen. Have your child take the items out, one by one, and chat about how the items feel, smell, sound, and taste (if applicable). Talk about what your child knows about each item and how those items connect to the subject of the book.
Activating schema is just one reading comprehension strategy that parents can model, practice, and use with their children during read-alouds. It doesn’t have to be something formal; you can go through these steps casually, and you can use it in along with other strategies–like connecting or predicting–to further increase your child’s understanding of a text. The more we use these strategies now, before our kids are reading, the more likely that the strategies will become habits when our readers get older!
Originally posted as a series on ABC and 123: A Learning Cooperative, this is part of a series I’m doing here on Learning During Read-Alouds.
Next up is a biggie, one that I’ve had help with from the experts over at we teach: 5 Things Never to Say to Emerging Readers.
With the end of the school year quickly approaching, we’re all getting antsy for summer.
So I’ve had to be super crafty during our work time in order to keep Maddy, Owen, and Cora engaged and excited. As I’ve said before, most days I go with whatever Owen and Cora are up for doing, but at least 2-3 times a week I sneak in some deliberate math or literacy learning.
This week and last, I’ve hit the jackpot with a game that everyone wants to play–Maddy included. WORDO! WORDO! totally rocks because it’s so completely adaptable to just about every game you need, similar to our pal, Tic-Tac-Toe. We’ve used WORDO! to practice Maddy’s spelling words (a very difficult list. . .), to practice sight words with Owen, and to practice letter writing and recognition with Cora. All at the same time.
I haven’t pulled out WORDO! for ages (gulp! it was the summer before Maddy entered kindergarten!), but when I finally did, they all loved it.
WORDO! is crazy simple. Here’s what we did:
WORDO! (to practice spelling words, sight words, letters–or just about anything!): All you need to play WORDO! is a board and some cards to flash.
You can download the wordo boards here as a pdf, and there are four boards in the document.
Maddy plays WORDO! to practice spelling words.
To play WORDO!, every player gets a board. These WORDO! boards have nine boxes, 3 x 3.
And then depending on what your focus is–spelling words, sight words, letters, numbers, family names, whatever–each person chooses nine words from a set of flash cards to write in the boxes. A different word goes in each box.
Then, just like BINGO, someone flips the cards, and when a word is chosen that’s on your board, you cover it up. We play that a full board wins.
Maddy remembered playing the game, so when I suggested that Owen, Cora, and I play while Maddy finished her homework, she said, Noooooo! I want to play. Pleasepleaseplease? I can do my spelling words! It’ll be perfect.
So that’s what we did. She took a break from her work, got her spelling word cards, and chose nine words for her board.
Owen chooses the sight words he wants for his WORDO! board.
When he was finished, I gave him high fives, and then I placed 3-4 word cards next to the board. I said, You did a great job, Owen, writing these words, but take a minute to double-check these three (or four) words before we begin.
I did this so that he was checking his work and so it wasn’t me who was saying, Oh great job but this is wrong and this is wrong and this is wrong. . .
Presenting kiddos with something along the line of ‘check your work‘ helps them recognize their successes (Hey! MY word looks just like the word on the card–I’m CORRECT!!) and it helps them recognize when they need to revise (Whoops–there’s an ‘n’ instead of an ‘m’ at the end of ‘can’; I better change it!).
Owen checks the words on his board. . .
. . . and here he’s playing game 2 (or 3 or 4)!
I pulled nine uppercase alphabet letters for Cora to use for her WORDO! boards. The first time I pulled the letters of her name, and several letters I knew she frequently mixed up (M/ W) and then some ones I knew she could write easily (O, X, P).
I wanted her to practice the letters of her name, I wanted to challenge her a little, and I wanted her to have some certain successes.
So after each board was created, Maddy, Owen, and Cora each had a small pile of 12 cards next to them. Nine of the cards were definitely on their board, and the three extra would throw them off a bit, mix-up our game a little.
Once everyone was ready and had nine markers–either ‘gems’ from our gem jar, beads from our bead box, or a combo of both. I’d say, Okay. . . FLIP! and they’d flip a card, search for it on their board, and cover it if they had it. That’s it.
And the first person to fill his or her board yelled, WORDO! as loud as he or she could. (I secretly think this was everyone’s favorite part.)
Cora carefully covers the letters on her board.
So we played WORDO! for a few days last week and a few days this week, and the kids have been happy. I’m betting the long weekend ahead will knock us out of our WORDO! craze, but if it doesn’t, we’ll just keep playing.
I like it because it works for everyone–Maddy, Owen, and Cora, and though it was tough at first to get everyone into the swing of flipping together, we have it now, and it’s cool. Everyone waits, everyone helps, and everyone celebrates. . . most of the time.
Not only are these great activities to help develop kiddos’ fine motor skills, but it shows how connecting–putting things together–is a natural inclination for people.
I’ve found that among all of the comprehension strategies out there, connecting is one of the easiest for children to learn and for parents to model. It’s one that we do around here most often, without thinking, because it’s natural to try to figure out where we fit compared to the world around us.
Many important reading comprehension strategies can be taught to children even before children can read–they just take some solid modeling by parents and teachers during read alouds. Connecting, activating schema, questioning, predicting, visualizing, inferring, determining importance, or synthesizing, can all be taught in casual, relaxed–but meaningful–ways during the short span of a read aloud.
Here are a few ways parents can model for their children the reading comprehension strategy of making connections:
Making Connections: Making connections is usually one of the first reading comprehension strategies that children do naturally when reading a text, since most young ones looove to talk about themselves.
When your daughter shouts, Mommy! I have the same pink tutu as Zoe! while reading a Sesame Street book, she’s making a connection. Your son is making a connection when he says, Hey! There’s a clown fish like Nemo! during your trip to the aquarium. When Arthur’s Family Vacation gets your kiddos reminiscing about your own family’s crazy beach trip, they’re all making connections.
Connecting allows readers to relate directly to the characters, events, or ideas in a text. When readers are able to draw a connection to a text, they’re more likely to remember what they’re reading, appreciate what they’re reading, and be more invested in what they’re reading. Connections can be personal (self-to-text), they can be between two texts (text-to-text), or they can be between the text and some other world event (text-to-world).
During read alouds, parents or teachers can model connection-making by saying something like:
I remember feeling the same way when I lost my favorite lovie. . .
Oh, Lilly is so excited about her purse, she just can’t stop talking about it. When you got your new shoes, you felt the same way! Remember, you wanted to tell everyone how happy you were. . .
It’s sometimes difficult to try new things. Michael in this book is just like Taylor in the book we read yesterday. . .
It looks like the people in this story are really struggling with litterbugs. We just worked hard to pick up the litter we found in our park. . .
Remember how the girl in The Gardner sent letters to her family while she was away, the little boy in this book. . .
Connections are pretty easy to make, no matter the text. And modeling this strategy doesn’t have to be a huge, time-consuming endeavor. If one or two connections are made during one read aloud, that’s great. Our hope is that when emerging readers–and even toddlers or preschoolers–hear the adults in their lives making natural connections as they read, that the little ones, too, will make connections when they are the ones decoding the text.
And when readers make connections, they’re drawing themselves closer to the text which will ultimately help them to better understand what they read. Very simply, we’re hoping that our little ones will pick up on the habits of strong readers early on, and then they will naturally use these strategies on their own when they’re able. Pretty awesome, right?
This Quick Trick is admittedly a work in progress. While Owen hasn’t quite mastered tying his shoes yet, he’s getting there. Slowly.
He expressed interest last summer to learn how to tie his shoes, but each time we sat down to try it, he balked. Now, as he’s only a few months away from making the big leap into kindergarten, he’s ready to learn how to tie those kicks, solo.
For many preschoolers and early elementary students, learning how to tie their shoes takes a simultaneous jiving of both fine motor skill readiness and cognitive readiness. Learning how to tie shoes takes a huge heap of concentration, and kiddos must be at a developmental stage where they are able to try, fail, try again, fail again, and re-try until it finally clicks. That’s the hard part.
Oh, and they have to want to learn how to do it. If they don’t want to do it, forgettabout it.
That’s where were were last summer with Owen. But now, he wants to learn, and seriously, just like potty training, I feel like I’ve got to jump on this train while it’s here. Or it might not arrive again until he’s in like second–or fifth–grade.
So when I was invited to participate in a Cardboard Box Creative Challenge this week, I knew exactly what we needed to do. I grabbed a small cardboard box, some ribbon, and a huge chunk of patience, and I set out to create a little something that I thought would help the O-Man learn to tie his shoes: A Shoelace Box.
Or, as Owen named it, Ribbon Rows.
Here’s the skinny. . .
How to Teach Kids to Tie Their Shoes:
Owen cuts ribbon for his Shoelace Box
I grabbed a small cardboard box, a shoe box, and I gathered tons of ribbon and string from our ribbon bag.
I made several holes on the box: three sets of two holes, one inch apart on the top and two sets of holes on each side.
Owen threads the ribbon through the holes.
I wanted a variety of textures in the ribbons and string I chose so that some would be thick, some thin, some long, some short, some rough, and some smooth.
My thinking was that some would be easier than others, and whatever worked we’d go with.
I was also thinking that once he got the tying thing down pat, he could use the other lengths and textures to hone his new skeeeels.
We used the language that I had heard but was not taught–that each loop was a ‘bunny ear’, but that wasn’t sticking, so I moved to something that I knew would: swords. I used the image of a sword fight, since I thought it would be more enticing than bunny ears. I was right.
Make one sword, then make the other. Then cross them. Bam! This guy ducks under, through, and PULL!
Owen tries the loop–or sword–as we called it.
He stayed with it, but it got ugly at times. . .
But it was frustrating, slippery, and challenging for him–even though his brain and hands seemed ready.
So we took some breaks, focused on his successes, which was the first part. He could totally complete the first step in shoe-tying; it was just the blasted bunny ear/ sword part that got him all jumbled up.
We took breaks, and tried and re-tried. Rewarded and took deep breaths.
And then we had a break-through. . .
——————————————————————-
BIG CHANGES! BIG CHANGES: two-toned ribbon did the trick!
After a few days with Owen practicing on his Shoelace Box, I noticed he was still having a hard time with the second part of tying–the looping under and pulling through.
So I un-taped his box and took out the red ribbon on the bottom and the white ribbon in the middle; I tied them together so that one side was red and the other side was white, and the two-toned ribbon made a world of difference!
Owen rocks out his *new* box. . .
. . . and seems to have an easier time keeping track of loops and pulls.
So, so, so, SO happy!
We figured out something that will work–and he wants to try to tie a few times each day. Some days we forget, and some days he’s not feeling it, but most days, he’s ready to practice tying his shoes.
Woot! Now I have TWO kids who can tie their shoes in ONE house! I can hardly contain my excitement!
fyi: Some of the links in the post above are “affiliate links.” This means if you click on the link and purchase the item, I will receive an affiliate commission. Forever and always I recommend only products or services I use personally and believe will add value to my readers. I am disclosing this in accordance with the Federal Trade Commission’s 16 CFR, Part 255: “Guides Concerning the Use of Endorsements and Testimonials in Advertising.” For more information, please see teachmama media, llc. disclosure policy.
We shouldn’t try to fill every second of our children’s lives with learning and lessons.
Our kiddos really do need time for free play indoors or out in the fresh air every single day. However, it never hurts to sneak in a little-teeny lesson during read-alouds, especially since many of us read to our children several times a day.
Even before children are able to read texts on their own, they can develop vocabulary, oral language, comprehension strategies, phonological awareness, and print awareness just by participating in a read-aloud with an adult.
For this series, I’ll highlight some ways to develop each of the above areas in super-simple–but very worthwhile–ways.
Here are just a few ways of developing Vocabulary during read-alouds:
Vocabulary Development–Word Consciousness:
Before, during, and after reading, we have a captive audience during read-alouds. Why not use this time to model how excited we are when we come across the use of rich and descriptive language?
By sharing our love of words and talking about new and exciting words, we are teaching our children to become Word Conscious. Word Consciousness is an integral component of language development and one of the early predictors of success in reading comprehension.
We can develop Word Consciousness by stopping during a read-aloud and commenting on a particularly awesome, unusual, or interesting word we encounter.
Oh, I love that the farmer ‘perseveres’ after the fire ruined his farm. He doesn’t give up. He keeps going, he re-plants his crops, and he moves forward. I love the word ‘perseveres’ because I like how it sounds when I say it, and it is a strong word. It means that someone doesn’t give up and that they work very hard (re: The Farmer, by Mark Ludy).
Sure, kids need down-time, but time during read-alouds can be useful for sneaking in some learning, too–no matter the child’s age!
Or when reading Deborah Guarino and Steven Kellogg’s Is Your Mama a Lama? you might say,
The bat says he ‘does not believe that’s how llamas behave.’ I sometimes like to use the word ‘believe’ instead of the word, ‘think’. To me, ‘believe’ just sounds a little fancier. I ‘believe’ I prefer the word ‘believe’ instead of ‘think’.
You can also develop Word Consciousness by:
talking about the way a word sounds when you say it;
discussing the meaning of a word;
talking about the way a word looks on the page;
trying different ways of using a particular word;
challenging each other to use a ‘new word’ later that day;
listening for ‘new words’ during other read-alouds and taking turns ‘catching’ them;
sharing ‘new words’ as a family, at the end of the day or at dinnertime;
keeping a family list of ‘Cool, New Words‘ or becoming ‘Word Wizards’ and making a ‘Word Wizard Wall’ of words you love. . .
Word Consciousness can be started with our littlest readers and should continue into adulthood. (Okay, or at least until our kids can stand it!). It’s easy, it’s important, and it promotes a love of language and an awareness of language that will ultimately help strengthen reading comprehension down the road.
When children are word conscious, they “are motivated to learn new words and able to use them skillfully” (Lane & Allen, The Vocabulary Rich Classroom: Modeling Sophisticated Word Use to Promote Word Consciousness and Vocabulary Growth, in February 2010’s The Reading Teacher.) So let’s start noticing words–and keep talking about it!
We’ve been very busy over here lately, as this week I helped organize and run our elementary school’s Kindergarten Orientation (so fun!) and I have been trying to get myself ready for the theMom 2.0 Summit in New Orleans this weekend (so exciting!).
But I’ve wanted to share how we made Cora’s bumblebee birthday a buzzing success, so here we are: the skinny on how we made sweet bumblebee wands, bumblebee pens, bumblebees for our hair, and played bumblebee games. All to ring in our Cora’s big #4.
After a ton of research, we’ve got a boatload of bumblebee birthday ideas: bumblebee wands, pens, games.
We had bumblebee cupcakes–of course!–that were a huge success, but the wands and pens brought smiles to her teeny-tiny playdate party pals, too.
Bumblebee Wands: Cora’s fantabulous preschool teacher gave her a bumblebee wand at Halloween because Cora dressed as a bumblebee. It also marked the day that Cora needed to have a bumblebee birthday party (her birthday was still five months away–) with bumblebee cupcakes, bumblebee wands, and bumblebee games.
So bumblebee it was.
The bumblebee pens actually were made for her family party–we thought that the large number of boys who were part of our ‘family’ party might prefer a bumblebee pen to a bumblebee wand (which would have probably morphed into a bumblebee sword or poker).
How PRETTY are these bumblebee pens!?
S0 I basically copied the bumblebee wand that Cora’s teacher gave her. I started with a bumblebee patterns which can be downloaded here as a pdf.
Then I copied it onto yellow felt, cut out two pieces–for a front and a back–and outlined the bumblebee body with a black Sharpie. I cut out small black stripes out of black felt, and the bumblebee body was born!
Bumblebee pens are in the works!
To fluff up the bumblebee, I cut small pieces of a flat cosmetic pads (the kind that you can buy at the drug store). Then I hot-glued the two pieces together, leaving a small opening at the bottom where I shoved in the top of the pen. I glued the pen inside, and then the fun began.
They turned out cuter than cute, and the kids loved them!
Bumblebee pens totally rock!
Making the Bumblebee Wands was very similar, except that in place of the pens, I used thick wooden sticks (a la craft store). I also used a Larger Bumblebee Pattern for the wands (see below) and cut bigger pieces of the ‘fluff’ for each one.
Since the wands were larger, I also divided the bumblebee wings with black felt to break them up a bit more.
We also tied pretty ribbon on the wands–two different types–to make them look more fluttery and fancy. I love the bumblebee ribbon, but you could totally use white satin mixed with a simple pattern ribbon, and it’d look awesome.
The bumblebee wands were ready to be cut. . .
. . . filled with fluff. . .
. . . and decorated with some glitter and feathers!
For Cora’s little playdate party, we needed a bumblebee game.
So we made teeny pom-pom bumblebees out of yellow pom-poms and black pipe cleaners for the game, Find the Bumblebee!
Each kiddo got a tiny bumblebee magnifying glass and a plastic bag. The instructions mirrored the game name–Find the Bumblebee--and that’s what they did.
We hid tons and tons of not-so-scary plastic bugs in our playroom along with about 10 bumblebees. The girls used their magnifying glasses to become little bumblebee detectives, finding as many bees and bugs as they could.
Because Cora only really wanted to have a teeny party with three preschool friends and that was it, that’s the only game we planned and played. The girls played freely with dress-ups, the bugs, the playset, and each other–and it was honestly one of the most fun parties ever!
Things don’t have to be huge and wild and crazy to still be a lot of fun, especially for our little guys. I know it’s easier said than done when the crafty possibilities seem endless–but something that makes sense so that we, as parents and party-planners, don’t go insane.
We put bumblebee wands and pens and tiny tablets in simple white bag (stamped with a bumblebee, of course!) and containing flower pins/ barrettes with a bumblebee glued on. The girls snacked on bumblebee cupcakes, marshmallows, and sweets, and my littlest bee was a happy, smiley new-four year old!
Many, many thanks to Cora’s super-awesome bumblebee preschool teachers for making her year so fantastic that she not only wanted to be a bumblebee for Halloween but also have a bumblebee birthday party! Woo-hoo, good teachers are the BEST!
Many of us have taken a moment now and again to encourage our children to find pictures in the sky on a cloudy day, right? No matter if it’s a turtle, a shoe, a bunny, or a Cheerio, it always amuses me to hear what types of things my kids see the clouds.
With very little effort, even in the time during a read-aloud, we can have our little ones continue to stretch their imaginations by practicing visualizing. This time the pictures aren’t in the clouds; with visualizing, the pictures are in their heads.
Visualizing: Visualizing, as a reading comprehension strategy, is simply using the words on the page to create images in your mind. Some teachers refer to visualizing “mind movies” to make the concept easier for younger learners.
Many children’s books are jam-packed full of illustrations, photographs, and drawings, our little ones don’t even need to use their brains to visualize what’s happening. And it makes sense; the reason we want to spend time each day reading rich and varied literature with our children is so they create banks of images in their little brains. They can then pull from this ‘schema’ later to make connections to new reading and concepts. And the pictures they have stored will help them to better understand these ideas.
But it’s quite all right every so often to stop for a second during a read-aloud and purposefully close the book, forcing listeners to create their own “mind movies” before you show them the next page, the next illustration.
For example, if you’re in the middle of a book, and the character has been working up to something–a decorated Christmas tree, a surprise for a friend, or even that first step into a new classroom–consider pausing. Close the book and say, Hmmm. Take a minute, close your eyes, and use your brain to make a picture in your head of what the decorated tree/ picture for her friend/ new classroom might look like. What colors do you see? What kinds of things are in your picture?
Be forewarned: kids get antsy. They want to see what really comes next without figuring it out for themselves. But if you model for them, explain what you see in your “picture” or “mind movie”, they may be more inclined to follow suit.
When teaching visualization to students, no matter the grade, I always pulled a rich passage from one of my own texts–for high schoolers, it’d be a vivid passage from Jurassic Park or Frankenstein, and for the younger kiddos, a stanza from a Maya Angelou poem or the The House on Mango Street would do the trick.
I’d say something like:
Close your eyes. Listen to this passage, and let your imagination go to work.
Hear the words and think about them, letting them be the brushes for the movie in your mind.
What do you imagine this (whatever it may be) to look like? What kinds of things are in your mind picture?
Take a picture as I read of what you see. Remember the colors, the textures, the sounds and smells.
Use the words on the page to make a visualization–or picture in your brain–what’s happening.
And after you take a minute to share what you visualized, let the kiddos share what took place in their “mind movie”. Finally, if you are able, turn the page and compare what you thought to what the author and/or illustrator created. The similarities–and differences–can spark a pretty worthwhile follow-up discussion about the author’s word choices and the illustrator’s artistic decisions.
So that’s that. Just another quick, totally easy way of throwing in a meaningful reading comprehension strategy lesson that can–and should!–be introduced even before your child is the one decoding the words on the page. And for transition readers who will soon be moving into chapter books? This exercise is a must-do because it will get her into the habit of visualizing now!
Many thanks to Anne E. Gregory and Mary Ann Cahill for writing “Kindergartners Can Do It, Too! Comprehension Strategies for Early Readers” (The Reading Teacher, March 2010), an inspiring and informative article worth checking out!
Originally posted on ABC & 123: A Learning Cooperative, this post will be the first in a formal series on Learning During Read-Alouds. We’ve got captive audiences during read-alouds, so we really need to make sure we jump on easy, worthwhile learning opportunities for our kiddos when we can!
I’ve said time andtime again that read-alouds are an absolutely perfect time for sneaking in some learning with our kiddos, I believe there the sky’s the limit as far as what concepts, terms, and ideas we can teach our little ones during these times.
My kiddos love to learn ‘big’ words, so when I introduced Maddy and Owen to ‘onomatopoeia’ during our bedtime reads last week, they were all over it. Paired with a little print referencing, some superheroes, and some really silly books, it was time well-spent. (And they had no idea they were learning along the way!)
Print Referencing and Onomatopoeia: Print referencing is really nothing to be afraid of; it’s simply paying attention to the print (form, features, and function) on a page, pointing out and chatting about it with our kids. That’s it.
Onomatopoeia, on the other hand, is much more exciting in my opinion. I have always been a lover of words, and ‘onomatopoeia’ is one of my faves for obvious reasons–it’s fun to say (it just rolls off of your tongue!), it’s like no other word I use, and the meaning is just plain cool. Onomatopoeia is using words whose sound suggests its meaning, like buzz, hiss, pow, or bang. So fun.
So when Maddy, Owen, and I read Superhero ABC, by Bob McLeod, along with Mungo and the Spiders From Space, by Timothy Knapman, print referencing and onomatopoeia were obvious connections and emerged naturally during our reading.Superhero ABC is an alphabet book that incorporates superheroes for each letter, along with tons of alliteration (repeated initial consonant sound in words).
Mungo and the Spiders From Space is a wacky book where Mungo, the little boy, is peacefully enjoying his book about Captain Galacticus trying to save the universe from the evil Dr. Frankenstinker when all of a sudden, Mungo jumps into the book and saves the day! With tons of onomatopoeia and wild and crazy text features, Mungo lent itself to many learning opportunities, even in a short time, even with a silly, silly book.
Owen just pointed to ‘yow!’
Drawing attention to text features, even simple words on a page, helps our little ones’ early literacy skills.
Initially, all I did to throw in a little print referencing was simply point to the words as I read them. I did this as we read through the comments and description on the pages of Superhero ABC. Maddy can read on her own at this point, so this was more for Owen. But we all got involved.
In the first few pages of the text, I’d point to the words as I read: Choke! or Caw! on Captain Cloud’s page, or Gross!, *Gulp!*, or She Grins and Giggles with Glee! on Goo Girl’s page.
When I hit ‘E’, The Eagle’s page, where the little squirrel says EEK!, I said, Hey! Do you know that there’s a special name for words like this–‘eek’? Words like ‘ouch’, ‘bam’, and ‘buzz’ are called ‘onomatopoeia’. Isn’t that a wonderful word, ‘onomatopoeia’? I love it. I always have. It was one of my favorite things to teach kids because it’s so cool.
Like a big nerd, I had them each say it themselves a few times, saying it slowly at first and then speeding through it so it barely came out correctly.
From that point on, Maddy took over as ‘the pointer’, and by ‘T’ (The Terrific Three’s page–and just in time for Upside-Down Man’s page), Owen took over. I’d read the word, and they’d point to it. It was a simple, but important, exercise for Owen to listen for the sounds in the words I was saying and then look around on the page for words with letters that made that sound.
It’s silly, playing with onomatopoeia in the first place, but it was a cool way of also working on phonological awareness–figuring out which groups of words created the sounds I was saying.
By the time we finished Superhero ABC, we were ready to read an actual story, and Mungo–with all its superhero silliness and unusual text layouts–was a really cool (totally random and completely lucky) follow-up.
I read the story, and for the first few pages, I’d point to the words as I read them just to make sure Owen was following the left to right movement of text and so both he and Maddy could appreciate onomatopoeia when we bumped into it.
Sometimes I’d read a page with particularly unusual fonts or spacing without pointing to the words. Instead, I’d say something like:
I just read, Boom! and Zoom! two great examples of onomatopoeia. Owen, can you point to either ‘Boom!’ or ‘Zoom!’?
The rocket ship went, vrooom-vrooom. Take a minute and search for those words on the page. Can you find them? Who can point to them?
Wow! I just said a word in a really loud voice, and the author showed me he wanted that word read loudly because all of the letters are in uppercase. Look on this page for that word and point to it when you find it. Good. Now read it exactly the way the author wants us to read it.
Sometimes this author shows us how he wants us to read certain words by making the whole word bigger than the other words. Like this one here, ‘Yeerrpp!’
How do you think he wants us to read this word, ‘HOORAY!’? Like this, ‘hooray!’ (in a tiny voice) or like this ‘HOORAY!’ (in a big, booming voice).
That’s it. We rocked it out with some serious onomatopoeia and print referencing, superhero style, and then Maddy and Owen hit the sack. Here’s to hoping that their dreams were comic-book crazy.
Print referencing is easy–and it can be done with just about any book, to any degree, at any time. It’s as simple as putting your finger at the top left of a page when you begin reading and touching the last word at the bottom right of a page.
It can be pointing to the title of a chapter or a character’s dialogue. It can be asking a child to point to a letter in a word or a word on the page (just always remember to give choices–Can you find the word ‘dog’ or ‘cat’?–so that we’re setting our kiddos up for success!). Print referencing can be just about anything relating to the form, features, or function of print on a page.
These two books are about as close to comic-book reading that my kiddos do at this point, but I do know that comic book reading can yield some really worthwhile results for reluctant readers. In fact, I found Jason Ranker’s article, “Using Comic Books as Read-Alouds: Insights on Reading Instruction from an English as a Second Language Classroom” (The Reading Teacher, December 2007) incredibly interesting and packed with ideas.
Like so many families, we love Play-Doh over here. And whether it’s the real-deal, packed-in-yellow-containers-Play-Doh or happy homemade-on-the-stovetop-playdough, it doesn’t matter–my kids love it just the same.
But what I’ve found is that even playdough time can be an opportunity for some super-sneaky learning over here, so this Quick Trick shares one super-easy way we do just that.
Fast-Finger Challenges with Play-Doh: Sure, Maddy, Owen, and Cora love the times when I lug out our super-cool Play-Doh sets. Who wouldn’t love squeezing out bright pink ice-cream or making a guy’s hair grow down to his feet in seconds? The ice-cream shoppe, hairdresser, and kitchen sets are awesome.
But I’m also a firm believer in giving kiddos the opportunity for free play, so that their growing brains can find ways of occupying time, figuring out what they can make with no limits or impositions, and having fun together at the table full o’ playdough.
So on occasions when my kids are rockin’ the playdough like free birds, I’ll give them a good 30 minutes or so to do whatever they want. But when their fingers are warmed up, when the colors have all become one big blended mess, I’ll throw out some Fast-Finger Challenges.
And. They. Love. Them.
Can you guess what this Fast-Finger Challenge was?
You got it! Healthy foods!!
So the Fast-Finger Challenge? Simple.
I come up with a topic–pets, numbers, clothes, junk food, fruit, sports–anything. And then my tiny sculptors sculpt.
They sculpt slowly at first, working hard on their very first item.
Then we talk about what they made (shhhhh–it’s always a surprise!) and then we brainstorm as many other things that will fit into that category, and they use their fast-fingers to quickly create whatever they can.
We put all the items in one central place–either a bowl if we ‘re doing fruit, or a box if we’re doing animals, or on the table if we’re doing numbers or letters.
And then we talk about what they made, oooh-ing and ahhhhh-ing and acting all impressed at each other’s sculpting skeels.
And this Fast-Finger Challenge? A little more tricky. . .
Yes–JUNK FOOD!!
Though Cora is not as quick with her sculpting as Maddy and Owen, she’s getting there. And what she makes, she makes in bulk.
Her many, many lollipops are pictured to the right.
Some of our standard, go-to topics include:
pets
numbers
clothes
junk food
fruit
sports
toys
tools
seasons–this is tricky!
birthday
As long as we can explain why it fits in a topic, it’s good to go. And this is not high-stress; it’s fun. Cora and I are usually on a team, and sometimes even Maddy and Owen team up.
Owen works on his animal. . . a bird.
Maddy’s animal (gulp–I can’t remember what it is. . . ) eats one of Cora’s lollipops.
Norman! I made Norman, and he got us all smiling!!
Watching little fingers moving, brains thinking, and eyes dreaming as they create anything under the sun is incredible to me. It’s not only a forced slow-down for us all, but it’s a great opportunity to talk, sing, tell stories, and laugh together. It’s time to listen, practice good manners (and finding at least one nice thing to say about someone’s sculpture!), and work on that all-important skill of grouping and sorting.
If you’re not a fan of playdough (and many people are not–) no worries!
Try these similar ideas:
Fast-Painting Challenge with watercolors
Fast-Chalk Drawing Challenge with chalk on the sidewalk
Fast-Dry-Erase Board Challenge on white boards with dry-erase markers (kids LOVE these!)
Fast-Magnadoodle Message Challenge on Magnadoodles
Fast-MarkerCrayon Challenge with markers or crayons on over-sized paper, drawing on the floor or on paper taped to the wall
It’s been a busy week over here; our tiny Cora turned four! So we celebrated with a very small–but very buzzy bee-special–birthday party. With birthday preparations along with the incredibly exciting work I’ve been doing on some online curriculum has kept this family busy as can be!
I’m looking forward to sharing what we’ve done in the next few days–thanks for reading and happy Fast-Finger Challenging!
It seems that Maddy’s leveled out a bit with her reading this year.
She’s doing great with her spelling, she’s made huge strides with decoding, but she’s stuck on one particular level and needs to stretch her brain a bit as far as reading comprehension is concerned in order to move upward and onward. I’m not stressing about it. We couldn’t be more proud of how hard she’s working, and she loves that she’s a big ‘chapter book’ gal who can read to Owen and Cora.
I’m just trying to sneak in a few things here and there that might help her, whenever I’m able. Quick, easy, 5- or 10 minute strategies during nighttime read-alouds. Anything helps.
Doing a little bit of questioning is one teeny way, and it’s a strategy I wish I would have explored a bit more months ago.
Questioning to Improve Reading Comprehension: When Maddy had to knock out her first ever Book Talk last week, she chose a book that she really fell hard for–The Perfect Sword by Scott Goto. The Perfect Sword follows an apprentice, Michio, and his teacher, the acclaimed swordsmith, Sensei Masa, as they search for the perfect owner for their perfect sword. Richly illustrated by Goto, with amazing attention to detail, this story emphasizes the importance of humility, hard work, compassion, and Bushido–the Samurai code of honor.
I’ll be honest–it’s unlike any book we have around here–which is partly why I believe Maddy was so taken by it. But it really is a beautifully crafted story filled with characters both awful and incredible. And the message is one that is worth exploring at any age.
ahhh, the beloved Takeshi
The Perfect Sword was perfect to use with questioning, but I had to be sneaky. My kiddo was tired, so our first reading, though it was before bedtime, had to be totally relaxed, comfy, and engaging. I didn’t even tell her what I was doing; I simply modeled my own questioning to get her brain moving.
After every few pages, I’d simply stop and say something like, I wonder why Sensei Masa is so worried about who gets his sword. I mean, what’s the big deal? and then I’d kind of shrug and move on.
Sometimes if I found an answer to one of my questions, I’d comment aloud: Oh, so he wants the sword to go to someone who deserves it–not just anyone, but someone special. I got it.
By the end of the book, I invited Maddy to share a question. After I read the page, I said, What question is in your head after hearing . . . ? She thought for a while and gave me something–not what I’d hoped for, but it was something. I said, Hmmm, that’s an awesome example of a ‘thin’ question–one that you can find an answer to pretty easily like ‘I wonder what color his hair is or where his shoes are’. You can find the answers by looking at the page.
My questions are ‘thick’–they make me think a bit, look hard for the answer, and might not be so easy to find. Let’s keep going. We read on, and I modeled another thick question for her: Takeshi stopped the thief in the market. Why would he have done that, when it wasn’t his stuff that was stolen?
She added, Yeah, and I see Michio and Sensei Masa are watching, so I wonder what they’re thinking. I said, Good ‘thick’ question, my friend. You’re really thinking!
And that was it. We questioned. We read, we thought, and we asked ourselves questions. Because that’s what strong readers do.
My hope is to continue to practice some sneaky self-questioning with Maddy (and Owen and Cora for that matter!) because it’s easy, it’s important, and it is a super-worthwhile skill for emerging readers to develop. I’ve said before that children do not have to be readers themselves in order to develop reading comprehension strategies; rather, teachers and parents can model strategies through think alouds, shared readings, and by promoting critical thinking (Cunningham & Shagoury; Hickey).
And questioning in particular is muy importante because self-questioning is one characteristic of thoughtful readers which results in deeper levels of understanding text (Brown, et al). When kids can ask themselves questions while they read, they’re interacting with the text in a way that will make them more active stakeholders. They’ll be more likely to remember what they read and will want to read on to find out more.
Questioning can be as easy as asking yourself things like:
I wonder why that character. . .
What did she think about when she . . .
How did he feel about. . .
Why did that character say . . .
When will he figure out that. . .
It’s anything you, as a reader, want to know about what you’re reading. Anything goes. And no worries about distinguishing ‘thick’ or ‘thin’ questions at this point; we want our kids to enjoy reading, to want to read, and to grow as readers. That’s what’s important.
Thanks to the following sources for information in this post:
-BrownG. Cassar, M., Craven, R.G., & Marsh, H.W. Improving standardized reading comprehension: the role of question-answering. SELF Research Center, Univ. of Western Sydney, Austrailia. Oct. 2006.
-Cunningham & Shagoury. (2005). Kindergartners explore reading comprehension using a surprisingly complex array of strategies. Educational Leadership.
-Hickey. (1998). Developing critical reading readiness in primary grades. The Reading Teacher.
Yikes! Valentine’s Day is right around the corner, and although we’ve been busy over
Our family’s still on a knock-knock joke kick, so I ran with that again for our Valentine’s Day-themed notes.here planning our Valentine’s Day cards, I’ve been sneaking around, making more lunchbox notes.
Really, I’m of the notion that any way we can get our kiddos to read–whether it’s a comic strip, the tv-listing, the menu at McDonald’s, license plates, street signs, etc–is something.
So if my kids are into jokes, I’ll go with it.
And especially because Owen’s beginning to pick out words here and there, if he can read ‘knock’, he might be able to create the word ‘sock’ and ‘rock’, and if we’re lucky, he may be able to make–or at least read– ‘clock’, ‘block’, ‘smock’. So cool.
But I’ll be honest: if he picks up a word or two, great. The really important thing is whether or not my kiddos giggle with their buddies at lunchtime. That’s what I’m really hoping happens.
With apologies to Hall & Eisenberg, I modified the jokes slightly, but only because the book’s jokes link together; several jokes on a page center around an illustration or tell a little story.
A Valentine’s Day Joke Note is ready for Owen’s lunchbox.
The valentines day knock-knock joke notes are here to download as a pdf if you so choose. There are two sheets of mixed shapes and various jokes and poems. I printed mine on cardstock because it holds up better, but plain paper will do.
xxxxxx
I fold the longer ones and hold them together with a heart foamie. But you don’t have to, and if I’m running late, I’ll just toss it in.
I think it’s a riot to throw these kinds of notes in your kids’ backpacks, lunchboxes, or tennis shoes. Put one on a pillow or around a toothbrush; sneak one in a pair of undies (clean ones!) or coat pocket. Leave one on the car seat, placemat or piano bench.
And sometimes it’s hard, but I try really hard to laugh harder and harder each time I hear the jokes because before I know it, knock-knocks will be a thing of the past for my kiddos, and they’ll be onto the next thing. . .
So that’s it–just a teeny bit of (silly) learning between now and Valentine’s Day. I’ve got a super-cool, fabulous and fun lunchbox love up my sleeve for after the day o’ love, thanks to one of my pals. Stay tuned!
Want a few more fun Valentine’s Day ideas? Check out:
fyi: Some of the links in the post above are “affiliate links.” This means if you click on the link and purchase the item, I will receive an affiliate commission. Forever and always I recommend only products or services I use personally and believe will add value to my readers. I am disclosing this in accordance with the Federal Trade Commission’s 16 CFR, Part 255: “Guides Concerning the Use of Endorsements and Testimonials in Advertising.” For more information, please see teachmama media, llc. disclosure policy.
Finding interesting and meaningful activities for Owen and Cora during Maddy’s homework time has kept me busy lately, but I’ve found tons of great things for these two to do. Finally, it’s a natural part of our day for everyone to sit down for ‘work time’ after snacks.
Recently, I pulled out an oldie but a goodie for Owen: Write Around The Room.
He loved it. Loooved it. And it’s really super simple. So we’ll certainly pull it out again this week or next.
Give a guy a clipboard, some paper, and a pen, and he’s happy. At least for a while.
Write Around the Room: Write Around the Room is just that–giving kiddos the task of writing the words that they see in any room.
It’s great for a classroom, where there’s a Word Wall, a huge calendar, and children’s work, posters, and signs, but it works just fine even at home. It’s funny what they can actually find in the rooms you spend so much time in every day.
And all kiddos need is some paper–Owen used his own personal notebook–and a pen. My kids love themselves a clipboard, so I clipped the notebook in, and Owen was ready to go!
I said, Okay, today, Owen you can do a ‘Write Around the Room’ for your work time. Grab your notebook and a clipboard, a pen, and your detective eyes, and I’ll tell you how to do it.
He scrambled for his supplies, and when he found everything, I explained what to do: For a Write Around the Room, you do just that–you write the best words you can find around the room. But you need your strongest detective eyes so that you can pick out only the best words you can.
And once you find a word, you write it on your paper here. Your goal–and I’m not sure you can do this because 10 is pretty many words–but your goal is to find 10 words. Be sure to copy the letters exactly, and when you find them all, come back and we’ll read them together.
So he did. His words were found in our work room and in our living room, and he really did use his best detective eyes! He found words on the sides of boxes, on papers, and on our Wii!
When he was finished, we read them together. I wasn’t sure where he found some–but he was able to point them out. Although ‘en’ and ‘cdu’ were initials on boxes and a paper, he got the idea.
Owen’s Write Around the Room list. Number one word? Wii. Yikes.
And because Owen cannot decode the words himself at this point, he totally understands that a bunch of letters grouped together is a word–and that’s half the battle of reading!
Although our goal for getting our kiddos to write is to find authentic writing experiences, something contrived like Write Around the Room is fine–it’s great!–to use as an activity to get them paying attention to the words around them because it’s sometimes a loooong journey from scribble to word.
According to the Continuum of Writing Development, writing mark levels include:
scribble (even scribble has variations–all over the page, to scribbles in lines, to scribble in lines without detail, to scribble in lines with detail–really!)
mock letters
actual letters (rudimentary approximations)
actual letters (closer approximations)
actual letters (conventional)
The most common levels in the preschool years are levels 1-3, although some older preschoolers reach levels 4 and 5 (and there are always variations, remember!). Preschoolers can “often form best the letters in their names” possibly because they see this letter the most or because oftentimes they write that one letter to stand for their whole name. As for the other letters, preschoolers often compose letters without much care to their exactness. In fact,
. . . even though a few preschool children write letters that are fully conventional, this is the exception, not the rule. Forming letters conventionally requires fine motor skill beyond what is typical for most preschoolers, along with very detailed knowledge of letter features and how to combine lines to create these
from Schickedanz, J.A., & Casbergue, R.M. (2009). Assessing Writing Development in the Early Years. In Writing in Preschool (pp. 75-87). Newark, DE: International Reading Association.
Many thanks to the above article and Duke, N.K., Purcell-Gates, V., Hall, L.A., & Tower, C. Authentic Literacy Activities for Developing Comprehension and Writing. The Reading Teacher, (2006, December) for information for this post.
Want some other cool ideas for creating words and sending messages? Check out:
Each year, we end up with tons of leftover candy canes after the holidays. This year, I vowed I wouldn’t allow one candy cane in our house past January; I was determined to find some useful way of using them.
So, in the spirit of our previous candy experiments, and after our wave of coughs and colds this past week, we hit the ole lab (kitchen counter), put on our lab coats (not really), and had some fun with our leftover candy canes.
Nothing fancy, no new recipes, no fabulous dessert to show for it–just some learning, once again, in the name of sweet-science:
How to Have Some Fun With Leftover Candy Canes: I think it was between Dora and Sid on sick day numero dos that I asked Maddy, Owen, and Cora to meet me at the counter if they wanted to play with some candy.
With a sweet-toothed family like ours, candy is quite a draw to any sort of activity, so the kids came quickly. I said, Remember after Halloween, when we played with some of our leftover candy–painting with Skittles and watching the letters come off? They did. And they were eyeing up the candy canes, boy. . .
Our candy canes, ready to meet their match.
Today we’re going to do some experimenting with candy canes. We’re going to see what happens when we put candy canes in different liquids–hot water, warm water, freezing cold water, and vinegar. Then we’re going to sculpt with candy canes. It’ll be so cool. But first we need to unwrap. Let’s get our fingers going.
So we unwrapped and unwrapped some more.
I said, We’re going to use these bowls for the water and vinegar. Then I poured boiling water into the first one, warm water in the second, and icy water in the third. I put vinegar in a fourth.
We talked about what predictions they had for what would happen to the candy canes when we put them in each. Maddy thought the colors would come off in all of the water like it did with the Skittles and M & M’s. Owen said the candy canes would freeze in the freezing water (yes!), and Cora said she didn’t know but could she have a bite of one.
Everyone had a few pieces before we dumped the candy canes in, and then we watched.
We noticed that within a minute or two, the candy canes became teeny, skinny sticks in the hot water, but nothing much happened in the warm and cold water. And then the kids started giving the glasses a stir, and the colors started to move, just like Maddy predicted. Hooray!
The candy canes melted into tiny twigs in the boiling water.
When nothing much happened in the vinegar, and we had given the hot, warm, and cold glasses a few good final stirs, we moved the water out of the way. I brought out some baking soda, talked about what the kids knew about it (we used it for baking, in cookies and muffins), and then we talked about what would happen if we added it to the vinegar and water.
Everyone was in agreement that nothing much could happen except the water might turn white (verrry logical for little scientists), so they were crazy excited when I dumped some into the vinegar and it bubbled over the glass.
Eeeeee! The bubbling vinegar was one of our experimenting highlights!
We checked the candy cane afterward, and nothing much changed–same results as the water but nothing major. We added some baking soda to the water glasses and the kids held their breath for bubbles, but nothing.
They decided it must be something strong in the vinegar to make the bubbles–they’re right, and that’s as far as I went with scientific explanations for the day. Not enough prep on my part; I wasn’t sure where to go from that point anyway.
Finally, we sculpted. I said, Okay, we know what happened when we put candy canes in boiling water, so what do you think might happen if we put candy canes in a hot oven?
Maddy said they might melt, and Owen said they might shrink (like they shrunk in the glasses, perhaps?), and Cora said they’d melt. So we tried it.
I put a bunch of candy canes on a cookie sheet at 225 degrees for about 8-10 minutes. I pulled them out, and formed it into a letter ‘C’ for Cora, and she loved it. I gave the kids their own canes to mold, and after some initial frustration with cracking canes and moving quickly, they got the hang of it–if they moved slowly, they could twist and stretch and turn their candy canes into something new. And they did.
After three batches of sculpting, we were finished. We had enough, but we had fun. It wasn’t but 30 minutes or so that we ‘experimented’, but the predicting, the hands-on learning, the using one thing for something new, the brief excitement of bubbles and wonder–it was pretty cool. And it was a super-cool way of using candy canes if I do say so myself.
I found TONS–and I mean tons–of amazing recipes, crafts, and ideas for ways to use candy canes, but I didn’t find much on using them for science experiments. I thank my friend Loralee for initially getting us into candy experiments, and I thank Marie, from Make and Takes for sharing her idea of sculpting candy canes. Many thanks, Loralee and Marie, for sharing!
If you have any ideas for how to use them, please link back or share them here–I’d LOVE to know; we’re always up for something new!
  Want a few more holiday-inspired gift ideas or activities? Check out:


")


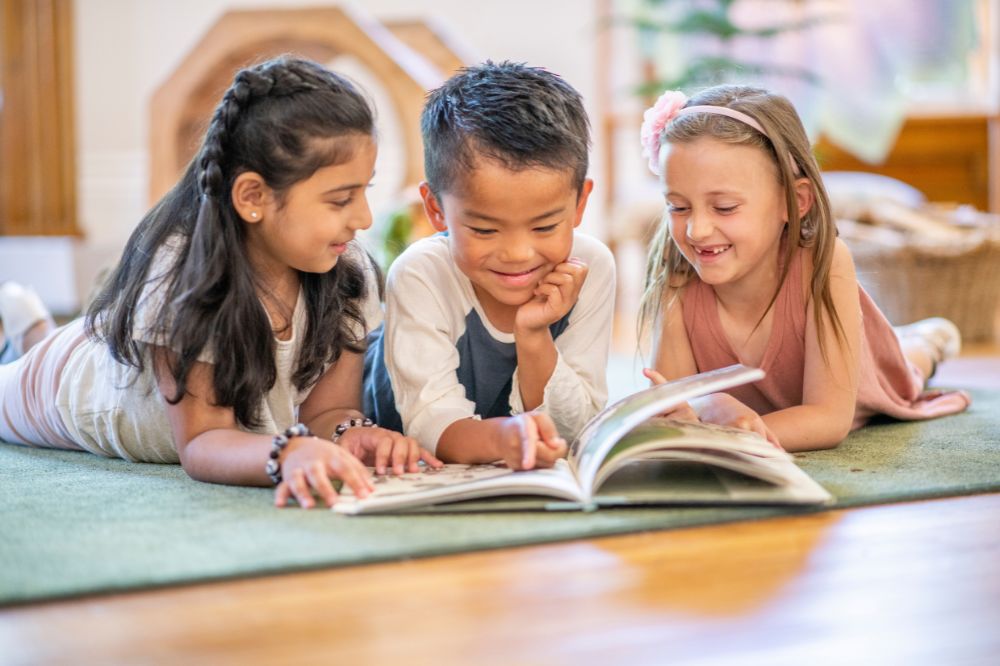

 Owen cuts ribbon for his Shoelace Box
 Owen threads the ribbon through the holes.


 He stayed with it, but it got ugly at times. . .


 Sure, kids need down-time, but time during read-alouds can be useful for sneaking in some learning, too–no matter the child’s age!
 How PRETTY are these bumblebee pens!?
 Bumblebee pens are in the works!


 . . . and decorated with some glitter and feathers!


")

")
")
")

")
")
")
")
")
")
")

")
")

 ahhh, the beloved Takeshi


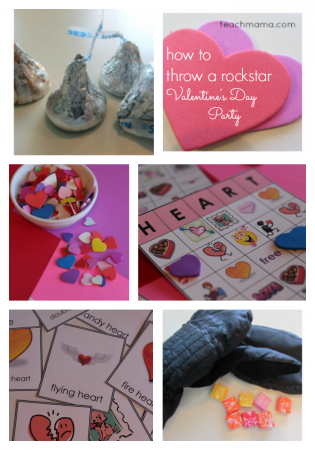


")
")
")
")
")
")


