Teach Mama
  • Reading
  • Early Literacy
  • Writing
  • STEM
  • Activities
  • Digital Literacy
Top Posts
Summer Learning Activities for Kids: A Low-Pressure Guide...
Effective Techniques for Teaching Complex Historical Topics
4 Neighborhood Adventures That Teach Kids Real-World Skills
What Does an Urgent Care Visit Cost in...
Future Trends Influencing Enterprise Learning Management System Adoption
How to Survive Your Husband’s Grad School Years...
How Technology is Reshaping the Rules of Education
How Advances in Artificial Intelligence Are Making Modern...
How Technology is Transforming Learning Experiences
A Practical Guide to Managing Family Finances Without...
Teach Mama
  • Reading
  • Early Literacy
  • Writing
  • STEM
  • Activities
  • Digital Literacy
Teach Mama
Teach Mama
  • reading
  • early literacy
  • writing
  • STEM
  • Activities
  • digital literacy
  • Contact
remembering the importance of pretend play | teachmama.com
parentingpretend play

Remembering The Importance Of Pretend Play

by Teach Mama January 10, 2011
written by Teach Mama

The Red Checks Restaurant was up and running over here for the last few days, serving up its famous chicken noodle soup, corn, pizza, sandwiches, eggs, and chicken legs.

Wearing brand-new, made-especially-by-Grandma aprons, the servers were polite, prompt, and eager to serve.

And sure, they were coughing a little, but everyone was, so it wasn’t that big of a deal.  And I was the only customer who could talk; there were several small dolls and stuffed dogs there, but who needs conversation with a plastic meal this good?

We’re sick. We’re all sick.  And on day six for me and four for the kids of being stuck in the house, rather than go batty, we got creative. My husband was on his golf trip, so this weekend, we opened up a restaurant in our basement.  Here’s to thinking big.  Here’s to really rockin’ pretend play on a sick day.

Remembering the Importance of Pretend Play:

I was putting away the last of the Christmas gifts when I came across the beautiful aprons my mother-in-law made for us.  For a split second, I thought, Ooooh, what could we bake? and then the chorus of Maddy, Owen, Cora, and my coughs reminded me it wasn’t that great of a time for cooking.

We’ve got a play kitchen full of food, some small tables, and aprons. Let’s open a restaurant! I said to the kids, and we headed downstairs.

We’d been taking it verrrrry easy for the last few days, watching a lot more tv than usual and reading a lot more books than my throat cared to admit. So it was natural for us to branch out a bit, head downstairs, and get our imaginations going.

remembering the importance of pretend play | teachmama.com

I put everyone to work; Maddy and Cora organized the play kitchen and food, and Owen and I set up the restaurant. We pulled out two small tables, covered them with blankets, and put two tiny chairs near each one.

I found two small vases for a flower on each table, and then we rallied at the computer.

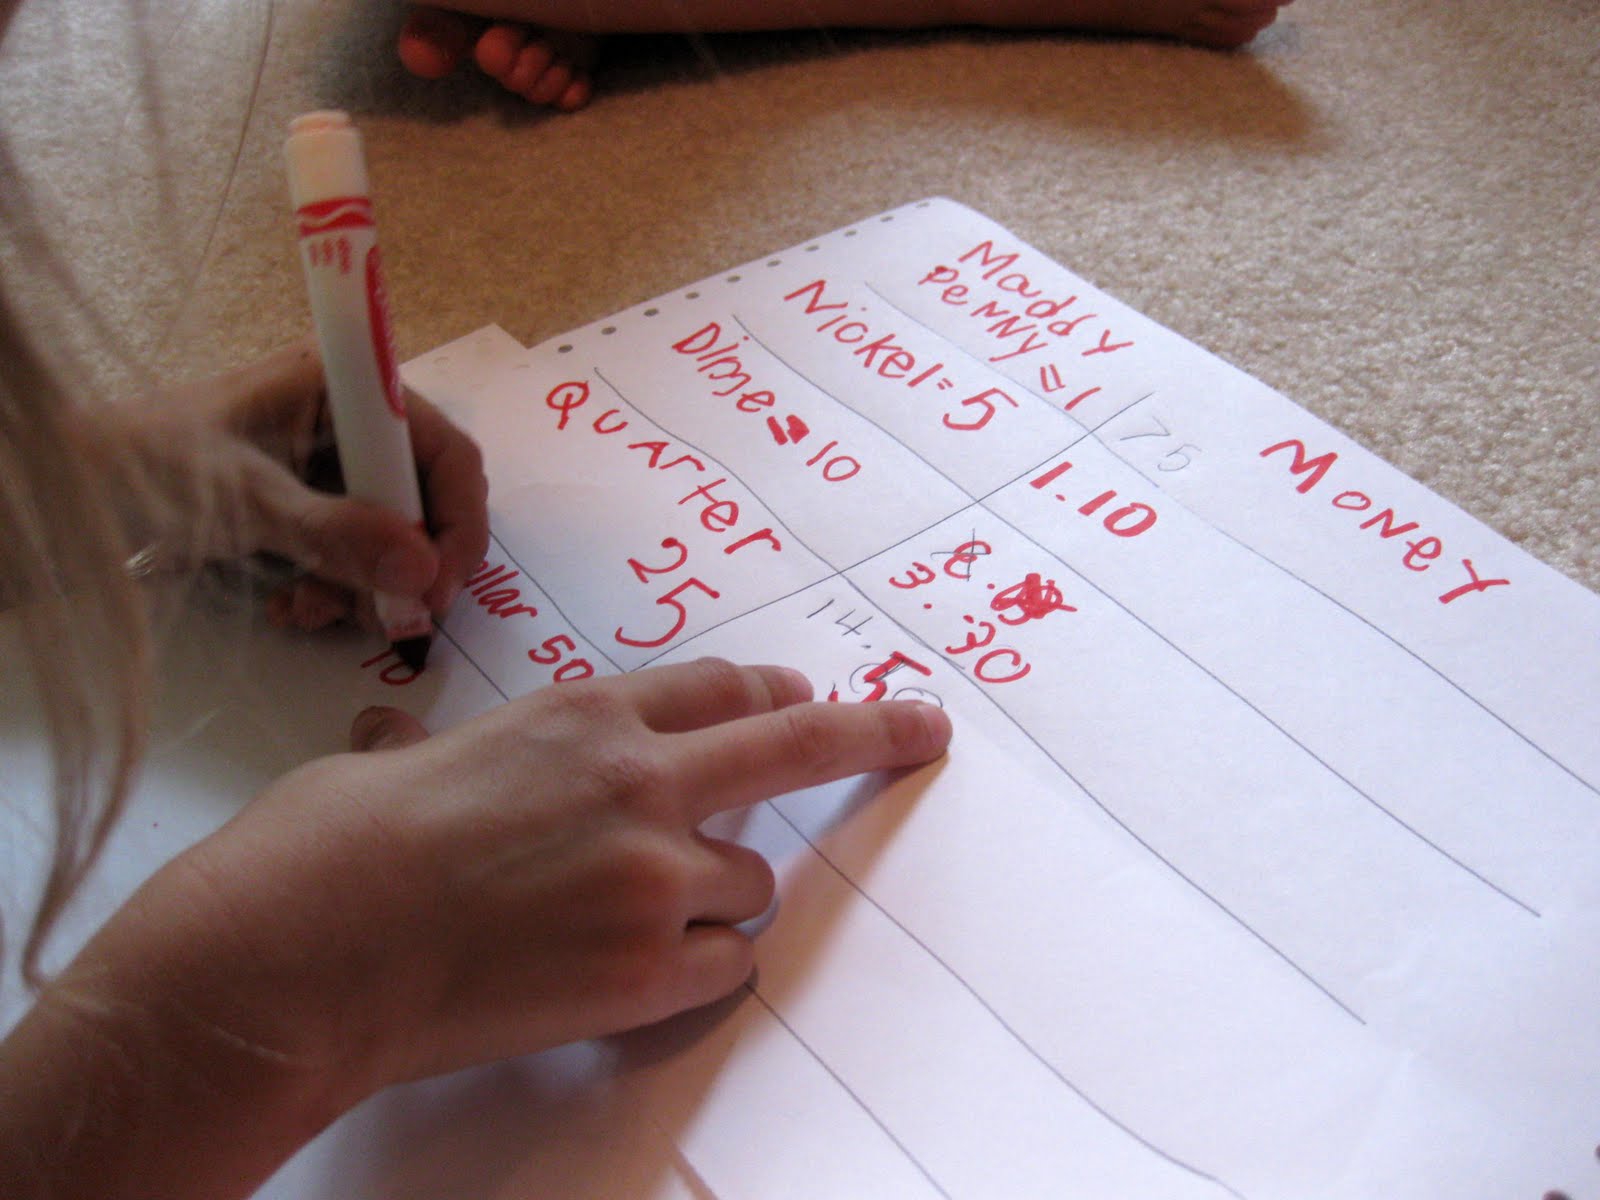
Okay. Take a look at the food we have in the kitchen, and let’s decide what kinds of food we want to serve at the Red Checks Restaurant.  I’ll type up the menu.  What should I add first?

Maddy said, Soups! We need to serve soup, and I think we have chicken noodle.

I typed, ‘Soup: Chicken Noodle’.

Okay, what else should our restaurant serve?

Drinks! Owen yelled.  We have drinks! I know we can have lemonade, juice, and milk.

Cora added, Soda! We have soda! (Did I mention that we’ve been drinking a ton of ginger ale?)

I added ‘Drinks’ to our menu.

remembering the importance of pretend play | teachmama.com

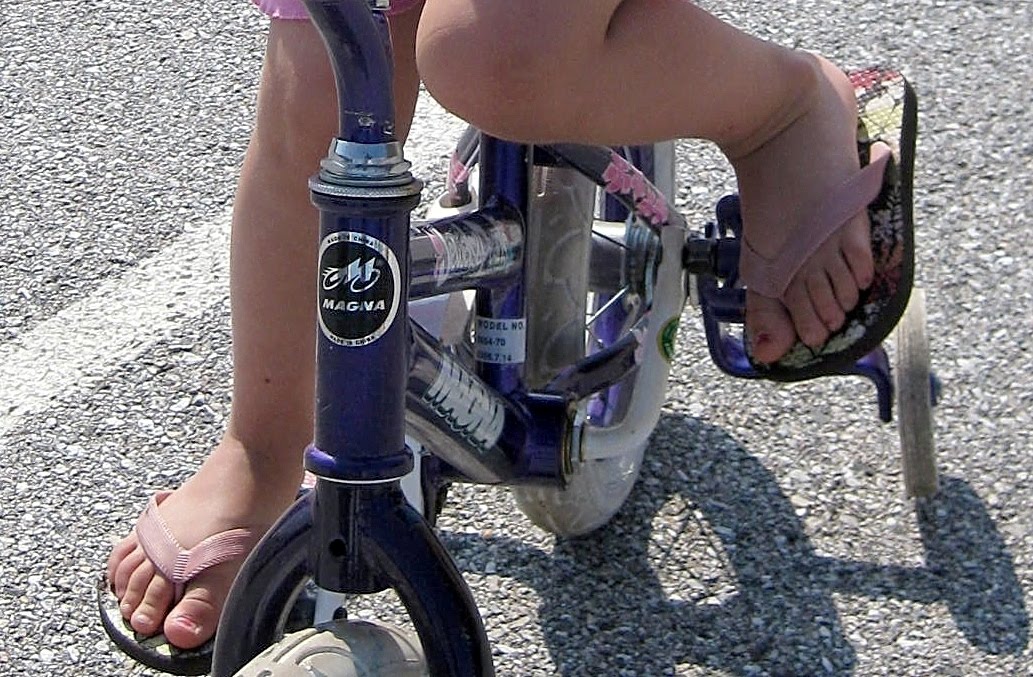
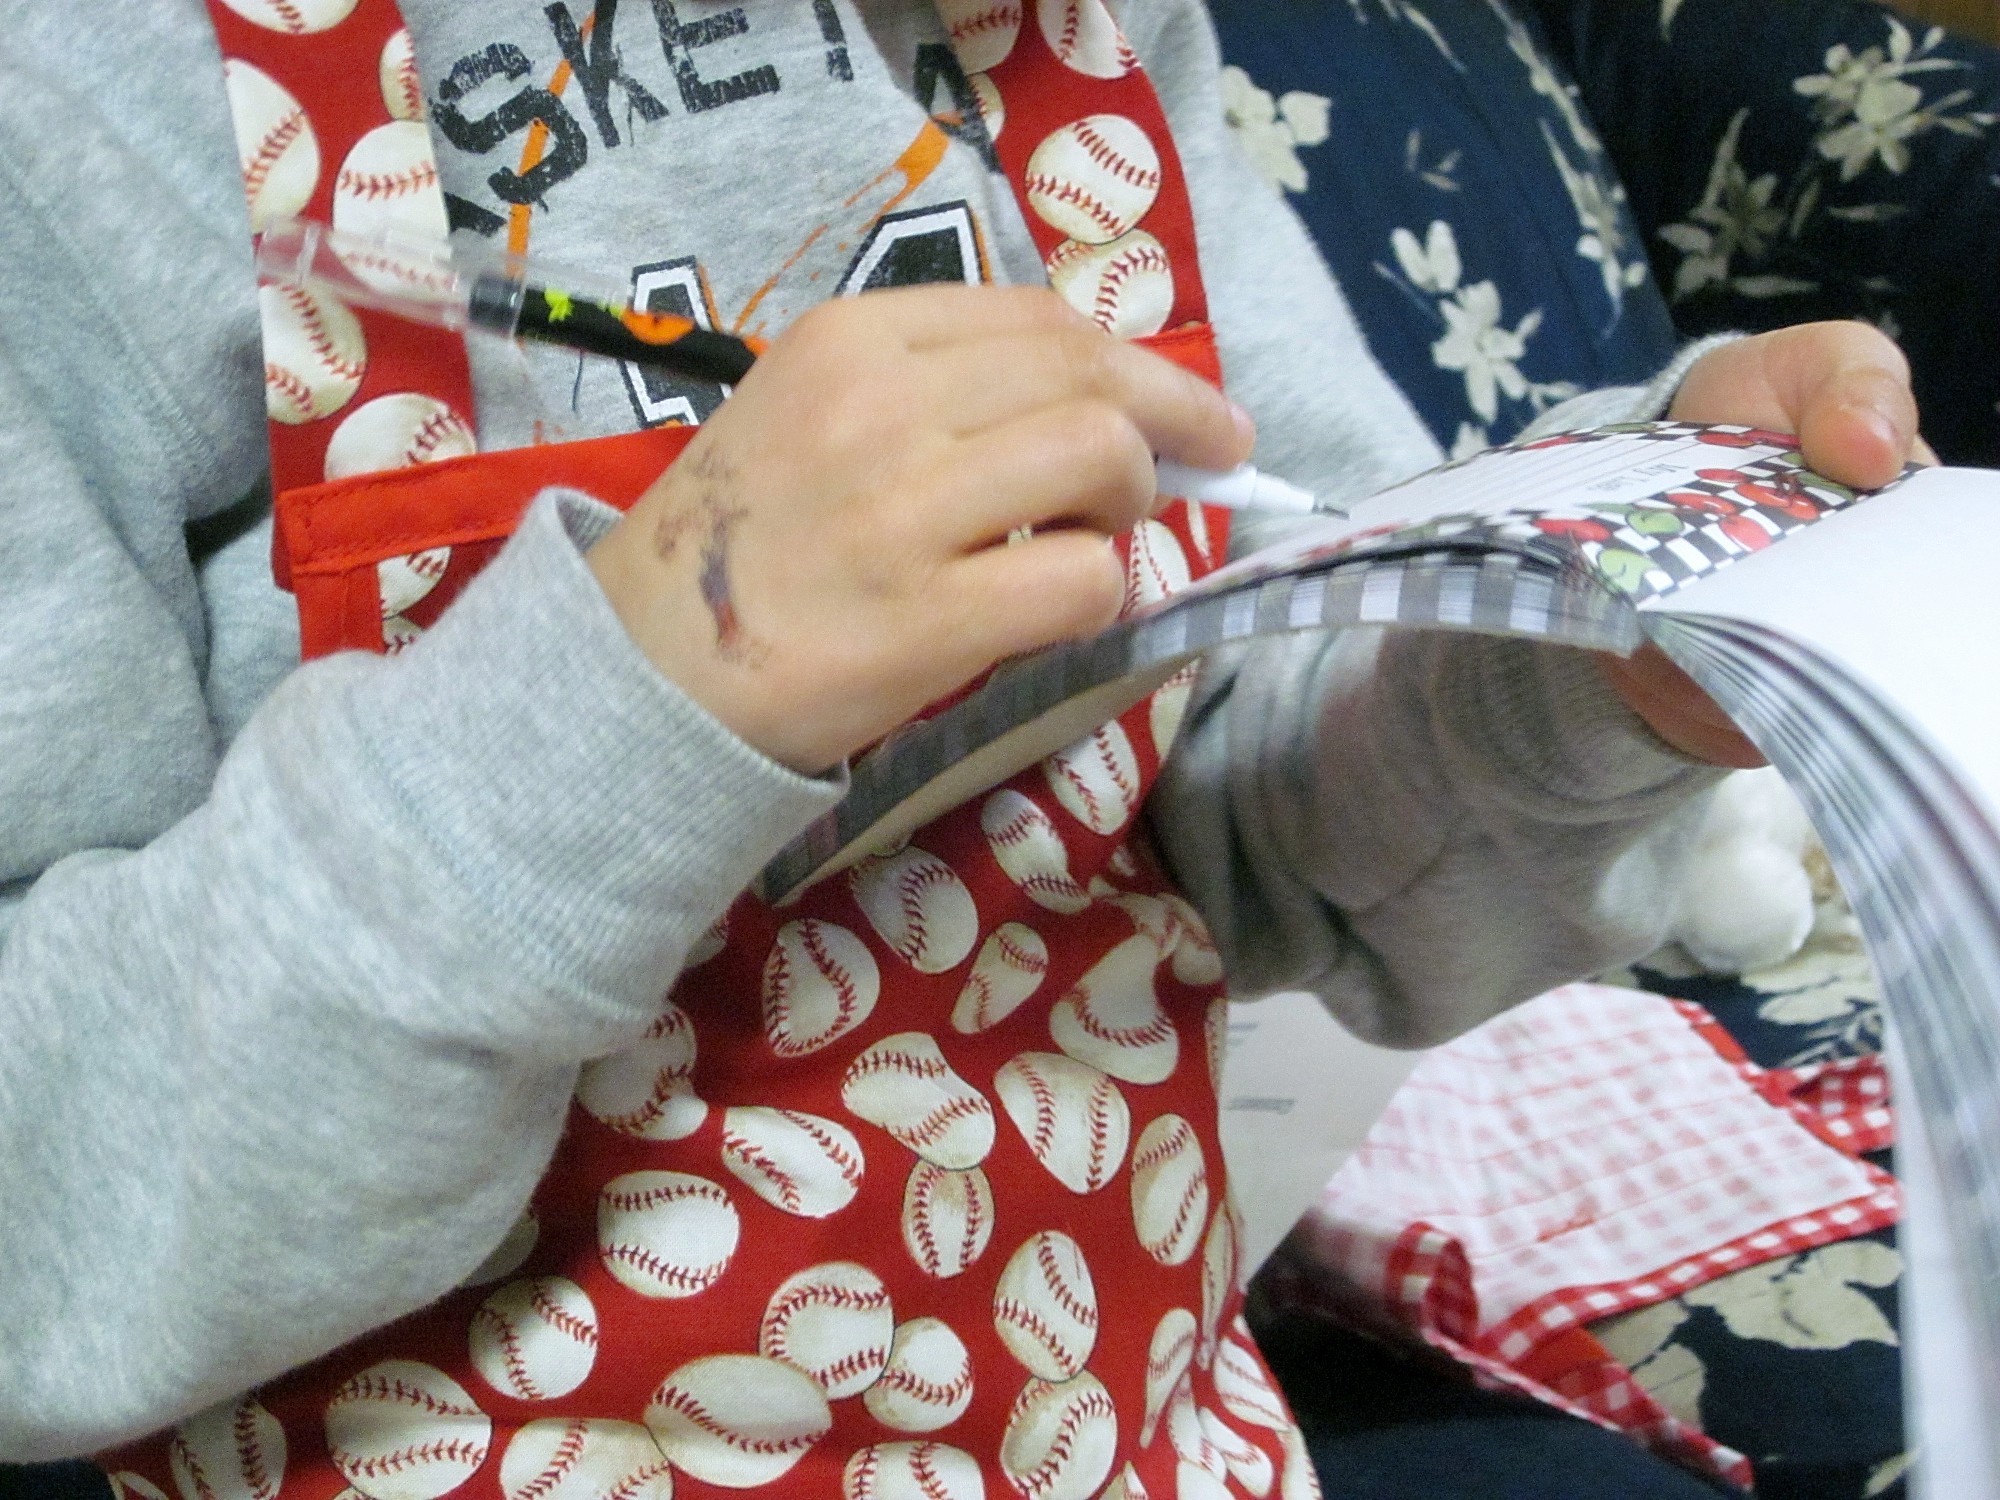
Owen takes an order at the Red Checks Restaurant.

We decided on Appetizers, Meals, and Desserts for our menu, and I printed out four copies of the Red Checks Restaurant Menu.  Just like that–simple menus for the Red Checks Restaurant.  (Print out a copy if you’d like!)

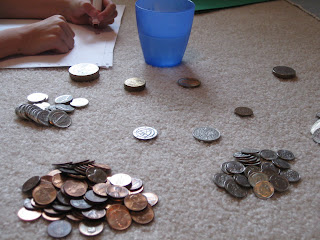
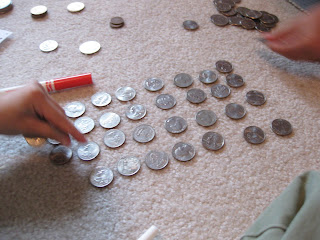
And that’s it–we took turns as customers, as cooks, and as servers. We brought down the cash register, pretend money, and pretend credit cards.  Sometimes we were polite customers, and sometimes we were rude–we laughed a lot but did end up practicing some different ways of dealing with unexpected occurrences (the customer whose soup is never hot enough, the crying baby, the very clumsy customer, the server who just can’t get it right. . . ).

And then we got tired of it, hung up our aprons, and watched Tinker Bell and the Great Fairy Rescue for the third time in three days. But we came back to the Red Checks again today, which tells me that we have something good going on. At least for a while.

It seems like supporting childrens’ pretend play is all the buzz lately, with an article written by two Harvard professors for CNN and an article arguing the importance of playground play in the January/February issue of NEA Today Magazine.   Both articles essentially said the same thing: that pretend play is absolutely necessary for childrens’ development, possibly even more important than instilling the ole ABC’s and 123’s into their little brains.

One thing that stood out for me in Want to get your kids into college? Let them play was this:

One of the best predictors of school success is the ability to control impulses. Children who can control their impulse to be the center of the universe, and — relatedly — who can assume the perspective of another person, are better equipped to learn.

Psychologists calls this the “theory of mind”: the ability to recognize that our own ideas, beliefs, and desires are distinct from those of the people around us. When a four-year-old destroys someone’s carefully constructed block castle or a 20-year-old belligerently monopolizes the class discussion on a routine basis, we might conclude that they are unaware of the feelings of the people around them.

The article goes onto cite a study where 4- and 5-year olds were engaged in pretend play with adults.   The study recognized ‘substantial and durable gains in the ability of children to show self-control and to delay gratification’ and ‘countless other studies support the association between dramatic play and self-regulation‘ (Erika Christakis, MEd, MPH, and  Nicholas Christakis, , MD, PhD, CNN.com, 12/29/10).

So pretend play is muy importante because without it, children are unable to really, fully understand how “take turns, delay gratification, negotiate conflicts, solve problems, share goals, acquire flexibility, and live with disappointment”, skills that these two Harvard professors are noticing are lacking in some of their own students.  That’s pretty scary if you ask me.  Makes the decision to wait a year for kindergarten for my boy a little easier when two Ivy League prof’s are saying that the social piece may be a heavier weight than the academic weight for kindergarten readiness.

In “Play Ethic“, an excerpt from Playing for Keeps: Life and learning on a public school playground (2010), written by Deborah Meier, Brenda S. Engel, and Beth Taylor, (and available on the NEA Today site), the authors say basically the same thing: that the lessons learned on the playground are invaluable.  In fact, they’re imperative for a democratic society. Through years of observing mixed-aged children playing on a public school playground, the authors came to the conclusion that creative thinking, meaningful interactions, and true life skills require free play and that

the future of democracy. . . depends on “wishful thinking” in the positive sense, on playing with ideas and being able to imagine better solutions. As adults, we need to cultivate the habit of taking leaps beyond our own self-interest and kinship. It is from such thinking that new realities are invented.

Interesting stuff.  Makes me wonder where the kids and I will go tomorrow. . . I’ve always wanted to head to the moon.

Many thanks to my awesome mother-in-law for bringing these articles to my attention, and, of course, for the fabulous aprons she made for my littles.

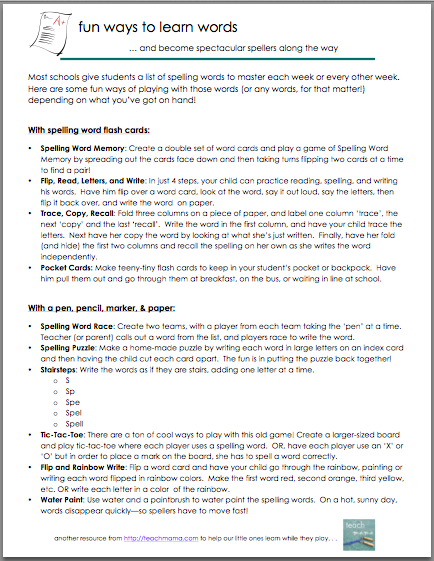
Check out a few other posts that may help you develop strong and healthy habits for your family:

  • wait time
  • my day, your day
  • frozen peas
  • kids who rock the kitchen
  • kids who rock the laundry
  • rest time
  • gem jars
  • arm circles
  • noticing kids
  • homework routine

fyi: Some of the links in the post above are “affiliate links.” This means if you click on the link and purchase the item, I will receive an affiliate commission. Forever and always I recommend only products or services I use personally and believe will add value to my readers. I am disclosing this in accordance with the Federal Trade Commission’s 16 CFR, Part 255: “Guides Concerning the Use of Endorsements and Testimonials in Advertising.”  For more information, please see teachmama media, llc. disclosure policy. 

January 10, 2011 16 comments
0 FacebookTwitterPinterestPocketEmail
mastering math with mini math fact cards
computationmath

Mastering Math Facts With Mini Flash Cards

by Teach Mama December 28, 2010
written by Teach Mama


Simple addition math fact flash cards should have been made, used, and memorized months ago, but they weren’t, we didn’t, and Maddy hasn’t.  And I feel awful.

Like foul shots in basketball, these basics are concepts that can be made better with repeated practice, and these are things that parents can–and I believe should–help their kids practice and learn. They’re the building blocks of math, and with a little support and a few reminders, most kids can commit these to memory.

So after Maddy (gulp) had to repeat her Math Fact Practice Sheet for the (gulp, again) gazillionth time, with a little push from one of my super-smart sisters, I realized I needed to move my Reading-programmed brain into full-fledged math-mode.  So along with a lot of new-toy playin’, this winter break will be filled with a lot of math-fact practicin’.

Maddy wants to learn these basic facts–and she needs to in order to move forward. But I’m afraid that unlike her brother (and much like her mama) her brain is more wired for reading and language.  So practice she needs, and practice we will do.

  • Mastering Math Facts With Mini-Flash Cards: No matter how much I tried to incorporate math learning into our every day, no matter how many number games we played–on the road or at home–for some, learning math facts means memorizing. Just like sight words, just like left and right.

So I tried to make these basic mini math fact cards addition simple, but a little bit novel.  They’re not normal-sized flash cards–big, bulky and screaming that she doesn’t know the facts she should know by now.


mastering math with mini math facts

The mini math fact cards addition are ready!

Instead, they’re mini without being too, too small.  Because everything my sweet Maddy seemed to ask for recently has been just that–mini.   Littlest Pet Shop pets, Polly Pockets, American Girl accessories–teeny-tiny things for already small toys.

The mini math fact cards addition are here to download as a pdf if you so care to use them. They include 10 pages of basic addition facts: 0-10 with ten cards on each sheet.  Small enough to fit in your pocket or your purse or your kiddo’s backpack.

Want the math fact cards subtraction NEW, too? You got it!

mastering math with mini math facts

The basic addition Math Facts are cut out . . .

When I printed them out, Maddy was unusually, surprisingly excited. She actually smiled and said she wanted to use them immediately so she’d do better on her Math Fact Practice sheets at school (my textbook oldest child).  So I cut them out, and we sorted them by fact families.

mastering math with mini math facts

. . . and the Math Fact bags are labeled, sealed, and ready to be learned.

And then I labeled six sandwich bags with ‘math facts’ in six different colors. I put about 16-20 cards in each bag, and they were ready to go.

I want to have six bags of mini math fact cards addition ready to use and practice anywhere–in my purse, in the kitchen, in the living room, in Maddy’s room. Anywhere.  And I think that 16 or so cards will be just enough to create a mix of facts that she knows already with facts that she needs work on, and since the bags are color-coded, we’ll kind of be able to keep track of which groups she knows and which she doesn’t know as well.

mastering math with mini math facts

And then I asked which bag she wanted to start with, and she chose blue, and we practiced. And practiced. And practiced more.

We reviewed some tricks as we came across problems needed tricks, like the 10’s family (just put the number added to 10 in the 1’s spot, and it you have the answer), and we reminded her that if she’s stuck, it’s totally fine to take a minute to figure the answer out. When in doubt, she can always take the larger number and use her fingers to add the next number to it.

With a lot of praising, she ran through the mix of cards about six or seven times, and she tried to get speedy the last few times.  We focused on her successes and were patient when she got hung up, reminding her to give herself a second before she called out an answer.

After a week or two, once I notice that Maddy’s committed more of the facts to memory, I’ll pull out some math-fact games–much like the ones we do with spelling words or with sight words–so that she gets used to ‘playing’ a little with the facts like she does with words.  But until then, we’ll rock out with these simple mini math fact cards addition for a good long while, increasing her confidence and doing what we can from our end to help support Maddy’s math learning.

It’s (almost) a new year–a time for starting fresh and stepping out on the right foot–so we’re turning over a new leaf as far as math facts are concerned.  Let’s hope this is a New Year’s Resolution I can remember to stick with!

December 28, 2010 36 comments
0 FacebookTwitterPinterestPocketEmail
word searches for early literacy learning | teachmama.com
reading

Word Searches For Early Literacy Learning

by Teach Mama December 15, 2010
written by Teach Mama

I’ve struggled this year with how to occupy Owen and Cora while Maddy does her homework, and what I’ve come to realize is that in order for me to  support Maddy, Owen and Cora have to pretend they’re in Rome and do as the Romans do.

So after we get home from picking Maddy up from school, we get organized, clean up, have a snack, and we do homework.  All of us.  Maddy, Owen, and Cora.  It’s become our after-school job.

It takes a bit of prep on my part–not much–but it’s worth it.

I felt like it just wasn’t fair to plop Owen and Cora in front of the tv while Maddy worked, and that Owen and Cora could both actually benefit from 20-30 minutes of quiet work time. Next year in Kindergarten, Owen will have a bit of after school work to do, and the following year Cora will.  There’s no harm in starting the pattern one year early, right?

Some ‘homework time’ activities have worked well, and some things have totally bombed.  One thing that Owen really loves is a made-just-for-him Word Search.  And thanks to Discovery Education’s puzzlemaker, he’s got a ton to choose from!

Here’s the skinny:

  • Word Searches, Word Searching, Word Finds: It took me all of five seconds to fall hard for Puzzlemaker, which I found thanks to Maddy’s teachers and the Fun Ways to Learn Spelling Words post.

Owen has always loved Word Searches, and even before he was able to search for words, we ‘revamped’ his Spiderman Activity Book so that he could play with the Word Searches way back when.


word searches for early literacy learning | teachmama.com

Owen likes to highlight the words on his Word Searches.

word searches for early literacy learning | teachmama.com

So the very first time way back in the fall when I brought out the Family Word Search for Owen to do during homework time, he was really, really happy. I have often touted the power of names in early literacy, so when he was able to actually read many of the family names that he was searching for he was over the moon excited.


The Word Searches require me reading the list of words to Owen before he begins. I read and point to each word as I go.  Initially I helped him get started; I’d run my finger along the top line, looking for the first letter of the first word to be found.  If we found it, we’d go back to the word and  check out the second letter.  If we could find that second letter next to the first, we’d look for the third letter, and so on; if not, we’d move to the second line of letters.word searches for early literacy learning | teachmama.com

word searches for early literacy learning | teachmama.com

Rockin’ the Halloween Word Search

Over the last few months,, I’ve created a ton of Word Searches for him, and every few days, he’ll pick one up, finish it–or not–or clip it on the board to finish when he’s up for it.


I try to keep them in a Word Search folder, easy-to-reach and labeled so he knows where they are if he wants one.

word searches for early literacy learning | teachmama.com

The Word Searches I’ve created this year, thanks to Puzzlemaker–are below  as pdf’s to download and print out. I will add to this list as Word Searches are created.

  • word search wintertime
  • word search christmas santa
  • word search christmas the story
  • word search halloween
  • word search family names
  • word search football
  • word search sight words

Most days,  we do more interactive, directed activities with Owen and Cora before their rest time, but the ‘homework’ time really has to allow me to sit with and chat–uninterrupted–with Maddy.

I’ve found that our day rolls more smoothly when homework is finished right off the bat; we’re an early-to-bed family, so homework at 7:30 won’t work, and after dinner is the only time they get to hang with their dad.

So that’s that–the first of a bunch of  ‘homework time’ posts to come. . . and a super-fun way of getting our emergent readers to practice their letter recognition and early literacy skills!

December 15, 2010 14 comments
0 FacebookTwitterPinterestPocketEmail
little holiday notes and lunchbox jokes
christmasholidays

Little Holiday Notes And Lunchbox Jokes

by Teach Mama December 7, 2010
written by Teach Mama

Who doesn’t need to laugh a little more during this sometimes-way-too-stressful holiday season? I surely do–and there’s nothing like a super-corny, incredibly simple knock-knock joke to get me smiling and my kids rolling.

And I mean rolling.  On the floor.  In stitches.

So thanks to my dear friend with many great ideas who sent me her own set of Halloween jokes that she made for her two lucky girls, I felt inspired to follow suit and create some holiday lunchbox jokes for my own kiddos.

At least these jokes kind of make sense; the ones that Maddy, Owen, and Cora seem to be telling these days are totally off-the-wall.

Holiday Notes and Lunchbox Jokes:

These are simple but funny, and I found them all around the internet.  I didn’t make them up, and they didn’t come from one source–they came from a bunch of places and I lost track (so, gulp, thanks for sharing!).

The Holiday Notes and Lunchbox Jokes are here to download as a pdf if you’d like to share ’em with your little lovies.  (Please, if you decide to share, link to this post instead of the attachment page!)

Little holiday notes and lunchbox jokes:

little holiday joke notes teachmama.com


Just throw your email in the box below, and the notes will magically appear in your inbox. Enjoy!

The jokes are waaay basic, and I tried to choose ones that had relatively easy to read words so that my emerging readers could at least read them and tell them to their buddies at lunchtime.

little holiday joke notes teachmama.com

little holiday joke notes teachmama.com

Our holiday notes and lunchbox jokes are so totally cute and actually pretty funny.

I loved how my girlfriend’s Halloween jokes were formatted so that if you folded one side in, you had to read the joke on the left side and then open up the page to read the answer.  So I tried to do that for most of my holiday jokes.

Using a small Foamie sticker, I folded the right half of the paper shut, and planted a holly leaf or tiny star right there to keep the answer a secret until the reader was ready!

little holiday joke notes teachmama.com


And that’s it–just a little teeny holiday note that doubles as a lunchbox joke to get my kiddos laughing a bit and reading along the way.

It’s been so busy here, preparing for Maddy’s birthday and trying to get everything set for the holiday, and carry on with normal everyday activities that it’s almost laughable.

But I’m sure it’s the same for everyone everywhere.

So I’m just going to read a few of these notes to keep myself focused (ha!) and smiling.

Cheers!

Want a few more holiday-inspired learning ideas? Check out: 

  • Holiday Fun Fact and JOKES Lunchbox Notes (with Hannukah!)
  • Holiday Time Fun Fact Lunchbox Notes
  • Little Holiday Notes and Jokes
  • Holiday Notes for Families
  • The Polar Express tradition
  • Scratch-off Cards
  • K-Cup Advent Tree
  • New Year’s Family Interview
  • Happy Holidays Backyard Birds 

fyi: affiliate links are used in this post

December 7, 2010 40 comments
0 FacebookTwitterPinterestPocketEmail
magnetic letters: how to really use them with your kids for early literacy learning | teachmama.com
early literacysight words

Quick Trick: Magnetic Letters (How To Use Them With Your Kids!)

by Teach Mama December 1, 2010
written by Teach Mama

Holiday time is here, and things are sure to be nutty around our house–and everyone else’s–for the next few weeks.

Although I know it’s going to be hard to sneak in a little bit of learning each day while we’re busy decorating, making gifts, wrapping, and eating sweets (which we do a lot of over here!), I do have a little something up my sleeve.  I threw our magnetic letters on the fridge this week just to squeeze in a little word-learning when we’re able.

This Quick Trick has been used by millions of homes all around the world, but I’m sharing just a few of the next steps for moms and dads out there.

It’s one thing to put some letters up on your fridge.

It’s another to actually use the letters to teach your kids a teeny trick or two after breakfast one day.

Here’s the skinny on how you can really use magnetic letters with your kids for early literacy learning.

  • Magnetic Letters: Our magnetic letters are on and off of the fridge every few weeks.  Usually at first I put all of the letters in one big clump, hoping that someone will stop by on their way to the breakfast table to create a word or two.

Sometimes it works, and sometimes it doesn’t.

Sometimes somebody will put the letters in alphabetical order (woo-hoo!) and sometimes a mystery kid will sneak into our kitchen and spell ‘butt’ or ‘poo’ or ‘bootie’ (certainly not one of my kids and it’s usually blamed on Brady. . . ).

Sometimes someone will stop to spell his or her name, create a little message, and make this mama smile big.

But if no one notices the letters for a few days, I’ll build a few words myself, some varying-in-difficulty CVC words (consonant-vowel-consonant) with a CVCC here and there, and when my kiddos are in the mood, maybe they’ll play around with them.


magnetic letters: how to really use them with your kids for early literacy learning | teachmama.comjust a few words on our fridge, ‘real’ words and nonsense words


Here are a few other little, teeny ways that little ones can learn a bit o’ something while you’re working on dinner and the kids are hangin’ around the kitchen, playing with the magnetic letters:

  • ABC Challenge: Put the letters in alphabetical order but then pull every five or so letters out of the mix.  Place the ‘lost’ letters under the alphabet and ask your little one to help the lost letters make their way back to their alphabet family.
  • Find Me A . . . : For the early letter-learners, simply asking, Can you use your strong eyes and smart brain to find  me a letter ‘O’ or ‘M’? is all you need to do to get them focused.  Always give a choice between two letters because we want  to set our kiddos up for success; if we ask, Can you find the ‘L’? and they can’t, they’ll be less likely to want to play our little learning games down the road.
  • Sense and Nonsense: Create several ‘real’ words that are easy to read, and add in a few non-sense words that follow the same word family pattern– cat, bat, rat, zat, wat.   Once your little one can ‘read’ the ones he can recognize, he’ll giggle like crazy when he reads a silly nonsense word.
  • Make Many: The simple act of adding an ‘s’ to a word is incredibly empowering for emerging readers.  With just one letter, they can read–and create–a whole new word!  So throw a few easy-to-read nouns up on the fridge (dog, cat, pet, hat, etc.) and show your kiddo how to make one into many!

magnetic letters: how to really use them with your kids for early literacy learning | teachmama.com

  • Family Names: I’ve said it many times before, but it’s true–names are some of the first words that little guys can read.  So starting with Mom and Dad, make your way through the whole family, challenging your kiddos to build their names first, then Mom and Dad, then their siblings’ and pets’ names.  If they’re not ready for the whole name, you build the name and then take away the first letter.  Mix it up with three other letters and ask if they can find the letter that begins that person’s name. It’s a start–but it helps!
  • We are (Word) Families: Word families are a great starting point for emerging readers because in just a few minutes, a little guy can ‘own’ a whole word family! Start by putting ‘at- at the top of the fridge, and then put some consonants close by (c, b, h, m, r, s).

Demonstrate how just by adding one little letter to the beginning of  ‘at’, your kiddo can now read six new words! Challenge him to ‘surprise’ you with a new word by switching that important first letter, and every few days add a new word family to the fridge.

  • Spell it, Baby: For an older kiddo who’s already conquering the Spelling List, ask her to spell a word from that week’s list on the fridge, just like the good ole days when she was teeny and could only find A, B, and C.  You’ll be surprised how interested she might be in demonstrating her expertise!
  • Prefix/ Suffix FUN: Really, prefixes can be fun.  Put ‘re’ on the fridge and then add ‘write’ to make ‘rewrite’.  Then leave ‘re’ on and add ‘view’ or ‘do’.  Talk about each word and its meaning and then explain that two little letters placed in front of these words means ‘to do again’ and then talk about what ‘rewrite’, ‘redo’, and ‘review’ mean.  Play around with different prefixes (pre-, un-, mis-) and suffixes (-y, -less, -ful).


magnetic letters: how to really use them with your kids for early literacy learning | teachmama.com

click here to download: making and breaking words

This does not need to be anything major, crazy-confusing, or stressful.  These are just a few fun–fast!–ways of throwing in a little bit of deliberate word learning with those magnetic letter friends of ours when we have a minute or two.

Want a handy little sheet about the basics of word-building? Here’s the making and breaking words which I still find super helpful.   Or head over to a previous Letter-Lid Word-Building post.

If we’re excited about words, our kids will become excited about words and will (hopefully!) become eager learners. All of the reading research on the topic of word learning says basically the same thing:

Effective teachers display an attitude of excitement and interest in words and language.  Teachers who are curious and passionate about words inadvertently share their enthusiasm with students, and it becomes contagious (Bromley, “Nine Things Every Teacher Should Know About Words and Vocabulary Instruction,” Journal of Adolescent & Adult Literacy. April 2007).

We are our children’s first teachers, so let’s get excited about word learning and put some love into our simple fridge magnets!

fyi: affiliate links are used in this post, which means that if you purchase something from one of the links, we over here at teachmama.com get a teeny, tiny percentage

December 1, 2010 29 comments
0 FacebookTwitterPinterestPocketEmail
The Terrific Task Of Teaching Kids How To Tell Time
computer timemathprintables

The Terrific Task Of Teaching Kids How To Tell Time

by Teach Mama November 17, 2010
written by Teach Mama

Teaching kids how to tell time is no easy task. But this little analog clock, printed on cardstock–with labeled, movable hands–has made Maddy’s homework this week a whole lot more manageable.  (And I’m betting just a little more fun!)

The minute- and hour-hand confusion, the skip counting by 5’s for the numbers on the clock, the craziness of figuring out the hour hand when it’s not really on the hour yet–it all makes for one difficult lesson for many kiddos. And at this point in time, in this digital age where even teaching penmanship is controversial since students do so much work on computers, I have to admit that it takes me a few minutes to think about telling time on an analog clock.

Here are a few resources I used–and hunted down–to get my sweet Maddy over the telling-time hump (or so I hope):

  • Teaching Kids How to Tell Time: There’s no magic here, I fear; it’s the ole basic principle of practice, practice, and more practice.

Maddy had several worksheets this week in her homework packet that focused on telling time.  She seemed to breeze through the half-hour and hour-clocks from previous weeks, but this week she hit a wall when it came to figuring out the mixed-up hours and minutes.


I knew she needed something in her hands that she could move herself, or she’d be constantly erasing like crazy.  Luckily, her amazing first-grade team of teachers provided her with this fab clock a few weeks back.  I didn’t realize quite how awesome it was until this week, when the worksheets got a whole new world of tricky.


the clock, before it got its hands


I scanned the Analog Clock and page of numbers, I printed it on cardstock, and we used a gold fastener to secure the hands. I cut two small circles from a margarine lid and placed them on the back of the clock and also between the hands and the clock face; sometimes it helps with spinners and rotating pieces to have more space to move.


The Small Analog Clock with Movable Hands is here to download as a pdf if you’d like.  I cannot give credit to anyone other than Maddy’s teachers and school.  Many, many thanks yet again!


After the major road bumps Maddy hit the first time she attempted the clock worksheets this week, she seemed a little relieved to have an actual clock to practice on before she drew in the hands on her paper.


When Maddy could actually manipulate the hands, see the numbers better, and see the ‘hour hand’ and ‘minute hand’ written on the pieces, she became more comfortable.

I wrote the numbers by each quarter hour–15, 30, and 45–and that seemed to help her a bit, too.

And really, that’s it–it’s just a clock that helps my sweets with her big-time first grade homework.

And here are a few other time-telling resources I hunted down in a feeble attempt to support this (initially) troubling task:

Time for Time site:

  • Telling Time Lesson Plans: for teching hours, half hours, minutes, etc.
  • Telling Time Worksheets: Hours, Create-your-own time (like Maddy’s), analog-to-digital and vice versa, etc.
  • Class Clock: Kids can manipulate and change time on the screen
  • Telling Time Games!: Even a cute Just In Time board game (love it!)
  • A History of Time: Seriously. Sundials and the works.

Just in Time:

  • Time Concentration Cards (and Set II): LOVE these. Kiddos can match the clock to the correct time.
  • Tell the Time Hour Worksheet and Minutes Sheet
  • Blank Calendar
  • Online Quiz

Math is Fun: Analog and Digital Clock: Kids can set the times and compare the clocks

And that’s it.  Just a few time-telling treats to keep in our back pocket and some really cool online stops worth checking out!

November 17, 2010 24 comments
0 FacebookTwitterPinterestPocketEmail
teach kids to stand up for themselves
behavior managementparenting

Teaching Kids To Stand Up For Themselves

by Teach Mama November 12, 2010
written by Teach Mama

teach kids to stand up for themselves

It’s been a gorgeous fall week here, so one morning, Owen, Cora, and I spent a good while at the park with our buddies.  Turns out there were a handful of 4’s and 5’s there, and Owen made fast friends playing superheroes with ‘the big guys’.

Little did I know that this seemingly eventful playdate would lend itself to a great ‘teachable moment’ –one that every kiddo needs to experience and one that every parent should find time to sneak in: a lesson on standing up for themselves.

It’s a Quick Trick because it only takes seconds to give children the words they need to build confidence and, in the long run, create better friendships.

  • Teaching Kids to Stand Up For Themselves:  I am so far from an expert on parenting that it’s not even funny.  Every single day I’m learning something new, researching one thing or other, begging my pals for advice, calling my mom and dad, wondering how terribly I’m screwing up my kids, and trying to figure out this parenting gig.

I do, however read a ton and continually refer back to those parenting books that have found a permanent place on our shelves.  I’ve learned to take pieces from one guy and parts from another and form them into some sort of recipe for my own parenting madness. It’s not perfect, and it’s certainly a work in progress.

One person I do love and often keep close at hand is Dr. Becky Bailey’s and her whole Conscious Discipline approach. Her advice on empowering even the littlest guys by giving them the words they can use to stand up for themselves is something I really admire and often use.


So on the playground this week, when my Owen came-a-runnin’ to his mama saying that some little guy was name-calling and wouldn’t stop, I said,  What did you say to him?


Owen told me, I told him ‘don’t say that’ and ‘no I’m not’ but he still won’t stop.  So I don’t want to play with him.

I felt really sad for my uuber-sensitive boy because I knew the guys were really having a fun time zooming around the equipment, flying from buildings and saving the universe, all the while playing soccer on the side. And I knew Owen was probably really confused about why this guy was calling him a poopie-whatever-whatever.


So I said, Did you try saying ‘I don’t like it when you name call me because it hurts my feelings’?


He said, No.  Will you come with me and I’ll do it?


teach kids to stand up for themselves


Of course I said I would, and we walked over together.  Owen bravely put his chin up and said I don’t like it when you name call me and it’s not okay because it’s not nice.


And did the rest of the conversation unravel perfectly like I wished, with the little guy saying ‘I’m sorry‘ and the two buddies slapping five and heading back to superhero world? No, not really.  Bummer.


But I can only worry about my Owen and how he handled things and hope that by sticking up for himself he felt better and more confident about the situation.  And I really think he did.

I guess my point is simple: that kids need to know that it’s okay to stand up for themselves. That if one guy on the playground says or does something that isn’t cool with the next guy, that the second guy can–and should–say something like ‘I don’t like it when you (hit me/ run away from me/ take my ball).  It makes me feel (sad/ upset/ frustrated/ angry).

There’s absolutely nothing wrong with being kids direct with their friends–even new friends–about how they’re being treated. It’s better in the long run, and although the identification of feelings is hard for little ones, it may come with time.  And there’s no arguing the way that someone makes you feel.  It’s not like saying ‘I don’t like it when you run away because you’re a big creep.‘  Even if they end their ‘I don’t like it when you (whatever) with a ‘so I’m not going to play right now’ or ‘so I’m taking a break from this game‘ it’s something.  It’s empowering because we’re teaching our kids to step into the driver’s seat, which ultimately becomes a confidence builder because our little guys–and gals–should not tolerate unkind behavior from one of their pals.

So that’s it–just a little Quick Trick teachable moment on the playground this week, thanks to a couple of 4 and 5 year old superhero soccer players.

November 12, 2010 22 comments
0 FacebookTwitterPinterestPocketEmail
paint with candy | candy experiments
sciencescience experiments for kids

Painting With Candy: Candy Experiments (Part Two)

by Teach Mama November 4, 2010
written by Teach Mama

Maddy, Owen, and Cora had an absolute blast performing candy experiments using their Halloween loot this week, but I think the most fun they had stemmed from our own experiment missteps.

We tried to conquer the Color Separation experiment, but our little sheets from the USA Science and Engineering Festival didn’t outline the experiment steps like we (I) needed them to.

(Please note: I should have done a little more research to prepare, but I, too, was in a candy fog, I admit. I’m sure if any other person read the directions on the handy dandy little Candy Experiment Sheets, she’d have no problem whatsoever!)

Here’s how my scientists turned all Monet on me:

Painting With Candy:

The goal of Color Separation Experiment is to let brightly colored candy dissolve in water, then use coffee filters so that the different dyes separate and climb up the filter paper.

Sounds incredibly interesting and magical, right?

paint with candy | candy experiments

Maddy dips her Skittle ‘brush’ into the water, ready to paint!

paint with candy | candy experiments

paint with candy | candy experiments

paint with candy | candy experiments

My little experiment sheet from the ‘Fest didn’t outline the steps like I needed them to be outlined, but what my little scientists learned was that the dye on their candy worked just as well as the watercolors in their palates. And this was fine with me.

We reviewed the sheet a few times, tried to follow the directions, but Maddy, Owen, and Cora got majorly distracted by their inner artists.  So they spend a solid 30 minutes painting.

They rolled, they dropped, they blended, and they drew.   With Skittles.

We talked about how the colors moved up and around the coffee filter and how they could stamp colors onto the filters if they placed the filter on the color-saturated plate.

paint with candy | candy experiments

Candy painting was not the cleanest of activities. . .

paint with candy | candy experiments

paint with candy | candy experiments

. . . but it was so much fun!

We watched the colors fade over time, when more water was added or when the whole paper was submerged. We wondered what would happen if we tasted the ‘paint’ (nothing) or if we tasted the colorless candies (no one wanted to).  Unlike the times when we’ve played with Jell-O mix on wet fingers (accidentally, of course), these colors weren’t that sweet, so we did chat about where the sugar seemed to be in the candies (not in the dye–or not much in the dye).

paint with candy | candy experiments

paint with candy | candy experiments

We are totally hooked on candy experimenting!

Although that’s all we’ve done up to this point,  we do have a ton of other ways we plan to play with our candy in the next few days.   Until then, however, we’ve got a soccer season to close out, some Thanksgiving projects to begin,  homework to be completed, and family coming in for the weekend!

Again, many thanks to Loralee for her work on candyexperiments.com and for her inspiration on our own Candy Experiments (part one) as well as today’s post.

Happy experimenting!

Want a few more fun, foodie-science ideas?

Check out:

  • candy experiments, play with color
  • candy experiments part 1
  • paint with candy
  • candy cane experiments, 2.0
  • learn with food
  • get kids to try new foods
  • fractions with food
  • chocolate math
  • monster sandwiches
November 4, 2010 11 comments
0 FacebookTwitterPinterestPocketEmail
playing with candy: candy experiments (part one)
halloweenholidays

Playing With Candy: Candy Experiments (Part One)

by Teach Mama November 2, 2010
written by Teach Mama


With  three overly-tired kids and three pumpkins full of Halloween candy, I knew that I had to be extra creative if I wanted Maddy, Owen, and Cora to do anything other than moping around and asking to eat another piece of candy all day.

So I pulled out the teeny-tiny candy experiment sheets I picked up from one of my bloggy-mom idols who I had the awesome opportunity to meet just last weekend at the USA Science and Engineering Festival on the Mall in DC.  If you missed the Fest, no worries!

Super-cool Loralee Levitt has a handful of candy experiment sheets to download from her site, candyexperiments.com.  If you haven’t been over there, it’s worth checking out–and it will give you something fun to do with all that Halloween candy!

Here’s how we passed some time this morning, playing with candy in the kitchen–all in the name of science!

Candy Experiments:

From the time they fell out of bed today, my three kiddos had candy on the brain–and why wouldn’t they? They gathered what seems like their weight in the sweet stuff, it’s a wonder they could lug it all back to our house.

candy experiments


Cora gets the Skittles ready for their bath.

So when I said for the millionth time, No, you can’t eat any candy now, but you can play with candy in the kitchen if you want.  Let’s do some candy experimenting–they ran.  Fast.  To the kitchen.  Before I knew it, their chairs and stools were positioned, and three little scientists were ready.

candy experiments


candy experiments


Maddy re-reads the experiment instructions. . .

We began with the one I perceived to be the easiest: Floating Letters. This experiment is  super-simple; scientists simply submerge candy with lettering on them and watch to see if the letters float.

Maddy, Owen, and Cora searched for Skittles and M & M’s–candy we knew had letters–dumped them on a plate and then dumped them in some agua.

And then we waited.

And we watched all of the rainbow colors merge into one nasty, ugly-duckling Easter egg mix of green nasty.  Maddy re-read the directions to make sure we had done everything correctly, and then we waited a bit more.


candy experiments


candy experiments


. . . and while she read, the letters appeared!

And then all of a sudden, after a little stirring, we noticed these teeny white flecks appear on the top of the water–the letters were floating!

We didn’t talk much about why they floated and that’s okay in my book, but we talked about what kinds of things float–lighter vs heavier–so we figured that whatever material made the letters on candy was lighter than the stuff that colored the candy.   Cool.

candy experiments


candy experiments


The second experiment we conducted was the Acid test.  This one wasn’t a huge hit for us, but the playing with baking soda was a huge hit.

The Acid Test involves dropping baking soda into candy that has been dissolved in water, and if the water bubbles, then the candy contains acid.

I filled eight glasses with water, and we picked out eight different candies–sour Skittles, Sour Patch Kits, Hershey’s chocolate, Tootsie Roll, regular Skittles, Nerds, Swedish Fish, and a Twix– to try.  Maddy, Owen, and Cora each poured candy into the glasses, and then they took turns adding baking soda to ‘their’ candies.

To be honest, we didn’t notice a huge difference with the sour candies or the Nerds (which are more acidic than the others), but it didn’t matter. Just for kicks I let the kids spoon some vinegar into each glass to watch it bubble, so that was cool for them.

candy experiments


Our Acid Test was ready to go!

candy experiments


candy experiments


candy experiments


We talked a little about acid and how certain foods are more acidic–like oranges or lemons–and how they taste and feel different than other foods.  I asked what kinds of candy we eat that makes our mouths want to pucker like when we taste lemons? And that’s as deep as we got into acids vs. bases.

Maddy, Owen, and Cora really loved making the bubbles in the glasses, mixing up the candy, and really just playing with candy in the kitchen, but this is only the half of our fun.

They even more seemed to enjoy pulling out their Monet skills when it came to candy and creating mini masterpieces.  But I’ll share that piece tomorrow.

Until then, many, many thanks to Loralee for her fab work at candyexperiments.com and for sharing her science expertise in many parent-centered publications.  We only took our experiments so far–really there’s a ton more that parents and teachers can do with this if they want to.  More specific counting, color sorting, prediction and hypothesis creating, chart-making, observation-recording, and result-graphing would take this candy fun to the next level.

And it’s worth exploring.

Want a few more fun, foodie-science ideas?

Check out:

  • candy experiments, play with color
  • paint with candy
  • candy cane experiments, 2.0
  • learn with food
  • How to Have Some Fun With Leftover Candy Canes
  • get kids to try new foods
  • fractions with food
  • chocolate math
  • monster sandwiches
November 2, 2010 24 comments
0 FacebookTwitterPinterestPocketEmail
super easy halloween treats
halloweenholidays

Super Easy, Super Spooky Halloween Treats

by Teach Mama October 30, 2010
written by Teach Mama

Woo-hoo! It’s the busy few days before Halloween, and as I’ve said before, I’m more a fan of tricky and treaty than I am of scary and creepy.

This week, I planned my first-ever elementary school Halloween party for Maddy’s class (with the help of the coolest co-Room Parent ever). We put our heads together and came up with (we think!) some really fun ways of rockin’ Halloween, first-grade-party style.

We played a bunch of Halloweeny games but our super-easy–and super-spooky–Halloween treats are what I think were crazy cool.

I put all of the recipes our family used this year at home and at school (except Dinner in a Pumpkin) on one sheet so that next year it’s all together.

Super-Easy, Super-Spooky Halloween Treats is here to download as a pdf if you’d like.

Here’s the skinny:

spooky halloween treats eyeballs-WMeyeballs on a plate
Eyeballs on a Plate: Not to worry! They’re not really eyeballs! They’re just powdered donuts, gummy Life-Savers, a chocolate chip, and gel icing.

My super-awesome co-RP made these, and they look so fabulous! I am not sure I would have had the patience to make them look so realistic, but I’ve learned that my pal has crazy eyeball-making skills!

spooky halloween treats fingersThe fingers were all ready. . .

Fingers in a Bowl: So easy–and for some reason, so funny to me–these ‘fingers’ turned out completely hysterical. Peeled carrots, a little cream cheese ‘glue’ and a slivered almond for the nail are all they are, and they only took a few minutes to make.

spooky halloween treats fingers

. . . to meet their hands.

I tried to pick out the long and skinny, twisted carrots, cut them in half, and that’s it. The fun part for me? Putting the hands together in the bowl of dip.

Boogies on a Stick: I’ll be honest, these did make me gag as I made them. Cheese-Whiz meets green food coloring and together they meet a pretzel rod.

That’s it. I read that to make ‘goopier’ boogies you could let the ‘boogies’ cool, then dip them again, but I couldn’t do it.

I could barely handle the bubbling mixture as I blended the Whiz and food coloring.

Maddy admitted later that the Boogies on a Stick might have been ‘the absolute grossest thing she ever saw in her life’ and they tasted ‘disgusting’. Nice.

spooky halloween treats boogies
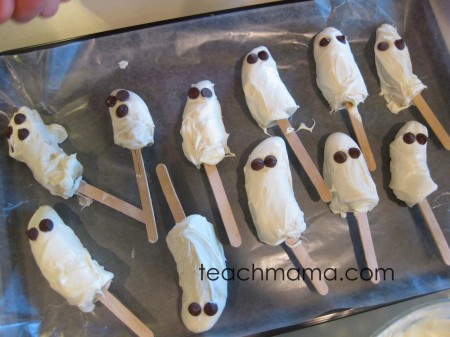
Boogies on a Stick, lookin’ oh-so-yummy on their tray.
spooky halloween treats

Frozen Ghosts: One that I’ve wanted to try for some time, Frozen Ghosts are really just bananas dipped in white chocolate and frozen. Yum.

I did try to make mine lighter and more ice-creamy by adding a tub of Cool Whip into the melted chocolate, but these were not as easy as I thought they’d be.

Some of my bananas broke when I pulled them out of the chocolate (like that poor, first guy in the photo), so things did get a little messy for Owen and me as we made them this afternoon.spooky halloween treats ghosts

Soon we hit a stride, though, with me doing the chocolate dipping, and Owen adding eyes (and a mouth when he could).

spooky halloween treats
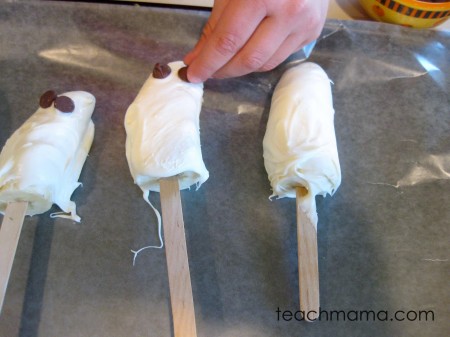
Owen was my right-hand Frozen Ghost makin-man today.

spooky halloween treats

I also had a bunch of extra tiny banana pieces left over, so I dipped them in the chocolate, broke a popsicle stick in half, and gave them eyes–just for fun. Some are really ugly.

I put both trays of ghosts in the freezer and will take them out for an afternoon pre-Trick-or-Treat snack tomorrow!

And that’s it. I like these recipes because they’re easy. They’re funny, and they’re quick. And the huge plus is that they’re all pretty inexpensive.

Want a 2-page printable of these fun and spooky recipes? Grab ’em here:


It’s Dinner in a Pumpkin tomorrow and it’s been super-easy, super spooky Halloween treats all week long!

Many thanks to a handful of sites and books for inspiring our Halloween treats: Family Fun & Family Corner to name just two!

Want a few more fun halloween party ideas?

  • halloween class party
  • more halloween class party ideas
  • GHOST bingo!
  • spider web craft
  • pumpkin match 
  • halloween word search
  • halloween ghost cookies
  • boo! your neighbors
  • alternatives to halloween candy
  • halloween joke notes
  • halloween learning
  • hats, cats, and pumpkin grid game
  • dinner in a pumpkin
  • candy experiments

fyi: Some of the links in the post above are “affiliate links.” This means if you click on the link and purchase the item, I will receive an affiliate commission. Forever and always I recommend only products or services I use personally and believe will add value to my readers. I am disclosing this in accordance with the Federal Trade Commission’s 16 CFR, Part 255: “Guides Concerning the Use of Endorsements and Testimonials in Advertising.” For more information, please see teachmama media, llc. disclosure policy.

October 30, 2010 32 comments
0 FacebookTwitterPinterestPocketEmail
20 fun ways to learn spelling words
Best Of Teach Mamareadingspelling

Fun Ways To Learn Spelling Words

by Teach Mama October 19, 2010
written by Teach Mama


Not only did we lose Maddy’s very first homework packet over here in the chaos of the first few weeks of school; we also only spent only a fraction of the time we should have on her first spelling word list.

Needless to say, that first test wasn’t pretty, and Maddy really didn’t learn the words like she should have–or could have. So we’ve been trying new ways of tackling the spelling word beast over here.

This teachy-mama has done a little research and has come up with some very exciting Fun Ways to Learn Spelling Words for my sweet Maddy so that she doesn’t look at it as homework–she looks at it as fun.

So here’s what we found:

The entire fun ways of learning spelling words as a pdf to download (find it at the bottom of the post!), but here’s a sampling of what we’re trying. . .

With spelling word flash cards:

  • Flash Cards: I’m a flash card fan–not to endlessly flip in front of a kid’s face–but to use in games, activities, and sneaky-learning ways. I’ve created flash cards for each of Maddy’s lists but I’ve also created a Blank Spelling List for those weeks I just can’t type one myself (or for anyone else to use). spelling list-blank sheet is here as a pdf.

fun ways to learn spelling words | teachmama

  • Spelling Word Memory: Create a double set of word cards and play a game of Spelling Word Memory by spreading out the cards face down and then taking turns flipping two cards at a time to find a pair!
  • Flip 4 Steps: In just 4 steps, your child can practice reading, spelling, and writing his words.Have him flip over a word card, look at the word, say it out loud, say the letters, then flip it back over, and write the word on paper.
  • Trace, Copy, Recall: Fold three columns on a piece of paper, and label one column ‘trace’, the next ‘copy’ and the last ‘recall’. Write the word in the first column, and have your child trace the letters.Next have her copy the word by looking at what she’s just written.Finally, have her fold (and hide) the first two columns and recall the spelling on her own as she writes the word independently.

fun ways to learn spelling words | teachmama

Maddy tries Flip 4 Steps

With a pen, pencil, marker, & paper:

  • Spelling Word Race: Create two teams, with a player from each team taking the ‘pen’ at a time.Teacher (or parent) calls out a word from the list, and players race to write the word.
  • Spelling Puzzle: Make a home-made puzzle by writing each word in large letters on an index card and then having the child cut each card apart.The fun is in putting the puzzle back together!
  • Stairsteps: Write the words as if they are stairs, adding one letter at a time.

S

Sp

Spe

Spel

Spell

  • Tic-Tac-Toe: There are a ton of cool ways to play with this old game! Create a larger-sized board and play tic-tac-toe where each player uses a spelling word.OR, have each player use an ‘X’ or ‘O’ but in order to place a mark on the board, she has to spell a word correctly.
  • Window Writing: All you need is special wind0w-safe crayons to use, and Window-Writing makes learning spelling words totally crazy and so much fun!
  • WORDO!: Kind of like Bingo but with letters, words, or numbers! (Or just stick with a build-your-own bingo— but doesn’t WORDO! sound more fun?)
  • Flip and Rainbow Write: Flip a word card and have your child go through the rainbow, painting or writing each word flipped in rainbow colors.Make the first word red, second orange, third yellow, etc. OR write each letter in a colorof the rainbow.
  • Water Paint: Use water and a paintbrush to water paint the spelling words.On a hot, sunny day, words disappear quickly—so spellers have to move fast!

With a computer and other fun electronics:

  • Type it Out: Open up a Word document and have your child type the spelling words on the screen as you call them out.Enlarge the font, make it a cool color, and he’ll have a ball.
  • Spell on Tape: Have your child spell the words into a tape recorder or using the voice recorder on your phone or computer.
  • Video Record: Pull out the ole video camera or flip cam and take a video of your child spelling the words. Have him put on a funny hat, dress-up, or use a silly prop to add to the fun.

fun ways to learn spelling words | teachmama

  • Karaoke: That karaoke machine can double as a super-fun spelling machine if you turn it on and allow your child to spell her words into it!
  • Use Puzzlemaker: Have your child type in all of the week’s spelling words and then let her search for them using this cool resource from Discovery!
  • Use Let them Sing it: Type in a spelling word on this site, and the word is sung back to your student.(This one is bound to get giggles!)
  • Use Spelling City: Head over to Spelling City, have your child type in the spelling words, and then he can learn the words, play games with them, and be tested. This site is a gem!

With space to run, jump, and play:

  • Chalkboard Race: Form two teams, with one player from each team holding a piece of chalk and standing at a designated spot about 10 feet from a chalkboard.Teacher calls out a word, and players run to the board and write the word correctly as quickly as possible. The winner finishes the word first and spells it correctly.
  • Ball Toss: Players stand in a circle with a Nerf ball or something else safe to toss.Teacher calls out a word, tosses the ball to a student, and that student spells the word.If the word isn’t spelled correctly, the student tosses the ball to another person who will try to spell it; if it is spelled correctly, the player tosses object to another student and teacher gives her a new word to spell.
  • Swing and Spell: Teacher gives the student a word to spell, and the student says a letter of the word with each back and forth movement of the swing, much like you can do when teaching syllables.
  • Run the Bases: Student starts at home plate, gets a word to spell and for every word correctly spelled gets to make a move around the bases, beginning with hitting the ball, then running from first base, second, third, and home.

With anything and everything else:

  • Spelling Word Hunt: Look for those spelling list words in the newspaper or in another book, magazine, or text!Circle them or use a highlighter to highlight them.
  • Scrabble, Boggle: Use these cool game pieces to ‘build’ spelling words on the on a cookie tray, on the table, or on the floor.
  • Crazy Words: Put something ‘crazy’ (like jell-o mix, shaving cream, sand, or rice) on a cookie sheet, and have your child use his finger to ‘write’ spelling words on the tray.
  • Paint bag Writing: Put poster paint in a gallon-sized ziplock bag and seal it tightly! Then have your child use her fingertip to write the letters of each word on the paint bag.
  • Stamp It: Use alphabet letter stamps to ‘stamp’ the spelling words, first by looking at the words and then on your own!

fun ways to learn spelling words | teachmama

With magnetic letters or letter cards:

  • Word Scramble: Scramble up the letters of each word and have student put them in the correct order.(Don’t forget to point out patterns and families!)
  • Word Train: Use the letters to have your child create a ‘word train’ by using the last letter of the first word to begin the second word and so on:cat / tap / pan

fun ways to learn spelling words | teachmama

No prep, no materials:

  • Spell and Eat: While making breakfast, lunch, or dinner, have your child spell a word, and after each word is spelled correctly, reward her with a small, healthy “treat” from your meal prep.
  • Examine the Word: Really look at the words, talking about the tough parts and analyzing patterns.Make up silly ways of remembering the ‘tough’ parts: ‘president’ has an ‘I’ in the middle because one day I’ll be president, OR ‘setting’ has two t’s in the middle just like two tall trees in a fairyland forest.

I’ve put all of our ideas on fun spelling games — cards to cut into a Spelling Fun Box for days when we’re stuck, bored, in a rut, or want to leave that day’s spelling excitement up to a little at-home lottery.

If you’d like to download fun spelling games — cards to cut as a pdf, please feel free and make your own Spelling Fun Box at home. Just sign up below, and you’ll get both downloads–free!

And that’s it–that’s our spelling fun. If you choose to fun ways of learning spelling words–awesome! Just kindly let me know and link back if you would!

fun ways to learn spelling words | teachmama.com

fun ways of learning spelling words

fyi: I certainly didn’t do this on my own! Many thanks to these folks for inspiration and ideas–

  • A very, very big thanks to the incredible folks at MCPS–in our particular cluster of schools–for creating their own ‘spelling ideas’ document and for handing it to students this fall.It is a HUGE help, and it’s much appreciated.
  • Elrod School: Spelling Ideas http://www.sd5.k12.mt.us/elrod/multiage/Spelling.html
  • Resource Room: http://www.resourceroom.net/readspell/6waysspelling.pdf
  • Many other sites, pamphlets, books, articles, and resources I have here at home!

Cheers, and happy reading during this incredibly exciting journey!

A few more literacy-related posts worth reading. . . (click on image to read!)
what to say when kids make reading mistakes teachmama.com.png
5 things to never say to emerging reader
literacy terms every parent must know
talk to kids about books
how to help kids choose just right books
Want a little more help with all things literacy?  
Follow Teach Mama’s board literacy on Pinterest.
October 19, 2010 29 comments
0 FacebookTwitterPinterestPocketEmail
super-important inferring during read-alouds
comprehensioninferringreading

Super-Important Inferring During Read-Alouds

by Teach Mama October 7, 2010
written by Teach Mama

Read-alouds are the perfect time to sneak in a little bit of learning, whether you’re talking simple reading comprehension strategies, concepts of print, or word recognition.

Tonight, we rocked our nighttime read-aloud with a few more thought-provoking and difficult strategies than normal. We practiced inferring and drawing conclusions in only ten minutes.

For the last week, Cora has requested the same thing for her nighttime book: Too Many Pumpkins by Linda Arms White and illustrated by Megan Lloyd. Too Many Pumpkins is the sweet story about lonely and cranky Rebecca Estelle who loathes pumpkins only to have her yard taken over by pumpkins one season. In an attempt to rid herself of these pesky gourds, she bakes tons of pumpkin goodies and draws her entire town to her house for a pumpkin party.

My parents bought this beautiful book for the kiddos a few years back, so really, it’s one of those books we’ve read dozens and dozens of times. And it’s one of those books that I enjoy so much I don’t really mind the re-reading (and re-reading, and re-reading).

So rather than zip through the book one more time, tonight I tried to get my little sleepyheads thinking while they listened. . .

  • Inferring During Read-Alouds: Inferring is simply using background knowledge along with text clues to come to a conclusion about a topic or idea. Inferring happens every single day, dozens of times, but for many, inferring as a reading comprehension strategy is more intimidating than it needs to be.
Cora’s book of choice, Too Many Pumpkins,
set the stage for pumpkin talk and inference-making.
 

Inferring is nothing to be afraid of; rather, it’s something to play with and get kiddos comfortable with early in the game so that they’re able to move to bigger and more challenging synthesizing, determining importance, and summarizing down the road.


So when Cora pulled out Too Many Pumpkins for the 80th time in two weeks, I stepped back a bit and tried to look at the book a little differently than I had before. I pushed Maddy, Owen, and Cora to do a little more ‘reading between the lines’ like Harvey & Goudvis say in their 2000 Strategies That Work.


Inferring is ‘reading between the lines’ according
to Harvey & Goudvis.
 

When we read on the first page that when Rebecca Estelle was a child, her family ate pumpkins for every meal because ‘money was scarce’, I asked, Rebecca Estelle’s family ate pumpkins all of the time when ‘money was scarce’, so what might that tell us about pumpkins?


A tough, open-ended question for Cora and maybe Owen, but Maddy picked up on it and said, I bet you can get a lot of pumpkins for only a little money. Or something. I said, You’re right. They may have bought pumpkins for only a little money or how else do people get food?

Owen said, They make the food or get it from somebody else. Or grow it like our tomatoes in our garden.


So we ran with that and talked briefly–briefly!–about what we remembered about the veggies in our garden, and then we read on.

We stopped now and again for me to ask questions or to have Maddy, Owen, or Cora talk us through a page here or there, but the end was another great spot for making inferences.


Rebecca Estelle gave away all of her pumpkin seeds and goodies in the end, until ‘all that remained was a handful of seeds’ which ‘she tucked snugly into her pocket where they would be safe until planting time next spring’.


I asked, Why would Rebecca Estelle have kept a handful of seeds for herself if she dislikes pumpkins so much? and we talked about what she might do with the pumpkin seeds next planting season. I asked them to tell me how they knew she’d plant them (after they told me she would) and they came up with some pretty solid answers, even pointing to Rebecca Estelle’s smiling face at her pumpkin party.


It was a pretty cool–quick!–before bed chat, and Maddy, Owen, and Cora had no idea they were making inferences using a book they’ve read a million times.

Harvey and Goudvis (2000, Strategies That Work) say it best when they state, ‘Inferring is the bedrock of comprehension, not only in reading. We infer in many realms. Our life clicks along more smoothly if we can read the world as well as text. . . Inferring is about reading faces, reading body language, reading expressions, and reading tone as well as reading text.‘

It makes total sense. We use what we know to make conclusions about the world around us. Why not practice using a simple read-aloud?

Here are some prompts to consider using when helping kiddos make inferences during (or after) read-alouds:

  • How do you think the character feels about. . . ?
  • Why did the author make the title of the book _____?
  • What does the author want you to know?
  • This character’s actions show me that. . .
  • This character’s face tells me that. . .
  • What clues did the author give you to make you come to that conclusion?

Thanks to Valerie Ellery’s Creating Strategic Readers (2009) and Harvey & Goudvis’s Strategies That Work (2000) for information in this post.

Check out some more fab Valerie Ellery resources for Primary Grades and Intermediate Grades if you’d like more strategy-work freebie ideas.

You may also like every picture tells a story.

Thanks for subscribing to teachmama! Have a good one!
October 7, 2010 6 comments
0 FacebookTwitterPinterestPocketEmail
lowercase letter hunt and sort | teachmama.com
alphabet

Lowercase Letter Hunt And Sort

by Teach Mama September 23, 2010
written by Teach Mama

Our first super crazy fall week has hit us.

Hard.

With double Back-to-School Nights, double tutoring, and meetings, on top of a mid-week trip to the Newseum to learn about some pretty awesome new video games, this one’s been a doozey. And there’s only more fun to come at the end of the week.

So we’ve been trying to take it easy and enjoy the last of our really warm afternoons outside, trying to laugh a lot, and in the end, just hold on to our sanity.

But the ole bag of Alphabet Cards have been hanging around. So Owen’s been rockin’ his lowercase letters. . .

Lowercase Letter Hunt and Sort:

The part of ABC Hide-and-Seek that Owen loves most is the seeking. But he also sometimes begs to do the hiding. And even though every single time he hides the cards, he hides them so well we can never find them all, I let him do it once in a while.

lowercase letter hunt and sort lowercase letters teachmama.com

So when he insisted in the middle of this very nutty week–when he begged and pleaded–to do the hiding, I let him have a go.

First he had to count the lowercase letters to make sure there were 26. (We couldn’t remember if the last time we used them we found them all, and a little extra counting never hurts. Luckily, we had ’em.)

And then he hid the cards.

And of course, Cora and I couldn’t find them all.

So what should have taken us about 10 minutes max took us 20 minutes. But it felt like an hour.

lowercase letter hunt and sort lowercase letters teachmama.com


lowercase letter hunt and sort lowercase letters teachmama.com


So while Cora and I searched and searched and searched and searched, Owen started to put the lowercase alphabet letters in order.

And the job was a little more difficult for him than I anticipated–and hoped. He got stuck on the traditional toughies–b, d, g and p. (Looks like I’ll have to pull out our Fun Font Sort next week!)

And when we finally–finally!–found all of the letters, we did a little jig of joy. And then we ran to let Brady out then ran to get our shoes on then ran to get our water bottles, and Owen ran to get his helmet on then he ran to grab his scooter, and Cora ran to the stroller, and I ran to the pantry for an on-the-way snack so that we could kinda sorta hopefully try to be on time to pick Maddy up from school.

And that was that. A little super-sneaky alphabet learning made for a teeny bit of time but that took waaaay too long for our day.

We should have left the cards hidden, but with our luck, Brady would have found them and called them a snack.

Do you want to grab the Alphabet Cards so you can play at home?

Want a few more alphabet activities? Check out:

  • backyard alphabet hunt
  • homemade alphabet book
  • leafy letter learning
  • ABC hunt
  • on the road ABC hunt
  • lowercase ABC hunt
  • build your own bingo: uppercase and lowercase match
  • ABC cards and clothespin match
  • alphabet letter splash
  • alphabingo (play with lowercase letters)
  • alphabet letter lids
  • leafy outdoor alphabet hunt
  • build your own board game
  • clothespin letter match
  • 10 fun ways to learn the alphabet

And don’t miss our #raiseareader series on YouTube!

Follow us on pinterest, and check out our literacy pins:

Follow Teach Mama’s board literacy on Pinterest.

September 23, 2010 4 comments
0 FacebookTwitterPinterestPocketEmail
Digraphs And Blends Search, Find, And Rhyme Game
beginning soundslisteningphonological awarenessprintablesrhyming

Digraphs And Blends: Search, Find, And Rhyme Game

by Teach Mama September 16, 2010
written by Teach Mama

It’s no secret that digraphs and blends are tough for some kiddos to enunciate and hear. These tricky, unique sounds are difficult for little mouths to create, and it’s known that speech sounds come with time.

But if we can find reasons to say words with these sounds, play games with the sounds, and give our kiddos opportunities to practice them, it’s a win-win! (And some seriously sneaky learning. . . )

My two little sweets, Owen and Cora, both have enunciation struggles that I never experienced with Maddy. Although Maddy was over 2 years before she started to talk–seriously!–the words she spoke were as clear as day.

It was like she was waiting until she could say the words correctly before she’d say them at all.

Owen spoke early and quickly, using any word he could any way he could, and to this day, he still has a difficult time with a handful of tricky sounds. Cora followed in Owen’s footsteps, trying to keep up with everyone else language-wise. She’s only three, sure, but contends with a little lisp and often exchanges her r’s for w’s.

My only point in sharing this is to explain why I have been searching for a few new games to get us playing with those tricky, tricky digraphs and blends. This one is a winner.

  • Digraphs and Blends Search, Find, and Rhyme Game: A few weeks ago, when I started the quest for fun ways of playing with blend and digraph sounds, I found some really awesome sites with great resources. The Florida Center for Reading Research site totally rocks, and the Blend and Digraph Picture Cards I used for this game came from the FCCR site.

shower, flower and chain, train cards
(Cora, my little DC gal, called the train the ‘Metro’.)

I used the cards from the Change My Word Game and switched things up a bit, as I know that Owen and Cora like to get up and moving, and they love hide-and-seek.

So after lunch, I said, Who’s up for a new hide-and-seek game? In this one, you have to find secret rhyme cards, though, so it might be too tough for you two. Should I put it away and try it another day, maybe, or are you ready for it today?


They convinced me they were both ready, so I told them what to do: I held up a folded yellow card, and I said, There are a bunch of yellow cards hidden in the living room. You have to find a card, open it, and then find its partner rhyme card. Tough! I know. But each card has a pair. Ready? Find ’em!


Owen and Cora both sped around picking up the folded yellow cards, not opening each one but rather gathering all they could at once. No biggie. (Not what I intended, but it seemed to work for them.)


When they had found all of the cards, I said, Okay, bring all of the yellow cards here, and we’ll find the rhyme partners together.

Owen found the flower.

They unfolded the cards, and they identified the pictures (and here’s my big mistake–I should have said the names of all of the pictures before the cards were hidden!). The pictures could have been different things; Cora called the ‘train’ a ‘Metro’, the ‘shower’ they called ‘water’ and the ‘chick’ a ‘bird’. Not the end of the world, but it may have made their rhyming easier.


So it really ended up as us all matching the rhyming cards together on the table: Hmmm, this is a ‘flower’. What rhymes with ‘flower’? ‘Flower’, ‘train’ or ‘flower’, ‘shower’? Or, This is a ‘sheep’. ‘Sheep’, ‘stick’? ‘Sheep’, ‘sleep’? ‘Sheep’, ‘chick’?


The game cards were found, unfolded, and matched!

Eventually all of the cards were matched. We read through the rhymes together, and they asked to play again. A good sign for a new game, right? Yes!

My goal for this game was not to force Owen and Cora into correct pronunciation of words they already have a difficult time saying; rather, my focus was really just to give them a chance to hear the sounds in words, play with the sounds a bit with rhyming, and give them the chance to try to say the words if they wanted. That’s it. And I wanted it fun, I wanted them up and moving, and I wanted them to want to play.

When Owen or Cora–or any little person, for that matter–mispronounce a word, I don’t make them try and try and try again until they say it correctly. I simply repeat the word the way it should be pronounced in a natural paraphrasing of what they just said.

And if the time’s right, if the kids are in the mood, and if there’s no audience, I’ll maybe explain how they can make the sound if they want to try it. For the ‘th’ sound, Owen and I have talked about where the sound is formed–with the tongue flat on his top teeth, not with the tongue on the roof of his mouth where the ‘s’ is made. And if they get it, great; if not, no worries.

Need some digraph or blend games? Try:

  • Digraph Shopping
  • Tricky, Tricky Digraph Sort
  • Just Owen and Me, Sortin’ S’s and T’s
  • Follow-the-Path Game: P, D, T, S beginning sounds
  • S-Blends Bingo

We’ll be doing more blend and digraph gaming in the next few weeks. . . any great ideas? Please let me know!

Thanks for subscribing to teachmama! Have a good one!
September 16, 2010 0 comments
0 FacebookTwitterPinterestPocketEmail
Quick Trick Keeping Kids Busy In Line
behavior managementparenting

Quick Trick: Keeping Kids Busy In Line

by Teach Mama August 30, 2010
written by Teach Mama

This Quick Trick is one of those that works only when I use it only occasionally. It’s one that helps every so often to distract Maddy, Owen, and Cora from the actual task at hand–waiting in line.

Whether it’s at the grocery store, at Costco, or the bank, time in line can be brutal for little ones (and okay, let’s admit it–their over-tired parents).

The errands that once took 15 minutes sans kids often takes an hour with little ones in tow, and on days when there’s more than one stop, even the most simple errands can be brutal unless we plan ahead. And everyone knows that’s not always possible.

So while shopping last week for a new loaf pan for our Zucchini Bread, I desperately needed to pull out some tricks for passing time in the long line. Here’s what we did:

  • Find Your (*insert body part*) First: Sounds crazy, a little questionable, maybe even a little inappropriate for passing time in line, but it works for my kids and it teaches them–or reminds them, in some cases–of the parts of their body.

Usually if there’s a half dozen people in front of me and tons of enticing impulse items on the shelves from me to the check-out, I’ll say, Okay, let’s see who really knows the parts of their body. . . find your ankle bone!

And if the items on the shelves aren’t too awesome, if the stars are aligned, and if the kids are listening, they’ll turn to me and really quickly touch their ankle bones. Or they’ll turn and look at me with complete and utter confusion, look at whoever found the said ankle bone and copy that person.

Sure–Maddy and Owen (and Cora mostly) know the major parts of their bodies–the kids are 6, 5, and 3 for goodness’ sakes. But I use the time in line to make sure they know some not-so-obvious parts, the parts that aren’t part of a catchy kids’ song.

I’ve had them ‘find’ the following body parts (and I always throw in some easies along with the toughies just to keep up morale!):

  • ankle, ankle bone
  • elbow
  • thigh
  • calf
  • eyebrow
  • eyelash
  • cheekbone
  • chin
  • earlobe
  • nostril
  • wrist
  • elbow
  • funny bone
  • knee cap
  • nape
  • cuticle
  • biceps, triceps
  • jaw, jawbone
  • joint
  • knuckle

I’ve found that they like to show me they know the ‘tough’ ones and they like to learn new words for parts they already know. I haven’t hit them with ‘gluteus maximus’ yet, but I can imagine the giggles when I do. . .

And that’s that. An easy, spur-of-the-moment Quick Trick that takes no planning, little time, even less brain power, so that we (I) can actually make it from the line to checkout with some of semblance of sanity.

This list is hardly extensive. If you have a suggestion for a part I should add, let me know! Thanks and happy waiting in line!

Thanks for subscribing to teachmama! Have a good one!
August 30, 2010 3 comments
0 FacebookTwitterPinterestPocketEmail
coin counting
countingmath

Coin Counting And Skip Counting

by Teach Mama August 20, 2010
written by Teach Mama

Our summer took a crazy turn about two weeks ago when we learned that Maddy needed to have a tonsillectomy before the end of the summer.

With just a few days to shove in all of our summertime fun, poor ole teach mama blog (and many other things!) took a rightful back burner. We barely had time to prepare Maddy for the realization that she wouldn’t be running, playing, swimming, or biking for the last two weeks of her break.

Needless to say, after a successful surgery (woo-hooooo!) our attention was directed toward our brave little 6-year-old, feeding her a lot of ice cream, playing easy games, reading lots of books, and doing what we could to keep her comfortable.

Counting money–and practicing skip counting–was one activity that Maddy requested and that Owen and Cora were totally up for. For some reason, playing with money has always been exciting for Maddy, Owen, and Cora–cleaning money, singing songs and poems about money, sorting it, and counting it.

  • Coin Counting and Skip Counting: Coin counting is one thing, but ‘skip counting’ is simply the way our school system describes counting by 2’s, 5’s, 10’s, or any set number.
Yesterday, Maddy asked if we could count her money to see if she had enough to take to the toy store to buy this stuffed dog she has been dreaming about for months now. After her very lethargic past few days, I jumped on this opportunity to do a little math learning since school is (yikes) right around the corner.

I knew she wanted to add all of her money together, but I wasn’t sure about the best way to keep track of the numbers and addition; sure, I know how I’d do it with the ole calculator, but I wasn’t sure the best way to do it so that she–a rising first grader–would understand. And I wanted it to make sense for Owen and Cora, too.


So we started by sorting the coins–something that Maddy, Owen, and Cora did with ease. They sorted by pennies, nickels, dimes, quarters, half dollars (thanks to the Tooth Fairy!), and dollars–coins and bills. We had one pile for ‘extras’–anything coin-like that wasn’t really money but that ended up in her jar.


After sorting the coins, I had Maddy create a very simple sheet to keep track of what she had and what we counted. She titled it “Maddy’s Money” and made columns for each coin she had.


Maddy wrote the number value of each coin next to the name of the coin, and then we counted. She, Owen, and Cora put the pennies in rows of 10, and then Maddy skip counted by 10’s to find the total number of pennies.


We did the same thing for nickels–we put them in rows of 10 and skip counted by 5’s to get to 50. For dimes, we put them in rows of 10 and skip counted by 10’s to 100.


We counted the quarters and half-dollars and dollars–coins and bills–and put the total numbers on Maddy’s chart.

I helped with the final adding, and that was it. Did MIaddy have the money she needed for the puppy at the store? I’m not sure.


I think we’ll take an extra trip to the toy store this weekend or next, and maybe with all of the gems from her gem jar along with her own saved money, she’ll be able to buy it. She has been so tough. . .

What I realized is that money counting is hard. Really, really hard. It’s difficult to explain because the concept is just beyond so many young kids at this point. So I think it’s super-important to focus on one or two coins for the younger kiddos and then max out at quarters for kids about Maddy’s age. When you get into decimals and carrying numbers and the dollar bills and dollar coins, it just becomes so much.

Having never taught math to elementary school students myself and having cried my way through most of my math classes throughout school, today was an eye-opener. I’m betting I’ll rely heavily on my pals over at we teach and my husband (who taught grade 5 and high school math) to get the troops through this kind of stuff. . . or maybe I’ll just need to take a second or two to think through things before I move into them. Or maybe I’m just a little more sleep-deprived than usual.

Thanks for subscribing to teachmama! Have a good one!
August 20, 2010 3 comments
0 FacebookTwitterPinterestPocketEmail
nonfiction reading and real life learning
comprehensionquestioningreading

Non-Fiction Reading And Real-Life Learning With Fish

by Teach Mama August 4, 2010
written by Teach Mama

We’re pet sitting for the next few days, and Maddy, Owen and Cora are loving it. Nothing cuddly or furry, but these little guys are certainly entertaining if you ask my three kiddos.

We’re fish-sitting, actually, for what may be close to 20 fish.

Two separate ponds with a waterfall and lily pads. And a back yard like you wouldn’t believe that makes me want to get work on my own cruddy back yard like right now and one that Maddy has said is ‘the most beautiful place she’s ever seen’.

Anyway, I’m loving our fish-sitting because sure–I get so see what a yard can look like when the kids are out of college and you have time to into it. But ‘fish-sitting’ has also opened up the perfect opportunity to sneak in a little learning about a topic that is of high-interest, timely, and completely relevant to our lives.

All you need is an open door for an opportunity to get kids more comfortable with non-fiction reading, and this is one of them. Two girls on the Kids Post even had their picture taken with a big ole fish this week. We had to do some research and reading!

  • Real-Life and Non-Fiction Reading: Probably about once a week, we head down the street to our neighbors’ house to feed the fish.
  • But this is the first time ever that we’re in charge of the fish. For several days. So we’ve spent time watching them, feeding them, hanging out with them.

This time, Maddy and Owen and Cora have begun to sit back after throwing handfuls of fish pellets in the water and really look at these guys.

And they’ve begun to ask questions. Tons of questions. And any teacher knows that questions are a great starting point for real-life learning.


How can they see in this dirty water?
Do they close their eyes when they sleep?
How do they swallow without chewing?
Can they see us?
Where are their ears?


I told them that I wasn’t really sure of how to answer these questions but that we had to go to the library that afternoon to return some books anyway, so why don’t we look for some books that may help us? They were psyched.


We hunted down as many fish-related books as we could find, threw them in our bag, and headed back to the home front.


My vision for all of us sitting down and reading them that afternoon fizzled when the sun came out and the kids wanted to run out back when we got home, and that’s fine. Over the last few days, though, we’ve been picking up the books, reading and re-reading, skimming, and looking at the pictures.


The big white guy with black dots vacuums the fish pellets.

Some books Maddy can read herself, and some I’ve read to everyone. I wanted to have a variety. Even if non-fiction texts are above a reader’s own ability, it’s fine; parents or teachers can read the text during a read-aloud and the benefits of doing so can benefit vocabulary, knowledge of informational text structure, content area learning, reading interest and engagement with the topic (from “Informational Text Use in Preschool Classroom Read-Alouds,” by Pentimonti, Zucker, Justice, & Kaderavek in The Reading Teacher, May 2010).


We picked up several non-fiction easy-readers about fish which I didn’t actually love; I found the text features to be really wild and too hard for emerging readers to follow. I am a bigger fan of simple non-fiction texts with basic text features–easy to read Table of Contents, Index, Chapter Titles, photo captions, etc. The reading a-z book I printed was better in that respect (Is That a Fish? by Susan Hartley).


I also mixed some fiction with our non-fiction picks so that we could talk–generally–about the differences between them. Of course, Maddy’s got a grasp on it by now, but it never hurts to review. And it helps for Owen and Cora to have a head’s up on concepts they’ll learn down the road. We read Fishing With Grandpa by Robert Charles (from reading a-z) and A Fishy Story, by Marcus Pfister along the mix of non-fiction.

our pile of fishy books

We’ve read non-fiction books based on topics of interest before, and it is well worth the time it takes to hunt down the books and sort through them with your kids.
It’s so cool to hear kiddos share facts that they’ve learned or remembered, and it makes them feel so proud.

I love it–fish facts, dog facts, caterpillar facts, firefly facts, toad facts, I love, love, love it.

Especially when it comes to science concepts, enjoying non-fiction texts in a read-aloud when kiddos are at an early age, is mucho helpful. In fact, “teacher-led read-alouds can provide the necessary support as children encounter potentially difficult content, text features, and challenging vocabulary” which was definitely the case when we were reading the texts from the library that had text and captions and photos all over the place (from “Introducing Science Concepts to Primary Students Through Read-Alouds: Interactions and Multiple Texts Make the Difference,” by Heisey & Kucan in The Reading Teacher, May 2010).

The National Science Education Standards(National Research Council, 1996) “emphasized the importance of introducing science concepts early on” in children’s lives, and many researchers have started to “acknowledge the power and usefulness of integrating science and literacy instruction” (also from “Introducing Science Concepts. . .”). It makes sense; reading should be–needs to be–integrated with content-area learning. Literacy instruction is just that important. And if we want our kiddos–boys and girls included–to be turned on to science from the get-go; there’s a lot out there to learn and explore!

And that’s that. Happy reading, researching, and learning along with your every day experiences!

Thanks for subscribing to teachmama! Have a good one!
August 4, 2010 2 comments
0 FacebookTwitterPinterestPocketEmail
adding practice with street sign math
countingenvironmental printmathnumberstravel

Adding Practice With Street Sign Math

by Teach Mama July 29, 2010
written by Teach Mama

Today, we hit the road a bit, to a new-for-us library to hang out with some friends and learn about 4-H and county fairs and then to (our fave!) Ikea to pass a rainy afternoon. (And the free kids’ meals don’t hurt, either.)

Being on the road gave us a chance to play with numbers in a way that I had never thought to do before. Thanks to Maddy, we threw in a little adding practice on the road today, called it ‘Street Sign Math’, and pretty much had a rockin’ time.

  • Street Sign Math: It began with Maddy calling from the back seat, Hey Mommy! That sign has a four and a zero. Forty. Do you know what four plus zero equals? It’s four!!

Owen said, I know that! It’s four! Maddy do another one!

And so began our Street Sign Math. It didn’t matter if it was a speed limit sign, a highway sign, or a house number; if we could clearly make out the numbers, we added them together.


Speed limit signs that ended in zeroes were the easy ones!
4 + 0 = 4!
 

If there were three numbers, I’d say, This one has three numbers (rte 495), so listen closely. What does four plus nine plus five equal? Add the first two numbers, four plus nine. (I’d wait for the answer.) Awesome! Thirteen! Now add five. What does thirteen plus five equal? Yes! Eighteen! That was a tough one.


Some were tricky, but some were easier, like the speed limit signs: 35 (3+5), 40 (4+0), 55 (5+5), which led us into some doubling practice.


Nothing was stopping us– 2+6+9?
8+9 = 17!
 

Maddy and Owen were really revved up about the whole idea, calling out numbers and adding them, checking each other’s work. Cora was yelling out numbers and trying to play along, too, so we gave her the challenge of shouting whenever she saw ‘her number’, number 3 or Owen’s number (4) or Maddy’s number (6).


Owen is pretty quick at adding, so I really had to focus on not making this an adding race and instead making everyone use wait time before they shouted out their answers. For a while Maddy and Owen worked together, then Maddy added the first two numbers and Owen added the third, or vice versa.


It was fun. Maddy, Owen, and Cora said it was fun, and they basically made up the whole game. And that’s probably why they loved it so much and it worked out so well in the first place.

This morning’s Street Sign Math definitely reminded me of the importance of reviewing basic, easy math facts–the ones that eventually need to come quickly and without thought just like the sight words that we practiced in games and cool activities before and throughout kindergarten.

And that’s it. Thanks to Maddy today for getting us going and helping me along in my desperate attempt to get us all to be a little more math-mindful this summer!

Check out getting ready for kindergarten: summertime prep.

Thanks for subscribing to teachmama! Have a good one!
July 29, 2010 2 comments
0 FacebookTwitterPinterestPocketEmail
Quick Trick Playing On Positive Behavior
parentingquick trick

Quick Trick: Playing On Positive Behavior

by Teach Mama July 21, 2010
written by Teach Mama

Back in the end of May, our little familia was experiencing a rough patch. Owen finished preschool a few weeks before Maddy ended kindergarten, Cora’s playgroup was still meeting but Owen’s soccer wasn’t over. The pool was open but school was still in session. It was strange.

The schedule we had grown accustomed to for months and months was changing, and we were in flux. And it turned into a big, ugly behavior rut.

I was raising my voice more than I’d liked. Maddy, Owen, and Cora were bickering more than they needed, and we all were just drifting between schedules–waiting for some sort of new summer normal to come in and sweep us into regularity and happiness. (Sigh.)

But I knew things wouldn’t level out again for some time, so I needed something to rope us back in before we were cranky, tired, and unfocused all of the time.

Luckily, I ran across something in the June/ July issue of Family Fun that has helped to put us back on track, and we’ve been using it for well over a month with great success–Our Gem Jars.

  • Gem Jars: Our Gem Jars are just that–glass jars I picked up (on sale) at the craft store and from our recycle bin, and the ‘gems’ are those clear glass beads that we love over here and have used time and time again as bingo markers.

I bought black letter stickers so I could put each family member’s name on a jar. Maddy, Owen, and Cora each have a jar, and there’s even one for Mom, Dad, and Brady.

The deal with the Gem Jars is simple, and it’s one that’s been supported by research over and over and over again: rewarding positive behavior.

After I had assembled all of the ‘pieces’ of this Gem Jar experiment, my husband and I called a Family Meeting just like we do when we have to discuss anything new.

I said, Daddy and I are excited to tell you about a new way we’re going to reward the great things we see you guys doing every day. These are your new Gem Jars, and these are the gems. Notice there are big gems and little gems? I’ll tell you why in a second.

See these two lines on the side of everyone’s jars? There’s one at the top of the jar and one in the middle. When your jar is filled with gems, you will earn a reward. Half-full jars will earn small rewards, and bigger rewards will come when your jars are totally full of gems. And imagine how beautiful your jars will look when they’re filled!

Maddy’s jar is almost full!

I took out a piece of paper and we all brainstormed some ways that we all could earn gems. We came up with:

  • playing nicely with pets
  • being first-time listeners
  • sharing toys
  • keeping a clean room
  • brushing teeth and washing face without being asked
  • flushing toilet and washing hands with soap without being asked (gulp.)
  • using good manners
  • waiting patiently to talk and not interrupting others
  • being extra kind and loving toward each other
  • telling the truth
  • saying “I’m sorry” without being asked
  • being extra helpful to others

We explained the difference between big gems (a pack of fancy diamond-like glass beads I found at the store near the wedding supplies) and little gems (a mix of the smaller glass beads I mentioned above). Big gems could be earned for going above and beyond, but they were very special; it might take time to earn those.

We all also discussed rewards for half-full and full jars, and we wrote them on a list. We decided that a trip to Rita’s, a special trip somewhere with Mommy or Daddy, being able to choose dessert one night, a chap stick (for the girls–I know. . . ), a new book, a pack of silly bracelets, or even a trip to the toy store with a $5.00 or $10.00 limit might be good things to work toward.

The kids seemed excited, and so were we. Anything was better than what we had, and we were all ready for a change.

We’re about six weeks into Gem Jars, and we’re really happy with how things are going. We’ve hit the toy store once about two weeks ago since the jars were close to full, and it helped keep up the momentum. Maddy picked out a dolphin stuffed animal, Owen picked out a Lego set, and Cora also picked out a Lego set.

Is it perfect? Absolutely not. Is it fool-proof? Nope.

But what it does do is give everyone something to work toward and it keeps us focusing on the positive: Let’s get this room picked up so that I can throw two gems in your jars! or Thank you, Owen, for letting Brady outside. Put a gem in your jar! or I love the way you’re speaking to each other and sharing toys! Three gems for each of you!

It’s a riot to hear them actually notice positive behavior and say to each other, Maddy, you were nice to help me. I’m giving you a gem, or Mommy needs a gem! She made us a great dinner (okay, so they said that once, but I’ll never forget it!).

On tough days, when kids are arguing, hitting, or are unkind, sure–we count 1, 2, 3 or use time-outs if we need to. But we also remove gems from jars if we need to–if behavior is not what we expect. If they ask for a gem? No way do they get one! The sure ticket to not getting a gem is to ask for one.

In my book, it’s not bribery. It’s incentive, it’s recognizing and immediately rewarding the behavior we want repeated, and it’s simple. No points, counting, or record-keeping. Just beautiful jars slowly being filled with gems that represent love, generosity, kindness, and support. We won’t do it forever, but for as long as we need or want to and until the behavior is as automatic as breathing. Or so we hope.

Thanks, thanks, and more thanks to Malissa O’Brian for sharing her family’s idea on Creative Solutions in Family Fun! Love it–thank you, Malissa!

Thanks for subscribing to teachmama! Have a good one!
July 21, 2010 13 comments
0 FacebookTwitterPinterestPocketEmail
Coffee Can Stilts Old School Summer Fun
family funfamily lifeoutdoor activities

Coffee Can Stilts: Old School Summer Fun

by Teach Mama July 6, 2010
written by Teach Mama


coffee can stilts | old school summer fun teachmama.comJust for fun, just because I had two empty coffee cans, and just because I remember loving the yellow plastic-cup stilts we had as kids, we made coffee can stilts over here one recent afternoon.

It was a day when we decided we were all pooled-out and we were looking for some out-in-the-backyard excitement. So in between some games of soccer and some sandbox play, I made these old-school toys to challenge my little ones.

Maddy, Owen, and Cora are fairly athletic kids, but this kind of game really tested their coordination and gross motor skills. With help from me–especially at first–they did a pretty decent job and had some fun along the way.

  • Coffee Can Stilts: I literally made these with basic, basic supplies that we had around the house–two coffee cans, yarn, a hammer, and a nail.

I made two holes in the bottom of each can by using a hammer and nail. Then I doubled-up a long piece of yarn (probably more sturdy string would last a bit longer.

Our coffee can stilts required only the basics. . .
coffee can stilts | old school summer fun teachmama.com
coffee can stilts | old school summer fun teachmama.com
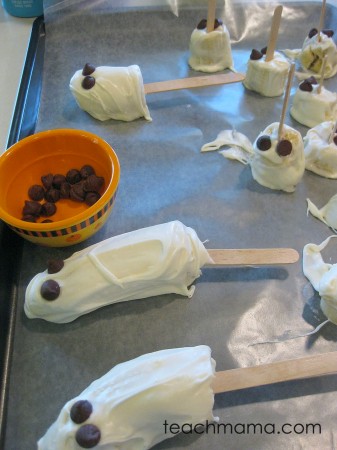
. . . but they really were pretty fun.

Owen and Cora were the first to give ’em a try, but then Maddy decided to get in on the action. It was much easier for Maddy to understand that in order to make the stilts move smoothly, that she needed to pull up on the strings and have them move along with her step, but Owen eventually got it, too.Even with Maddy and Owen, I was right there, ready to catch them, for fear of their little ankles or arms breaking if they fell the wrong way.

coffee can stilts | old school summer fun teachmama.com

Cora just liked being tall and probably stood still on hers for ten minutes before she felt comfortable enough to move with my help. It was a riot.

Everyone fell, everyone got frustrated, and everyone got back up on the stilts at least once or twice. Whew! It’s always interesting for me to watch how Maddy, Owen, and Cora handle this kind of struggle, and really, I’ve come to the conclusion that their attitude depends on the day, the company, the weather–you name it. It always seems to change.

Anyway, it was just a little stretch–a little old-school game with a bit of learning about how they handle a new physical activity on a sunny summer afternoon.

Thanks for subscribing to teachmama! Have a good one!
July 6, 2010 13 comments
0 FacebookTwitterPinterestPocketEmail
Newer Posts
Older Posts

About Me

About Me

Hi! I'm Hannah.

A mother of one, I am passionate about inspiring mamas and educators with hands-on, meaningful learning ideas that make everyday moments fun, purposeful, and filled with curiosity.

Follow Teach Mama

13.4K Fans Like
2.8K Subscribers Subscribe
132K Followers Follow Us

Recent Posts

  • Summer Learning Activities for Kids: A Low-Pressure Guide for Reading, Play, and Family Connection

    June 15, 2026
  • Effective Techniques for Teaching Complex Historical Topics

    June 13, 2026
  • 4 Neighborhood Adventures That Teach Kids Real-World Skills

    June 12, 2026
  • What Does an Urgent Care Visit Cost in Manhattan Without Insurance?

    June 12, 2026
  • Future Trends Influencing Enterprise Learning Management System Adoption

    June 10, 2026
  • How to Survive Your Husband’s Grad School Years Without Going Broke

    June 9, 2026

LEARN

PLAY

CRAFTS

PRINTABLES

About Me

A mother of one, I am passionate about inspiring mamas and educators with hands-on, meaningful learning ideas that make everyday moments fun, purposeful, and filled with curiosity.

Useful Links

  • About
  • Contact

Popular Posts

  • Words 3 Ways: Learning Sight Words For Kindergarten

    May 17, 2012
  • Quick Trick: Magnetic Letters (How To Use Them With Your Kids!)

    December 1, 2010

Recent Posts

  • Summer Learning Activities for Kids: A Low-Pressure Guide for Reading, Play, and Family Connection

    June 15, 2026
  • Effective Techniques for Teaching Complex Historical Topics

    June 13, 2026
  • Facebook
  • Pinterest
  • Youtube
Teach Mama
  • Reading
  • Early Literacy
  • Writing
  • STEM
  • Activities
  • Digital Literacy

Shopping Cart

Close

No products in the cart.

Close