Teach Mama
  • Reading
  • Early Literacy
  • Writing
  • STEM
  • Activities
  • Digital Literacy
Top Posts
Summer Learning Activities for Kids: A Low-Pressure Guide...
Effective Techniques for Teaching Complex Historical Topics
4 Neighborhood Adventures That Teach Kids Real-World Skills
What Does an Urgent Care Visit Cost in...
Future Trends Influencing Enterprise Learning Management System Adoption
How to Survive Your Husband’s Grad School Years...
How Technology is Reshaping the Rules of Education
How Advances in Artificial Intelligence Are Making Modern...
How Technology is Transforming Learning Experiences
A Practical Guide to Managing Family Finances Without...
Teach Mama
  • Reading
  • Early Literacy
  • Writing
  • STEM
  • Activities
  • Digital Literacy
Teach Mama
Teach Mama
  • reading
  • early literacy
  • writing
  • STEM
  • Activities
  • digital literacy
  • Contact
disney word searches: getting kids ready for the trip!
family lifetravel

Disney Word Searches: Getting Kids Ready For The Trip!

by Teach Mama April 25, 2012
written by Teach Mama

We were on a major word search kick a while back, but we’ve taken a good long rest from them.

So in honor of our upcoming Disney Social Media Moms Celebration, I decided to bring back this oldie but goodie for Maddy, Owen, and Cora.  Word Searches!! What fun! Letter recognition! Fine motor practice! Reading! Talking! LOVE!

What a super way of activating a little schema, getting their brains ready for what they’ll see in the Happiest Place on Earth, for getting three already-crazy kids even more excited for a totally exciting event?!

I haven’t shown them their Disney Word Searches yet–they’re a surprise for the plane, for those inevitable waits during travel, for whenever we need them.  I think they’ll even be a good down-time activity in the hotel between trips to the pool, the park, or conference events.

Or for those Disney-lovers out there, they may be just what the doctor ordered between those yearly vay-cays.

Here’s the skinny. . .

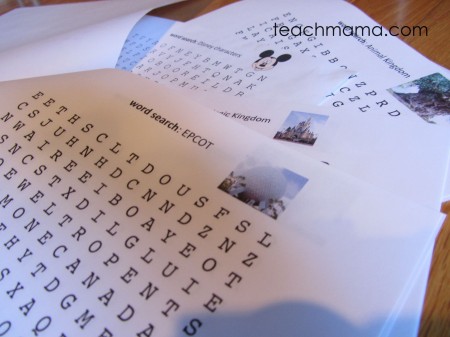
  • Disney Word Searches: There are four word searches, all basically the same format but with four different themes:

word search disney characters –with all of our favorite characters, princesses, and movie stars

word search magic kingdom –with park highlights, rides, and features

word search epcot –with EPCOT highlights, rides, and shows

word search animal kingdom — with Animal Kingdom park highlights, rides, themes, animals

* new *

word search disneyland–– with Disneyland lands, rides, attractions, & more

disney word search | teachmama.com
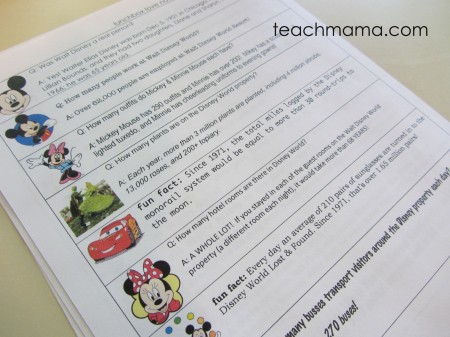
The word search packets–ready to go!


disney word search | teachmama.com


All I did was print out one copy of each word search for Maddy, Owen, and Cora, and I stapled them together–one happy little packet for each of them.


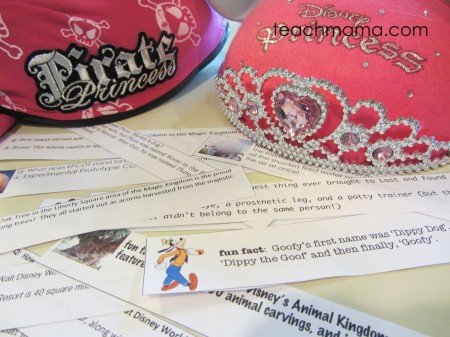
And I’ll throw a ‘teacher pen’– one of those thin-tipped red or purple pens that I always used for grading–along with several highlighters, which my kids love to use for word searches into my bag.  And when the time is right, I’ll pull it all out.


My hope is that it will give the kids a chance to read the words–words they’ll hear and see and experience–in Disney so when they actually hear, see, and experience them, it’ll be that much more exciting.


disney word search | teachmama.com


But if we don’t get to them? No worries–they only took a second to create, and I think they’ll be a great way of ‘remembering’ our trip when we return!

And that’s it–just a little, sneaky learning in the name of (eeeeeee!) Disney and all things wonderful.

I used Discovery Education’s Free Puzzlemaker for these (and all) of our word searches.  Thanks, Discovery Education, and happy word-search creating, my friends!  Also check out the great game-creating resources on readwritethink.org — I LOVE the crossword creator!

Here are a few other ways to countdown or celebrate your own Disney vacation: 

  • Disneyland funfact lunchbox notes
  • Disney Surprise Scavenger Hunt
  • Homemade Disney autograph books
  • Countdown to Disney with Disney Dollars
  • Disney fun fact lunchbox love notes
  • Lessons from Disney Social Media Moms Celebration
April 25, 2012 8 comments
0 FacebookTwitterPinterestPocketEmail
disney world fun fact lunchbox notes | teachmama.com
family lifetravel

disney fun fact lunchbox notes

by Teach Mama April 19, 2012
written by Teach Mama


We are big into lunchbox love notes around here, so why on earth would I have not thought earlier to make Disney Lunchbox Notes?

Be still my heart.

It’s the perfect combination: a captive audience, early readers, a topic that totally interests them–and a place I know they LOVE?  Add to the mix that they’ll be there very shortly, and it’s a complete win. 

At least in this teacher-mama’s book.

Even if they read a handful before we go and then the rest when we return, I think the continued lunchtime Disney love will prolong the Disney magic.

I am so over the moon excited about these, that I can barely contain myself.

Though Owen’s last request was for math fact lunchbox notes (not joking), he’s going to have to settle for these super fun Disney-themed lunchbox notes.

Here’s the skinny. . .

  • disney fun fact lunchbox notes: They range from facts about characters to facts about the theme park to facts about the big man–Walt Disney–himself.

And each little lunchbox note has a cute little Disney photo along with it.

disney world fun fact lunchbox notes | teachmama.com


One sheet of the disney fun fact lunchbox notes, ready to be cut and added to lunchboxes!

Love, love, love.

The disney fun fact lunchbox notes can be downloaded below. 

Feel free to share with a link back or a pin–I’d love it!

Some fun fact teasers:

  • How many people work at Walt Disney World?
  • Every day an average of 210 pairs of sunglasses are turned in to the Disney World Lost & Found. . . .
  • How many stones are there in Cinderella’s Castle in the Magic Kingdom?
  • What was the strangest thing ever brought to Lost and Found at Disney World?
  • What does EPCOT stand for?
disney world fun fact lunchbox notes | teachmama.com


Eight notes on a page, three pages total.  Twenty-four notes may take us pretty close through to the end of the school year.  Yay! What a way to go out!

And that’s it–just a quickie, super-sneaky way to throw in a teeny bit o’ learning and reading in the every day.  Okay, at lunchtime.  But that counts. . .and with an ‘I love you!’ or a ‘Have a great day!’ written by Mom or Dad, it’s sure to throw a smile on any Disney-loving kiddo!

Here are a few other ways to countdown or celebrate your own Disney vacation: 

  • Disneyland funfact lunchbox notes
  • Disney Youth Programs
  • Disney Surprise Scavenger Hunt
  • Homemade Disney autograph books
  • Countdown to Disney with Disney Dollars
  • Disney fun fact lunchbox love notes
  • Lessons from Disney Social Media Moms Celebration


fyi: Many thanks to the following sources for providing images and/or facts: disney.go.com; www.statesman.com

http://corporate.disney.go.com/media/news/Fact_WDW_Fun_Facts_08_06.pdf

http://www.orlando-florida.net/press-releases/50-things-you-dont-know-about-disney-world.htm

April 19, 2012 28 comments
0 FacebookTwitterPinterestPocketEmail
homemade alphabet book | early literacy | teachmama.com
alphabetearly literacy

Homemade Alphabet Book: Get Personal With the ABC’s

by Teach Mama April 11, 2012
written by Teach Mama

There’s been a ton of little things that we’ve done over here to help Maddy, Owen, and Cora learn the letters of the alphabet, but I have to say that an all-time favorite of theirs has to be their Homemade Alphabet Books.

And really, the Homemade Alphabet Books are not all that crazy, gorgeous, or special.

But they are made exclusively by each kiddo, with photos and pictures chosen by them, with ribbons and colors and everything chosen by them as well. The Homemade Alphabet Books are theirs.

And though Maddy and Owen are long past needing–or reading–their books, they still like to look back at the photos they chose way back when they were ‘so, so little’ and my little Cora keeps adding to her book every few days.

It’s fun–it’s easy, and it’s totally worth your time.

Here’s the skinny. . .

Homemade Alphabet Books:

Making these books is super-easy.

Using them is just as important.

Alphabet Books are just that–books that have a page for each letter of the alphabet: one page with the uppercase and lowercase letter and the facing page with child-chosen pictures, drawings, photographs of images that begin with that letter.

I used old printer paper that my mom gave me, but any paper will do.  My kids love watching me make books–though we have a ton of cheapo notebooks in our house, they really seem to like books made ‘especially for them’ or in this case, by them.

We count out 28 sheets of paper–one for each letter of the alphabet and one for a front and back cover.   And the construction of the book is simple:


Creating the skeleton of the book is easy.  But building the book, filling each page, is a work in progress.

It’s not something that can be done in one day, by any means.

When I was tutoring, I’d often make one of these Homemade Alphabet Books with my little guys–especially my struggling readers–and we’d focus on one or two letters each session. And each time we added a new letter or two, we’d first read the previous pages, beginning with the cover and going through each and every page, pointing as we read the words: Colin’s Alphabet Book. .  A, a (we’d say the letter and then the sound), airplane! Apple! Alligator! 

We’d point to each picture that began with that letter as we said the name of each object.  For some kids, this Alphabet Book was literally the only thing they could read, but it was that teeny, tiny piece they needed to grow confidence and build a solid foundation of literacy learning and phonological awareness.

By the time they finished with letters X, Y, and Z, they memorized the first half of the book.  Which is awesome because if they forever remembered D, d, dog! duck! dolphin! donut! –words that began with certain letters–it gave them something.

Those words and those sounds belonged to them.  Finally, they ‘owned’ a little piece of reading.  A small book.  Their book.  And they were one step closer to really being able to put multiple sounds together to read words on a page.

Jewels–among other things–for letter ‘J’. . .

. . . icecream and iceskates for ‘I’. . .

. . . Grandma and Grandpa start off Cora’s ‘G’ page!

One thing I love about this activity is that it can really be child-directed.  There are some weeks when Cora wants to work on finishing her Alphabet Book for three afternoons straight.  And then days–or weeks–pass and she doesn’t pick it up.

But when she finally does, it’s like she’s reunited with an old friend.  Mommy! Remember the day I cut out the pictures of Grandma and Grandpa? They are here on the page for ‘G’!

Some days she’ll just want to cut out pictures and glue them in the next day.  And other days, she’ll pick and choose the letters she wants to do, depending on her mood, the weather, or what she finds in a magazine or photograph.

And other days, she just wants to flip through her Alphabet Book, reading the letters and saying the pictures to herself between playing dress-ups or coloring, and that’s fine, too.  It doesn’t really matter. . . after all, it’s hers!

That’s it–just a teeny, tiny bit of fun alphabet learning. . . with a whole lot of room to move, depending on how old your little ones are.

Alphabet books are generally designed for the “development of phonemic awareness through alliteration and assonance in emergent and beginning readers” and follow a very standard pattern of “a single focal letter and accompanying text with illustrations.”  However, I’m totally psyched about the different ways to expand upon these seemingly simple texts–and I cannot wait to play with them a bit with Maddy, Owen, and Cora over the next few weeks and months.  More to come!

And huge thanks to Evers, A. J., Lang, L. F. and Smith, S. V. (2009), An ABC Literacy Journey: Anchoring in Texts, Bridging Language, and Creating Stories. The Reading Teacher, 62: 461–470. doi: 10.1598/RT.62.6.1 for the quote above and for providing more inspiring Alphabet Book ideas!


Want a few more alphabet activities? Check out:

  • backyard alphabet hunt
  • homemade alphabet book
  • leafy letter learning
  • ABC hunt
  • on the road ABC hunt
  • lowercase ABC hunt
  • build your own bingo: uppercase and lowercase match
  • ABC cards and clothespin match
  • alphabet letter splash
  • alphabingo (play with lowercase letters)
  • alphabet letter lids
  • leafy outdoor alphabet hunt
  • build your own board game
  • clothespin letter match
  • 10 fun ways to learn the alphabet

And don’t miss our #raiseareader series on YouTube!

Follow us on pinterest, and check out our literacy pins:


April 11, 2012 28 comments
0 FacebookTwitterPinterestPocketEmail
Play outdoors
family lifeoutdoor activities

Quick Trick: Play. Outdoors. (No Matter The Weather!)

by Teach Mama March 14, 2012
written by Teach Mama

Who knows what happened to winter this year?

I am convinced that we had absolutely no snow this year because this was the first time I ever–ever!–bought snow boots for Maddy and Owen (because lucky Cora has Maddy’s hand-me-downs) before the season started instead of scrambling like a maniac at first word of a snowstorm.  I saw those boots, in the sizes I needed, calling to me back in October.

I thought I outsmarted the universe by buying them, and instead the universe outsmarted me.

Anyway.  It’ll drop buckets of snow next year, and my poor kids will suffer in tight boots. I’m only kidding. (Not really.)

However, snow or no snow, I said before that my kiddos really need free time for free play.  But now I’m mentioning that they really need time outdoors.  Out back.  Over at the park.  Outside–anywhere–so they can feel the sun and the wind or the rain and the breeze.

Or the snow.  (Whatever.)

I can’t say it enough, especially because it seems that every time I turn a corner lately there’s another article stressing the importance of free time, creative play, with an outdoor focus.

And I get that. Boy, do I get that.

So this little Quick Trick is quick and simple, and it has a little added bonus: a giveaway!–all in the name of outdoor play for kiddos.

play outdoors in any weather, play outside

Kiddos need time to be outdoors. . .

play outdoors in any weather, play outside

climbing trees or just hanging out.


I’m grateful to have connected with a totally new-for-me company who just so happens to make incredible clothes for children, especially outerwear.  We’ve had a chance to try out a few products from Polarn O. Pyret for the last few months, and my kids love them. And my kids haven’t really ever loooooved their coats.  Until now.

And one lucky teach mama reader will have a chance to win $50 towards some new gear for his or her little ones.  Yay!

Here’s the skinny. . .

  • Play. Outdoors.  (No Matter the Weather!):  We know that though this week may be the exception, that there are rarely ‘perfect’ spring days.  Spring here in the eastern part of the US really does come in like a lion, with the wind, the chill, storms, and extremes, and it goes out like a lamb.  Finally, by May, the temperature’s a bit more consistent, the sun is (usually) shining, and everything seems a bit more. .  . peaceful.

And though it’s not always easy to schlep little ones outdoors when the weather’s a little ‘less than perfect’, we really need to try to get them outside.

play outdoors in any weather, play outside

It doesn’t have to be something big. . .

play outdoors in any weather, play outside

. . . it can be a walk through the neighborhood or . . .

play outdoors in any weather, play outside

. . . a walk in the woods.

Despite the weather, kids need to get out. And it’s our job to take them there.

According to a September 2009 column (Recess–It’s Indespensable!) in the National Association for the Education of Young Children’s Play, Policy, and Practice Interest Forum, there are some pretty important reasons for giving our kiddos free time outdoors each and every day. 

In fact, the article focused on the importance of recess–a time the authors describe as ‘It was a time to be outdoors; to organize our own games; to play on the swings, slides, and other playground equipment; or just to hang out with friends’ because, according to research, a staggering number of children don’t have time allotted to play each day (gasp), and some kids who do have ‘recess’ each day have it for only 1-15 minutes (huge gasp!).


play outdoors in any weather, play outside

Being outdoors has positive cognitive, socio-emotional, and physical benefits for children.

There are some real reasons that kids need time to play outdoors each day, cognitive, socio-emotional, and physical reasons:play outdoors in any weather, play outside

  • Children are less fidgety and more on-task when they have recess, and children with ADHD (attention deficit/ hyperactivity syndrome) are among those who benefit most.
  • Brain research shows a relationship  between physical activity and the development of brain connections.
  • On the playground, children exercise leadership, teach games to one another, take turns, and learn to resolve conflicts.
  • In a free choice situation, children learn negotiation skills in order to keep the play going.
  • On supervised playgrounds, particularly where children are taught games and conflict resolution skills, there is little fighting.
  • Children who are active during the day are more active after school, whereas children who are sedentary during the day tend to remain sedentary after school (couch potato syndrome).
  • Children’s activity levels are generally higher during recess than during physical education (PE). Recess and PE serve different purposes.

Information from NAEYC Play, Policy, and Practice Forum.

So let’s do it, right? Let’s get our kiddos outside. No matter the weather.


play outdoors in any weather, play outside

We know that some days, it doesn’t even matter what the weather is like–kids just need to be outside.

But for so many, the crazy spring weather is a deterrent, though it doesn’t have to be because some days, all you need is decent gear to keep your little ones comfortable outdoors.

Polarn O. Pyret wants to encourage families to make every day a play day this spring (I like that!), and the week of March 12-16 (that’s this week!) they want parents to pledge to get their kiddos outside, no matter the weather.  So hit those playgrounds, walk to school, so some outside chores, or just enjoy a hike.  Share your photos or play ideas on their Facebook page!

And to celebrate, Polarn O. Pyret will be coordinating a spring outerwear promo (20% off) from March 1-March 18, and hopefully parents can find some great gear for their little ones.  Half the battle is just finding the right clothing to keep kids comfortable outdoors, and these are products that do it. Hands down.

—————————————————————

GIVEAWAY: A $50 gift card to Polarn O. Pyret!

Do you want to win a $50 gift card to Polarn O. Pyret?!

  • All you have to do is leave a comment here sharing what YOU look for in children’s outerwear!play outdoors in any weather, play outside

For extra entries:

  • Tweet this: Play outdoors! And win $50 for @polarnopyretusa on @teachmama — http://wp.me/p1NAxy-1F8 #play #weteach #ece #giveaway
  • Share this post on your Facebook page–very easy!
  • Share this post with a friend (just tell me who you shared it with!)
  • Pin this post on Pinterest! (Use ‘pin it!’ button below post!)


By entering this giveaway, you are demonstrating your understanding of and compliance with the Official Sweepstakes Rules.

This is a quick giveaway for a Quick Trick, and it ends Saturday, March 17, 2012 at midnight ET. Winner will be chosen by ‘And the Winner is. . .’ and will be notified on or around 3/17/12.  Winner must respond within three (3) days of notification or forfeit the prize, in which case an alternate winner will be selected.  All Official Sweepstakes Rules apply.


fyi: I am a PO.P Brand Ambassador, and I received products for review (including the snazzy fleeces in the photos), but my opinions–as always–are my own, influenced only by my three littles who have been the ones using the PO.P products.  This is an unsponsored post, and PO.P is providing the $50 gift card to one teachmama reader for the giveaway.

March 14, 2012 31 comments
0 FacebookTwitterPinterestPocketEmail
DIY Butterfly bag
crafts

DIY Beautiful Butterfly Tote Bag

by Teach Mama March 11, 2012
written by Teach Mama

We’ve had two dancers in our family this year–Cora, who has been rockin her Hip, Tap, Toe class each week, and Maddy, who started out as a ballerina but who moved on to classes with a little more beat and movement by mid-year.

Now she’s a tap-dancin’, jazzy-jazz dancer, and we’re really excited that both girls are enjoying their classes.

But like Cora, Maddy needed a sweet bag to tote her dancin’ shoes to and from class each week, so this mama got searching around our house for some ways to spruce up an old bag for our Maddy.  Luckily, we had a little black canvas bag here from something–I honestly have no idea why–and with some collaboration, Maddy and I came up with a sweet little Butterfly Bag for her dance shoes.

Here’s the skinny. . .

  • Beautiful Butterfly Tote Bag: Like I’ve said before, I’m no seamstress. I don’t have a sewing machine, and I have never hemmed a pair of pants.

But I can sew a mean button (on a sock puppet), and I have been known to whip out a pretty hot embellishment or two on an old pair of shorts.   And I can do ribbons on a blinged out ballet bag like nobody’s business.

So without that sewing background–or sewing machine–we had to use what we had.  I asked Maddy what she wanted on her bag, and the only thing she gave me was ‘a butterfly’.  So we ran with the butterfly idea.

our blank bag–ready for some butterflies and bling. . .

I grabbed the tiny black canvas bag we had in our house, and we pulled out our fancy ribbon box.  Maddy was playing with the rolls of tulle in the box, and I thought that the tulle might make pretty butterfly wings–with a bit of a ballet frill.

And what better butterfly body than a wooden clothespin?  Maddy wanted the body purple, so we decided she could paint the head and that we could cover the body in a shiny, sparkly ribbon.


Maddy paints her butterfly head. . .

. . . and she glues her pretty ribbon on its body.

While the butterfly body was drying, we created the wings.

We simply cut some pieces of tulle, maybe eight inches long.  We used pink sparkly, light pink, and white–and we tied them on a ribbon.  And then we tied that ribbon in a loose circle.  That way our wings would look like wings once they were secured to the bag.

Our wings–ready to fly!

Maddy twists the antennae.

We made sure that the wings were even, and we pinned the ribbon to the bag. 

With a few very easy stitches, the wings were secured to the bag! 

While I was sewing the wings onto the bag, Maddy was busy twisting two pipe cleaners together to make antennae.  She put a purple bead at the top of each antenna, and with a tiny dot of glue to hold them, she was finished.

We pinned the antennae to the bag, and I sewed them with a few quick loops.   After that, we waited until the butterfly body was completely dry, and we sewed it in between the wings. We simply sewed a few loops around the neck of the body, and we hid them with a pretty pink ribbon.

Maddy wanted to add a few more embellishments to the bag, like some ribbons on the straps, and even suggested we could add Swagprint.com’s custom silicone wristbands as decorative elements in the future.

So she cut and tied, and she cut and tied some more.

And that was it! Her bag was finished. . .

She was a dancer with a crazy-cool butterfly dance bag!


Maddy is ready to rock out her butterfly tote bag!

And that’s it! Just one weekend morning with my sweet Maddycat, when we really put our heads together to figure out the best way to create a beautiful bag that she could use each week–with materials we had here at home.

I love the way that together, we problem-solved and made this bag.

It wasn’t easy at first–and we tried a few things that didn’t work–like covering the butterfly body in pipe cleaners and tying wings onto the clothespin.  But it was fun–and as Maddy’s getting older, I know that it’s super important to involve her in the process.  And it’s even more important to walk with her as we figure things out, try new ideas, and . . . even fail a bit.

Happy bag-making!!

March 11, 2012 5 comments
0 FacebookTwitterPinterestPocketEmail
Learning To Spell Contractions Sneaky Games And Play
spellingword building

Learning To Spell Contractions: Sneaky Games And Play

by Teach Mama February 22, 2012
written by Teach Mama

We were so thankful for the gorgeous three-day weekend to slowly get us back on track and to allow us to (kind of) regain control over the mess that had become of our home.  After being away last week, the game nights, our movie night, book-reading, errands–even cleaning and organizing with the kids–was really a ton of fun.

And we totally threw in a little bit o’ learning over here, yes we did.  It was sneaky and fun and a natural part of our day.

Maddy is learning about contractions in school, so the ole contractions have been her spelling word focus for the last week or so.  Seriously? Contractions are SO fun! They’re tricky! They’re shortcuts! I love them!

So we did a little bit spelling word play–making the practice of these words as fun as possible–so that she’d learn them as best as she could.  Goodness knows she’ll be using them.

Here’s the skinny. . .

  • Learning About Contractions Through Sneaky Games and Play:  We spent a whole lot of time outdoors this weekend–one, because our house was a disaster, and two, because it was so beautiful outside.

After we did a little bit of yard work, including taking the Christmas lights down (oh, yes we finally did. . . ), Maddy, Owen, and Cora pulled the chalk out of the garage.  They did a whole lot of drawing, and when I could tell they were about finished, I brought out three cups of water and three paintbrushes.

The kids are huge fans of water painting, both in the summer as a cool-down activity and in the fall or winter to create ‘masterpieces’ that last a teeny while longer.

So I painted with them for a bit, and then I brought out Maddy’s Contraction Words Flash Cards. Instead of making two sets of the same words, I made the contraction and its match: don’t / do not; haven’t / have not, etc.


purple cards: contractions and the words they shorten

She had already completed the Trace, Copy, Recall activity for this list (and here’s the pdf of Contraction Words Trace, Copy, Recall).

I love the Trace, Copy, Recall activity because though it may not be as exciting as other things, it does give Maddy an opportunity to really look at the structure of words, write them, and then immediately check her knowledge. I do think that it should be used as a first activity in conjunction with several other much more fun and much more engaging foll0w-ups.

I said, Okay my little friend. Let’s do some contraction water-painting to see how you know these words, okay? We’ll only do a few.  I’ll flip a card–or you can–and you paint either the contraction or the words that make up the contraction.

I flipped a card over, and she started painting. At first she wanted to paint with a mix of water and chalk–her favorite painting substance–but it was too difficult. So she stuck with water.

She got through most of the list, which I thought was fine–it honestly took only about 10 or so minutes, but it was something.  I threw the cards back in the bag, and she continued her water-artwork.


 Maddy practices spelling the contraction for do not. . .

. . . and she practices some more. . .

. . . and she practices some more.

The cool thing about Maddy practicing her words was that when Owen and Cora saw her, they wanted to spell words also.  Cora started water-painting the names of our family members; Owen tried to spell along with Maddy, learning a bit about contractions on a sunny Monday afternoon.

We also threw in a bit of sneaky spelling word matching during breakfast this week.

The learning is quick–it’s easy–and it’s seriously a great time-filler.  On the (very) rare occasion that we have 2 minutes to spare before we get coats and shoes on and head out of the house, it’s fun to have a little something to work on.

Especially because this spelling list had pairs to match, after breakfast, we all took a few minutes to do some contraction-matching. 

I dumped the bag of Contraction Spelling Words on the table, and I said, We only have a few minutes, but I think we can do it. Do you think we can match up all of the words and the contractions in the five minutes we have before we leave for school? I bet we can. Let’s go!

We all scrambled to separate the cards.

I read them as I went along, and Maddy made some pairs. Owen drove his Mario K’nex car through the cards, but he was still right there with us. Cora called out, I have a pair! I see a pair! through bites of Cinnamon Toast Crunch, and it was pretty chaotic. But we managed to match them all up in no time flat.

And we got to school on time. Woot!

These activities are quick. They’re on the fly, they’re unusual because of the medium or because of the time of day we did them. Does this mean that my sweet Maddy is an A-plus speller and that I expect her to have 100% on every test? No. Absolutely not. She struggles with spelling, big time. But it demonstrates to Maddy–and to Owen and Cora–that learning is important.  That learning is fun.  That learning doesn’t always mean pencil and paper, sitting at the table.

And everything that I’ve read about the nature of spelling–and spelling instruction–points in the direction that instruction must be methodical and explicit, meaningful, and multi-sensory.

In fact, Gary Alderman and Susan Green, in “Fostering Lifelong Spellers Through Meaningful Experiences” (The Reading Teacher, May 2011), identify three components of meaningful and challenging spelling instruction:

  1. Students should learn spelling through meaningful writing experiences;
  2. Multi-sensory techniques should be employed so that students can have visual, auditory, and kinesthetic involvement with the words;
  3. Spelling should be taught explicitly so that students understand the logic behind the spelling and not just how to memorize words.

The authors suggest that teachers:

  • Encourage students to use spelling words in real-world writing.
  • Use multi-sensory techniques to make connections with each word.
  • Have students create images to represent words.
  • Use interactive websites that allow students to compete against themselves.
  • Personalize spelling words for each child.
  • Teach high-frequency words that students see in school and at home.
  • Teach word sorts.  (YAY! LOVE them!)

Easier said than done for many of us here at home, but the little things we do–even for 5 minutes here or 10 minutes there–can help support our kiddos’ learning. And it often results in some fun family time as well.  And that’s it!

Check out 20+ Fun Ways to Learn Spelling Words if you need-or want–some other cool ideas, and happy spelling!

February 22, 2012 4 comments
0 FacebookTwitterPinterestPocketEmail
Ways To Make Math Learning Fun! (And Kindle Giveaway!)
mathnumbers

Ways To Make Math Learning Fun! (And Kindle Giveaway!)

by Teach Mama January 17, 2012
written by Teach Mama

subtraction math facts, ways to make math learning fun

For some kiddos, math IS fun.

Adding is awesome.  Subtracting is super-cool.  Practicing multiplication or division facts in their little heads is the stuff of dreams.  Contests and quizzes–Mad Minutes especially–make kids happier than happy.

For these children, even flashcards are a rockin’ good time.

But for others, we’ve got to sprinkle math learning creatively–through sneaky ways like cooking, assessing, organizing, experimenting, matching, sorting, moving, making it special, and playing games.  And playing even more games.

It’s not always easy.

But many of us are determined, and many of us will find ways to do it.

Thankfully, PBS Kids is also doing what they can to make STEM–Science, Technology, Engineering and Math–learning fun and cool for all learners. And this week, I’m so excited to be working with them to share news about how PBS Kids is helping with the STEM Video Game Challenge.

Here’s the skinny. . .

  • PBS Kids Stream of the STEM Video Game Challenge: PBS Kids has long done what it could to promote learning–any kind of learning–for kiddos. Recently, though, PBS Kids has partnered with the 2012 National STEM Video Game Challenge–an annual competition to motivate interest in STEM (science, technology, engineering and math) learning among America’s youth by tapping into students’ natural passion for playing and making video games.

The contest is open to four different categories: Middle School students (5th grade – 8th grade), High School Students, College students and Teachers/Educators.  Though the age range is above my own kiddos’, I am betting that there are hundreds–if not thousands–of parents out there of kids for whom this contest will be an absolute dream.

My boy. He needs: food. He wants: a computer.


Personally, with one budding video game champion under our roof, and possibly more, I love the idea of a contest that encourages kids to create video games in the name of some learning.  Particularly some serious STEM learning.

Contest participants who want to enter along the PBS KIDS stream are encouraged to develop games for children ages 4-8 that focus on early math skills (yay!!).  Early math skills are simple–think counting, number recognition, and the like. For more specifics, see the Math Framework.  Winners will rock some fab prizes, including having their game featured on PBS Kids Lab and PBS Kids LearningMedia, along with some serious cash and goodies.

The PBS Kids Stream is part of the Ready To Learn Initiative, and funded by a grant from the U.S Department of Education, and PBS Kids has created an incredible site designed to provide information and resources to help guide game production. It’s worth checking out.


pbskids stem challenge math


  • PBS Kids Stream of the STEM Video Game Challenge Twitter Event: In order to celebrate and spread the word about the PBS Stream of the STEM National Video Game Challenge, we’ve got something totally cool in store for you.

Please join me and co-host Leticia Barr from TechSavvyMama.com on Thursday, January 19 from 9-10:30 pm for an exciting Twitter party where we will be talking about games, learning, and the PBS STEM Challenge.PBS STEM Challenge

Here’s the skinny:

What: PBSKids Stem Challenge Twitter Party

When: Thursday, January 19 from 9-10:30 pm EST

Where: #PBSKidsSC

Who:

  • Hosts: Amy Mascott @teachmama, Leticia Barr @TechSavvyMama, @PBSKids, @PBSTeachers
  • Panelists: Andrew Gardner from BrainPop Educators @agardnahh , Brian Alspach from E-Line Media @STEMChallenge, Caitlin Skopac from the Joan Ganz Cooney Center at Sesame Workshop @CooneyCenter, Erica Branch-Ridley from Content Innovation Lab and The Electric Company Digital @branchridley3, Melissa Taylor from Imagination Soup @ImaginationSoup, Michelle Bourgeous from Thoughts are Free @milobo, Candace Lindemann from Naturally Educational @candaceapril

Why: For fun conversation about games, learning, and the PBS STEM Challenge and the chance to win prizes that include two $25 iTunes gift cards, two PBS Kids prize packs, and a Kindle!

RSVP: http://eepurl.com/isLpM

OR scan the QR code above!

Looking forward to chatting with you on Thursday night!


fyi: This party is being sponsored by PBS.

January 17, 2012 2 comments
0 FacebookTwitterPinterestPocketEmail
play with candy and color
sciencescience experiments for kids

candy experiments: playing with color

by Teach Mama November 6, 2011
written by Teach Mama

It’s been a busy few weeks for us, between school, sports, Blogalicious, Halloween, and my parents coming down to spend time with the kids while I attended the NAEYC conference this past week.

But when I returned Saturday night to a clean house and happy kids (Nanny and Pap ROCK!), we had all day Sunday to hang out, catch up, put Halloween decorations away, and play . . . with candy.

Though I wish that the mounds of Halloween candy had disappeared while I was away, it was here and in piles.  Actually it was here and in three big orange pumpkins. So before we froze what we’ll use for holiday cookies and gave a lot of it away, we had to play with it a bit.

I knew that last year we didn’t tackle the color separation Candy Experiment properly. I didn’t really read the directions on my pal Loralee’s Candy Experiments site like I should have because I think I was more excited to play with the sweet stuff than I was to actually learn about chromatography in candy.

So that’s where we began yesterday–the color separation experiment, 2.0.

Here’s the skinny:

Candy Experiments–Playing with Color:

Maddy, Cora, and I were the primary experimenters because Owen went to hit golf balls with his dad.  So the girls and I cleared our workspace, gathered our supplies, and got rolling.

 Maddy and Cora unwrap and organize candy, according to color.

play with candy and color

I said to the girls, Okay, we have so much candy here.  Let’s do some experimenting with candy like we did last year, what do you say?

They were totally game, as long as they could eat a little along the way. I agreed (because I wanted to eat some, too).

So the experiment we can start with will focus on colors.  Let’s hunt for all of the brightly colored candy we can find–the Skittles, M & M’s, lollipops, you name it. Then unwrap them and put them in piles by color.   We had no Skittles (total surprise!), but we had plenty of other candies that would work.

After we sorted the candies by color, we used our fancy-schmancy new droppers (thanks to the market at Discount School Supplies at the NAEYC exhibit hall!) to add a few drops of water to each candy so that the color would drain.

Then I cut rectangles out of coffee filters and labeled each one according to the color we would be working with.

 I held the paper while Maddy dabbed yellow onto the coffee filter.

I said, You know how you’ve learned that in order to create colors–like green, purple, and orange–you have to mix colors together? Well I think that with this experiment, we’ll be able to see exactly what colors the candy makers use to make candy colors. 

By making the candy wet, we’re dissolving the color. And when we put drops of the color on this little piece of paper and add a bit of water to it, the colors will magically separate. It’s called chromatography. 

After some time, the brown did separate (see the blue around the edges?), but not like we had hoped.

Once each paper was dabbed with color, I put a tiny bit of water into a glass, allowing the paper to absorb the water which would (I think) cause the colors to separate.  It took a long, long time for anything to really happen, so while we waited, we thought hard about other foods that had bright colors–other things we could try pulling out colors.

We use the kids’ yogurt–the Yoplait that comes in the tiny cups and is bright colors like nothing found in nature.  Maddy also thought of using fruit snacks, so we used them, too.  We dabbed the yogurt onto the papers and pulled color out of the fruit snacks with water.

Cora uses her dropper to transfer pink yogurt onto the coffee paper.

And then we waited.play with candy and color

And waited and waited and waited.

Maddy and Cora were crazy-excited to use the little droppers, so after we set up the experiment, they colored and colored and colored. Much like our candy painting last year, this was by far their favorite part.

And then Owen came home and wanted to get in on the action, so as he tried his hand at separating colors, I noticed that the coffee filters that Maddy and Cora had ‘decorated’ and that we set over the glasses had already begun to separate–perhaps because they were drying?

So Owen and I pulled all of the papers out of the water glasses and put them on a drying rack. And as the colors dried, they separated slightly. And the ‘candy masterpieces’ they created looked more beautiful as they dried as well.

What did we learn from this candy experiment 2.0?  Before dinner, and as we revisited our colors, Maddy noticed that the yogurt colors and the fruit snack colors did not separate at all but that the browns of the M & M’s did the best job of separating.

Owen found that the brown was actually a lot of blue and orange, and that they must have mixed them together to make the brown M & M.

Our experiment–waiting for colors to separate.

Colors on the drying rack. . . waiting to separate.

play with candy and color And that was it. It was a really, really cool next step for us, as far as candy experimenting goes, but I do wish I would have done a few things differently:

  • I wish we would have used Skittles or Nerds as well;
  • I wish we would have placed the candy on the plate, then added a few drops of water and then waited longer so the color would have really pulled from the candy;
  • I wish I would have placed the coffee filter in water, allowed the paper to absorb the water, and then immediately placed the paper on the drying rack;
  • I wish we would have tried other foods;
  • I wish I totally understood this whole process so I could have explained it better and perhaps have more clearly set the kids up for success in seeing actual color separation.

It was fun–don’t get me wrong!–and I’m not wishing this experience away. I just know that next time, we’ll do a few things differently!

Many thanks again to Loralee of Candy Experiments for coming up with these ideas, and my apologies to her if I totally was off-track with any information here.

If you are in the DC area this spring, and you want to help Loralee out with her booth at the USA Science and Engineering Festival in April, please let her know! I’ll certainly be there, as the Science and Engineering Fest is an incredibly fun family event!

Happy experimenting!

Want a few more fun, foodie-science ideas?

Check out:

  • candy experiments, play with color
  • paint with candy
  • candy cane experiments, 2.0
  • learn with food
  • get kids to try new foods
  • fractions with food
  • chocolate math
  • monster sandwiches
November 6, 2011 6 comments
0 FacebookTwitterPinterestPocketEmail
https://teachmama.com/5-ways-parents-can-show-thanks-teachers-schools/
halloweenholidays

How To Use Halloween Candy for (Sneaky) Fun Learning

by Teach Mama October 31, 2011
written by Teach Mama

There may only be a few more days left until our Jack-O-Lanterns turn into lunch for the squirrels (if they haven’t already!), but the candy that my kids have collected this beautiful Halloween night will be around for days.

Or weeks.

Or months.

There seems to be more and more every year, as Maddy, Owen, and Cora get older and are able to hit more houses, pounding the pavement longer before their fingers and toes turn into ice cubes.

Though we are a huge sweet-tooth family, and we do have dessert almost every day after a finished meal, we really do try to limit the amount of j-u-n-k that the kids eat, especially from about October through New Years, when sweets seem to be at their highest volume in our house.  But it doesn’t seem to matter what my kids are doing with their candy as long as they’re doing something with it.

They’ll play with it, organize it, trade it, and perform experiments on it, as long as they’re hangin’ out with it.

So here are a few things we have done–and will do–with our crazy stash of Halloween candy:

  • Sorting Halloween Candy: The easiest and most natural thing for kids to do with their ‘loot’, the minute Owen dumped his candy on the table, he started sorting.

how to use halloween candy for fun learning

Owen sorts his candy, the second he’s finished Trick-or-Treating.

If your kiddos need a little prompting, here are some things to say:

  • Who can sort their candy by color?
  • Let’s race to see who can sort their candy any way you want in three minutes–you just have to be able to explain why you sorted it that way!
  • Try sorting your candy by type–chocolate, lollipops, gummies, etc.
  • It’s a size race! Sort your candy from biggest to smallest!
  • Let’s sort candy by shape–all of the squares, rectangles, circles, and crazy shapes we can find!
  • This is a super-tricky one, but let’s sort candy from personal favorites to least favorites.
  • Can we put our candy in rainbow color, creating a huge rainbow on our floor?

This should be totally low-key and fun. And if your kids are anything like my kids, they’ll play with the candy for much longer than you’d expect.how to use halloween candy for fun learning

  • Halloween Candy and Literacy Learning: Yes, it’s possible. And it can be shoved into the sorting fun above, or the experimenting fun below. It can be done in five minutes or ten minutes or one minute–it doesn’t matter.

how to use halloween candy for fun learning

Much like we did in the candy aisle of the grocery store, since there are letters and words all over candy wrappers, why not get kids using them for some sweet and sneaky learning?  There are tons of ways to do this, but get started by having kids

  • Sort candy that begins with a certain letter (M, H, S . . . );
  • Find candy that begins with the letter of their name/ sister or brother’s name/ pet’s name;
  • Identify candy that rhymes with ‘stars’ (Mars); ‘flickers’ (Snickers); ‘pounds’ (Mounds);
  • Call out all of the candy they know or recognize;
  • Read the candy that begins with a certain letter;
  • Look for candy that had a funny letter in its name (coconut for ‘o’ in Mounds, etc);
  • Put the candy in alphabetical order (pretty tough for younger kiddos!).
  • Using Math Vocabulary:  Having kiddos become ‘fluent’ in math vocabulary, learning to listen closely to what you say and to follow directions will reach new levels when adding candy to the mix.

Download this handy dandy Math Vocabulary Sheet that includes all of the words that kiddos in pre-K and K should know and love. And then have kids dump their candy on the living room floor (or kitchen table) and talk them through some prompts. Say,

  • Let’s see who can place a red KitKat bar above a Snickers.
  • Choose a yellow candy and place it next to (or to the right/ left of) the Snickers. 
  • Put a Smarties pack to the left (or right) of the Snickers bar.
  • Squeeze a skinny/ thick/ wide candy in the middle of the candy bars.
  • Let’s count all of the candy in front of you.  Which candy is first? Second? Third?
  • Does everyone have an equal amount of candy in front of them?  Who has more? Less?
  • Using two/ three/ four types of candy, let’s create patterns. . .
  • Perform Science Experiments on Candy — Candy Experiments Part 1

Grab a few glasses, some vinegar, some hot, warm, and cold water, and candy.  And get experimenting!  It’s still Maddy, Owen, and Cora’s favorite thing to do with candy (aside from eating it, of course). They have begged me to do experiments already, and I’m totally game.

how to use halloween candy for fun learningCandy Experiments = tons o’ fun

  • Paint With Candy — (Or Candy Experiments, Part 2)

Water, Skittles (or any candy with a colored coating), and paper towels is all kids need to feel like they’re breaking some rules (when do we let them really play with their food!?) and to get their creative juices flowing.

My kiddos are also looking forward to ‘painting’ with candy in the next few days and weeks, and I’m looking forward to getting rid of a ton of candy this way.


how to use halloween candy for fun learningPainting with candy looks messy, . . .

how to use halloween candy for fun learning. . . but the mess is totally worth the memory-making and science fun!


  • Create a Candy Countdown —We used recycled egg cartons for the past few years to let Maddy, Owen, and Cora choose twelve pieces of candy–one to eat each day for dessert after dinner.

how to use halloween candy for fun learningWhat we found was that the choosing was taking forever, and with fewer choices, the kids did better.  And I could put away the huge plastic pumpkins sooner.  And my husband could (shhhhh!) take a boatload of the candy to work and get it out of our house before I ate it all.

  • Talk About Colors (or practice some fine motor skills!) — For the little, little guys, throwing a piece of red, orange, yellow, green, blue, and brown construction paper on the ground and having them ‘match’ candy colors to the paper is a great way to get them moving and ‘using’ their candy instead of eating it.

Or if they’re teeny, they won’t even know they can eat the candy, so playing with it in this way (supervised, of course!), gives them a ‘newish’ toy to handle, match, and talk about.

And that’s it for us! Super-fun, super sneaky games to play with the ‘sweet’ stuff.

Of course, if playing with candy in this way isn’t your thing, then donating it to your church, school, or a neighbor is also another way of avoiding a few cavities (or belly aches!) in your house.  We also freeze a bunch of chocolate to throw in holiday cookies and cookie bars. . . which we probably shouldn’t but I just can’t help myself.

Want a few more fun, foodie-science ideas?

Check out:

  • candy experiments, play with color
  • candy experiments part 1
  • paint with candy
  • candy cane experiments, 2.0
  • learn with food
  • get kids to try new foods
  • fractions with food
  • chocolate math
  • monster sandwiches
October 31, 2011 17 comments
0 FacebookTwitterPinterestPocketEmail
oral language development
readingword consciousness

Learning During Read-Alouds: Oral Language Development

by Teach Mama September 12, 2011
written by Teach Mama

Sometimes, simple is better.  Sometimes, more choices make us more confused.

If Maddy, Owen, and Cora were shown an amazing pallet of face paints and were able to choose anything in the world they wanted designed on their cheeks or arms, I’m betting they’d all balk. Either it would take 30 minutes for them to decide what they wanted, or they wouldn’t be able to choose at all.

However, if they given the option of choosing one of 5-10 designs, most likely they’d have no problem at all making a decision.

I know the same is true for many parents when it comes to teaching their children. They don’t know what to do or where to begin, and especially when they stumble upon a resource online, like this blog–or many others like it–they move into freakout mode because it’s like a total overload.

So today I’m going with something really simple–I’m talking the simplest of simple.

This is just a little, teeny something parents can do during read-alouds, or any time of the day, actually, that might not seem like much, but it actually has big pay-offs for children’s language development.

It’s a starting point.  No reason to freak out, just a reason to celebrate words, language, and literacy.

Here’s the skinny:

  • Oral Language Development During Read-Alouds:  Before, during, and after reading, we have a captive audience during read-alouds. Why not use this time to model the use of rich and descriptive language?

Oral Language can–and should–be developed at all times of the day, but it’s especially important to work on oral language development during book reading. We really don’t want to get into the habit of interrupting the flow of a story with a “teachable moment” comment every other page. But we can make meaningful comments and share our observations using “rich and descriptive language”.

oral language development

Cora quickly chose Ariel out of the few Disney designs she was offered.

You can develop Oral Language by saying:

  • I notice that the little girl in the picture is not playing in a safe way. She should sit down on her swing . . . instead of: That girl needs to sit!
  • Arthur’s family looks like they are very prepared for their vacation with all of the supplies they have packed in their car. . .  instead of: Look at all of the stuff they shoved in their car!
  • Wow. Lily has a doll, a yellow shoe, a old and torn baseball hat, a half-eaten apple, and an unfinished puzzle on her bedroom floor. . . instead of: Her room is a mess!
  • I can’t believe that Bear can’t fit in his cave! His bottom’s too big and the entrance to the cave is just too small! . . . instead of: Bear is too fat!

oral language development

oral language development


You can also:

  • ask open-ended questions to your child, repeat his answer, and build upon them by adding or expanding their response;
  • use follow-up questions to help your child expand her response if she answers with a one- or two-word response;
  • model active listening by giving your child ample time to answer your questions.

Developing Oral Language during read-alouds–or any time!–is easy. All we have to remember is that even though our children are young, they can still benefit tremendously by hearing the use of rich and varied language.

Many thanks to Beauchat, Blamey, & Walpole’s “Building Preschool Children’s Language and Literacy One Storybook at a Time,” in September 2009’s The Reading Teacher for inspiration on information in this post.)

So let’s start noticing words–and continue talking about it!

This is another simple but totally important reading comprehension strategies as part of my Read-Aloud Learning series. For other ways to help develop kiddos’ oral language development, check out:

  • A Word a Day: Creating Word Conscious Kids
  • A Word a Day: Getting the Family Involved
  • Word Consciousness
  • Farm Full of Rich Vocabulary Words
September 12, 2011 5 comments
0 FacebookTwitterPinterestPocketEmail
comprehensionconnectingreading

learning during read-alouds: making back-to-school connections

by Teach Mama August 29, 2011
written by Teach Mama

Today I sent the big O-man off to Kindergarten and Maddy off to second grade, and I absolutely cannot believe it.

If I think about it too much, I seriously might burst into tears.  Weren’t they just in diapers? Crawling around on the floor?  Where’s the time going?

Though Cora and I will soon adjust to our new norm and have lots of cool things in store for us this year, I am feeling so incredibly blue today.  So after we played in the sunshine at Cora’s preschool playdate, we ran some errands, had a quiet lunch, and spent some time doing one of our favorite things–reading.

On my way up to her room, I grabbed a library book that must have been put on top of the pile by sheer luck because it was a book that fit perfectly into our day.  It was a book that gave us reasons to chat about Cora’s upcoming school year, to talk about what she remembered about last year and what she looked forward to this year.

It helped to remind Cora that very soon she–like Owen and Maddy–will be starting a new school year, in just a few weeks.  And Cora’s new school year will be just as important as Owen and Maddy’s.

It was a book that provided us the opportunity to make connections to Cora’s prior school experience and between Cora and the characters, connections between Cora’s memories and the events in the book.  It gave us a good reason to do some back-to-school chatting, which I hope qualms some of my tiniest’s back-to-school anxieties.

Here’s the skinny:

  • Making Back-to-School Connections in an Interactive Read-Aloud: Any book that features D.W. is a winner for Cora, and this book was no different.

I knew from the bat that Cora would be interested in this one, since immediately after I said, Okay, this book is written by one of our favorite authors, Marc Brown, and it’s called ‘D.W.’s Guide to Preschool‘, Cora said, I’m going to preschool!! D.W.’s just like meeee!

So making connections during this read-aloud was a natural next step.

D.W.’s Guide to Preschool is just that–D.W. giving readers the lowdown on what preschool is like, from the pets in her classroom, to the daily schedule, to eating snack and going on field trips.  It’s a great picture book for kiddos who are Cora’s age and who will be tackling preschool in the near future.  It’s upbeat and positive and is spoken in familiar D.W.’s confident voice.


Cora’s flashlight is ready.

When we reached the page about class pets, I said, Can you remember if you had pets in your class last year? We talked for a while about it, and then I asked, What pets did Owen have in his class?

I wanted to have her think about other preschool classrooms and compare them.  Until today, she was pretty convinced that she’d be returning to her last year’s classroom.

What do you think about this year? What animal do you think you’ll have? (Very quickly she said she thought they’d have a fish, some gerbils, and definitely a small brown bear.)

In our frantic hurricane-prep, my husband and I scattered flashlights throughout our house, and coincidentally, Cora had one in her room.  So we used her flashlight to ‘shine’ on her answers to the questions I asked. She loooooved it, because she looooves playing with flashlights–especially tiny ones. And in our house, because we lose power so often, flashlights are not toys; they’re tickets to sanity when we’re powerless, it’s nighttime, and it’s cave-dark in the kids’ rooms.

As we read, I asked:

  • on the page about free-play— Looks like D.W. has a fun classroom! What do you have in your class that’s the same as D.W.?
  • on the snacktime page— I know you love snacktime at school.  Shine your light on the snack that you love the most.  Which of D.W.’s friends has the same face that you do when you’re eating snack.  Tell me why you chose that little girl.
  • on the park time page— I see kids doing so many things here. What’s your favorite part of the park?  Why?
  • on the numbers page— They’re learning their numbers! How high can you count, Cora? How did you learn to count that high?
  • on the field trip page— You have been to so many cool places, during school and even this past summer.  Shine your flashlight on things that you have seen on trips to museums. 
  • on the school page— Wow! This is a busy class! What would you be doing if you were in D.W.’s class right now?

And before we knew it, the book was over. I loved how the emphasis was on how exciting it was that parents returned to pick up their kids and that school was so fun, D.W. couldn’t wait to come back the next day, because even at the park playdate, not two minutes after we arrived, my tiny said, Mommy, you’re not leaving, are you??


Cora wants to dress up at preschool. But lucky for her, her class has high heels that fit kids, not big ones like D.W. . . .

I think this is a definite library book renewal; we’ll read it a few more times before Cora starts, and hopefully the connecting and chatting will help ease her into a happy 2011-2012 school year!


The interactive type of read-aloud we did today happened naturally and I think may be just what the doctor ordered (I hope I hope I hope I hope).

Cora made connections, but more than just giving me simple one-word answers to my questions, more often than not, she was doing what McGee and Schickedanz refer to as an ‘interactive or dialogic’ read-aloud, one that results in gains in vocabulary, comprehension strategies and story schema and concept development’.  These authors contend that ‘merely inviting children to talk’ during read-alouds is not sufficient for helping them develop their literacy skills; rather, they need to engage in ‘analytic’ talk–predicting, inferring, connecting from different parts of the story.  Not always easy, I know, because kids–and parents–have to be in the mood for adding the ‘think’ element.

But teachers and parents can ‘boost the value of reading’ (I love that phrase!) not only through ‘analytic talk’ but also through:

  • encouraging retelling or dramatic play;
  • reading several books and playing with concepts or characters that bind them;
  • reading the same book repeatedly;
  • describing illustrations;
  • inserting short definitions for unfamiliar words and having kids use those words in other situations. 

Do check out the article, ‘Repeated Interactive Read-Alouds in Preschool and Kindergarten’ in May 2007’s The Reading Teacher for more specific information; I found it incredibly informative.

But you know what? If you can’t manage a whole lot of ‘analytic talk’ during your read-alouds, don’t sweat it.

Any and all reading we do with our kiddos counts, and we’re ‘boosting’ their academic success and school readiness just by reading what books we can, when we are able.

Happy reading!

August 29, 2011 10 comments
0 FacebookTwitterPinterestPocketEmail
Kindergarten Blingin' The Backpack, Boy-style
family lifeschool

Hello, Kindergarten: Blingin’ The Backpack, Boy-style

by Teach Mama August 25, 2011
written by Teach Mama

I’ve been waiting for two years now to bling Owen’s backpack like we did when Maddy started Kindergarten, but I knew I couldn’t make felt flower pins for him.

He needed something cool, something quick, and something totally big-guy.

And what better backpack bling for a rising Kindergartener than Mario Brothers Shrinky-Dinks?

I’m not talking store-bought, super-expensive Shrinky-Dinks, either; I’m talking we searched for images that the kids liked, we saved them onto a file, and we printed them onto special Shrinky-Dink paper.  And we also searched for characters that the kids wanted to color.  We added them to the mix and they beautified them with colored pencils.

And they really turned out shrinky-dink adorable. (I mean really cool-dude smooth.)

But I bookmarked a post by my friend Christy of Superheroes and Princesses waaaay back when, and we just used her idea today. So thanks, Christy, for the inspiration!

Here’s the skinny:

  • Blingin’ the Backpack, Boy-Style: I like to send my kids off to school with a little something special, something that they like, something that will make them smile.

I like to help them bling out their backpacks.

Maddy colors a Toadette. . .

I’m sure that it’s not going to happen much longer with Owen, but he was game this year, so I ran with it. But I knew that I had to play on his faves in order for him to be even a little bit interested, so I asked him–while we played a few rounds of Word Feud: Hey Owen, if you were going to have any kind of character on a keychain, who’d you want?

He thought for a few minutes and said, Probably somebody from Mario Brothers or Mario Kart.

Cool. Like who’s your favorite–your absolute number one Mario guy?

Uh, Koopa Troopa or maybe Funky Kong.

Great. Thanks.

. . . and Owen twirls his Koopa Troopa on his colored pencil.

So, I, being the totally-hip mom that I am–down with everything cool for Kindergarten--searched for some Koopa Troopa and Funky Kong images, and I saved them on my computer in one document.

(The Shrinky Dink images are here if you’d like to use ours!)

Then I did the same sort of shady, top-secret character inquiry with Maddy and Cora.

They, oddly enough, answered me without hesitation or question about why I asked, but they gave me Mulan, Hannah Montana, Pocahontas, Toad and Toadette (from Mario Bros), Princess Peach, and My Little Ponies.

I added their faves to the document, and I lightened the colors (according to the directions, you need to do this with photos).


Cora grabs her (twisted–waaaah!) Toadette.

Then I called everyone to the computer to tell them what I was doing: Remember at the craft store when we picked up that special Shrinky-Dink paper? 

(They did.)

Your totally amazing mom found all of your favorite characters–and we can print them on Shrinky Dink paper, color the ones that are blank, shrink them, and add them to your backpacks this year. HOW cool is that?!

Shrinky Dinks: cooled and sprayed and ready for backpacks!


They agreed that it was pretty. darn. cool.

So I printed out the images on the special paper.  We used Shrinky Dinks for Computer InkJet Printers and Shrinky Dinks Frosted Ruff N’ Ready sheets for coloring. They were not cheap, but I had a coupon, which at craft stores equals big savings.

We cut out the images, the kids colored them with pencils, and we punched a hole in the corner of each Shrinky Dink. And then we placed them on brown paper, on top of a cookie sheet, and we baked tho

se puppies (probably a little too long).

I tried to flatten gently–according to directions–but it was hard because we had put so many on the tray.

Woot! Mario rockin’ Owen’s backpack–

Some shrunk down perfectly, but others got crazy and twisted, which I think is cool but which sent Cora into mad tears. I explained it was our first time, that sometimes it takes many tries to get something right, and that we can make more tomorrow, but it didn’t help.

We sprayed them with sealer, let them try, and headed off to Baltimore for the afternoon.

Later in the day, when I was ready to revisit our Shrinkies, I put a pipe cleaner, about 3-4″ long, through the hole of each one and twisted them into the zippers of the kids’ backpacks and lunchbags. They looked so cool.

I think I may be in love with Shrinky Dinks.

I may make Maddy, Owen, Cora faces and hang them on a necklace.  Or something.


And that’s that–just a little bit of fine-motor, creative-thinking, coloring, Shrinky Dink, backpack-blingin’ fun before school begins next week.  Here’s to a happy 2011-2012 school year!

Love, love, love this simple and adaptable-for-anything idea and seriously may be Shrinky Dink obsessed this year. Watch out.

August 25, 2011 8 comments
0 FacebookTwitterPinterestPocketEmail
writing

meeting new teachers: hello, teacher notes!

by Teach Mama August 16, 2011
written by Teach Mama

Today we spent a few minutes doing one of our favorite back-to-school activities–one that gives my kiddos a chance to say a little ‘hello’ to their teachers even before they meet them at the Open House.

A while after breakfast and after we all enjoyed some much-needed end-of-summer downtime, I printed out Hello, Teacher Notes for Maddy, Owen, and Cora.

It was a gorgeous morning, so I thought it would be perfect for a slow walk up to the school to deliver the notes before we crammed in a front-yard, clean-out-the-fridge picnic and an afternoon pool trip.

Here’s the note-writing skinny:

Meeting New Teachers with Hello Teacher Notes:

We sat down at the dining room table, sharpened pencils in hand, and we got rolling.

Owen and Cora used the same template, the Hello Teacher Note. It has a spot for kiddos to add a tiny picture of themselves and to write their name and birthday (because kids need to know their birthdates!).

The Hello Teacher Note also have spaces for kids to write their favorite food, sport, animal, book, holiday, and activity.

hello teacher notesOwen works on his Hello Teacher Note

As Owen wrote, we talked through the spelling of the words he didn’t know. I’d say something along the lines of, Okay, Owen, what’s your favorite food? 

hello teacher notes

He’d think for a minute or so and give me his answer, and I’d say, ‘Hot dogs’ are your favorite food.  What sound do you hear at the beginning of ‘hot dog’? (He’d tell me.)  You got it. And what letter makes the ‘hhhh’ sound?  Right–‘h’.  So we spell ‘hot dog’ with an ‘h’, then an ‘o’, and what sound do you hear at the end of ‘hot’? Yes, my friend. ‘Tttt’ and ‘t’ makes the ‘tttt’ sound. Hot is spelled, ‘h-o-t’.

We walked through the Hello Teacher Note with this kind of shared writing, with me writing the words on a sheet above his and giving him the difficult sounds. My focus was to have him isolate and identify the beginning and ending sounds of the words.


With Cora’s note, I really just had her write her name, and I wrote as she dictated.  She was happy to be able to write her name on her own while we talked about her favorites.

I really was glad that she has reached a point where she’s comfortable–and confident–writing her name. Woo-hoo!

hello teacher notes

Maddy’s finished Hello Teacher Note–my soon-to-be second grader!


I made Maddy’s note a little bit different, since she’s heading to grade two–the bigger leagues.  I wanted Maddy to have more ownership of the note and to respect the fact that she is becoming a stronger writer and more creative thinker.

The Hello Teacher Note, grade two has a spot for a photo and a place for the child and teacher’s name, but instead of a quick favorites fill-in, it has lines for a short note. Maddy wrote something along the lines of,

hello teacher notes

Dear [teacher’s name],

My favorite things are [favorite food], [favorite sport], [favorite animal], and [favorite holiday].  I am excited for school to start!

Love, Maddy


She used the fill-in’s on Owen and Cora’s notes as a guide, which was fine with me. I didn’t have her do a rough draft and a final, but I did have her re-check the spelling of some of her words before she put it into an envelope.

And really, she didn’t stretch her brain like I’d hoped, but she did write the note without complaint, which really, is all I can ask for some days.


hello teacher notes Cora mails her Hello Teacher Note to her new teacher–exciting!

When everyone was finished, they folded their notes and put them in envelopes, writing the teacher’s name on the front. I wrote the address to Cora’s preschool on her envelope, added a stamp, and she sent it on its way.

We walked up to the school to put Maddy and Owen’s notes in their teachers’ mailboxes, and we headed back to the homefront for one of our last lazy days of summer.

And that’s it–a little bit of sneaky learning, happy back-to-school style!

Do you want the notes to download for yourself? 

Here you go!

hello teacher note | teachmama.com

Hello Teacher Note, K: hello teacher note g K 2011


hello teacher note | teachmama.com


Hello Teacher Note, Maddy grade 2: hello teacher note gr 2 2011

ALL of our Hello Teacher Notes can be downloaded here:


Check out a few other posts that may help you develop strong and healthy habits for your family:

  • wait time
  • my day, your day
  • frozen peas
  • kids who rock the kitchen
  • kids who rock the laundry
  • rest time
  • gem jars
  • arm circles
  • noticing kids
  • homework routine


August 16, 2011 11 comments
0 FacebookTwitterPinterestPocketEmail
Backyard Water Fun
family lifeoutdoor activities

Easy, Frugal, Backyard Water Fun

by Teach Mama July 30, 2011
written by Teach Mama

It’s H-O-T.  Hot, hot, Hot with a capital ‘H’.

I know I’ve been a total complainer, but I really don’t care.

So rather than complain any more, I thought I’d just skip to some of the fun–inexpensive–things we’ve done that involved water, since we’re rounding out the Water Fun Smart Summer week.

Sure, these are mostly fun and silly activities, but they involve water. And lately, around here, any reason to hang around some agua is a good one in my book, learning or no learning involved. . .


Here’s the skinny:

  • Pet Rocks: Who doesn’t LOVE Pet Rocks??! Find rocks.

 Clean them.


 Make them into the easiest pets you’ll ever have.

  • Pimp that Cozy Coupe: It’s sitting in your back yard, and it’s probably so sad-looking.

Double hand-me-down from two different neighbors, so make him happy.  Your kiddo and the coupe.


Pimp that Cozy Coupe!


And while you’re at it, Beautify that Baby Slide!

  •  Water Painting: The hotter the sidewalk, the quicker they have to write!  They write, and you guess the word–and then switch!

All you need is water and brushes. . .

 . . . and words, letters, or numbers to paint!

  •  Clean Toys, Play with Bubbles: Gather all of the pieces to the tea set, all of those Matchbox cars that’ve spent the spring outside, and let the kids clean ’em.

Then find all of the medicine droppers you used for infant medicine, and let the kids play with them!

Water droppers double as toys.

 And toys need to be cleaned.

  • Sneeeeeaky Backyard Learning: While you and your kids are watering the flowers, cleaning the toys, or just playing in the hose, these ideas will maximize what little time you do spend out back this weekend.


  • Water-Happy Cupcakes: For any summertime party, these Teddy Graham Bears have never been happier than they are having fun in the sun!


Week #6 of our Smart Summer Challenge starts tomorrow–so I’ll share some cool ideas for you to rock your way through this last exciting week.

But you can still link up your Week 5 Smart Summer Challenge ideas. You have ALL week–until late Thursday, August 4, 2011, to link up your ideas to win last week’s prize. SO worth it–so take a second and share your ideas for a chance to win $200 from Guidecraft!

We’re now only one week away from our HUGE giveaways which I cannot wait to share.  Please check out the skinny on our Smart Summer Challenge, the 6-week fun summer learning campaign I’m running with Candace and MaryLea, where we’re challenging all parents to do what they can to throw in a little bit of fun learning every day (or as often as they can!). And seriously–summer reading counts!! So link up your ideas through the whole week and win prizes.  That’s how much we love our readers and value summertime learning!

July 30, 2011 1 comment
0 FacebookTwitterPinterestPocketEmail
Quick and Easy Ice Experiment
outdoor learningscience

Ice Experiments: Quick and Easy (And On Our Driveway)

by Teach Mama July 26, 2011
written by Teach Mama

Lots has been going on over here this week, but the most exciting news has been the break in the heat.

Finally we’re able to get out and enjoy the sunshine a bit–and see what it can to ice on a 95-degree afternoon!

So after we came home from a local summertime fair, we took a few minutes to see what would help a few ice cubes melt faster–paper, foil, plastic, glass, or concrete.  In the spirit of Water Fun Week of our Smart Summer Challenge, it seemed to fit right in!

We had been talking about ice earlier, after I put a handful of cubes into Brady’s water bowl but wouldn’t let him take one out of the kitchen.  I don’t want a huge puddle of water on the living room floor, so keep Brady in the kitchen until the ice cube is gone, I said.

Cora asked what made it melt, and I told her that heat made the ice melt–but I thought I’d have her see for herself.

Here’s the super-quick, Smart Summer skinny:

  • Ice Experiments — Quick, Easy (and On Our Driveway):  This was no huge scientific experiment, don’t get me wrong. It was quick, and on the fly, and all I wanted was for Maddy, Owen, and Cora to see firsthand how ice melted on different surfaces.

I grabbed a piece of paper, a paper plate, a plastic plate, a glass bowl, and a piece of aluminum foil.  I put a few ice cubes in a bowl and we all went outside.


our ice experiment


The only spot of sun in our front yard was on the driveway, so we set up our experiment right smack dab in the middle of the driveway.

Cora put two ice cubes in the aluminum foil, two on the paper plate, two on the plastic plate, two in the glass bowl, and we had two left.  We put those last two on the driveway.

I said, Okay, my friends. We’ve got two ice cubes on the foil, two on the paper plate, two on plastic plate, two in the glass bowl, and two on the driveway.  What is your prediction–where do you think the ice will melt fastest? Think for a minute and let me know.

Cora called out, The driveway! It’s so hot on the driveway, and I think it will make ice melt fast. It’s already very, very hot.


Who’s prediction would be correct?


Maddy said, Maybe the metal will make it melt–metal gets hot the quickest. And I think that foil is like metal.

Okay, let’s see. We’ll check back in one minute, then five minutes, then ten minutes. And each time, we’ll see which is melting the most.

 Cora checks on our ice cubes. . . and the driveway was well ahead of the other spots.


We hung around out front for a bit, watering flowers, picking up the mail, and playing with the hose.

Owen made a river down the driveway, and Maddy and Cora set their stuffed animals in the tree.

Before we knew it, about five minutes passed, and we checked back with our experiment. Maddy, Owen, and Cora decided unanimously that the driveway was winning, then the foil, then the glass, followed by the plastic, then the paper.

And that’s really how it ended up–the hot driveway one hands down.

I asked them why they thought it made the ice melt fastest, and they said Cora was correct–that the driveway was so, so hot from so many hot days, that the ice cubes started melting from the beginning, compared to the other surfaces.  And they were right on target–go, Cora!

And that’s about as far as we got with the day’s Smart Summer learning-the kids got hungry, it was lunchtime, and they saw the ice melt–right on their very own driveway. Better there than on my living room floor!

Remember, it’s week 5 of our Smart Summer Challenge! You have ALL week–until late Thursday, July 28, 2011, to link up your ideas to win last week’s prize. SO worth it–so take a second and share your ideas for a chance to win BIG from LeapFrog!

We’re now only one week away from our HUGE giveaways which I cannot wait to share.  Please check out the skinny on our Smart Summer Challenge, the 6-week fun summer learning campaign I’m running with Candace and MaryLea, where we’re challenging all parents to do what they can to throw in a little bit of fun learning every day (or as often as they can!). And seriously–summer reading counts!! So link up your ideas through the whole week and win prizes.  That’s how much we love our readers and value summertime learning!

July 26, 2011 2 comments
0 FacebookTwitterPinterestPocketEmail
learning during read-alouds: making connections and questioning (with siblings!)
comprehensionconnectingreading

Learning During Read-Alouds: Making Connections And Questioning (With Siblings!)

by Teach Mama July 25, 2011
written by Teach Mama
post contains affiliate links


We have been putting in a lot of pool time lately, but we’ve also been spending a boatload of time indoors–staying cool in the comfort of our ac, eating popsicles and ices, playing games, Wii, and reading.

Even though Maddy, Owen, and Cora often play well together, a ton of at-home time also opens up opportunities for bickering, arguments, and fighting.

So when I saw Kevin Henkes’ book, Julius: The Baby of the World, with a cover illustration of Lilly making a scary face at the baby in the bassinet, I thought it may open up some good, old-fashioned conversation about sibling relationships and allow us to do some questioning and connecting.

It was perfect.

Not that Maddy, Owen, and Cora’s relationship is now perfectly perfect–it’s not, and please don’t get me wrong. But it was a worthwhile conversation and some meaningful connecting during the read-aloud.

Here’s the skinny:

  • Making Connections & Questioning (With Siblings!): Julius: The Baby of the World focuses on Lilly, (yes! Lilly of Lilly’s Purple Plastic Purse!) and her feelings toward her new baby brother, Julius. Before Julius is born, she loves him with her whole heart. But after Julius arrives, she is nasty, unkind, and hateful towards him. Her parents try everything they can to change her feelings–from punishing her to showering her with love and attention–but nothing works. Nothing works until Cousin Garland is unkind to Julius; then Lilly becomes his biggest fan and most fierce protector.

We sat down with a pile of new library books, and Cora chose Julius–.   No one had ever read the book before, so I started with some simple–quick!–questions:

  • What is going on in the cover illustration?
  • Why would a little girl do something like that to a new baby?
  • How do you think the baby feels?
  • How do you think the mommy and daddy feel?

Then we started reading. And the minute I read: After Julius was born, it was a different story. Lilly took her things back.  She pinched his tail and she yelled insulting comments into his crib, I stopped.


My kids looooove to hear about times when kids are naughty or misbehaving. So they were hooked from page two of this book.


Maddy, Owen, and Cora were silent. They knew that Lilly’s behavior was inappropriate, unkind, and nasty.  And like many kiddos, my kids love to read or hear about naughty kids.

I said, OH. MY. GOSH. I cannot believe this. I have never seen Lilly act so unkindly, and I’m totally confused. Why would her behavior have changed so quickly?  I asked:

  • How do you think she feels? 
  • When have you felt the same way that Lilly feels–jealous, confused, upset?
  • How do you think baby Julius feels?
  • Can you think of a time when someone else was unkind toward you?
  • What did you do?

 We asked questions, made connections, and talked about being kind toward each other.


We read on and talked about these same topics, briefly, and now and again, I’d ask:

  • Lilly is being so rude toward Julius. What would Daddy or I do if you acted this way towards each other?
  • What do you think Lilly’s mom and dad should do?
  • What else could Lilly do instead of [banging on instruments; scaring Julius; telling a nasty story]?

The kids were really into this story, so I tried not to stop too often or for too long. They were totally curious about how this was possibly going to end.  And honestly, so was I.


Lilly changes her attitude towards Julius. . . and we were so happy!

Finally, towards the end, when Lilly’s feelings turn from anger towards Julius to anger towards Cousin Garland, Maddy, Owen, and Cora were sitting with eyes wide open.  As soon as I read, ‘Lilly’s nose twitched. Her eyes narrowed. Her fur stood on end. And her tail quivered’ I asked:

  • You are all siting here with your mouths open. What’s on your mind?
  • Why did Lilly change her feelings toward Julius?
  • Have you ever felt protective towards a friend or each other?
  • Why is it super important for us to stand up for each other and for our friends?
  • What do you think will happen now? How will Lilly and Julius’s relationship change?

And on the last page, when Lilly makes Cousin Garland scream, ‘JULIUS IS THE BABY OF THE WORLD!‘, we were all smiling.  Big.

I didn’t make a big deal about how much better we feel when we’re kind toward each other, when brothers and sisters and friends are loving and kind toward each other. All I said was, I feel so much better looking at this last illustration of Lilly and Julius than I felt when I saw this cover picture. 

And everyone agreed.

Super book, Kevin Henkes. Thank you, thank you, thank you.

And that was our super-sneaky summer learning for today. . . here’s to hoping this heat breaks and that we can get back outside, play a little with our buddies, and have some outdoor fun.

Talk about some sneaky smart summer learning!

Welcome to Week 5 of our Smart Summer Challenge! You have ALL week–until late Thursday, July 28, 2011, to link up your ideas to win last week’s prize. SO worth it–so take a second and share your ideas for a chance to win BIG from LeapFrog!

We’re now only one week away from our HUGE giveaways which I cannot wait to share.  Please check out the skinny on our Smart Summer Challenge, the 6-week fun summer learning campaign I’m running with Candace and MaryLea, where we’re challenging all parents to do what they can to throw in a little bit of fun learning every day (or as often as they can!). And seriously–summer reading counts!! So link up your ideas through the whole week and win prizes.  That’s how much we love our readers and value summertime learning!

Check out:

  • learning during read-alouds: visualizing.
  • making connections– with poems we love
  • super-important inferring during read-alouds
  • help with letters b and d
  • time to rhyme–go fish!
  • putting the pieces together–story repair
  • every picture tells a story
July 25, 2011 8 comments
0 FacebookTwitterPinterestPocketEmail
kindergarten school supplies
family lifeschool

Getting Ready For Kindergarten: Summertime prep

by Teach Mama July 16, 2011
written by Teach Mama

children's section of the library

We’re almost exactly at the mid-summer point, and before we know it, the new school year will be upon us.

What can families do this super-important summer before Kindergarten?

How can we prep our rising Kinders for this big year?

So with my sweet Owen heading off to the wilds of Kindergarten this year (wah!),

I thought it would be worthwhile to share a few things we’re doing over here to get our big man ready for his first year of elementary school.

This isn’t a list of terribly involved, time-consuming activities; rather, these are little things that we try to sneak in now and again to make learning fun and to get him started on the right foot. There seems to be a big discrepancy between what some parents think that kids need to know before they start school; some think that kids have to be reading fluently so they prep, prep, prep and practice, practice, practice while others leave all of the ‘teaching’ up to teachers and don’t even talk numbers or letters with their kiddos.

It’s up to us to find a happy, comfortable place somewhere in between so that we, as parents, feel good walking our child to school or putting him on the bus that first day, and he feels comfortable, and confident, doing the same.

Here are just a few things that you can do now (yes, right now, like immediately after you read this) to get your child ready for kindergarten:

everyday name booksThe Everyday Name books are just one way we celebrate–and practice!–names around here.

Practicing name writing:

Kids should be able to write their names by the time they get to kindergarten. Really. Kids are 5 or 6 by the time they hit elementary school, and many have been in preschool or daycare for a year or two before that.  That’s a lot of time for practicing the few letters that make up a child’s name.

The writing doesn’t have to be perfect, but it should be legible. Most likely on day one, kiddos are going to be asked to write their names, and what a confidence boost for a nervous child if he’s able to do it!

Do this by: Starting an Everyday Name Book; playing with names, playing with family names; finding any and every excuse to write names!

Talking about letters–and identifying them and knowing their sounds

There are tons of ways of playing with the letters of the alphabet, and by kindergarten, children should be able to identify most–if not all–of both uppercase and lowercase letters.

child writing sight words on bingo board

Sure, they’ll learn all about letters throughout the kindergarten year, but it’s important to make sure that children are able to identify of most of the letters so that they can focus on learning the sounds they make–often this is the more tricky part.  But we can help them learn letters, and we can do it in really fun, sneaky ways.

Do this by: Doing ABC Hunts; playing clothespin games with letters; putting letters on lids, play alphabingo; playing some alphabet board games; exercising with ABC’s; going on a backyard alphabet hunt; doing an on-the-road (or at the grocery store or anywhere) alphabet hunt.

Rockin’ some sight words

Many school districts suggest that parents even start some sight word practice with their rising kindergartners before school starts, and I think it’s a really great idea. Most children know that when they go to kindergarten, they’ll learn to read. And learning sight words–the words that are best learned by memorizing because they need to be recognized quickly and automatically (and because many don’t follow phonics rules!)–can be a confidence booster just like learning how to write names can be.

But the days of standing in front of a child flipping flashcards and making them read them for you are over. There are a ton of cool ways that kids can start practicing–and learning–these words that trump the ole ‘drill-and-kill’ methods.

Do this by:  Taking out the magnetic letters and using them for building sight words; using sight-word word searches; making wiggly words; writing sticky finger words; playing sight word Go Fish! or Memory; playing WORDO!; or check out a ton of other cool ways to play with sight words.

child counting items in a box on a piece of paperNumber Boxes are a great way for kids to connect numerals with quantities.

Playing with numbers

We will do a lot of number-playing this summer, in card games, in street sign games, and in simple pool-snack-bar addition, but it’s really important for our kids to be exposed to math concepts and have a general number sense before kindergarten.

child holding weather section of newspaper

Counting during walks, lining up Lego guys and counting them as you add them to the bridge you just built, or something as simple as timing how quickly ice-cubes melt in the sunshine all helps build a solid mathematics foundation in our kiddos.

Do this by:

  • Including math in your everyday activities or newspaper reading;
  • counting money and skip counting;
  • playing with numbers and number words;
  • pulling out the ole grid games;
  • reading some math-poetry;
  • playing with number boxes.

Reading, reading, reading

We really cannot read too much to our kids. We can’t. Reading can–and should–be done throughout the day, in a number of ways and not just reserved for before bedtime when everyone’s beat and you can hardly keep your eyes open.

We–as parents–need to show our kiddos that we don’t only read our friends’ and family members’ Facebook updates; it’s our job to demonstrate to kiddos that we read instructions so we can put together that bookshelf from Ikea, we read the newspaper so we know what’s going on in the world, and we read recipes so we know how to make Nanny’s awesome zucchini bread.  And probably most importantly–we need to show our kids that we read for pleasure. We read to relax, we read for enjoyment.

We want them to get psyched for kindergarten and learning to read because then. . . then the world is open to them and they can learn about anything and everything they want!

Do this by:

  • Reading, reading, reading. Reading the newspaper.
  • Reading street signs, reading cereal boxes, reading the words on their Wii games.
  • Making reading fun.
  • Talking about words and celebrating words.
  • Throwing in easy, natural reading strategies during read-alouds.

The Shoelace Box–or Ribbon Rows–no matter what you call it, it works.

Tying shoes (and zipping and buttoning)

Yep. Kids should start learning how to tie shoes, zip zippers, and button buttons. and though most are wearing flip-flops or crocs right about now, they’ll be wearing sneaks soon–and they’ll feel great if they can tie those pups themselves.

It was Owen’s goal last summer–but it only happened recently, and with a lot of practice–that he learned how to tie his shoes on his own. It’s not easy for many kids, and it takes practice. But it may be a great summer rainy-day activity in the next few weeks. . .

Do this by:

  • Making a shoelace box.  Though Maddy taught herself on her dolls’ clothes and by wearing dress-ups, Owen used the shoelace box for about four weeks this winter and spring, and he finally got it. His ties aren’t perfect, but he can (almost) do it on his own.
  • When it comes to zippering or buttoning, have your child practice by zippering or buttoning the sweatshirt that you’re wearing so she sees how it works more clearly than when she tries to zipper or button the one wearing the sweatshirt herself.  Yours is bigger, too, so that sometimes helps.

little child holding up the circles of 'me on the map'
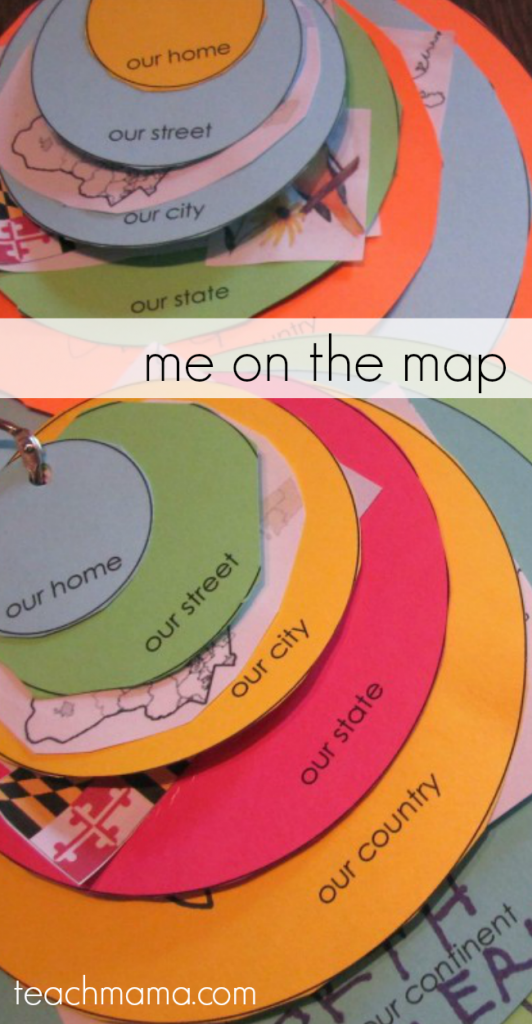
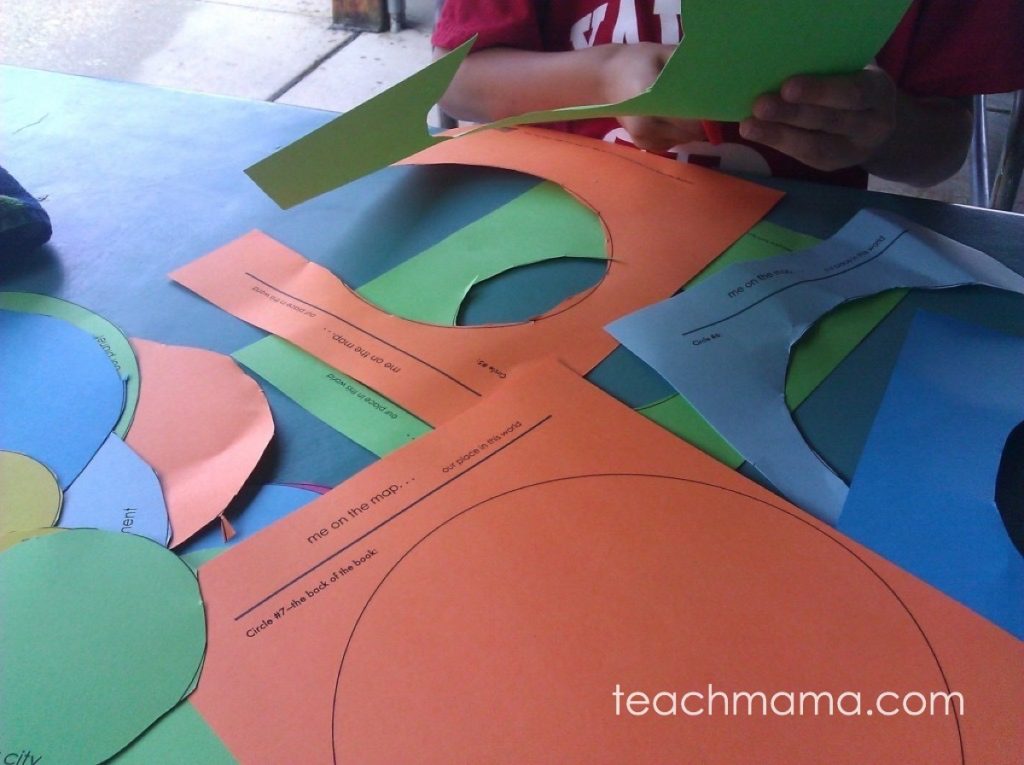
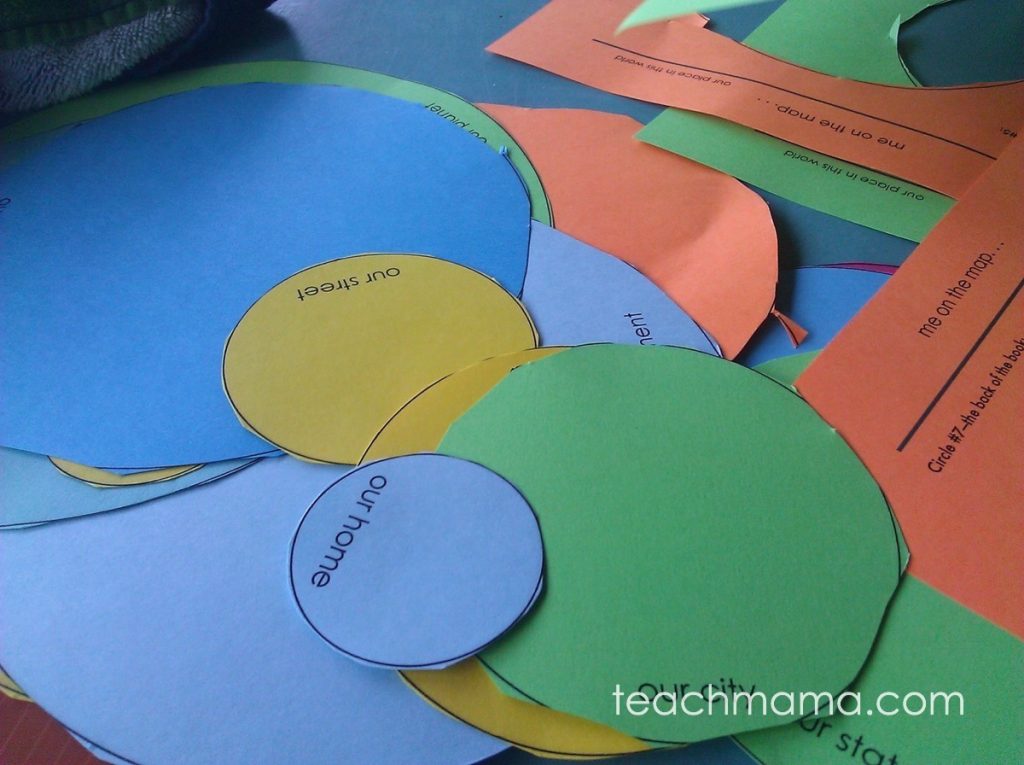
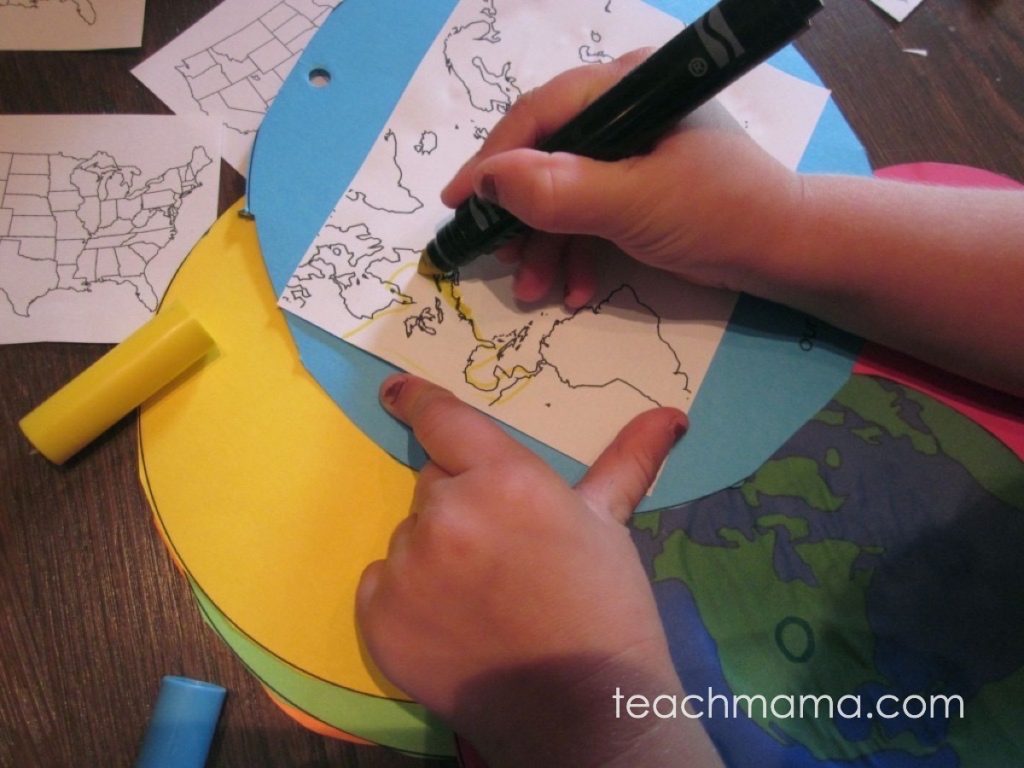
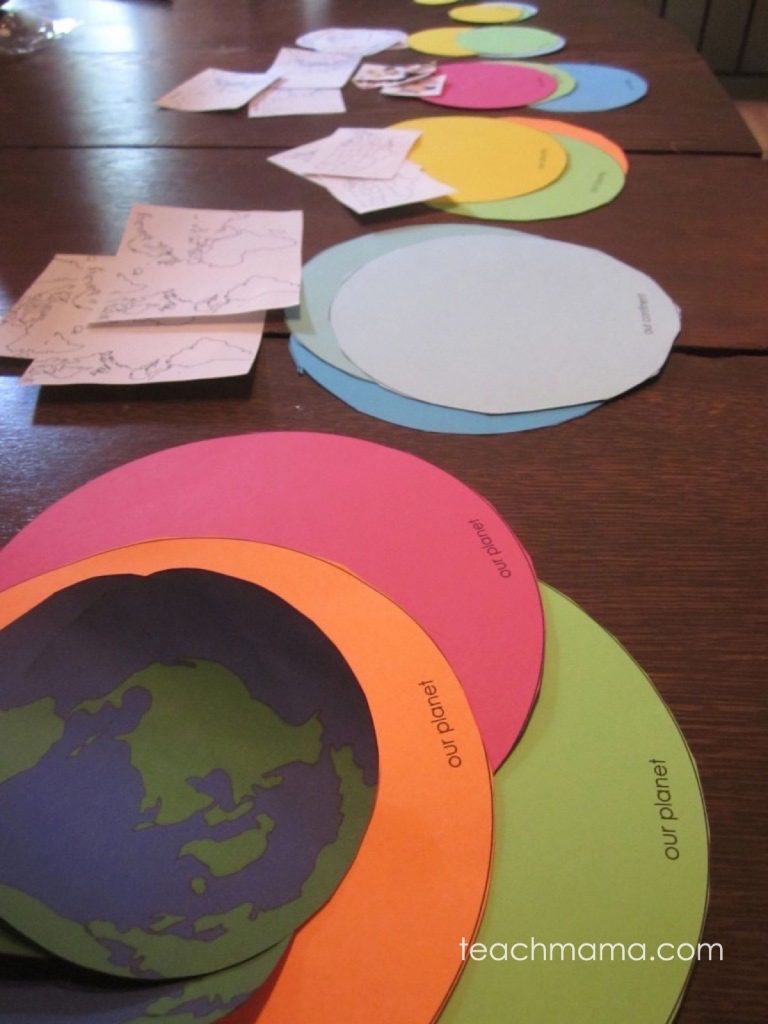
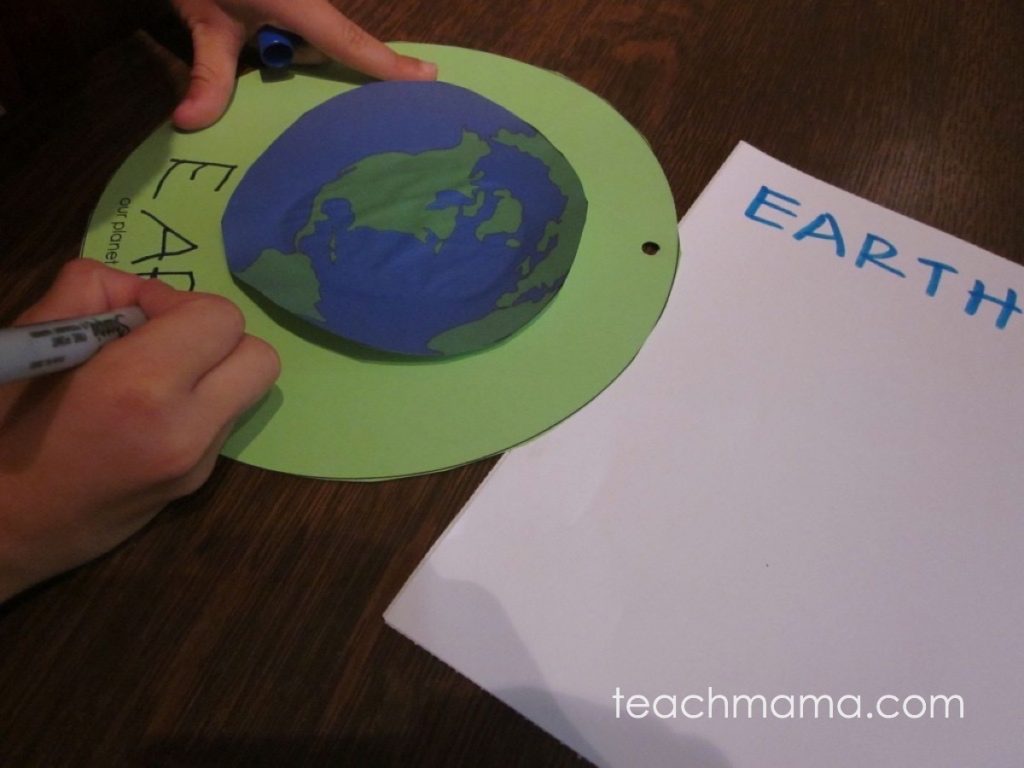
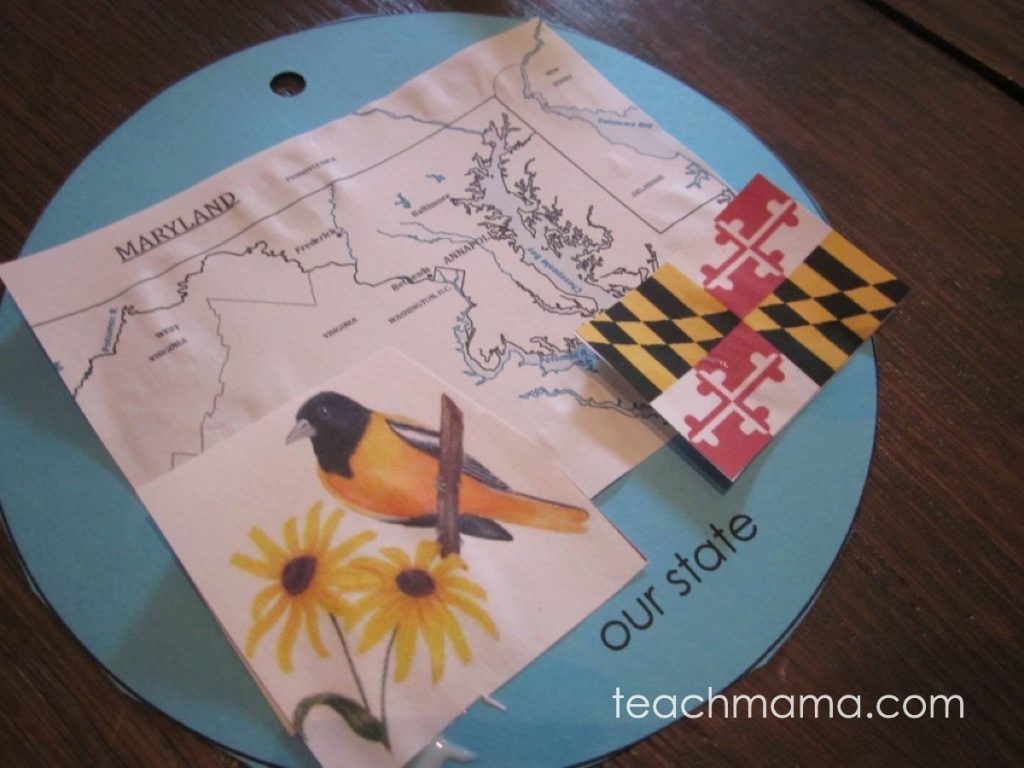
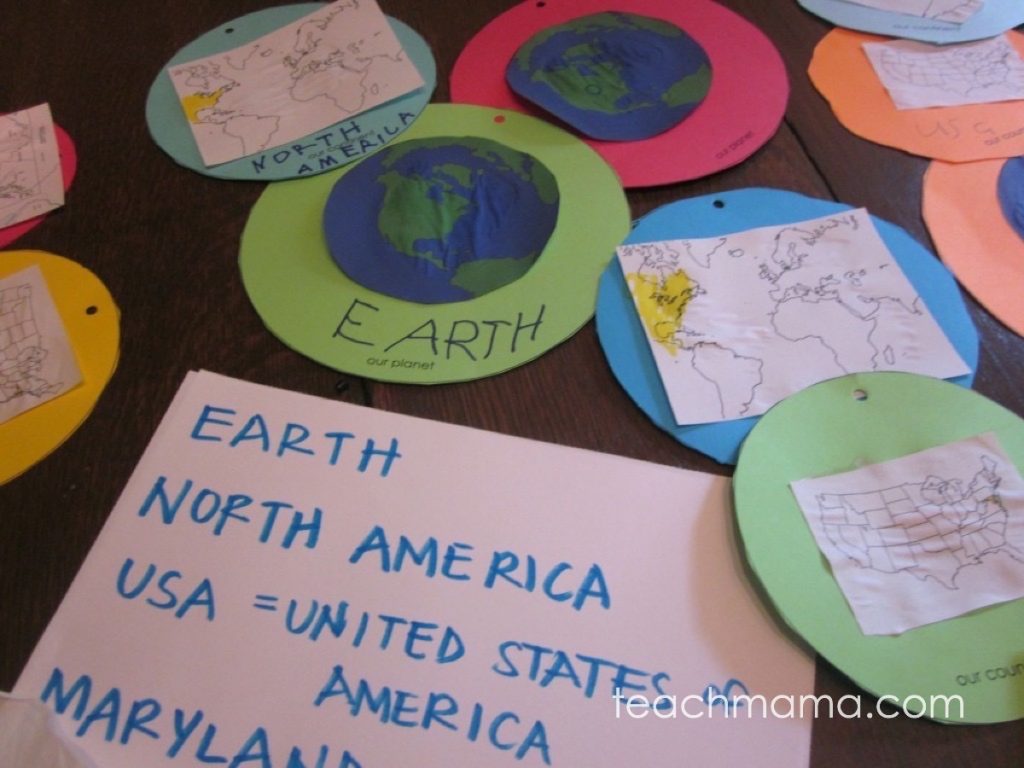
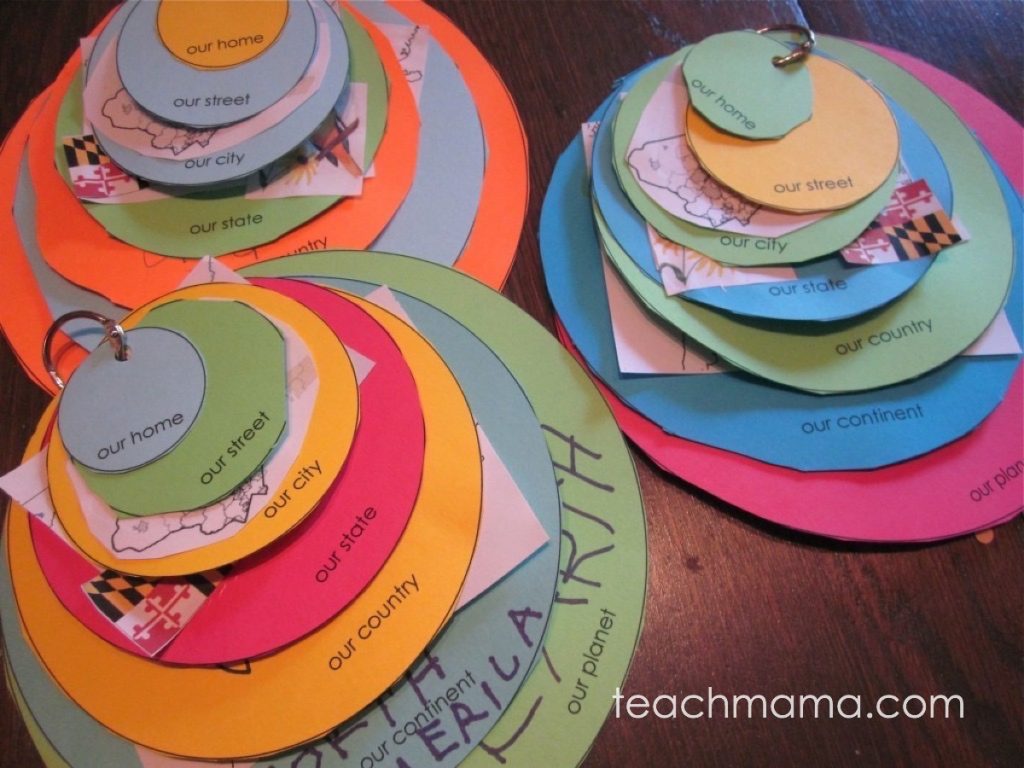
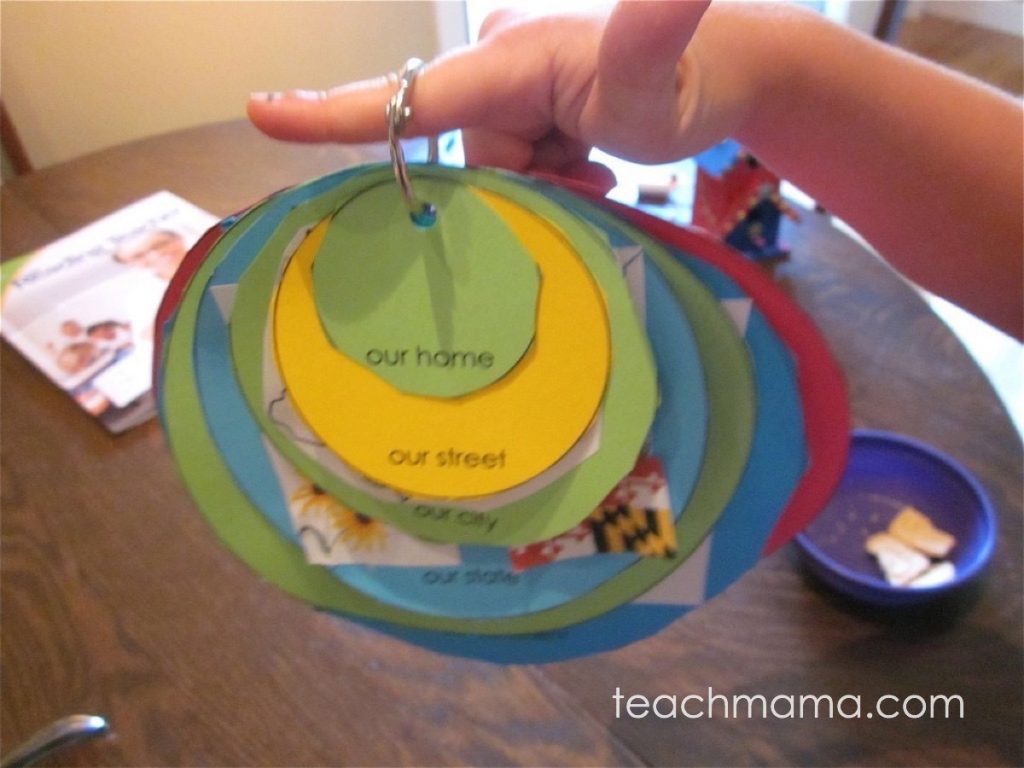
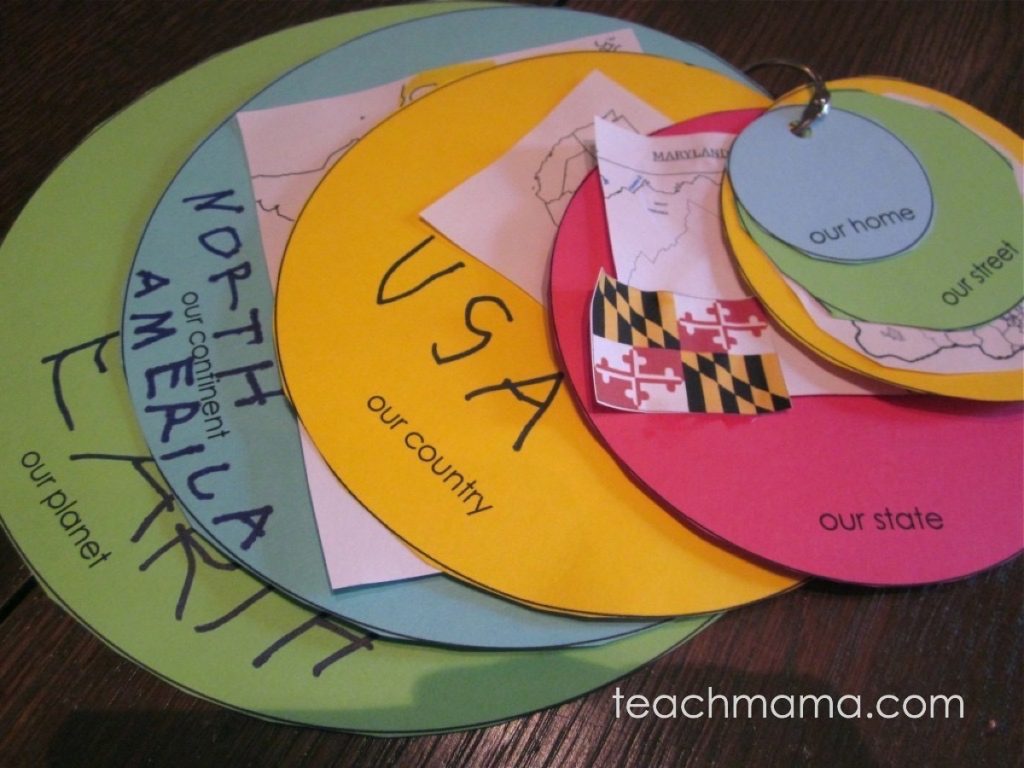
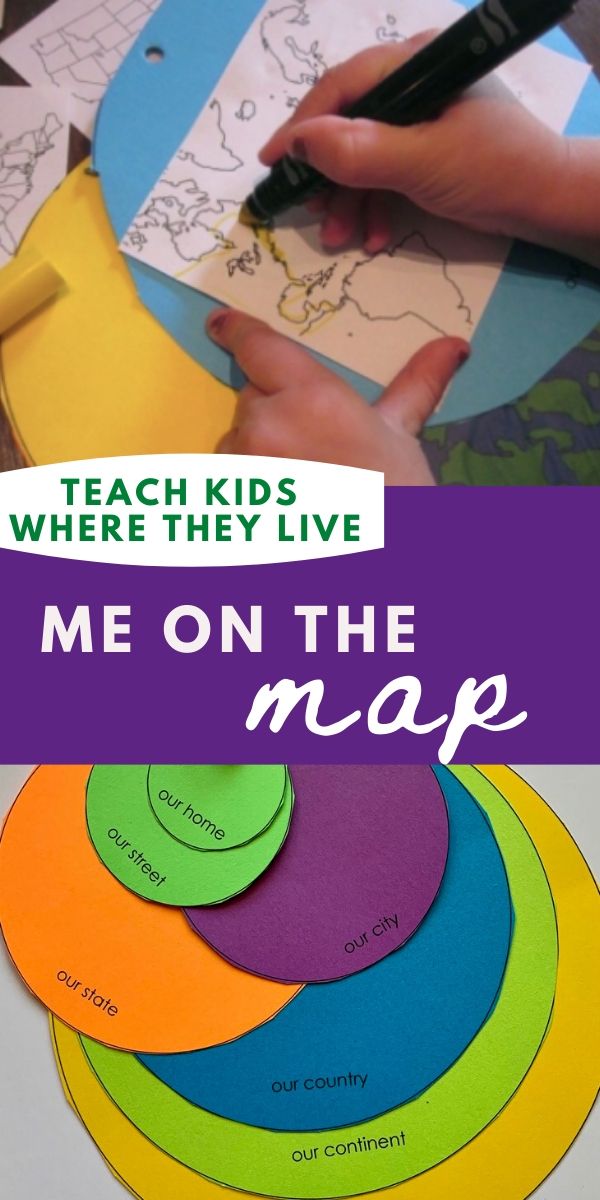
Me on the Map may help kiddos learn their stats.

Memorizing their info–full name, phone number, and address

Kids should know their stuff by elementary school.  If they don’t know their whole name–first, middle, and last–then start on that pronto! They don’t need to spell the whole thing (that would be nice . . . ) but your child needs to know that he’s Travis J, or Travis Johnson, not to be confused with Travis K, Travis O, or Travis W.

Okay, so the phone number and address are a little more difficult, and admittedly, I’m not sure that Maddy knew ours when she went to kindergarten. But Owen will know his, because I’m now a much older and wiser parent (not really).

Do this by:

  • A good friend of mine taught her girls to memorize their phone number with this song, set to the tune of Frere Jacques (Are you sleeping, are you sleeping? Brother John. . . ):

1-2-3, [Insert your own phone number for these–]

1-2-3,

4-5-6.

4-5-6.

7-8-9-10,

7-8-9-10,

Call any time. [I can’t remember if these are the words she used, but these are the words our family uses.]

Call any time.

  • The address? The only thing we’ve done is the Me on the Map activity, but aside from that, I don’t have a trick for learning addresses. But I know that we talk more about it than we did with Maddy, and even if Owen doesn’t know our exact number, he at least knows our street name.

Talking about stranger safety:

Ugh. I totally despise this ‘life lesson’ but it has to be taught–over and over and over.

Do this by:

  • Watching The Safeside: Stranger Safety DVD with the kids and being informed myself was all we did, have done, and plan to do with Owen.

pink lunchbox with flower pinned to it

Eating lunch out of a lunchbox:

Many kids do this at preschool before they hit the big K-year, and Owen’s preschool included. But when his new lunchbox arrives, I’ll pack it–just like I will for the first day–and we’ll have a picnic somewhere.

Do this by:

  • Packing his lunch in his brand-new, just-for-kindergarten lunchbox and picnicking somewhere!

Blingin’ his backpack

I have read that it’s not wise to get backpacks monogrammed with kids’ names because then it’s easier for a stranger to call their name and lure them way.  I don’t remember where I read it, and don’t mark my words.

So rather than make a huge, fancy name-plate for new kindergartners, I do think it’s important to personalize their bags a bit.

Do this by:

  • Making something simple and fancilicioius, like the felt flower pins we made for Maddy, or make it a little more subdued.
  • My plan for Owen is to make some shrinky-dink bling like my friend Christy, of Superheroes and Princesses, did waaaay back when her son went to kindergarten.

Saying ‘Hello’ to his teacher

We’ve done this every year since Maddy started Kindergarten, and the kids love it–and I think the teachers do, too.

It’s just a quick introduction–nothing fancy or involved–between student and teacher before Open House, Back-to-School picnic, whatever.

Do this by:

  • Sending Hello Teacher Notes to the new teacher.  We’ll find out Owen’s teacher pretty soon, so once we do, Owen will write his letter which tells the teacher a little bit about him, and he’ll send a blank one to the teacher. She (or he) will complete the letter (some quick one-word answers–I know teachers need a summer break!), and she (or he) will use the stamped envelope we provide to send the response back to us.

little kids swinging on swings on backyard playsetLet them play, let them play, let them play. With new friends and old.

Hanging with friends

It’s so important for kids to have at least one familiar face when they walk into the building, but I am well aware that that is not always possible.  I do know though, that at this point in time, so many communities have online message boards that help with the organization of a summertime playdate.  So take a second, sit down at the computer, and do a little research!

Do this by:

  • Post a park playdate event on a community message board, something along the lines of: Let’s get the Bayside Elementary School 2011 rising kindergartners together!  Plan to meet at [this park] on [this date] at [this time].  Bring snacks! Bring outside toys! Siblings welcome!!  Any questions, please contact [your email].
  • And be sure to stop by the grocery store for some cheap freeze pops if you can and bring paper and a pen so you can gather everyone’s contact information for the next park playdate.
  • Or post a sign at your community pool or the library or wherever.  You can meet at the library, or just meet with some of the parents the first time, or send a note to your MOMS Club or church or even the counselor at the school could possibly help connect you to a person who may be able to help you.

dandelions in grassy field

Giving him jobs:

Having kids listen to verbal directions–and then follow them–is super-important for success in school.   I have no secrets as to how we get our kids to follow directions (they don’t always, believe me), and my husband and I are perpetual students in this parenting gig–learning every single day.

For us, Gem Jars have worked and Game Time Tickets have worked as incentives for listening and being respectful. But it’s uber important to give kids specific tasks with clear directions so they practice those listening skills.  Maybe it’s not always a ‘Get in there and clean your room‘, ‘Hang up those wet towels!!’ or a ‘Please turn off the light‘– maybe if we occasionally throw in a ‘Please make yourself–and me–a huge bowl of ice-cream‘ or a ‘Will you please teach me how to play Mario Kart?‘ they’ll listen more closely. . .

Giving him space

It’s hard, but free time is important. I’m not talking about setting our kids free to roam the ‘hood with the instructions to return at dinnertime. I’m talking about taking a break from our helicopter tendencies, from our incessant worrying, from our need to fill space and time, from our perpetual ‘where-is-he-and-what-is-he-doing?’

Kindergarten’s a big step.  And our kids need to know that we have confidence in their success.

Thanks to a good friend of mine, I recently read an article in the July/ August 2011 The Atlantic, How to Land Your Kid in Therapy.  Interesting stuff. Gave me a ton to think about and is totally worth reading.

four leaf clovers

Giving him love

I’ll never stop hugging and kissing on my kids. I can’t keep my hands off of their sun-tanned shoulders and bleach-blonde heads.  I love the feel of Owen’s calloused, monkey-bar hands; I adore Cora’s crooked, self-cut bangs, and my heart sings when Maddy hugs me with her whole body–her long legs included.  Their hoots and hollers crack me up and the sparkle in each of their blue eyes is enough to bring me to tears.

But I have come to realize that love comes in so many different forms–and that a hard part of demonstrating love for my children involves me letting go, even if it’s just a little.  I’m working on showing them my love for them by letting them fall and get themselves back up.  Letting them run to me with a skinned knee instead of me running to them, waving a band-aid and Neosporin and a face full of worry.  Allowing them to explain to their coaches why they were late for swim practice rather than me doing the explaining. Not bringing back-up goggles when they lose their second pair in two days.

Showing my sweets that I trust in them and believe in their ability to bounce back.

It’s not easy–but I’m trying.

And so it goes. . . my second-to-last summer before my second child is off to Kindergarten.  Let’s do what we can to enjoy the journey!

July 16, 2011 22 comments
0 FacebookTwitterPinterestPocketEmail
easy backyard fun with flowers: dissecting, examining, and learning about flowers
plantsscience

backyard fun: dissecting, examining, and learning about flowers

by Teach Mama July 14, 2011
written by Teach Mama

 Dissecting flowers–totally pulling them apart–is a little bit funny for some kids.

At least it was for mine.

We tell them they can’t pick the flowers in our gardens unless they have permission; we teach them to care for and nurture our plants by watering and weeding.  We give flowers to loved ones for gifts and put fancy flowers in vases and ooooh and ahhhh over them for days on end.

So when I placed a bunch of flowers on our back porch and gave Maddy, Owen, and Cora permission to dissect them, they all balked.

My kids have always loved playing with flowers–really I can give them any excuse to pick them and pull them apart, they’re totally game.

Whether we’re painting flower pots, painting with flowers, making backyard rainbows, changing flowers’ colors, or conducting fragrance experiments, it doesn’t matter. Flower free-for-all’s mean F-U-N for Maddy, Owen, and Cora. Most days, at least.

But I suppose that the open-ended invitation to pull them apart–to look closely at how they were made–was just a little too strange for them.

Here’s the skinny:

Dissecting Flowers, Examining, and Learning:

When I told the kids after lunch one day that we were going to look a little more closely at flowers today and that we were going to pull petals off and look at the parts of a flower, Maddy froze.

She said that what we were doing wasn’t ‘being kind to nature’ and that it wasn’t okay.  I assured her that what we were using were fine–most of the flowers were older and were on their way out anyway and that it was totally okay.  We were learning a little bit about flowers–the parts of them and how they work–so it was not like we were pulling out every flower in the garden.


My kids had a hard time dissecting flowers. . . at first.


She bought it–hesitantly–in the name of science.

But it reminded me that maybe I need to give my kiddos a little more leeway, let them run through mud more, finger paint, dance around in the rain, and live a little more on the edge. Or maybe it was just a sign that right now my little ones are conscious and careful around pretty things, that they love–or at least respect–nature’s creations.  Who knows?

I’m probably just thinking too much about it because I’ve caught Maddy’s cold and have been totally under the weather lately. I do have to say that this was a really easy, relaxing, and worthwhile activity once we got started.

And looking at pretty flower parts is always a good reason to smile–even when you’re all congested and haven’t stopped coughing for three days.


The parts of a few flowers. . .


I wanted to keep this activity simple. I wanted it to be free, open-ended, and fun.

I thought about trying to have the kids identify parts of a flower, and I even printed out a teacher’s guide to parts of a flower and a child’s sheet for identifying parts of a flower.  But we didn’t use them.


  . . . before they became a part of Cora’s flower salad.

 Instead, our focus was:

  • talking about how the petals felt;
  • estimating how many petals each flower had;
  • figuring out which parts of the flowers were alike and which parts were different;
  • talking about the shapes of each petal, leaf, and stem;
  • deciding which petals were our favorites;
  • assessing which flowers were our favorites;
  • making pictures on plates with flower petals;
  • pretending that the flowers were microphones and their petals were salads;
  • enjoying the day, our time together, and conversation.

Really. That’s it.

I had the parts of a flower sheets there in case anyone asked me what the official names were of the parts, but no one did, and I totally know they’ll cover that in science class down the road.

That wasn’t all that important to me.

I just hope that on that day when their teacher hits them with the news that they’re going to learn about the parts of a flower, that Maddy, Owen, and Cora can recall a teeny, tiny, distant–but fond–memory of a warm summer day on the back porch when their mom let them pull apart flowers.

Just for the fun of it.

 Flower salads don’t get much more beautiful than this. . .


Our goal is to show all parents that if we can do it, anyone can do it. And if we want our kids meet with success in school and to enjoy learning about the world around them, it’s our job to create a lifestyle of learning for our families.  Join us!

__________________________________________

smart summer challenge teachmama.com


fyi: Some of the links in the post above are “affiliate links.” This means if you click on the link and purchase the item, I will receive an affiliate commission. Forever and always I recommend only products or services I use personally and believe will add value to my readers. I am disclosing this in accordance with the Federal Trade Commission’s 16 CFR, Part 255: “Guides Concerning the Use of Endorsements and Testimonials in Advertising.”  For more information, please see teachmama media, llc. disclosure policy. 

July 14, 2011 6 comments
0 FacebookTwitterPinterestPocketEmail
get word conscious as a family cover
readingword consciousness

A Word A Day: Getting The Family Involved

by Teach Mama July 9, 2011
written by Teach Mama


Maddy, Owen, and Cora have loved the Word a Day we’ve been doing for the past two weeks–more than I anticipated and much to my surprise. 

It’s been funny to see which kiddo is the first to remember to flip the card or ask how to pronounce the word as we’re throwing back cereal on our way out the door to swim and dive.

And the incentive of a gem (or two) when they actually use the word throughout the day hasn’t hurt the word-consciousness cause, either. It’s made it more of a game, and my kids pretty much dig games.

So when I reminded them that they all could help choose the words we covered in the next batch, they were pretty excited.

I’ve had a word of the day list on the fridge since we started, and every now and again Maddy would add a word. But when we sit down every so often to write down some words together, undoubtedly, the kids come up with some pretty super ones.


We have all contributed to this set of Word a Day cards. . .


  • word a day cards set 2 teachmama.com: So today, though I’m not sharing an activity per se, I’m sharing Word a Day Cards, set numero dos. It’s a list created mostly though the words that Maddy, Owen, Cora, and I have encountered in the past two weeks.

We’ve added words that we read in the newspaper, that we’ve heard in conversation, and that the kids have learned on Word Girl.


. . . so everyone’s a bit more invested.


word a day cards set 2 teachmama.com–ready to be cut and hung!

 And that’s it–just another little way we’re having a word conscious, word-happy summer!


Want to check out the first set of Word a Day Cards? Click on the image:


word-a-day-cards-cover


Please join us and share YOUR ideas! We’d love for you to share your ideas as part of our Smart Summer Challenge!  You can add a link to a post on your blog or even a photo set on Flickr or any types of publicly viewable “journal” entry on a social media or community site.

Not a blogger? If you do not have access to posting entries on any public site, you can also leave a comment on this post, sharing the learning opportunities you incorporated into your week with your children.

Your post (or comment) can be something from your archives that speaks to our theme for the week (Government) or it can just be a general post about how you are fitting fun learning into your summer activities. You can find our weekly themes on our calendar of ideas but ANY learning activities, big or small, are welcomed!

Just add your link(s) (as many relevant links as you would like) to a our Smart Summer Challenge Week 2 Link-up, and you’re in the mix!


July 9, 2011 6 comments
0 FacebookTwitterPinterestPocketEmail
Best Of Teach Mamafoundationssorting

how to teach kids where in the world they live

by Teach Mama July 7, 2011
written by Teach Mama

For a long time now, I’ve realized that Maddy, Owen, and Cora have no idea where they live.

Sure, they get that they live in Maryland and their Nanny and Pap and most aunts and uncles live in Pennsylvania, but they don’t really know where they live in relation to the rest of the world.

Cora sees the American flag and calls it the American Idol flag.

me on the map teachmama.com


I know she’s four and that this knowledge and perspective is something that comes with time–and maturity–but I thought that it was about time we addressed the issue head-on.

In order to really understand even why our country has different types of coins (and governments) than other countries–like we discussed when we wrapped and counted coins earlier this week–they have to first learn that they live in the United States of America–a place quite different from the United Kingdom where William and Kate got married this spring, or Japan where Cars 2 took place, or Italy where their Grandma and Grandpa visited this year.

Younger kids sometimes get confused when we tell them they live on a continent, in a country, in a state, in a city. 

How can they live in so many places at once?

Believe me, I know there are tons of ways to do this, but I thought I’d give it a try with a Me on the Map activity I saw on Jenn from Finally in First’s awesome blog a few months ago. Among other things, I liked how this activity brought everything together, from planet to home, in one bright and happy package.

How to Teach Kids Where in the World They Live:

This Me on the Map activity spotlights where kids live from big picture to small–their planet to their home (or school).  It allows them to hold in their hands all of the places they can call ‘home’ which is why I really love it.

I created circles for each part which can be downloaded here. 

And for our friends in Canada: Me on the Map: Canada version is a part of the Me on the Map Circles.  Feel free to download, share with our friends up north, and watch our Canadian little ones learn about their place in this big world!

me on the map teachmama.com


 Owen helped cut out the circles at swim this week when he couldn’t go in the water.

me on the map teachmama.com


The circles include:

  • our planet;
  • our continent;
  • our country;
  • our state;
  • our city;
  • our street;
  • our home (or school)

I also added some links to resources I used to print out an earth for the planet circle, a map of the continents, the USA map, the state of Maryland map, our state flower and flag, and our city.

As cool as it would be to have kids do the research to find this information and to really work hard to draw pictures of each part, I know it’s the summer.  And my focus was simply to give Maddy, Owen, and Cora a more clear picture about where they live in relation to the rest of the world.

me on the map teachmama.com


me on the map teachmama.com


Cora colors North America–the continent where we live.

me on the map teachmama.com


and Owen writes ‘Earth’ for our planet.
me on the map teachmama.com


To get this party started, I said,

Okay my friends. This week we organized coins and found a lot of coins that belonged to other countries. I have no idea how they got in our coin jar, but they did. They obviously got really mixed up–somehow they made it from their countries all the way over to our country, the United States of America.

Today we’re going to take a look at where we are–where we live compared to other places in the world–and all of the places we can call our home. 

Because you know we live in Maryland. You know that Nanny and Pap live in Pennsylvania. And you probably know we live [on our street, in our city].  But it gets confusing to live in so many places at once.

This is going to make where we live a little bit more clear, but I’m really going to need your help because there are a few steps to this. I know you can handle it. Ready?

I had organized all of the circles by size, and I placed the ‘extras’ above them.

I said, First we’ll start with our planet. We don’t live on Mars, and we don’t live on Jupiter.  We live on. ..

Earth!! Owen and Maddy yelled.

Yep. We live on good ole planet Earth.  So glue your earth on the circle that says ‘our planet’ and write ‘Earth’ above it.

me on the map teachmama.com


Our Me on the Map circles, all spread out and drying.

We did the same for each circle, and as we went, I wrote the name on a piece of paper so they could copy it.

Really, Maddy was not feeling this activity. She was totally not into it. So I let her do what she was up for without pushing her.  She wanted to do her sketching, and that’s totally fine with me.

me on the map teachmama.com


She scribbled the words and glued quickly and didn’t care a bit.

Owen was into it; he worked hard to write each word, and he placed his circles carefully on the table to dry.

I found I had a really hard time keeping up with Owen and being slow enough for Cora, but when I finally just let Owen zip ahead while I stayed along with Cora, and I wasn’t worrying about Maddy, it was fine.  Maddy actually came back to it the next morning, when she was more in the mood. I love it.

I took photos before we added our street and home–so that our location’s not plastered in cyberspace–but the kids drew cute pictures of our house and their perception of our street.

me on the map teachmama.com


Cora holds her ‘Me on a Map’ proudly. . . and now that the picture’s taken, we can add our street and home.

me on the map teachmama.com


We linked them all together with a circle clip, and we were ready to go.  Now finally Maddy, Owen, and Cora will be able to tell anyone who asks where in the world we live. I totally love it.

I wanted the kids to be excited about doing this without dreading the work, and I think this did the job.  It gave them enough to do to be invested but not too much so that they thought it was work. . .


Happy mapping!

And check out these other fun activities for kids:

  • our fave programming for 6-9 year olds
  • make plastic bag ice-cream
  • apple taste test
  • backyard learning made FUN
  • start a blog– for kids!
  • backyard chopped challenge
  • make slime
  • take your family to the white house
July 7, 2011 60 comments
0 FacebookTwitterPinterestPocketEmail
Newer Posts
Older Posts

About Me

About Me

Hi! I'm Hannah.

A mother of one, I am passionate about inspiring mamas and educators with hands-on, meaningful learning ideas that make everyday moments fun, purposeful, and filled with curiosity.

Follow Teach Mama

13.4K Fans Like
2.8K Subscribers Subscribe
132K Followers Follow Us

Recent Posts

  • Summer Learning Activities for Kids: A Low-Pressure Guide for Reading, Play, and Family Connection

    June 15, 2026
  • Effective Techniques for Teaching Complex Historical Topics

    June 13, 2026
  • 4 Neighborhood Adventures That Teach Kids Real-World Skills

    June 12, 2026
  • What Does an Urgent Care Visit Cost in Manhattan Without Insurance?

    June 12, 2026
  • Future Trends Influencing Enterprise Learning Management System Adoption

    June 10, 2026
  • How to Survive Your Husband’s Grad School Years Without Going Broke

    June 9, 2026

LEARN

PLAY

CRAFTS

PRINTABLES

About Me

A mother of one, I am passionate about inspiring mamas and educators with hands-on, meaningful learning ideas that make everyday moments fun, purposeful, and filled with curiosity.

Useful Links

  • About
  • Contact

Popular Posts

  • Words 3 Ways: Learning Sight Words For Kindergarten

    May 17, 2012
  • Quick Trick: Magnetic Letters (How To Use Them With Your Kids!)

    December 1, 2010

Recent Posts

  • Summer Learning Activities for Kids: A Low-Pressure Guide for Reading, Play, and Family Connection

    June 15, 2026
  • Effective Techniques for Teaching Complex Historical Topics

    June 13, 2026
  • Facebook
  • Pinterest
  • Youtube
Teach Mama
  • Reading
  • Early Literacy
  • Writing
  • STEM
  • Activities
  • Digital Literacy

Shopping Cart

Close

No products in the cart.

Close