Teach Mama
  • Reading
  • Early Literacy
  • Writing
  • STEM
  • Activities
  • Digital Literacy
Top Posts
Summer Learning Activities for Kids: A Low-Pressure Guide...
Effective Techniques for Teaching Complex Historical Topics
4 Neighborhood Adventures That Teach Kids Real-World Skills
What Does an Urgent Care Visit Cost in...
Future Trends Influencing Enterprise Learning Management System Adoption
How to Survive Your Husband’s Grad School Years...
How Technology is Reshaping the Rules of Education
How Advances in Artificial Intelligence Are Making Modern...
How Technology is Transforming Learning Experiences
A Practical Guide to Managing Family Finances Without...
Teach Mama
  • Reading
  • Early Literacy
  • Writing
  • STEM
  • Activities
  • Digital Literacy
Teach Mama
Teach Mama
  • reading
  • early literacy
  • writing
  • STEM
  • Activities
  • digital literacy
  • Contact
math, literacy, and creative summer learning: tabletop surprises
family funfamily lifeindoor activities

Math, Literacy, And Creative Summer Learning: Tabletop Surprises

by Teach Mama July 28, 2013
written by Teach Mama


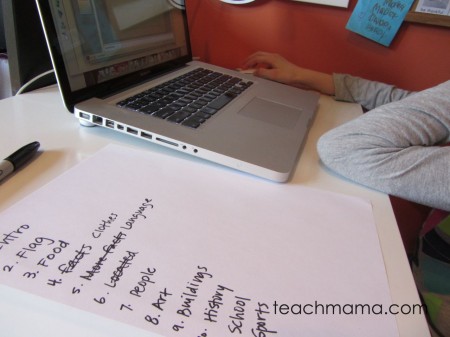
We’re week three into our tabletop surprises, and this week, we rocked some sneaky math, literacy, and creative thinking.

The kids woke up to some easy activities and ones that required more thinking—and two that required more movement. Sign language was one of the week’s activities.

The basis for tabletop surprises is just to let Maddy, Owen, and Cora find their own time to do these little activities that sneak in a little bit o’ learning and fun into their days.

They take all of five seconds to set up and prepare, and it’s a whole lot of pulling from resources that are around the house—from our own focused learning at home, or from my previous classroom teaching experience.

Fun stuff.

Here’s the skinny . . .

  • Math, Literacy, And Creative Summer Learning– Tabletop Surprises:   Set up and then go. That’s it.

We’re three weeks in. Here we go!

tabletop surprises sudoku

  • Sudoku: That’s right. Sudoku is hard. Number sense and critical thinking and logic all wrapped up into one pretty, griddy package.

Sudoku puzzles are logic-based number puzzles.

I found mine on KrazyDad, where I found the mazes a few weeks back.  Free. Tons of them. So worth checking out. I totally heart KrazyDad.

sudoku tabletop surprises

sudoku tabletop surprises

I printed some Easy ones for Monday’s tabletop surprises.   Even some of  Easy level ones were tough for the kids.

I’ll definitely throw Sudoku  in the mix again before the end of the summer because the puzzles were that hard for the kids. I’m not sure how we hadn’t tried them before, but Sudoku was on my mind from the cool outdoor Sudoku on this year’s we teach: summertime learning eBook.

Maddy, Owen, and Cora solved the Kid ones quickly—and they should have. They were super easy. But the Easy ones really challenged them. I think I need to learn more about how to solve them, some of the tricks and logic strategies myself, and then I’ll give them the skinny before trying this activity again.

My plan? To read up on the Sudoku Space site which has a pretty detailed explanation behind the puzzles.

tabletop surprises sign language cover

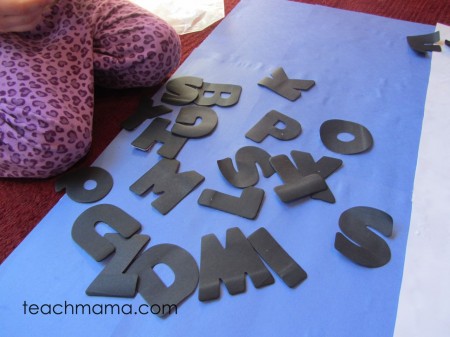
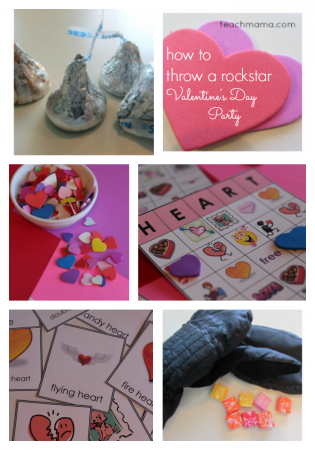
  • Learning With Sign language: I got these great sign language cards from a friend who moved a few years ago, and every so often I pull them out for the kids.

For our tabletop surprise on Tuesday, I simply gave them the following challenge:

1. Put the cards in ABC order.

2. Learn your name in sign language.

3. Learn two more words of your choice in sign language.

4. Show me what you’ve learned!

sign language cards tabletop surprises

sign language cards tabletop surprises

Owen ran with it and impressed Maddy, Cora, and I while we ate breakfast. He’s my early bird and usually gets his tabletop challenges finished before the girls finish breakfast.

Maddy and Cora move a little later, usually tackling the challenge after lunch or late afternoon.

Consensus was they liked this one.

Want to give it a go? Download and print one of the free sign language cards from the ASL site or these little sign language alphabet printables from abcteach.

tabletop surprises day money

  • Money counting and wrapping: Big fail on this activity.  We skip counted with coins and wrapped coins a while back, and they loved it. But this time?  Notsomuch.

I think the problem was that I didn’t have a lot of money out for them to play with—we didn’t have a ton of coins to actually play with or fill the coin wrappers. I get it. It’d be hard to spend time counting coins and then not actually have $2 in nickels to fill a wrapper completely.

Anyway, it was out on Wednesday, and they enjoyed sorting the coins from the non-coins (Chuck-E-Cheese tokens, foreign coins, random small, coin-like objects).  I think you can grab coin wrappers at any bank (at least you could a while back), or you can find them very inexpensive on Amazon.

tabletop surprises letter writing

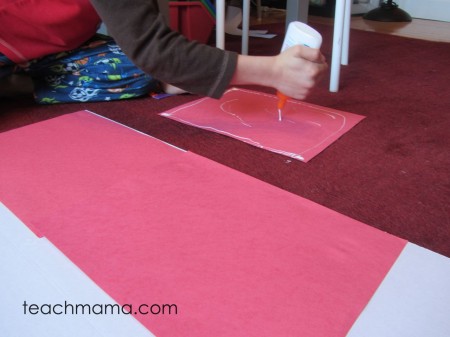
  • Letter Writing: The other day, Cora received a little ‘hello’ note from one of her classmates, and it reminded me of how much kids—mine, especially—enjoy getting mail.

So on Thursday, I put out some note paper, pens, and envelopes and a little note that said:

Send a little ‘hello’ to

-Nana! -Cousins! -Grandparents!  -Friends!

tabletop surprises letter writing

tabletop surprises letter writing

letter writing tabletop surprises - 4

What got them stuck was the envelope and how to address it properly.  I made a little sample, and it helped a bit.  Spelling their cousins’ names? Also tough.

Clearly we need to do more practice here or at least I should update our Family Playing cards.  I’ll add it to my list.

I just liked how this got Maddy, Owen, and Cora thinking, writing, and sending a little love.  We need to do it more often, for sure.

tabletop surprises descriptive writing

  • Descriptive Writing: Inspired by our Stop, Observe, and Write activity from last summer’s Everyday Journals, I threw a card from the Everyday Journals on a clipboard along with some journals and notebooks.

We had breakfast out on the back porch, and then the kids took some time to find a quiet spot and write.

descriptive writing tabletop surprises -

descriptive writing tabletop surprises -

It was quick, it was easy, and my hope was that they would be able to tune into what they saw, heard, smelled, felt, and maybe even tasted as they sat, listened, and wrote.

The key? Modeling. You sit and write with them, sharing what you wrote so that they hear what descriptive writing sounds like.

And that’s it. Just an average, thoughtful, summer week.  And along with some trips to the pool and nearby parks, some errands and chores, it was a pretty sweet week.  Though it’s crazy, and I’m behind on all of my work, emails, and cleaning, I am thankful and blessed.

Stay on top of the Tabletop Surprises by checking out the past few weeks if you’ve missed them:

  • Tabletop Surprises Week One
  • Tabletop Surprises Week Two

Or check out some fun ideas from a our Smart Summer Challenge a few summers back.

July 28, 2013 2 comments
0 FacebookTwitterPinterestPocketEmail
soap dough soap molds and crazy cool fun with soap
sciencescience experiments for kids

soap dough, soap molds, crazy cool fun with soap

by Teach Mama July 26, 2013
written by Teach Mama

post contains affiliate links


soap dough soap molds and crazy cool fun with soap


What happens when you put a bar of Ivory soap in the microwave?

Really. Ivory soap. Plain ole sweet-smelling, plain-jane white bar o’ Ivory soap?

In the microwave.

Try it.

Your kids will think you’re a rockstar, and everyone involved will be in awe.

Do it during a playdate, and your kids’ friends will forever tell tales of your awesomeness.

Children will think you’ve lost your mind and then will be starstruck by your science fabulousity.

Your disinterested, challenging kids will begin to respond to your every word, move, and idea.

The whole family will wait with wonder to see what you have up your sleeve next.

Actually, I can’t guarantee all that. But what I can say is that my kids, my husband, and I had a blast playing with soap ‘dough’–what you get when you blast Ivory soap in the microwave.

All you need is this soap, and you’re good to go. Inexpensive soap. That’s it.

Here’s the skinny. . .

  • Soap Dough, Soap Molds, Crazy Cool Fun With Soap: I’ll be honest. Owen wasn’t digging the soap experiment.

soap dough soap molds and crazy cool fun with soap

He was over-tired and got frustrated with Cora in the beginning of the whole thing and so he went out front and shot some hoops instead of soapin’ it up with Cora, Maddy, and me. But he did keep coming around, sneaking glances, and trying to play but not really.

So it’s simple, and it’s not perfect, but playing with Ivory soap was something I’ve wanted to do with the kids for a while now, after catching a few fab pins on Pinterest.

It’s been sitting there on our neat-o, FUN, new things for us to try board, and finally, finally? We did it.

After a busy morning and after rest and after a whole lot of free-bird summertime fun, I said, Hey! Remember we had ‘Fun Science Experiment’ on the calendar for today? Who’s up for checking out what I meant?

soap dough step 2

Maddy, Owen, and Cora found me in the kitchen, and we got rockin’ and rollin’.

I said, So we’re going to do something a little crazy today with this. And I handed them the bar of Ivory soap.

I also got out the only other things we’d need:

  • Ivory soap
  • cookie cutters
  • wax paper
  • liquid food coloring

I got a lot of Huh? and What? and Why? and Mom?

Maddy opened the bar of soap, and we all held it and smelled it and passed it around. And talked about how it smelled so pretty like Nana’s bathroom. (Because that’s the soap she uses and has used for as long as I can remember.)

Then I placed it on a piece of wax paper, put it on a microwavable plate, and stepped back.

soap dough microwave

What do you think will happen if we put this puppy in the microwave? I asked.

It might melt?

It will explode?

It will ruin our microwave!

I’m not sure you should do that, Mom.

I told them that I’d only heard about this experiment but never did it myself, so I was a little nervous. I pressed 1:30 on the microwave, and we all stepped back.

What happened was totally crazy and completely strange.

soap dough soap molds

soap dough soap molds

soap dough soap molds

We did it twice, with two bars of soap, and the ‘explosion’ looked completely different each time. It. Was. Nuts.

And though the edges were cool, the insides were HOT. Like hot, hot hot.

soap dough soap molds

soap dough soap molds

But the whole thing was light–like a cloud–when lifted. So the kids took turns holding it after it cooled. It was so totally fun.

After a bit of holding and observing, we took the fun outside.

I had read that you could break the soap apart, mix it, and form a sort of dough. Though I was not willing to throw it in our food processor or blender, I read that you could. We were going to put our kids to work and mix and mold on our own.

soap dough soap molds

We put the big lumps of soap on two trays, each covered with a piece of wax paper.

And then? We just broke it apart. We added a few drops of food coloring to each lump, blue to Maddy’s and green to Cora’s. (By this time, Owen was shooting hoops.)

We found that the warmer parts were more easily molded and moved, but with a bit of warm water, it became this awesome, smooth, soft, fragrant dough.

soap dough soap molds

soap dough soap molds

soap dough soap molds

It did take some work and a bit of muscle to get it into a working ‘dough’ and we had to go really, really light on the warm water. But after we found the right combo, we were able to use the cookie cutters to make fun, brightly colored soap shapes.

soap dough soap play with blue

soap dough soap molds

The O-Man even came back to get his hands in the dough after a while.

Maddy and Cora loved it. Though Cora set her sights on creating a soap mold princess crown and was disappointed that she couldn’t make it perfectly, Maddy went simple with cookie cutter molds and was better off.

Next time, I’d only bring out basic shape cookie cutters–our soap dough was a little choppy and chunky for detailed molds.

soap dough soap molds

soap dough soap molds

soap dough soap molds

So fun. So much soapy, doughy, moldable fun that we were beside ourselves.

The big question is why does Ivory soap behave this way in the microwave? I had not a clue. But my savvy-science friends do:

  • Steve Spangler, the oh-so-smart and creative science guy covers it here in Soap Souffle
  • Physics Central talks microwaving soap with diagrams and a detailed explanation
  • The Indianapolis Public Library blog also covers it with a few helpful links and references in books

And that’s it. Some sneaky science and fine–motor sensory fun on a cool (thankfully!) summer afternoon.

Do you have any other cool and easy science-experiments for kids? Let me have ’em!


fyi: affiliate links are included for your convenience

July 26, 2013 4 comments
0 FacebookTwitterPinterestPocketEmail
tabletop surprises week one | ideas for free exploration and play each day of the week
family funfamily lifeindoor activities

Tabletop Surprises: Simple, Summer Learning Fun

by Teach Mama July 12, 2013
written by Teach Mama

post contains affiliate links


Summer is kicking us hard over here.

Actually, swim and dive are kicking us hard over here, like always.  And at five weeks in, between meets, practices, relays, pep rallies, and team events, our family has run a bigtime marathon.

So our Smart Summer Calendar and daily plan have morphed into something that is really, truly working out well for us: Tabletop Surprises.

Tabletop Surprises? Easy.

On their own time.  On my own time.

Creative learning and crafting opportunities for the kids on the craft room table.

Opportunities for open-ended play and learning–when it works best for them.

For now? It’s rocking.

Here’s the skinny. . .

  • Tabletop Surprises–Simple, Learning Fun:tabletop surprises button

What are Tabletop Surprises? If you follow me on Instagram, you’d know what I’m talking about because each day I’ve shared a quick photo of each day’s surprise each day of the week.

Tabletop Surprises are fun learning or creative thinking opportunities for the kids on our craft room table. Just sitting there.

Waiting for someone to come along and try ’em out.

How to I get the kids to actually sit down and do the activities?  A few ways:

1. The activities are fun and they want to do them;

2. At any given time, on any given day, I have been known to toss a few gems into the gem jars of people who have been spotted doing the activity. Not every day, but some days.

3.  I’ll join them. Kids–I truly believe–like to hang out with their parents. Especially if their parents are kinda cool or funny or at least act like they’re cool or funny. I like to hang out with my kids, so when they sit, if I can, I’ll join them.

Tabletop Surprises for this week:  Here we go. . . 

magnetic words

magnetic poetry tabletop surprise


  • Magnetic Poetry: Magnetic words by our friends at Magnetic Poetry, and this set is the Magnetic Poetry Really Big Words Set. All I did was put a bunch of words on three clean cookie sheets.

That’s it. I started with a funny sentence on each tray, and I let the kids take it from there.

They liked it. Tried to sneak in a little potty talk, but lucky for us the set doesn’t really lend itself to such.

focus of this activity: creative thinking, reading, speaking

———————————————————————-

tabletop surprises shape blocks pattern cards

shape pattern cards

  • Shape Blocks & Pattern Cards: Love, love, love this set.  There are dozens of great sets out there on the market, and I’m not even sure where ours came from.

I put the cards out on the table, threw some shapes into three separate containers to avoid grabbing and arguing, and crossed my fingers. Owen hit the table without asking me to play Wii, and he sat and worked until breakfast. Win!

focus: geometry, critical thinking, fine motor skills

———————————————————————-

tabletop surprises perler beads cover

tabletop surprises perler beads

tabletop surprises perler beads

  • Melty Perler Beads & Pegboards: I love these, and so do the kids. Perler beads are simply teeny, tiny beads that fit on small pegboards.

Kids can create patterns, letters, words, you name it, by placing the beads on the small pegs. When the creation is complete, you iron it to melt them together. Once it’s cool, it pops off of the pegboard and you have a little masterpiece.

focus: fine motor, patterning, creative thinking

———————————————————————-

tabletop surprises mazes

  • Mazes: I have fallen head over heels for KrazyDad and his amazing math site. Serious gold mine of printable puzzles, mazes, and so much more, it’s insanity.

All I did for today was dive into the maze area of his site, and I printed out mazes of varying difficulty.  I went for Easy, Intermediate, Challenging, and

Tough, and they all rocked.

tabletop surprises mazes

tabletop surprises mazes

Second day in a row that the O-Man chose unplugged fun vs the siren call of his Wii.

focus: critical thinking, fine motor, problem-solving

———————————————————————-

tabletop surprises magnets

tabletop surprises magnets

  • Magnets, Pipecleaners, & Paperclips: Easy, easy, easy. Magnets are so fun, and my kids have loved them forever and ever.

I used the disc magnets from way back when we made Bottle cap Ornaments, glass vase and some empty glass jars from the recycle box, colored paper clips, and pipe cleaners.

tabletop surprises magnets cover

tabletop surprises magnets cover

I cut the pipe cleaners into various sizes and threw them in the bottom of the glasses. I added some paper clips and scattered the magnets. Done. Invitation to explore.

Kids? Loved it.

focus: science, fine motor, critical thinking

———————————————————————-

Really? That’s it. So fun, so easy.

Next week we’ve got some really cool ideas up our sleeve for Tabletop Surprises.  Gotta love summer, and as the kids are yearning for more independence, I think this is the recipe for success.

Need some supplies for your own Tabletop Surprises? Click below:

fyi: affiliate links are included

July 12, 2013 8 comments
0 FacebookTwitterPinterestPocketEmail
how to help kids choose just right books
reading

How To Help Kids Choose Just Right Books

by Teach Mama July 2, 2013
written by Teach Mama

It’s hard to watch a child struggle trying to read a book that is too difficult, especially when the kiddo is adamant about plowing through it.  Whether the struggles be with decoding the words on the page, with reading fluently, or with understanding what’s being read, it’s hard to watch.

Because though for many of us reading comes naturally and without thought, for others, reading is a continual struggle.  A long and laborious, difficult and painstaking process.

That’s why book choice is so important.

Muy importante.

Like really, really, really important.

Though children do need to be able to choose the books they read, if the child doesn’t choose a book that ‘fits’, it can really be downhill from there. He or she can get into a pattern of choosing books that won’t fit, making reading difficult and unpleasant.

But there are techniques and strategies that parents can employ to help guide children into choosing the ‘best fit’ books for their kids—books that match the child’s own strengths and abilities.

Nothing fancy or difficult, just a few quick reminders that your child can commit to memory that will ultimately provide him or her with skills that will make trips to the school library, media center, or book corner a whole lot more meaningful.

Here’s the skinny . . .

  • How to Help Kids Choose Just Right Books: I say it loud and clear right here. . .


And if you want the bookmarks to use for your own kiddos or classroom, please help yourself.

Best Fit Bookmarks: best fit books bookmarks

best fit bookmarks | teachmama.com

best fit books bookmarks | teachmama.com

I’d appreciate a pin, link back, tweet, or shout if you do choose to use them.  And if you have suggestions, I’d love to hear ’em!

(And if you choose to share them, which we hope you do, please link to this post instead of to the attachment page! Thank you!)

How do you help kids choose just right books? Let me know what has worked for you in the comments section below.

July 2, 2013 4 comments
0 FacebookTwitterPinterestPocketEmail
summer reading book swap | teachmama.com
reading

How To Host A Summer Reading Book Swap Event

by Teach Mama June 25, 2013
written by Teach Mama

Summer is almost in full swing, and for our family, there’s no better way to begin our summer fun than with a Summer Reading Kick-Off Party!

Each year, we invite a few friends over and turn it into an easy Backyard Book Swap.

It’s a great way to ease into summer and to remind kids that they still have to keep their brains moving over the long, hot months.

We always make it super-casual, and we always keep it fun.  This year, we kept it even more simple by having Maddy, Owen, and Cora walk home with some swim and dive buddies, books in hand, ready to swap.

The cool thing is that anyone can host a Summer Reading Book Swap.  And the par-tay can be done in the backyard, basement, or playroom. It can be in the beginning of the summer, middle, or even the end of summer–morning, afternoon, or evening.

All you need are some eager friends and a few books.

Here’s the skinny. . .

  • How to Host a Summer Reading Book Swap: In my opinion, for any get-together, you only need a few necessities: food & fun people. That’s it.

But for the Book Swap, you’ll need a few books, of course!

We rarely send out formal invites–more of a quick email or phone call thing for us–but if you’d like, you can use the super-cute Summer Reading Book Swap invites below:

summer reading book swap invite

book party invite _ teachmama.com — Summer Reading Book Swap invites

You can make your Book Swap a potluck where everyone brings something to share, or you can do what we did–provide snacks.

Our pals packed the main courses of their lunches (a sandwich or bagel) and we had fruit, veggies, chips, and drinks to share. And of course, we had freeze-pops for dessert!

summer reading book swap

Decorations? Easy. Big posters.

I’m a huge fan of graffiti walls, so we did what we could. A few posters where kids could write down their favorite books and characters. That’s it!

summer reading book swap

summer reading book swap

Kids ate lunch when they first got here, because hungry kids post-swim practice are no fun for Book Swaps!  So with full bellies, we were ready to move into the swap.

How do eleven kids actually swap without having the event turn into a big, awful brawl?

They draw straws!

summer reading book swap

 I cut a bunch of straws in varying lengths. Everyone picked one, and I told them to hide it once it was picked. Keep the size a secret.

Then I said, Okay, guys, we have to figure out who has the shortest and who has the longest and everything in between. So take a few minutes, figure out who has what and put yourselves into perfect straw-size order. When you’re finished, tell me by clapping three times together.

They were excited about it and got rolling right away–it’s a fun activity for a big bunch of kids and cool to see who steps up to organize.

summer reading book swap

summer reading book swap

summer reading book swap collage

It was a lot of fun.

Once the kids put themselves in order from smallest straw to tallest, I gave each child a sticker with a number 1-10.

Then I reminded them about how to choose “just right” books, and we talked about what it means to choose a book that “fits” you.

summer reading book swap collage

our ‘best fit’ bookmarks will be great reminders for the kids as they read

Then I called numbers 1, 2, and 3 up to choose their first book.

After the first group, numbers 4, 5, and 6 went up.

Finally, 7, 8, 9, and 10 hit the table to choose books.

We went through the groups a few times so that each child could grab 3-5 books, and if they really wanted another, after everyone went, they could grab another.

It worked out great.

summer reading challenge scholastic

summer reading challenge scholastic

Once everyone was settled with books, we chatted about the Scholastic Summer Challenge. My friends from Scholastic sent along some fun Summer Challenge goodies–books, bookmarks, pins, stickers, and tattoos!–so the kids had seen news of the Challenge and were curious.

Many kiddos had already grabbed a bunch of the Summer Challenge bookmarks and shoved them into each of their ‘new’ books.  I showed them that the bookmarks explained a little bit about the Summer Challenge and included a website where participants could actually track their time reading.

I also told them: scholastic summer challenge

  • The Scholastic Summer Challenge is a fun summer reading initiative that really makes it easy and fun for families to read. 
  • Scholastic is doing what they can to help kids prevent the summer slide–when kids forget what they learn during the school year–and to help kids read at least 11 books this summer–11 is the ‘magic number’ people think kids should read over the summer, but we know it should be more.
  • If you log your minutes read on the Scholastic Reading Timer, you can help beat Scholastic’s World Record from 2012 of over 95 million minutes read. Some schools are even doing it together and the winning school will get a visit from the author of Captain Underpants!
  • The Challenge runs from May 6th- September 6th, so there’s still a LOT of time to get involved!
  • Kids can log their minutes read each day and win prizes!

I showed them the Reading Timer on the iPad, and after our guests left, I registered Maddy, Owen, and Cora for this year’s Challenge. It only takes a few minutes to sign them up, and I know they’ll love logging their minutes. I tied their time to their school–so they’ll also love watching that time change throughout the summer.

Knowing how close we keep our iPads and phones, I know that updating the times will take no time at all. Cool incentive for our tech-savvy kiddos, too, to be able to log on and log time after they read.

And that’s it! Just a fun–hot!–Summer Reading Book Swap made so much more fun with great kids and a fab program.

Our summer plan:

  • Smart Summer 2013 calendar
  • Fun ways to keep summer reading rockin’ ALL summer long
  • talk about BOOKS!
  • 3 for REAL things we’re doing this summer

What do you think? How do you kick off summer reading with your kids? Let me know in the comments!

fyi: Many thanks to Scholastic for sharing some sweet summer reading goodies with us.  This is an unsponsored post, written only as an honest parent and educator who is grateful and proud to work with such a great company as a writer for the Scholastic Parents Raise a Reader blog.

June 25, 2013 0 comments
0 FacebookTwitterPinterestPocketEmail
what to do when your child can't remember what he reads
independent readingreading

How To Help Your Child Remember What He Reads

by Teach Mama May 20, 2013
written by Teach Mama


Some children are able to easily read the words on a page but cannot remember a lick of what they read.

Believe it.

Whole paragraphs, pages, chapters can sometimes decoded–words read, even fluently–but nothing.  The child remember nothing.  Frustrating right?  Believe me, it’s not all that unusual.

And you can help!

  • What can a parent do?
  • What can a teacher do?
  • What should the child do?

Fear not.  There is help, and there are a handful of strategies that really do support this kind of struggle.

I covered what to do when your child can’t remember what he reads over on the Scholastic Parents blog this week, and I totally think it’s worth mentioning here.

Don’t get angry about the jump from teachmama.com to Scholastic Parents. It’s totally worth it.

See you there!

Here’s the skinny. . .

  • What to do When Your Child Can’t Remember What He Reads: Find the deets over at Scholastic.

See you there!

May 20, 2013 2 comments
0 FacebookTwitterPinterestPocketEmail
fun ways to practice math facts
computationmath

5 Super-fun Ways To Learn Math Facts

by Teach Mama May 8, 2013
written by Teach Mama

It’s actually hard for me to type this title after years and years and years of math drills that made my elementary-school head want to explode.

Can learning math facts be fun? Is it possible that learning these facts can actually be ‘super-fun’?

That may still be debatable.

But what these five ways do is mix up the ole flashing of the flashcards and trick out the rote learning of these guys.  Learning math facts is actually kinda fun.

Scratch that. It’s fun. Pretty darn fun.

Instead we use some movement, some flashlights, and some technology to up the fun factor.

And honestly? That may have been enough to move from totally awful to kinda fun for this gal way back when.

Here’s the skinny. . .

5 Super-Fun Ways to Learn Math Facts:

Like I said, super-fun is up for discussion but there is certainly some fun to be had with these math fact practices.

Let’s try it.

1.  Play with dice.  Really. Toss the flash cards and practice adding, subtracting, multiplying, and dividing using the numbers you roll on dice.

2.  Flashlight math.  Use the flashcards and flip two cards at a time. Kids shine a flashlight on the one they know and answer that one. Simple. Don’t have a flashlight? Make a math wand.  Bumblebee wand, perhaps? Use a stick or a light saber. Anything that works for your kid.

3.  Use electronics. We love My Math Flash Cards App on the iPad and Math Practice Flashcards on my android phone.  There are a gazillion flash card apps out there. I’m sure any would do the trick, and if you have five minutes and your kid says, ‘Can I play a game on your phoooooone?’ Say ‘Why yes you may! I’m so very glad you asked. . . ‘

4.  Write the answer.  Or paint the answer.  Water on cement or chalk on sidewalk or window crayon on window.  One person flashes the cards and the other guy writes.

5.  Math bingo.  Again, toss the flashers and play Math Bingo as a way to learn and practice these numbers.

Five of many more cool ways, my friends, but this is just a start.

math dice game

Okay a few more:

  • Answer races: Stand on one side of the room and make kids run to the other side of the room to write the answer on a long piece of roll paper on the floor or taped to the wall.
  • Go crazy. You flip the card and say it in one voice and the child says the answer in the same kind of voice (whisper, grumble, shout, squeaky, princess, etc.).
  • Skype or Facetime with family members and have them flash the cards and the kids say the answers.
  • Check out the Multiplication Post where we shared all of the things Maddy was doing.
  • Play Strike it Out to practice those facts and critical thinking.
  • Try Magic Triangles to really get the fun flowing.
  • Get nuts and try any one of these 3 hands-on math games.

As in anything  you do with kids, keep it light, keep the pressure off, and make it fun. As soon as your child starts reaching a frustration level, stop.

Need the cards? Desperate for some mini’s?

Here they are:

  • Addition Math Fact Cards
  • Subtraction Math Fact Cards
  • Multiplication Fact Cards

multiplication facts

Consider starting with one fact family or number set at a time.  And print the cards on brightly colored card stock so they last longer and look nicer.

fun-ways-to-practice-math-facts-sq

Most of all? Have a super-fun time.


______________________

Join us!

summer fun for kids | teachmama.com

______________________

______________________

Follow us on Instagram: @teachmama1  / #tabletopsurprises

teachmama on instagram


Want a little more math fun?

Check out:

  • 26 puzzle
  • sums in a row
  • fractions with food
  • LEGO baseball
  • math and writing
  • driveway shuffleboard math
  • street sign math
  • mind-blowing math tricks
  • 3 hands-on totally cool math games

Or follow our rockin math pinterest board:

Follow Teach Mama’s board math on Pinterest.


fyi: Some of the links in the post above are “affiliate links.” This means if you click on the link and purchase the item, I will receive an affiliate commission. Forever and always I recommend only products or services I use personally and believe will add value to my readers. I am disclosing this in accordance with the Federal Trade Commission’s 16 CFR, Part 255: “Guides Concerning the Use of Endorsements and Testimonials in Advertising.” For more information, please see teachmama media, llc. disclosure policy.

May 8, 2013 8 comments
0 FacebookTwitterPinterestPocketEmail
3 all-time best games to play with sight words
early literacysight words

3 All-Time Best Games To Play With Sight Words

by Teach Mama May 2, 2013
written by Teach Mama

What games do you play with sight words?

Sight words are words that we all need to be able to read quickly and automatically in order to be strong readers, and the more we allow emerging readers to interact with these words, the better!

There are tons of hands-on ways to play with sight words, but these three games are total winners in our family’s book.  We’ve played them year in and year out with sight words so that Maddy, Owen, and Cora learn these little–but important!–words.

And the great thing? Play them with spelling words, vocabulary words, any words your kids need to learn and know.  Mix it up and play it with numbers and numerals. Bam.

But wait. How do you know which list of sight words to use?

Where do you get the cards that you need in order to play these three games?

Glad you asked.  It’s all right here.

Here’s the skinny. . .

  • 3 All-Time Best Games to Play with Sight Words:  Here are three fun and easy games that get your kids playing with–and learning—these important little words.

3 of the All-Time Best Games to Play with Sight Words


So there are just three of my kids’ all-time favorite ways to play with sight words.

But where are the words themselves?

In order to pick up some freebie word cards for playing sight word games, click on the photo of the post to grab some word cards:


go fish--sight words

Go Fish! A fish out of water–games for playing sight words

sight word memory

Sight Word Memory  –All of the word cards are here, including ABC cards

wordo sight words

WORDO! A game for word-learning

Wait. Sight words. High frequency words. Early emergent words, fluency words. Word wall words.

What in the world is the difference?

Essentially, they’re all focusing on words that all readers must know, and commit to memory, in order to be the best readers they can be. That’s it. Many school districts and counties offer their own specific list, or maybe they go with the Dolche or Fry list. The Dolche list is older, the Fry list is more updated.

Word Walls? What? Word Walls are walls in a classroom used as a tool to help teach young readers new words.  Word Walls are just that—words filled with words! Words are placed in alphabetical order and are introduced to children throughout the year, and after introduction, the child needs to lean and know the word.  These words include word family words (-at, fat, cat, mat, etc) and high-frequency words, many of which are sight words.

Need or want more on word wall words?

  • http://www.montgomeryschoolsmd.org/info/baldrige/staff/addresources.shtm
  • http://www.scholastic.com/teachers/top-teaching/2012/10/tips-teaching-high-frequencysight-words

Need or want more on sight words?

  • Visit: teachmama.com early literacy sight words
  • Visit: teachmama.com reading

The main thing?  Don’t sweat it. Your kids will learn these words eventually–and the best way to ensure that is to read early–and often!

And okay. . . play some games with sight words as well.  Questions? Let me have ’em!  I’m happy to help!

May 2, 2013 2 comments
0 FacebookTwitterPinterestPocketEmail
beautiful homemade flower barrettes
crafts

Beautiful, Easy Homemade Flower Barrettes

by Teach Mama March 22, 2013
written by Teach Mama

While we were at the craft store this past weekend, picking up some supplies for Maddy’s after school club and for Cora’s Butterfly Birthday Playdate this weekend, we stumbled upon this AWEsome springtime craft.

Beautiful, easy homemade flower barrettes.

So beautiful. Like really, gorgeous and WOW! Beautiful.

So easy. Like made in under five minutes easy.

Maddy and Cora and I are in love with them.

And they will make the little loves in your life smile huge this Spring Break if you make ‘em. Promise.

Actually, make ’em any time and you’ll find love fast.

Here’s the skinny. . .

  • Beautiful, Easy Homemade Flower Barrettes: So pretty, right? I know.

You only need a few things to make these babies, and one trip to the craft store will do it.  Any craft store will have ’em but if you want to use these links, feel free:

  • Silk flower stems
  • Felt pieces
  • Glue gun
  • Snap-open silver colored barrettes — They’re actually called French-style barrettes, and we used the 2 3/8″ (@ 60 mm) sized

Believe it. That’s all you need.   Maybe, if you want to get really fancy, you can add some gems and bling, but you don’t need to.

Now the whole deal, the start to finish, how-to-make-beautiful-easy-homemade-flower-barrettes is here in a quickie little vlog:

I love how beautiful these flower barrettes are but how totally simple they are to make.

I love that Maddy and Cora could ‘shop’ for their flowers and then wear them in their hair the very same day.

I love that my girls are not afraid to wear big, gorgeous, gaudy flowers in their hair to school, to the park, to anywhere.  Because it just really makes me smile.

Talk about a fun, simple, sweet springtime–or any time craft!   If your kids are old enough to help you with the glue-gun or help you with the cutting, it’s great fine motor skill work; if not, then put them to work in the choosing of flowers, arranging of leaves and petals, or blinging with some gems!

Have another idea for gorgeous barrettes? Have success adding something else totally cool to your own barrettes? Let me know! We’d love to add to our collection!

fyi: Amazon affiliate links are used in this post. Please feel free to use them–always appreciated because every little bit helps!

March 22, 2013 6 comments
0 FacebookTwitterPinterestPocketEmail
helping kids use powerpoint
computer timedigital literacy

Helping Kids Use PowerPoint For Presentations And Serious Learning Fun

by Teach Mama March 20, 2013
written by Teach Mama

It’s Spring Fair time, Science Share time, Reader’s Tea, Poetry Share, and International Night time at schools all around the country.

Kids are sharing their learning, and they’re learning about sharing. Or at least they could be!

My kids are a bit technically-savvy, love anything laptop, iPad, or DS–so for International Night this year, I took a little time to show my kids a few things about PowerPoint.

And honestly? They loved it.

It wasn’t all that involved–it was by no means the end-all PowerPoint intro. Just a touch. Just a taste.

And instead of making double work for us, we used the PowerPoint slides we created to decorate our France board.

Here’s the skinny. . .

  • Helping Kids Use PowerPoint for Presentations and Serious Fun: I suppose the ‘serious fun’ part may be a bit of an exaggeration, but the bottom line is that using PowerPoint for our France presentation for our school’s International Night sure upped the kids’ interest factor.

And doesn’t that count for something?

Last year, we did Madagascar for International Night. This year? France. Naturally. Maddy’s choice.international night poster

The kids love using Pixie, so Owen jumped right in and made us a France flag to include.

I started off by asking Maddy, Owen, and Cora if they wanted to try something a little bit new for their project this year–if they wanted to use a bit of technology alongside our poster for International Night. They did. So we got rolling.

I said, Okay, well we’ll try a tool called ‘PowerPoint’ that I’ve used for many of my own presentations and that Daddy also uses for his presentations at work. With PowerPoint, you can make slides that show your information. And then you can print your slides.

I thought it would be cool to make a PowerPoint presentation that we could play during International Night and use the slides to decorate our big poster. Does that sound okay to you?

It did. Phew.

So we began:

1. We built background knowledge on the format. I showed them a really quick example of a PowerPoint presentation I used for a meeting I had a few months ago so that they knew how a PowerPoint presentation could look:


2. We started fresh. I opened a new presentation [File -> New Presentation].

power point theme change

I showed them all of the ways we could change basic format and fonts.

We chose one that we thought would be simple and clear but bright and cool: Newsprint.

power point presentation newsprint


3.  We brainstormed.  We wrote down all of the topics that we wanted to include in our presentation, trying to cover all of the things people would want to know about France. We came up with: Intro, flag, food, clothes, language, people, art, buildings, history, school, and sports.

international night poster brainstorm

Then I showed them how to create new slides: [Insert–> New Slide OR Insert–> Duplicate Slide].

Maddy set us up with a new slide for each of our topics.

power point new slide


4. We researched.  We jumped over to PBS LearningMedia. We used KidRex. We used Time for Kids and Kids National Geographic.   The kids came up with the search terms, something that we’ve done quite often in the past.

We went simple, and we found what we needed: France map; food in france; france and clothes.


international night research


international night research


5. We created. For the sake of time, we added information to the slides as we found it. We did our best to read information, put it into our own words by summarizing it, and then typing it into each slide.

Because our focus with this was simply to get them some basic information on France and to get them familiar with PowerPoint, I didn’t worry too much about proper citation of photos and information. Believe me, as a former high school English teacher, I totally understand how important that is; however, I had to choose my battles here.

Instead, I created a ‘Resources’ page at the end of our slideshow, and anything we took from the internet, we added to that page. I felt it was enough to emphasize the importance of not just grabbing from the internet, but it also emI showed them how to

When we needed images, I showed them how to change our search terms on Google from ‘Search’ to ‘Images’ and drag the ones we wanted to use to the desktop.

google search

Then we could easily insert the new images into our presentation.

6. We added transitions.  In a really basic way.  Since I knew we’d keep our presentation on a loop, I knew I wanted to have the transitions advance after a few seconds, so we changed that, and we unclicked ‘on mouse click’.

power point transitions

7. We moved slides. I showed Maddy, Owen, and Cora how to view the presentation with the slides on the left side [view–> normal] OR [view–> slide sorter] so that we could easily move slides into a different order.

We moved them around in a way that we thought made the most sense.

france ppt full screen

8. We saved it. We saved it as a movie [file–> save as –> movie] so that it would loop while we stood at our booth.

9. We added, edited, and revised. And soon our presentation totally rocked the house.

10. We printed. We printed each slide four on a page because we thought that was the best size for our poster.  We followed [print –> preview –>images per page –> four], but I’m sure there are a million other ways to do it.

11. We blinged our board.  We covered it in France’s colors: red, white, and blue.

http://kids.nationalgeographic.com

We added letters at the top: FRANCE.

http://kids.nationalgeographic.com

http://kids.nationalgeographic.com

We cut out our slides with fancy scissors.

http://kids.nationalgeographic.com

international night poster

And we mounted each slide on another piece of construction paper.  Because doesn’t everything look so much more beautiful when mounted on colored paper?

http://kids.nationalgeographic.com

http://kids.nationalgeographic.com

international night poster

And we blinged a bit more, signed our work, and we were finished.

international night poster

international night poster

12. We gathered our French materials.  Thank goodness for our good friends whose grandmother is French and for my husband who has some French connections at the school where he works because our French display rocked.

We had flags, children’s books, a beret, French money, posters, and more. And we picked up some croissants at the grocery store, cdigital kids teachmama.com buttonut them in thirds, and gave our friends a little (teeny) taste of authentic France. Or as authentic as we could muster with us not being very French for real.

We set our France Presentation on autoplay, and we were good. To. Go. Woot.

Want a few more advanced PowerPoint links for your Digital Kids?   Check out:

  • PowerPoint in the Classroom by ACT
  • e-Learning for Kids PowerPoint


And really? That’s that. The kids had fun. I had fun. And they were proud of their display.

Was it perfect? Hardly. Is this PowerPoint tutorial perfect. Far from it.

But it’s here to prove that with a little bit of effort, we can give our kids a taste of something more technologically advanced than they may think they are capable of. And perhaps this little touch of PowerPoint may give them more confidence when it comes to doing another presentation down the road.


Next up: iPad Notes–fun family interviews

March 20, 2013 3 comments
0 FacebookTwitterPinterestPocketEmail
how to build a stage | teachmama.com
christmasholidays

An Easy-To-Build Stage For The Performers In Your Family

by Teach Mama March 6, 2013
written by Teach Mama


That’s right. A stage.

So your kids can totally rock it out during your spring break Staycation.  Or so your house becomes THE house for playdates.  Or so you and your husband can John and Olivia to some Summer Lovin’.  Or whatever floats your boat.

Think: a stage for plays, songs, acts, dances. Lots of pretending, lots of imagining, lots of dreaming.

Maddy, Owen, and Cora woke up Christmas morning to their very own homemade stage–a gift that came complete with rockstar karaoke machine and superstar lights. And it was–hands down–a big win for everyone.

We’ve had kids on stage, parents on stage, grandparents and aunts and uncles on stage. We’ve had cousins on stage and friends on stage and pets on stage.   And that’s only the beginning.

Here’s the skinny. . .

  • An Easy-to-Build Stage for the Performers in Your Family:  I’m going to let my amazingly talented father-in-law take over here, since he and my husband were the masterminds behind this awesome stage.

They did the hard part. The planning and heavy lifting. I embellished.

——————————————–

from planner & stage builder, Tom Mascott:

Last fall our son asked me to help him build a simple stage for his and Amy’s three kids, ages 5, 7, 9.  Like most kids they love to do skits, sing karaoke and dance.  They thought a stage would be fun to highlight the kids’ performances.

We designed an easy-to-build 4’x6’ stage made up of two, independent 3’x4’ platforms, which can be used separately, or bolted together to make one larger stage.  Two platforms have the advantages of being lighter to move and being able to use only one when floor space is limited.

The kids love it.  Turns out to be fun for the entire family, including Grandma and I who perform a mean karaoke number.  On stage is a great place to spend fun time together with the family.

how to build a stage finished

Material list:

  • 4-  2”x6”x8’ pine*
  • 1-  2”x4”x8’ pine*
  • 1-  4’x8’x 5/8” plywood- good one side
  • 1¼ “ flat-head wood screws
  • 3”  flat-head wood screws
  • 2-  3½”x1/2” dia. hex bolts, four washers and two hex nuts
  • 8-  1½ “ corner brackets and approximately 35- ¾” round-head wood screws**
  • Wood glue
  • Linoleum or other flooring material and appropriate glue
  • Wood filler
  • Paint, we used interior, high-gloss enamel, latex black paint

*It is important to select framing lumber that is straight, without being bowed or twisted.

** We used ¾” sheet metal screws, which worked just as well.

—————————————————————–

build a stage tools

Tools required  

  • Power circular hand saw
  • Hand power drill
  • 10’+ tape measure
  • Carpenter square
  • Phillips head screw driver
  • Hammer
  • Selection of small drill bits, ½” flat drill or round drill
  • Counter-sink bit to drill for counter sinking wood screws.  You can use a standard, round drill bit but be careful not to drill too deep a hole.
  • Two clamps
  • Tools required for installing the type of glue and flooring you choose
  • Medium grade (60-80 grit) sand paper
  • Sanding block
  • Paint brush
  • Wrench to tighten bolts and nuts

—————————————————————–

Instructions:

1.  Cut the tops of both platforms.  Cut two 3’x4′ pieces from the 4’x8′ sheet of plywood.  All corners must be square.

build a stage: wood

cut framing lumber

2.  Cut framing lumber.  From each 2″x6″x8′ cut a 35 15/16″ piece and a 44 15/16″ piece.  (The 1′ length remaining from each 2″x6″ will not be used.) Use a carpenter square when drawing cut lines.  Place the 2″x6″s along the edges of the plywood to see if they are the correct length.  The longer pieces will fit inside the shorter ones. The 2″x6″s should fit just inside the edges of the plywood.  If they fit properly, they’re ready to be attached.   (see photo)

3.  Screw plywood to framing lumber.  The “better” side of the framing 2″x6″s should face out.  We preferred to screw the plywood to the frame using 1 1/4″ wood screws, 8”-10” apart, before screwing the frame together, however either order works.

Later, the two platforms will be bolted together along the 4’ sides.  Identify which 4’ sides will be fastened together.  It is critical that the 2’x6”s NOT stick out past the edge of the plywood along these sides.

build a stage

fasten one 2’x6′ at a time (photo 3)

Fasten one 2’x6” at a time.  Pre drill and counter sink screw holes in the plywood.  Spread wood glue on the top edge of the 2″x6″s before screwing down plywood.  The 2″x6″s should be attached just inside the edges of the plywood. (see photo 3)

4.  Screw the corners of the 2″x6″s together using 2- 3″ wood screws in each corner.   Pre drill and counter sink screws.


build a stage photo 3

install corner brackets (photo 4)

5.  Install corner brackets.  Fasten the corner brackets to each inside corner of each platform, up approximately 1″-1 1/2″ from the bottom edge of the frame using 3/4″ round-head wood screws.  Pre-drill screw holes.  (see photo 4)


build a stage photo 5

cut and attach 2’x4′ supports (photo 5)

6.  Cut and attach 2″x4″ supports.  Turn both platforms upside down.  Cut the 2″x4″s to fit snugly inside the 3′ sides of each frame.  Apply wood glue to one edge of the 2″x4″s.  Place the glued edge down on plywood half way between sides of frame.  Screw in place with 2- 3″ wood screws at each end.  Pre drill and counter sink screws.  Turn platforms right side up and screw plywood to 2″x4″s with 1 1/4″ wood screws.  Counter sink screws.  (see photo 5)

7.   Prepare frame for painting.  Fill the groves between plywood and 2″x6″s, and the holes in the frame with wood filler.  Also, fill all screw holes in frame and plywood.  Sand wood filler when filler dries.  Refill any holes that remain and sand.  Also, sand any splinter edges on the plywood and frame.

We primed and painted the frame before installing linoleum.

8.  Install the flooring to the top of the platforms.  The surface of the plywood should be smooth with no screw heads sticking up and free of dust and debris.  Cover each platform separately. Refer to manufacture’s instructions when gluing flooring to plywood.

If you use linoleum, cut 2 pieces, each piece at least 2″ longer and wider than the platform.  If there is a pattern in the floor covering, be careful to cut and install each piece so that when the two platforms are side by side the pattern is repeated from one platform to the other.  Remember, platforms will be attached along the 4′ sides that you identified in Step 3.


build a stage photo 2

trim excess flooring (photo 2)

After glue dries, trim excess flooring back to edge of plywood.  We used a utility knife to trim our linoleum.  (photo 2)


build a stage photo 6

fasten two platforms together (photo 6)

9.  Fasten the two platforms together.  Stand up the two platforms on the 3’ sides such that the two 4’ sides that will be bolted together are next to each other.  Clamp the two platforms together.  Check to be sure that the surface of the platforms are flush, as well as the 2”x6” sides.  If adjustment is necessary, loosen the clamps slightly, adjust the frames as needed and re-tighten the clamps.  (photo 6)


build a stage photo 4

drill holes (photo 4)

Drill two ½” holes through the double 2”x6”s, each about 8”-10” from the end.  Put a washer on each bolt, tap the bolts through the holes, slip on a second washer and turn on a nut.  Tighten snugly.  Remove clamps.  Lower top edge of stage to floor.  (photo 4)

how to build a stage: bottom

My husband (and Brady) tighten up the stage before we set it out. . .

how to build a stage: decorate - 01

. . . and now it’s ready to go!

Your stage is finished!

—————————————————————–

Do you want the Easy-to-Build Stage Directions to download and print? Here they are: Easy-to-Build Stage Directions.

Have questions as you’re building? Feel free to tweet with my father-in-law: @TMascott

Thank you, thank you, Tom for doing an incredible job with this!!

—————————————————————–

 Now? Make that stage even more beautiful than it already is! Decorate!

how to build a stage: decorate - 04

taping our mirror plates

how to build a stage: decorate - sheers

We hung two plastic hooks on the wall for the ‘curtain’. . .

how to build a stage: decorate - ribbon

. . . and secured it with a fancy-schmancy ribbon.

These may not be exactly what we used, but they’re pretty darn close. 

  • hot pink window sheers as our backdrop
  • self-adhesive wall hooks
  • self-adhesive mirror tiles (we used two packs of 4, but I’d like them to cover the back wall)
  • string of star lights
  • black tree lamp with multi-colored lightbulbs
  • our standing easel as an announcement board
  • and of course, our Karaoke Machine! (This is exactly our model, and we love it!)
  • several party song CD’s for the machine (though if you have an iPod, you can dock it on the machine)

The possibilities are endless–I’d love to see what other people come up with, so do please share your photos here or on our facebook page!


how to build a stage--finished

My dream was a curtain that opened and closed, but that was just too much for us with the holiday crunch. Maybe soon!


And that’s it–an easy-to-build stage for the little (and not-so-little) performers in your family.  Something that will yield hours of fun family time, loads of memories, and (okay, I’ll be honest) maybe a headache or two. . . but it’s so worth it.

What are you waiting for? Get the stage plans printed, get to the hardware store, and start building–then watch those creative-kids go!

fyi: Affiliate links are used in this post.  Many thanks for your consideration in using them!

Huge, huge, huge and happy thanks to my husband and his talented dad, Tom Mascott,  for their hard work in making our stage dream come true! Thanks also to Tom for writing this detailed and difficult post with easy-to-follow directions. You both are amazing, and we are s lucky to have you!  What’s that next project going to be, I wonder? . . . 

March 6, 2013 9 comments
0 FacebookTwitterPinterestPocketEmail
fave programs for 6-9 yo | teachmama.com
family funfamily lifeindoor activities

Our Fave TV Programming For 6-9 Year Olds

by Teach Mama February 11, 2013
written by Teach Mama

We are big into managing our kids’ screen time over here, and that’s no secret.

Though we truly value all they can learn with the help of technology, and we also know that they need a whole lot of time away from the screen to keep themselves balanced and healthy.

We also believe that kids need down-time in front of the ole television once in a while. However, we’re really careful about what we throw in front of them.

So our DVR is packed with programs that we have chosen carefully–and we continue to choose carefully.

Sure, it’s an ever-growing list, always changing with our kids’ interests and ages, but for a good 4-5 months, we stick with the same menu on the DVR.

Here’s the skinny. . .

  • Our Fave Programming for 6-9 year olds: Right now, with a 9, 7, and an almost 6 year old in the house, our interests have changed a bit from where they were a few short years ago.  Back then, we relied heavily on Sesame Street, SuperWHY!, Dora & Diego, Dinosaur Train, Little Einsteins, and Between the Lions.

Now, here’s our list:


fave programs for 6-9 yo word girl

  • Word Girl: The whole focus here is words and word-learning.  Which is why I totally heart it. And my kids love the crazy creatures and superheroes throughout.  It’s big-time word-consciousness, to the max. Playing with words and learning words and celebrating words.

Sometimes, I wish they used words a little more kindly, but I may be a little hyper sensitive to those things. Where some parents don’t mind a ‘stupid’ or ‘dumb’ thrown in now and again, those words make me cringe.  Overall, the learning and high-interest piece outweighs that occasional (grrr!) ‘dumb’.

fave programs for 6-9 yo wild kratts

  • Wild Kratts: Maddy, Owen, and Cora totally love the Wild Kratts right now.  And I’m over the moon about it. It’s a cartoon-real actor show, and I think they really dig that format.

The Kratts are zoologist brothers who know everything there is to know about animals, so there’s definite learning in each episode. They find themselves in crazy situations, and each high-interest adventure seems to be more exciting than the next.  The random–totally cool–facts that my kids can hit you with about animals I completely attribute to Wild Kratts.

I particularly love the resources available for follow-up: PBS Kids has fab Wild Kratts resources online, available to anyone and everyone that focus on animals, learning, and fun.  There are a bunch of printables and videos up there, too.  The Wild Kratts app is a huge fave of ours, and they just released the first Wild Kratts Creature Power app. It’s awesome, so I’m betting there will be plenty more to follow.

fave programs for 6-9 yo electric company

  • Electric Company: I love this show so much, I’d marry it if I could. Seriously fun music, dancing, and cool shorts all incorporated into a meaningful storyline make this a fave of mine.  Songs about words and word-building. Songs about language with a crazy techy-edge.

It’s a cool, natural next step to Sesame Street to me–and whenever my kids have it on, I’m glad.  And similar to the Wild Kratts, the foll0w-up Electric Company resources on the PBS Kids are out of this world.  Games, printables, videos, and shorts–all great and totally well done.


fave programs for 6-9 yo fetch

  • Fetch With Ruff Ruffman: Love. This. Show.

And one of the greatest things as a parent is to find cool shows for your kids that you actually don’t mind sitting down with them and watching.

Fetch With Ruff Ruffman is part cartoon, part real-life gameshow, and ever since we saw our first episode several years ago, Maddy declared it was her dream to be one of the FETCHers and hang out with Sherya and the crew.  The FETCHers go on adventures and challenges that take them to the coolest spots, learning and having a blast along the way.

They have challenges–to build a bear-proof picnic basket or to bake a wedding cake for a wedding!–and they try to meet those challenges with the help of on-the-field experts. Great show, and again, great resources for follow-up.

fave programs for 6-9 yo good luck charlie

  • Good Luck Charlie: I hesitated on this one for a while because it seemed so ‘big’ for my littles, but it’s finally been approved in my book.  I met the star, the delightful and talented Bridgit Mendler during a Give With Target event I attended in Baltimore, and I loved her.

I even crowd-sourced my friends to see which ‘big kid’ shows they let their kids watch, and Good Luck Charlie came up again and again.

It’s a family show about families. A big family with mixed-age kids and a mom who is always trying to re-live her days in front of the camera, it’s silly and light-hearted. And though the teen characters sometimes say silly things or get flirty, it feels to me like a good show to bridge the kid- and tween- years for Maddy.

fave programs for 6-9 yo sofia

  • Sofia the First: Love this show. Love it.

It’s like a mini-movie wrapped up in a 30-minute animated program for little ones. And though the age recommendation is like 3 or so (shhhh!) my Maddy and Owen both enjoy watching it-and never complain.

Sofia’s mom remarried, and Sofia lands herself in royalty, complete with step-siblings and forest friends. I love the music in this one, and I love occasional visits from familiar Disney friends.  Honestly, it’s a beautiful show with beautiful messages.  Yes, yes, and yes.


fave programs for 6-9 yo

  • Doc McStuffins: It’s on the low end age-wise, I realize that–but my Maddy and Owen will still watch this show–and willingly. It’s a super-sweet show about 6 year old Doc McStuffins who takes care of her lovies and teaches viewers about health and well-being along the way.

Cute characters and gentle storylines keep my kids coming back to this one, and I’m totally cool with it.  I like especially that our main character is a female doctor because for goodness sakes it’s time.

Television. It’s tricky. It’s for some kids but not all, and one program that may work for one kid may not suit another.

Cora is still 5. But yes, she’ll be 6 next month.   Don’t think I’m trying to push her little body along, forcing her to grow up too quickly, but the fact is that as many parents know, the older kids in the house tend to manage–or want to manage–the screen choices.

I’m conscious of that, believe me.

common sense media

Maddy watched 30 minutes of Sesame Street while I made dinner up until the time she was 7 1/2–and I appreciated every minute of it. Though she may have complained–I’m the only first grader in the whole, wide world who has to watch Sesame Streeeeeeeeeeeet!— I was steadfast.

If you don’t want to watch it, you absolutely do not have to, I’d tell her. Go upstairs and play while I make dinner and Cora and Owen watch the show. It’s a great show–and it’s part of the reason you’re as smart as you are–because I refused to let you let you sit in front of the tv watching junk for your brain.  Your choice, my friend.

I never felt bad about it. Never. Because I could–and still do–see the value in Sesame Street programming.  But I did realize that when Cora hit 5 years old, she could handle the next step in programming for kids. I took a leap of faith (not a big one), asked my smart friends, did my research, and stuck with some names I could rely on: PBS and Disney.

I also lean heavily on Common Sense Media for any and all programming questions I may have.  It’s incredible. And it’s there to support families. And it’s free.  And there’s an app. So it’s pretty much like a dream.

And sure, we stray now and again, and the kids love an occasional Wheel of Fortune or Cupcake Wars, but for the most part? This is where we are, what we’re doing.

Any other faves? Please let me know–I’m always willing to learn!


fyi: Like I said, I rely heavily on Common Sense Media for all of my programming choices for Maddy, Owen, and Cora. Please do check them out:  — and THANK YOU! to my friends at Common Sense Media!  And in full disclosure, I am part of the PBSKids VIPS, but I was a longtime PBS fan well before I jumped on board as a VIP!

February 11, 2013 14 comments
0 FacebookTwitterPinterestPocketEmail
high school basketball game
family funfamily lifeindoor activities

High School Basketball Games: Why Families Should Go

by Teach Mama February 8, 2013
written by Teach Mama

Totally new-for-us this last month was something that I wish we would have done sooner, but I think our kids are finally at just-the-right age.

Just like the ole days (at least for me!) we spent a recent, wintery Friday night in a brightly-lit high school gymnasium, rockin’ it out at a high school basketball game.

And it was a total blast.

Maddy, Owen, and Cora had so much fun that we all want to return sooner rather than later, and the following week we even hit a local college’s gymnastics competition. We’re addicted to local sports.

And it’s not a bad thing.

Here’s the skinny. . .

High School Basketball Games–Why Families Should Go:

There are probably a good dozen or so reasons why families should take some time out to support local sports, but I whittled it down to three.

high school basketball games with kids

 1. The Teamwork.

There’s some serious teamwork going on at high school basketball games–or at least there should be.

And even if you’re not watching a stellar team full of future NCAA or NBA stars, a good coach should run a team tightly, with a whole lot of cheering and support for each other.

Most teams now have chants or little team-building rituals that are great for our little guys to see.  It not only gives them something to aim for down the road (Wouldn’t it be awesome if I were part of a team like that?!), but it gives them something to talk to the ‘big guys’ about next time they see them in the neighborhood.

high school basketball games

2.  The ‘Big’ Kids.

C’mon, guys, really, there’s no reason to fear ‘big kids’ — and I’m not even saying that because I was a high school English teacher.

As parents of young children, I’m realizing first-hand how important it is to find responsible, creative, fun ‘big kids’ as role models for my own ‘little ones’. 

Part of the reason that Maddy, Owen, and Cora all love their summertime swim team is because of their coaches–who just happen to be local high school and middle school kids.

And to see those very same ‘big kids’ shooting hoops on the high school court–or cheering or dancing or playing in the band–is so totally beyond cool for them.

high school basketball games for families

3.  The Excitement.

Especially now, later in the season, these games are surprisingly exciting. And I’m not even that big of a sports gal.

But when it comes down to the semi-finals and finals–add two ‘rival’ teams from across town–there is a buzz in the air.  There’s usually a mostly-full gymnasium, and often schools even bring out the band or dance squad.

It’s really cool.  Loud, yes–but cool–and so exciting for our little ones to see.

Are there more reasons we should support local sports?

Ohmygosh yes!

But these are just a few off the top of my head.

Should parents be on the watch for some crazy outfits, some nuts language, and maybe some on-the-court arguments? Yep.

But isn’t that life? Talk about some perfect ‘teachable’ moments about topics that might not otherwise arise in the safety of your own home, right?

So google your local high school, check the basketball schedule, and head on out there! Stretch bedtime for one night, and enjoy watching the stars in your kiddos’ eyes.  Buy ’em some popcorn and Skittles, and they’ll talk about it for weeks to come.

And then? Try the less-popular sports, a debate match, or a drama production.  The sky’s the limit.

Just enjoy the family time and the new-for-you fun!

high school basketball game

Check out a few other posts that may help you develop strong and healthy habits for your family:

  • wait time
  • my day, your day
  • frozen peas
  • kids who rock the kitchen
  • kids who rock the laundry
  • rest time
  • gem jars
  • arm circles
  • noticing kids
  • homework routine

fyi: Some of the links in the post above are “affiliate links.” This means if you click on the link and purchase the item, I will receive an affiliate commission. Forever and always I recommend only products or services I use personally and believe will add value to my readers. I am disclosing this in accordance with the Federal Trade Commission’s 16 CFR, Part 255: “Guides Concerning the Use of Endorsements and Testimonials in Advertising.”  For more information, please see teachmama media, llc. disclosure policy. 

February 8, 2013 3 comments
0 FacebookTwitterPinterestPocketEmail
homemade bookmark valentines
holidaysvalentine's day

Homemade Scratch Art bookmark Valentines: Easy, Cool, Kid-Happy

by Teach Mama February 1, 2013
written by Teach Mama

It’s that time of year when hearts and love and pink and hugs and candy and kisses are in the air.


So the kids and I have been busy making Valentines for their classmates—one of our favorite holiday traditions.

This year, with the help of Melissa & Doug’s Scratch Art Bookmarks, our homemade Valentines stepped up a few notches on the cool meter.   Actually, they’re so cool and Maddy, Owen, and Cora are so excited to share them with their buddies, that these homemade Scratch Art Bookmark Valentines may actually be off of the cool meter.

They were quick and easy to make which is a plus when you’re working with a 9, 7, and 5 year old, but they’re still totally and completely cute.

Anyone can make them.  And all kids will love ‘em.

And there’s no glue involved. (Hey, that’s a plus for some families. . .)

Here’s the skinny. . .

Homemade Scratch Art Bookmark Valentines:

Scratch Art meets bookmarks meets Valentine’s Day. So fun.homemade bookmark valentines supplies

Our supplies are ready to go–hole punch, Valentine cards, and scissors!

Scratch Art Bookmarks are simply bookmarks that appear plain-Jane black and boring. But with the help of a teeny, little scratch stick, you can ‘scratch’ designs–letters, words, shapes, scenes, you name it–and the images appear in a fun ‘hidden’ rainbow pattern.

bookmark valentines stamp cora

It’s the same Scratch Art material that we used for Maddy’s Golden Birthday goodie bags back in December, but we used key chains, fashion dolls, and bracelets.

For our Bookmark Valentines, we used the Scratch Art Bookmark Party Pack which includes 12 bookmarks, 12 scratching sticks, and 12 ribbons for the bookmark.

homemade bookmark valentines stick


homemade bookmark valentines


What took the longest was creating the actual card part; though I knew we were going to rock it out with the Scratch Art® Bookmarks, I wasn’t sure how we were going to incorporate the bookmark and the card part.  But I played around with sizes, with folds, with where to put the stick and where the kids could sign the cards, and I think we nailed it.

I created the Bookmark Valentines 2013 sheet, and then I printed it out on brightly-colored cardstock, about 65lb.  There are four cards on each sheet, and the document has three pages of cards for a total of 12 cards each.

The Bookmark Valentines can be printed after throwing your email in the box below:

I have no idea how many total I printed, but definitely enough to cover Maddy, Owen, and Cora’s classes.

After the cards were cut, the kids folded them in half.  It was easiest for them to figure out where to sign them once the cards were folded.

Maddy, Owen, and Cora each added a Valentine’s-type stamp—hearts, ‘LOVE’, flowers, and the like—and then they signed their names.

bookmark valentines owen stamp write

Next we added a fancy ribbon to the Scratch Art bookmark. The set comes with shiny red ribbons, but we mixed it up a bit and added some festive ribbons we had here at home—gold, white, pink, silver, and dotted.

While the kids were busy stamping and signing the cards and stringing their bookmarks, I was flexing my muscles with the hole-punch.

homemade bookmark valentines ribbon

I created the Valentine cards with two tiny ‘X’s’ on the front of each card. These were for me so I knew where to punch the holes.  Once holes were punched, the kids threaded the stick through, and the we were finished!

Miraculously, once the scratch stick was through the holes, the card stayed shut and the bookmark was safe.  So. Totally. Cute!  And so. Totally. Functional. No tape, no glue. Schweet!

homemade bookmark valentines ribbon


homemade bookmark valentines finish


So over several days, we cut, stamped, signed, threaded, punched, and sorted Valentines.  And while we worked, we chatted, laughed, and worked together to ‘tweak’ our process so that everyone was comfortable with what they were doing.

And we were all pretty positive that these Scratch Art Bookmark Valentines would be a huge hit for their classmates and teachers!  Such a fun way of celebrating our our kids’ love of reading with a Valentine treat that didn’t involve sweets!


homemade bookmark valentines finished


homemade bookmark valentines finished


homemade bookmark valentines finished


So there you have it, another year of homemade Valentines made simply–but with a whole lot of love.

Happy Valentine-making, friends!

Want a few more fun Valentine’s Day ideas? Check out: 

valentine's day class party ideas

how to throw a rockstar valentine's day party teachmama.com 2


valentine's day class party ideas, 2.0 | teachmama.com

  • How to throw a rockstar Valentine’s Day class party
  • Valentine’s Day Class party 2.0
  • Musical Hearts
  • Secret Message Valentines
  • Bookmark Valentines
  • Scratch-Off Ticket Valentines
  • Valentine’s Day Lunchbox Notes
  • HEART Bingo

fyi: Some of the links in the post are “affiliate links.” This means if you click on the link and purchase the item, I will receive an affiliate commission. Forever and always I recommend only products or services I use personally and believe will add value to my readers. I am disclosing this in accordance with the Federal Trade Commission’s 16 CFR, Part 255: “Guides Concerning the Use of Endorsements and Testimonials in Advertising.”  For more information, please see teachmama media, llc. disclosure policy. 

February 1, 2013 10 comments
0 FacebookTwitterPinterestPocketEmail
candy cane experiments
sciencescience experiments for kids

Candy Cane Experiments 2.0

by Teach Mama January 22, 2013
written by Teach Mama

We are always looking for reasons to play with our food over here, so when we put away the last of the holiday decorations, instead of tossing our candy canes, we held onto those puppies.

Today, in between a lot of lazying around, game-playing, book-reading, Hex-bug playing, we threw in a bit of candy cane experimenting. Candy cane experiments, 2.0.

So fun.

Nothing crazy complicated. Nothing involved or research-based.

We really just kind of free-played with candy canes, chatted, and enjoyed our creations.

candy cane experiments

Here’s the skinny. . .

  • Candy Cane Experiments, 2.0: We often play with candy over here–we’re a sweet-toothed family who jumps on any reason at all to hang around sugar in the kitchen.

The kids remembered especially loving playing with candy canes before–when we had fun experimenting with candy canes.  So when I asked if anyone was up for it, they totally were.

candy cane experiments, 2.0 | easy, at-home fun and learning


We’re getting ready. . .

candy cane experiments


. . . candy canes lined up and ready to hit the heat!

This time, our goal was free-bird creating and playing.

We started by having everyone help unwrap the candy canes, and then we talked about the best way to ‘soften’ the candy canes.  Maddy suggested putting the same sized ones on the tray at a time so that the smaller ones wouldn’t melt while the bigger ones just softened.

Just like we did last time we experimented with candy canes, we put them in for a short time on a very low temperature–about 250 degrees for about 3-5 minutes.   We ‘baked’ 3-4 at a time; we’d soften, pull them out of the oven and play, then put the next batch in.


candy cane experiments


At first, getting the time and temperature and handling down was tough. . .

candy cane experiments


. . . but the kids got the hang of it by the second batch.

We wanted to be able to move them around without having them break or burn our fingers.

They were hot!–even when in for a short bit of time, these babies got hot. But the kids really loved twisting and turning and pulling and flattening.

You know us–we can’t just free-play for too long (totally my fault, I know!). So after the third batch came out, I gave them a challenge:

Okay, candy cane challenge number one: let’s see who can make the coolest, craziest shape.

candy cane experiments


Crazy shape from Owen–a pretzel.

candy cane experiments


Still not sure how the O-Man managed his shapes. . .

candy cane experiments


. . . and Cora’s twists were crazy cool.

Their shapes. Were. Crazy.  Maddy was a star at pulling and stretching. Cora was big into making teeny, tiny twists and twirls.  Owen tied knots and made pretzel shapes.

Yes, they said Ooooh, mine’s hot! This one is really hot! once in a while, but it didn’t stop them.

They were on a mission. Big time.

Then I hit them with challenge number two: Let’s see who can make a number or letter–or if you really love making crazy shapes, you can still do that. No biggie.

candy cane experiments


Letter ‘C’ in the house.

candy cane experiments


Maddy’s ‘M’s turned into looooong, skinny sugar threads.

And Cora, of course, rocked out a ‘C’, and Owen tried for an ‘O’.  Maddy’s ‘M’ morphed into a long, skinny stretch of candy, and that’s as far as we got.

We were better off combining tiny pieces to make letters, and that’s what we did.

It was fun–so fun.

candy cane experiments


our ‘candy’ creation

candy cane experiments


The kids will absolutely love having these as their desserts in lunch this week. . .

candy cane experiments


. . . and I’m betting their friends will get a kick out of them, too!

Today’s ‘experimenting’ reminded me of all of the hours and hours we spent in the kitchen when my three teenies were home with me all day long–but it was really good proof that they still really need this kind of hands-on, fun and spontaneous, silly learning and play at home on the weekends.

And so do I.

Here’s to freebie days off of school and three crazy-cool kids who are always up for doing something fun.

Happy candy cane experimenting–and if you do decide to try it, share your photos! I’d love to see them!

Want a few more fun, foodie-science ideas?

Check out:

  • candy experiments, play with color
  • candy experiments part 1
  • paint with candy
  • candy cane experiments, 2.0
  • How to Have Some Fun With Leftover Candy Canes
  • learn with food
  • get kids to try new foods
  • fractions with food
  • chocolate math
  • monster sandwiches
January 22, 2013 9 comments
0 FacebookTwitterPinterestPocketEmail
Happy Face and Flower Valentines
holidaysvalentine's day

Our Happy Face and Flower Valentines

by Teach Mama January 19, 2013
written by Teach Mama

originally published on 2/5/2010:

——————

There’s something about creating homemade Valentines that makes my heart skip a beat.

So as long as I’m able–and my kids are willing–I hope to helpthem with their Valentines for their pals each year.

happy face and flower valentines

Last year, we made simple, glittery, Foamie-clad Valentine cards while we jammed to Laurie Berkner, so this year I thought we’d do something different.

I saw these cute Flower Valentines in Family Fun Magazine (I swear I don’t work for them–but I’d love to!).

Anyway, I couldn’t live with myself if I sent Owen to school with the same ones. So for him, we created Happy Face Valentines, and they are way too cute.

Happy Face & Flower Valentines:

These are pretty simple to make; they just require cutting out shapes ahead of time and picking up inexpensive lollipops.

happy face and flower valentines patterns
the patterns

I made a verrrry simple pattern that includes both the Flower Valentine and the Happy Face Valentine. They do not need to be perfect!

happy face flowery valentines patterns

The Flower Valentine has three parts: a pinwheel, a small circle, petals, and leaves.

The Happy Face Valentine has a small circle and a large circle.

We used old cards (seriously, the possibilities for cards are endless!), some cardstock, and some wrapping paper for the parts but construction paper for the big circle, petals, and leaves.

For the last few days, every now and again, Maddy and I would trace and cut. If I folded construction paper and cut right over the pattern, I could cut out six or more at once.

They were done in no time.

Today, I used a sharp knife to make a hole in the middle of each so that they were ready for assembly this afternoon.

happy face flowery valentines patterns

Maddy assembles her Flower Valentines

happy face flowery valentines patterns
Then Owen signed his name on the large circles, enough for his school buddies and teachers, and Maddy wrote her name on her petals.

Cora wrote her ‘C’ on a few petals, but then she was finished.

When the names were written, we assembled.

happy face flowery valentines patterns

Maddy’s finished Valentines!

The Happy Face Valentines just required the lollipop, small circle, and large circle.

The Flower Valentines required a lollipop, then the pinwheel, small circle, petals, and leaves.

I put a tiny piece of tape on the last piece of all the Valentines to keep them from falling apart, but if the hole is small enough, it’s pretty stable.

Maddy and Owen complained like crazy after writing their names when they hit the ninth or tenth times, but knowing they could have a lollipop while they assembled their ‘cards’ was reason enough to plow through. (And I loved the name-writing practice I forced upon them!)

I was thinking about taking the letter stamps–at least for Cora to stamp her name on her cards–but I never got around to it. With two feet of snow coming tomorrow, we’ve all got snow on the brain.

But it sure was nice to spend time in a sunny, happy-faced, lollipop flower garden for a bit today before we’re surrounded by winter once again.


Want a few more fun Valentine’s Day ideas? Check out: 

how to throw a rockstar valentine's day party teachmama.com 2


valentine's day class party ideas, 2.0 | teachmama.com

minute to win it class party | teachmama.com

valentines-day-class-party-ideas-teachmama.com_

  • How to throw a rockstar Valentine’s Day class party
  • Valentine’s Day Class party 2.0
  • Valentine’s Day Class Party ideas: Get Kids Moving and Grooving
  • Minute to Win It Class Party
  • Musical Hearts
  • Secret Message Valentines
  • Melted Crayon Valentines
  • Bookmark Valentines
  • Scratch-Off Ticket Valentines
  • Valentine’s Day Lunchbox Notes
  • HEART Bingo


fyi: Some of the links in the post above are “affiliate links.” This means if you click on the link and purchase the item, I will receive an affiliate commission. Forever and always I recommend only products or services I use personally and believe will add value to my readers. I am disclosing this in accordance with the Federal Trade Commission’s 16 CFR, Part 255: “Guides Concerning the Use of Endorsements and Testimonials in Advertising.”  For more information, please see teachmama media, llc. disclosure policy. 

January 19, 2013 3 comments
0 FacebookTwitterPinterestPocketEmail
make silent reading more meaninful
comprehensionindependent readingreading

How To Make Silent Reading More Meaningful

by Teach Mama January 16, 2013
written by Teach Mama

Silent reading can–and should–be a meaningful, rich, awesome experience for kids.

And parents can–and should–be able to support their young readers at home, just by keeping a few important things in mind.

Research shows that the more kids read, the better readers they become. It makes sense.  So let’s give kids time.  And let’s support them while they’re there.

Let’s give them time to practice the skills they’re learning in the classroom.

Let’s give them time to really dive into texts, walk beside the characters, really get to know an author’s style, or follow a series from start to finish.

Let’s give them time to try out different genres, subjects, and authors.  Let’s provide our kids with time to relax, enjoy some ‘me-time’ and cozy up with a book.

Silent reading may have once been thrown to the wayside by the National Reading Panel (NRP, 2000), but, with a little guidance, teachers and parents can make silent–or independent–reading an integral part of the reading experience.

Here’s the skinny. . .

  • How to Make Silent Reading More Meaningful: I recall vividly, a day about six years ago, while doing some consulting work for a local charter school in our area, sharing the latest research on silent reading: there was no conclusive data proving the value of silent reading in the classroom (NRP, 2000).

silent reading meaningful

We can–and will–make silent reading totally rock the house.

And the teachers to whom I was speaking were in disbelief.  Really? No SSR? You mean that giving kids quiet time to read in the classroom doesn’t help kids become better readers?

There is no current research to prove that, I said.  Though we all know that people learn by doing, At this point, using precious class time in other ways will better support their literacy learning.

Though I shared what I had learned, I was always curious about it–I loved SSR as a kid. Didn’t we all?  Didn’t all kids deserve time carved out especially for silent reading?  I wondered: How could that time be used more effectively? How could we, as educators, prove the worth of independent reading? Could someone actually put real, true value on silent reading?

Check it out: How to Make Silent Reading More Meaningful.
Recent research, however, does prove that “more reading leads to better reading” (Sanden 2012), but more specifically, more and more studies are placing real value on independent reading when implemented consciously.

Sherry Sanden is an educator and author who writes about highly effective teachers who have implemented silent reading programs in their classrooms–and these programs yield real student growth, learning, and tons of potential.  Each program contains several of the same components, and Sanden shares her findings in an article in the November issue of The Reading Teacher.

I was particularly moved by her article because–woo-hoo! yaaa-hooo! yip, yip, yippppeeee! woot!–it provided that value to silent reading that I wish I would have had when speaking with those teachers. Yes, silent reading counts. Yes, it sure does.

All we have to do is beef it up a bit.  Check it out: How to Make Silent Reading More Meaningful.

And the cool thing? A lot of what Sanden shares is what many of us do naturally to support our young readers.    All the time? Nah. Every single time we see our kiddo grab a book and sit back to read? No way, Jose. Every so often? Yes, you better believe it.

What do you think? How do you make silent reading more meaningful at your house?  Let me know–I’d love to hear it!

many thanks to the following references:

  • “The Report of the National Reading Panel: Teaching Children to Read,” National Reading Panel. April 2000.
  • Sanden, S. (2012). Independent Reading: Perspectives and Practices of Highly Effective Teachers. The Reading Teacher, 66 (3), 222–231. doi: 10.1002/TRTR.01120
  • numerous other articles on the IRA site
January 16, 2013 15 comments
0 FacebookTwitterPinterestPocketEmail
Activitiescrafts

Homemade Name Necklaces For Girls And Boys

by Teach Mama December 21, 2012
written by Teach Mama

For months and months and months and months, Cora has asked for three things: her name on a cup, her name on a shirt, and her name on a necklace.

Not just a ‘C’, she’d beg me.  Not ‘I love you’.  I just want my name: Cora.

My name is so unusual. It’s not common, and it’s nowhere to be found. Why did you give me this naaaaaame?

We love Cora’s name. We chose it—and all of our children’s names so carefully, with so much thought, with so much discussion, with so much research and time.

Names are the very first gifts you get from your parents, Cora.  Your name is so special and so beautiful—just like you.

One day she’ll realize how perfect it is, but until then, I’m hoping she finds her name more lovely when she sees it on a homemade name necklace. Made especially for Cora, by her mama who loves her like whut.

Of course I added Maddy and Owen to the homemade name necklace mix, and I was amazed at how easy–and fabulous–they all turned out. If I can do it, anyone can.

Here’s the skinny . . .

  • Homemade Name Necklaces for Girls and Boys: It’s no secret how much we focus on names over here, so it seems natural that we would have put names on necklaces at this point—but we haven’t.

When I started searching the world for name necklaces I realized that unless I was going to pay a small fortune for what I wanted, I had to stick with a ‘C’ or go really cheap-o.

homemade name necklaces for girls and boys step 1

Another great reason to have extra greeting cards around. . .

So I decided to build my own perfect necklace for my tinies, and I started by hitting the craft store.

Be forewarned, I made mine as simply as I could, using what few jewelry-making items I had on hand, which wasn’t very much.  I did have to pick up a few things, though.  And I’m certainly no jewelry-makin’ pro.

I purchased:

  • Two 24” 1.5mm open link silver chain necklaces
  • A combo pack of silver jump rings
  • Two packs of round, flat silver circle discs
  • A mixed pack of flat-sided jewels
  • A pack of silver, jeweled embellishments (on discount)
  • A black leather rope necklace
  • A flat, rust-colored rectangle tag
  • A pack of rust-colored jump rings
  • An inexpensive pair of jewelry pliers

I used these items that I already had on hand:

  • Super heavy-duty glue
  • Rub off transfer letters
  • Two holiday cards
  • Mod Podge, dimensional magic with sparkle
  • Mod Podge, original finish

I started with the main name charm for Maddy and Cora’s necklaces.

homemade name necklaces for girls and boys step 2

I used the letters I liked from the Mod Podge rub on words and phrases

I picked out a part of each greeting card that I liked—one for each girl: very light blue swirl for Cora and a pretty teal color for Maddy.

I traced the biggest disc, about 1” diameter, on each paper, and I searched for the letters I wanted for each name charm.  I knew I wanted to put Cora’s whole name on hers (of course!) but I wanted an ‘M’ for Maddy’s. She has a ‘Madeline’ necklace, so I thought she’d be happy with her letter—simple and totally tweenish.

Then I rubbed the letters onto the disc, paying close attention to where I planned for the hole to be and where I planned to place the jewels on each.

homemade name necklaces for girls and boys owen letters

For some reason this part made me nervous—probably because I didn’t have sheets and sheets of alphabet letters; I had only a few sheets of words and phrases. So I was literally cutting, rubbing, and hoping it would work.

To begin with Owen’s name tag (not a charm for boys, silly!), very simply I rubbed his initials on one side of the tag, then I added the word ‘proud’ on the other side.

I used my thumb to press the letters onto the tag—they didn’t seem to be taking to the metal like they did to the paper for the girls’ charms.

I felt that ‘proud’ was the perfect word for him: my husband and I are so very proud of all that he does in school and at home, and he should be proud of his hard work, kindness toward others, and compassion toward his family.

homemade name necklaces for girls and boys step 3

I glued the card to the metal disc using super heavy-duty glue–then made sure the hole would land where I wanted it to.

When the names were how I wanted them, I cut out the circles and glued them to the metal discs. I used the super-heavy duty glue, and with the help of the pliers I managed to not permanently connect my fingers to the charm.

I pressed the paper to the disc firmly and let them dry for about two hours.

homemade name necklaces for girls and boys jewels

I knew I wanted to use the Mod Podge Dimensional Magic because I wanted the name charm to have a 3-D feel, and I wanted to have the jewels sit inside the dome.

I squeezed a small amount of the Mod Podge and watched it grow, adding a bit more and pushing it to the outer edges.

homemade name necklaces for girls and boys dimension

My first time ever working with Mod Podge Dimensional Magic. Cool stuff.

Then I quickly embedded the jewels on each.  I wanted one big hot pink one for Cora and four ones for Maddy: dark purple, blue, light purple, and clear.

I made sure the gems were exactly how I wanted them, and then I set them out to dry. This Mod Podge takes three or more hours to properly dry.

In the mean time, I worked on the smaller discs for each necklace. I knew I wanted one that was just gems and the other that included one of the embellishments from the pack I purchased. (But really, you could use anything—and the possibilities are excitingly endless!)

homemade name necklaces for girls and boys drying

Smaller discs would be jeweled and Owen’s tag just needed one coat of regular Mod Podge to seal.

I squeezed a little bubble of Mod Podge on each disc and on one I placed gems and the other a flower with a gem in the center. I set them out to dry.

It was hard for me to find a place where the discs could dry without getting permanently stuck to something. What I finally found but wish I would have used the whole time were teeny, tiny cookie cutters. The discs could sit above the level working space without being flush—so they could dry on both sides.

homemade name necklaces for girls and boys back side

The pliers? Totally came in handy when working with this tiny stuff–and the best ever drying racks? Teeny cookie cutters.

When each piece was totally and completely dried, I used a pushpin to poke through the hole at the top. I knew I had to seal the back, but I wanted to make sure that the hole was open so the circle connector could get through.

The Sparkle Mod Podge worked as a sealer for the backs of all of the silver discs.

Finally I was ready to put the pieces together!

homemade name necklaces for girls and boys final steps

By now I’m feeling like a jewelry-making rockstar. (Even though I’m not.)

I removed about six inches from each of the 24” necklace chains. They were too long at 24” for my little girls, but I didn’t want them to fit tightly.

I used the trusty pushpin again to make sure the hole was open, and I placed the largest of the circle connectors on the name charm and the gem charm. I wanted both of these charms to move freely on the necklace.

homemade name necklaces for girls and boys cora

Cora–I’m hoping!–will totally heart her homemade name necklace because it is blinged out like she always wants to be.

I used the smallest circle connector on the flower charm because I planned to connect it to one link of the necklace. I wanted it to lie lower- to mid-way between the bottom of the necklace and the top, kind of off-centered so the other two charms would fall to the bottom.

I have a necklace similar in style to this, and I thought the girls would like to have one that mirrored mine.

homemade name necklaces for girls and boys owen final

Hoping that my Owen likes his manly, manly name tag. . . but if he doesn’t also cool with me.

For Owen’s, all I needed to do was use one of the antiqued jump rings and he was done.  I wanted his simple and manly-manly.

I. Love. Them.  Each one. I love them all.

homemade name necklaces for girls and boys maddy

Maddy’s necklace is in blues and greens–her favorites.

I mean, I really, really love how they turned out.  These are going to be special for Maddy, Owen, and Cora on Christmas, from their dad and me, and I can’t wait for them to see them.

I secretly cannot wait to make my next one.  As an educator and mom, I firmly believe that our kiddos should know, love, and celebrate their names–any and every day of the week. So name necklaces? Bring. Them. On!

These homemade name necklaces were way more fun than I ever anticipated, and the great thing is that as long as you have a secret spot where they can hang out to dry–anyone can make them.

If you have any questions or need some more information, hit me–and I’ll do my best to answer!  Happy name-necklace making!

December 21, 2012 13 comments
0 FacebookTwitterPinterestPocketEmail
candy wreath hanging on door
christmasfeaturedholidays

how to make a candy wreath

by Teach Mama December 14, 2012
written by Teach Mama

Making a Candy Wreath is a fun and easy activity for families and gift for friends and loved ones.

It’s a win-win.


One of my favorite challenges is finding a craft that doubles both as a fun family activity and a gift–especially during this crazy busy but totally festive time of year.

And the Candy Wreath is a serious winner in both categories.

The wreath is a project since it takes several steps and takes a bit o’ quality family time and manpower.

It’s a gift–it’s beautiful when finished. And kids’ smiles upon completion are totally worth a million bucks.

For the most part, it’s inexpensive. Aside from the candy, the materials are pretty affordable–which makes it a big-time winner in my book.

Here’s the skinny. . .

How to Make a Fun and Fabulous Candy Wreath:

The Candy Wreath is simple: it’s wrapped candy tied to a wire hanger. That’s it.

To make a Candy Wreath, you simply need:

  • curling ribbon (we use gold curling ribbon, dark green curling ribbon, bright green curling ribbon, and red curling ribbon)
  • holiday colored ribbon (thicker)
  • teeny, cheapo scissors
  • a wire hanger
  • one small piece of duct tape
  • 3-5 lbs of wrapped candy (do a mix! sour fruit balls, peppermints, Jolly Ranchers, fruit-filled hard candy, butterscotches, and caramel cremes!)

But it looks like you need a whole lot whole lot more:

how to make a candy wreath cut ribbon

Lots of cutting. . .

how to make a candy wreath tie candy

. . . and tying. . .

how to make a candy wreath candy

 . . . and candy-eating goes into making these wreaths!

 Want the real skinny?

Check out How to Make a Fun & Fabulous Candy Wreath video for the steps, the how-to, and a little more:

[adthrive-in-post-video-player video-id=”uA6qkce3″ upload-date=”2019-12-11T21:21:23.000Z” name=”how to make a candy wreath — kid crafts — teachmama.com” description=”Making a candy wreath is easy, and it’s a great homemade gift that children can help make for friends, families, or offices. Having children help with cutting, tying, and arranging candy is a great way to teach them about how good it feels to create handmade gifts for loved ones.” player-type=”static”]

This is the very first year our family rocked out the Candy Wreath, though growing up, we made them quite often.

My grandma taught my mom, and my mom taught my three sisters and me, and many a winter night was spent watching tv, chatting, and cutting or tying, tying or cutting.

how to make a candy wreath wreath

Final wreath? So pretty. And such a fun gift to give.

I think I cried hard my first year at college when the infamous wreath arrived at my dorm–a care package that spoke more to me than to the tons of friends who came by to grab candy before or after class would ever know. I knew the hours that went into making it. I knew the fingers that tied those ribbons.  And I wondered how it was at home–that year I wasn’t there to make them with everybody else.

I remember feeling my heart ache for the changes that this year signified.  But I remember feeling really loved.

candy wreath close-up and hanging on door

So here’s to hoping that the Candy Wreaths are a from-here-on-out tradition for our family–and here’s to hoping that I don’t weep too heavily when I send that Candy Wreath off to my baby eight years from now–when my first heads off to college.

Happiest holidays to you!

Want a few more holiday-inspired gift ideas or activities? Check out:

must have gifts for kids and families | teachmama.com

gifts for sunday school teachers or CCD teachers | teachmama.com

kids and family gift guide from teachmama.com

teachmama gift guide 2012

holiday gift guide | teachmama.com

  • True Holiday Spirit Lunchbox Notes
  • Holiday Fun Fact and JOKES Lunchbox Notes (with Hannukah!)
  • Holiday Time Fun Fact Lunchbox Notes
  • Little Holiday Notes and Jokes
  • Holiday Notes for Families
  • The Polar Express tradition
  • Scratch-off Cards
  • K-Cup Advent Tree
  • New Year’s Family Interview
  • Happy Holidays Backyard Birds 

fyi: Some of the links in the post above are “affiliate links.” This means if you click on the link and purchase the item, I will receive an affiliate commission. Forever and always I recommend only products or services I use personally and believe will add value to my readers. I am disclosing this in accordance with the Federal Trade Commission’s 16 CFR, Part 255: “Guides Concerning the Use of Endorsements and Testimonials in Advertising.”  For more information, please see teachmama media, llc. disclosure policy. 

December 14, 2012 14 comments
0 FacebookTwitterPinterestPocketEmail
help kids with articulation
foundationsspeaking

How To Help Kids With Articulation (You Can Help!)

by Teach Mama December 6, 2012
written by Teach Mama

As an educator and parent, I’ve always had an ear for the way my kiddos learned language, spoke, and pronounced their words.

Their articulation–they way they say words–has always been a top priority in their at-home at at-school learning for us.

And though I’ve written about stages of development in speech sounds, created many games for practicing speech sounds, I’m certainly not a trained speech pathologist.

I have, in fact, been a bit intimidated by all things articulation because there’s so much involved.  However, after a conference with Owen’s teacher this fall, I’ve found a resource that we have really grown to lean on–and love–over her: Articulation Station.

Though it’s an app for the iPad, the site is amazing–and I’m thrilled to share what we’re doing and how we’re using it.

Here’s the skinny. . .

  • How to Help Kids With Articulation (You CAN Help!): My O-Man has had longtime struggles with articulation; he went from 0-60mph in no time as far as speaking is concerned.

help kids with articulation

We. Love. Articulation Station. Period.


Where Maddy waited until she was well after two years old to start talking to make sure she was absolutely, totally, and completely correct before she spoke—she would even whisper a word sometimes before she said it out loud—Owen was different.

Owen let it all spill out—fast and furious—with very little care to how it sounded to anyone.

Whether it was one word or many, a sentence or a story, Owen left us guessing, wincing, and wondering what he was saying more often than not.

I did some research, created some games, created some more games, and did the best I could with the resources I had to help him along the way.

We had school Speech and Language Pathologists listen to him, talk to him, and give us feedback about his language development, and each time, they assured us it was developmental.   That because his articulation struggles were not in any way affecting his learning, that he was Good. To. Go.

This year, however, we are ready for him to get some support.

Though he is working so hard—reading like a champ—curious about the world, questioning what’s around him, and comprehending what he’s reading, we are worried that if he doesn’t get some help with his articulation hang-ups, he’ll begin to withdraw, slow down, or hesitate to share his smart opinions and cool ideas.

help kids with articulation

 Owen works on /r/ — playing with sentences.

We’ve got a bunch in the works with his school—they are great and wonderful and want to see our boy do well, just like we do—but until then, we are also doing what we can around here.

And that’s where Articulation Station comes into play.

Owen’s teacher suggested this app, and it was a true gift.

Our boy struggles with his r’s—initial, medial, and final –or, -ire, and some –ar words.

Instead of pronouncing ‘four’ so that it rhymes with ‘door’ or ‘more’, Owen’s ‘four’ sounds more like ‘fur’; his ‘board’ sounds more like ‘bird’; his ‘horse’ sounds more like ‘hearse’.

When I saw him hold four fingers up to someone a few weeks ago, to show the guy that he meant ‘four’  and not ‘fur’, I realized that it was for sure time to move forward with some change for him.

We started using Articulation Station.

help kids with articulation

We keep track of Owen’s (and soon Cora’s) progress. . .

help kids with articulation

. . . and we can add more sound resources whenever we want.

And as far as apps go, it’s totally not cheap, but you can download the app with /p/ resources and then buy additional sound work as needed.  Though it’s like closer to $40 for the Pro Version, I like this pricing schedule–we paid about $6 for the /r/ resources, and it’s awesome because we have what we need.

One day after Owen’s conference, I downloaded the app.  Then I called him over to the couch, and I said, Hey—we found this new app that I think you’ll love. It will help us help you to say your words more clearly. You know how sometimes your mouth has a hard time moving in a way to say your –or sounds, like ‘four’, ‘more’, and ‘store’?   Let’s take a look.We explored it together.ipad apps for teaching and learning

I wasn’t going to pretend to be a speech and language expert—he knows I’m not and I know I’m not.  So we watched the ‘how to’ tutorial on the app together, and we chose the sounds he needs help articulating.

We chose /r/ and focused on initial, medial, and final sounds: –or, -ire, and –er.  Just like we saw in the tutorial, we did for Owen.

Then we played. We chose the flashcards that first day, but since then, we’ve used the sentences and stories.

We’ve covered almost all of the /r/ sounds, even the ones he knows because we all know success feels good.

We’ve recorded and listened, listened and recorded, practiced and practiced some more.

We’ve kept it light, and we’ve kept it easy.  Short spurts—10-20 minutes at a shot and that’s it.

No matter what your child’s speech challenge, it seems like this app can offer some support.  And what I’ve realized is that the creator, Heidi Hanks, has a website full of ideas and resources—including printable speech and language development information and articulation practice worksheets—that anyone can use at any time.

We’re not finished, by any means, with Articulation Station.   And we’ll pull Cora in the mix as soon as the holidays are over—which she is totally thrilled about.  She could definitely use some support with her r- and s- sounds.

What I love, love, love about the app, and why I’m glad I spent the money on it:

  • the layout: it’s clear, clean, and totally pleasing on the eyes;
  • the images: varied and bright, with words in an easy-to-read font directly below each image (great for early readers!);
  • the clarity of instructions: watching the video helped us to really understand how to navigate the site;
  • the range of ‘game’ options: the flashcards, sentences, and stories;
  • the ‘record’ option: it helps Owen to first touch a flashcard and hear the word pronounced by the lady, practice saying the word a few times, and then to record himself saying the word.  He compares.  And he changes—the very best he can—afterward. It may be the first time he actually heard himself say these words incorrectly, though he’s known for a while something has been off;
  • the score-keeping: my game-playa likes this, so I like it.  We practice until he gets a green check, and the times he doesn’t it’s still a good gauge;
  • the wide variety of sounds covered: from those tricky, tricky digraphs to blends and the infamous r-, the sounds are all covered, along with more, I’m sure;
  • the fun factor: My boy wants to play. Bottom line, something keeps bringing him back. And I’m right there with him.

It’s been great. It’s given Owen and I a chance to sit down together for a ‘date’ almost every day—or every other day—and we both look forward to it.

Yes, I am *this* close to finishing my iPad app Round-Up (It’s coming! It’s coming!), but it’s taking me a whole lot longer than I’d hoped because, well, this family is kinda digging the digital literacy thing.

And there are quite a few pretty awesome apps for sneaky learning out there.

Do you know of a super-awesome app that has made you want to sing, dance, and shout its awesomeness from a mountain top? Please share! I’d love to check it out!

fyi: Huge and happy thanks to Owen’s fabulous teacher for sharing this app with us and to Heidi Hanks of Little Bee Speech for sharing her expertise with the world in this app and on her site, Mommy Speech Therapy. I love, love, love that she is empowering other parents to support their children’s learning at home. AWE-some.


Want a few more alphabet activities? Check out:

  • backyard alphabet hunt
  • homemade alphabet book
  • leafy letter learning
  • ABC hunt
  • on the road ABC hunt
  • lowercase ABC hunt
  • build your own bingo: uppercase and lowercase match
  • ABC cards and clothespin match
  • alphabet letter splash
  • alphabingo (play with lowercase letters)
  • alphabet letter lids
  • leafy outdoor alphabet hunt
  • build your own board game
  • clothespin letter match
  • 10 fun ways to learn the alphabet


Follow us on pinterest, and check out our literacy pins:

Follow Teach Mama’s board literacy on Pinterest.

December 6, 2012 18 comments
0 FacebookTwitterPinterestPocketEmail
Newer Posts
Older Posts

About Me

About Me

Hi! I'm Hannah.

A mother of one, I am passionate about inspiring mamas and educators with hands-on, meaningful learning ideas that make everyday moments fun, purposeful, and filled with curiosity.

Follow Teach Mama

13.4K Fans Like
2.8K Subscribers Subscribe
132K Followers Follow Us

Recent Posts

  • Summer Learning Activities for Kids: A Low-Pressure Guide for Reading, Play, and Family Connection

    June 15, 2026
  • Effective Techniques for Teaching Complex Historical Topics

    June 13, 2026
  • 4 Neighborhood Adventures That Teach Kids Real-World Skills

    June 12, 2026
  • What Does an Urgent Care Visit Cost in Manhattan Without Insurance?

    June 12, 2026
  • Future Trends Influencing Enterprise Learning Management System Adoption

    June 10, 2026
  • How to Survive Your Husband’s Grad School Years Without Going Broke

    June 9, 2026

LEARN

PLAY

CRAFTS

PRINTABLES

About Me

A mother of one, I am passionate about inspiring mamas and educators with hands-on, meaningful learning ideas that make everyday moments fun, purposeful, and filled with curiosity.

Useful Links

  • About
  • Contact

Popular Posts

  • Words 3 Ways: Learning Sight Words For Kindergarten

    May 17, 2012
  • Quick Trick: Magnetic Letters (How To Use Them With Your Kids!)

    December 1, 2010

Recent Posts

  • Summer Learning Activities for Kids: A Low-Pressure Guide for Reading, Play, and Family Connection

    June 15, 2026
  • Effective Techniques for Teaching Complex Historical Topics

    June 13, 2026
  • Facebook
  • Pinterest
  • Youtube
Teach Mama
  • Reading
  • Early Literacy
  • Writing
  • STEM
  • Activities
  • Digital Literacy

Shopping Cart

Close

No products in the cart.

Close